Grilled Pineapple Easy Tropical Dessert
Oh, where do I even begin with this zucchini bread? It’s honestly one of those recipes that just feels like a warm hug. You know, the kind of thing that transports you back to your grandmother’s kitchen, or maybe just that perfect autumn afternoon when the air is crisp and everything smells like cinnamon? This isn’t just any zucchini bread; it’s *the* zucchini bread. The one that’s always a hit, no matter who I serve it to. My kids, who can be the pickiest eaters on the planet, practically inhale it. And honestly, when I’m craving something sweet at 10 pm but don’t want the whole ordeal of baking a cake, this is my absolute go-to. It’s surprisingly simple, uses up that extra zucchini from the garden (if you’re lucky enough to have one!), and delivers pure, unadulterated comfort. Think of it as the chocolate chip cookie’s slightly more sophisticated, yet equally delicious, cousin.
What is Zucchini bread?
So, what exactly *is* zucchini bread? At its heart, it’s a quick bread, meaning it doesn’t rely on yeast for leavening. Instead, we use baking soda and baking powder. The “zucchini” part comes from finely grated zucchini, which, believe it or not, makes the bread incredibly moist and tender without imparting any strong vegetable flavor. It sounds a little strange, I know, especially if you’re not used to baking with veggies. But trust me on this one! It’s essentially a sweet, spiced loaf that’s packed with flavor and has a wonderfully soft crumb. The name itself is pretty straightforward, but the magic lies in how the zucchini disappears into the batter, leaving behind only moisture and a delightful texture. It’s not a cake, though it’s certainly sweet enough to pass for one, and it’s not exactly a muffin, though it bakes up beautifully in muffin tins too. It’s just… perfect zucchini bread.
Why you’ll love this recipe?
Okay, let me count the ways you’re going to adore this zucchini bread. First off, the flavor. It’s got this warm, comforting spice blend – cinnamon is the star, of course, but a little nutmeg and maybe even a pinch of clove can really take it up a notch. The sweetness is just right, not overpowering, allowing the other flavors to shine. Then there’s the texture. Oh, the texture! It’s incredibly moist and tender, thanks to that sneaky zucchini. It practically melts in your mouth. And the best part? It’s so ridiculously easy to make. Seriously, even if you think you’re not a baker, you can totally nail this. It’s a lifesaver on busy nights when you need a quick bake that feels special. Plus, it’s so budget-friendly! Zucchini is usually pretty affordable, and the other ingredients are pantry staples. What I love most about this recipe is its versatility. It’s fantastic on its own, of course, but it’s also amazing with a smear of cream cheese or a dollop of Greek yogurt. If you’re a fan of my cinnamon apple muffins, you’ll absolutely love the cozy spice notes in this bread.
How do you make Zucchini bread?
Quick Overview
This recipe is all about simple steps that come together quickly. You’ll start by mixing your dry ingredients, then your wet ingredients, combine them gently, fold in the star ingredient (zucchini!), and bake it until golden and fragrant. The whole process, from gathering your ingredients to pulling it out of the oven, takes less than an hour and a half, with most of that being hands-off baking time. It’s designed to be foolproof, with clear indicators to tell you exactly what you need to do.
Ingredients
For the Main Batter:
You’ll need about 2 cups of all-purpose flour. I usually just grab what’s in my pantry, but if you have a favorite brand, go with that! Make sure it’s spooned and leveled, not scooped directly from the bag, to avoid a dense loaf. Then, we’ve got 1 teaspoon of baking soda and ½ teaspoon of baking powder. These guys work together to give us that perfect rise. A generous teaspoon of ground cinnamon is a must – I like to use a good quality one for the best aroma. A pinch of nutmeg and maybe a tiny pinch of cloves add that extra layer of warmth. Don’t forget the salt, about ½ teaspoon, to balance out the sweetness. Now for the sweetener: 1 cup of granulated sugar. You can reduce it a little if you prefer, but this amount gives it that classic sweet flavor. And then, the magic ingredient: 2 large eggs, lightly beaten. They bind everything together beautifully. ½ cup of melted unsalted butter is next – make sure it’s cooled slightly so it doesn’t scramble the eggs. And finally, 1 teaspoon of vanilla extract to round out all those lovely flavors.
For the Filling:
This is where we add that crucial moisture. You’ll need about 1 ½ cups of finely grated zucchini. I usually just use the medium holes on my box grater. Don’t worry about peeling it; the skin adds extra nutrients and doesn’t affect the texture. Make sure to squeeze out as much excess moisture as you can after grating. Seriously, this is a key step! You can use a clean kitchen towel or cheesecloth. Set that aside. You can also add ½ cup of chopped walnuts or pecans if you like a little crunch, and ½ cup of chocolate chips if you’re feeling extra decadent. I’ve made it with both and without, and it’s always delicious.
For the Glaze:
This is totally optional, but it adds such a lovely finishing touch! You’ll need about 1 cup of powdered sugar, sifted to avoid lumps. Then, 2-3 tablespoons of milk (any kind works – I’ve even tested this with almond milk and it actually made it even creamier!). A splash of vanilla extract (about ½ teaspoon) and a tiny pinch of salt will make it extra tasty.
Step-by-Step Instructions
Step 1: Preheat & Prep Pan
First things first, let’s get our oven preheated to 350 degrees Fahrenheit (175 degrees Celsius). While that’s warming up, grab a standard 9×5 inch loaf pan. Grease it really well with butter or cooking spray, and then I like to lightly flour it too. This ensures your beautiful bread slides right out after baking, no sticking drama!
Step 2: Mix Dry Ingredients
In a large bowl, whisk together your all-purpose flour, baking soda, baking powder, cinnamon, nutmeg (and cloves if you’re using them), and salt. Just give it a good whisk until everything is evenly distributed. This is important to make sure you don’t end up with pockets of leavening agents. You want everything to bake up evenly!
Step 3: Mix Wet Ingredients
In a separate medium bowl, whisk together your granulated sugar and lightly beaten eggs. Then, stir in the melted and slightly cooled butter and the vanilla extract. Give it a good mix until it’s all combined and looks smooth and glossy.
Step 4: Combine
Now, pour the wet ingredients into the bowl with the dry ingredients. Use a rubber spatula or wooden spoon to gently fold them together until *just* combined. It’s really important not to overmix here. A few streaks of flour are okay; they’ll disappear as you add the zucchini. Overmixing can lead to a tough bread, and we definitely don’t want that!
Step 5: Prepare Filling
This is where we prep our star. Take your finely grated zucchini and, as I mentioned before, squeeze out as much liquid as you possibly can. The drier the zucchini, the better your bread’s texture will be. Once it’s squeezed, gently fold it into the batter. If you’re adding nuts or chocolate chips, stir those in now too. Just fold them in gently until they’re evenly distributed.
Step 6: Layer & Swirl
Pour the batter into your prepared loaf pan. Smooth the top slightly with your spatula. If you want to add a little swirl of something extra, now’s your chance! You could drizzle a little extra cinnamon-sugar mixture or even some melted chocolate on top and gently swirl it in with a knife. It’s purely for aesthetics, but it looks so pretty!
Step 7: Bake
Pop that pan into your preheated oven. Bake for about 50-60 minutes. Now, ovens can be tricky, so I always tell people to start checking around the 50-minute mark. You’ll know it’s done when a toothpick inserted into the center comes out clean, or with just a few moist crumbs attached. If the top starts to brown too quickly, you can loosely tent it with foil for the remainder of the baking time.
Step 8: Cool & Glaze
Once it’s baked, take it out of the oven and let it cool in the pan for about 10-15 minutes. This helps it set up. Then, carefully invert it onto a wire rack to cool completely. Resist the urge to cut into it while it’s hot! For the glaze, whisk together the sifted powdered sugar, milk, vanilla, and salt until smooth. You want it to be pourable but not too thin. Once the bread is completely cool, drizzle the glaze over the top. It will set up slightly as it dries.
Step 9: Slice & Serve
Once the glaze is set, it’s time for the best part! Slice your beautiful zucchini bread using a serrated knife for clean cuts. Serve it at room temperature for the best flavor and texture. Enjoy that first perfect bite!
What to Serve It With
This zucchini bread is a chameleon! It’s fantastic on its own, but it also plays well with others. For a simple breakfast, I love it toasted with a smear of butter. It’s also amazing alongside a hot cup of coffee or a soothing mug of herbal tea. For a more elegant brunch spread, I’ll often slice it a bit thinner and arrange it on a pretty platter. It pairs wonderfully with fresh fruit salads or a creamy yogurt parfait. As a dessert, it’s divine! A little dollop of whipped cream or a scoop of vanilla bean ice cream takes it to a whole new level. And for those cozy evenings, it’s the perfect companion to a glass of milk. My family also loves it with a bit of cream cheese, which adds a lovely tang that complements the sweet spices.
Top Tips for Perfecting Your Zucchini Bread
I’ve made this zucchini bread more times than I can count, and over the years, I’ve picked up a few tricks that I think make all the difference. Let’s talk about zucchini prep first. Squeezing out that excess moisture is *crucial*. I’ve learned the hard way that skipping this step results in a gummy, dense loaf. So, please, wring that zucchini out like you mean it! When it comes to mixing, remember the golden rule: don’t overmix. Just combine until you don’t see big streaks of flour. A few little lumps are fine. The zucchini will do the rest of the work to tenderize it. For the swirl, if you’re feeling fancy, a simple drizzle of melted chocolate or a mix of cinnamon and sugar on top before baking can elevate the look beautifully. Just a gentle swirl with a knife! Ingredient swaps are fun too. If you don’t have butter, you can use a neutral oil like canola or vegetable oil, though butter does add a richer flavor. Some people even like to add a touch of orange or lemon zest to the batter for a brighter flavor profile. For baking, if your oven runs hot, use the lower end of the baking time and keep a close eye on it. The toothpick test is your best friend here. And for the glaze, if it’s too thick, add milk a teaspoon at a time until it’s the consistency you want. Too thin? Add more powdered sugar. It’s all about that perfect pourable, yet slightly thick, consistency.
Storing and Reheating Tips
Once this delicious zucchini bread is baked and cooled (and glazed, if you did that!), you’ll want to store it properly to keep it fresh. At room temperature, it’s best stored in an airtight container or well-wrapped in plastic wrap and then foil. It usually stays delicious for about 3-4 days. If you find yourself with a bit left after that, or if your kitchen is particularly warm, the refrigerator is your friend. It can last for about a week in the fridge, but be aware that refrigeration can sometimes dry out baked goods a little. If you want to freeze it for longer storage, I highly recommend wrapping it tightly in plastic wrap, then in aluminum foil, or placing it in a freezer-safe bag. It can keep in the freezer for up to 3 months. To thaw, just bring it back to room temperature. If you freeze it with the glaze on, it should be fine. Reheating is simple – a quick toast in the toaster oven or a few seconds in the microwave brings back that lovely soft texture. If you’re reheating a whole loaf from the fridge, wrap it in foil and pop it in a low oven (around 300°F) for about 10-15 minutes until warmed through.
Frequently Asked Questions
Final Thoughts
So there you have it – my absolute favorite, go-to zucchini bread recipe. It’s the kind of recipe that makes your kitchen smell incredible and fills your home with warmth. It’s proof that sometimes the simplest things, made with a little love, are the most special. It’s not just about the ingredients or the steps; it’s about the comfort, the memories, and the joy it brings. If you’re looking for a recipe that’s reliable, delicious, and just makes you feel good, please give this one a try. I promise you won’t regret it! And if you love cozy, spiced baked goods, you might also want to check out my spiced pear crumble recipe. It’s another one that’s a real crowd-pleaser. I can’t wait to hear how your zucchini bread turns out! Feel free to leave a comment below with your thoughts or any variations you tried. Happy baking!
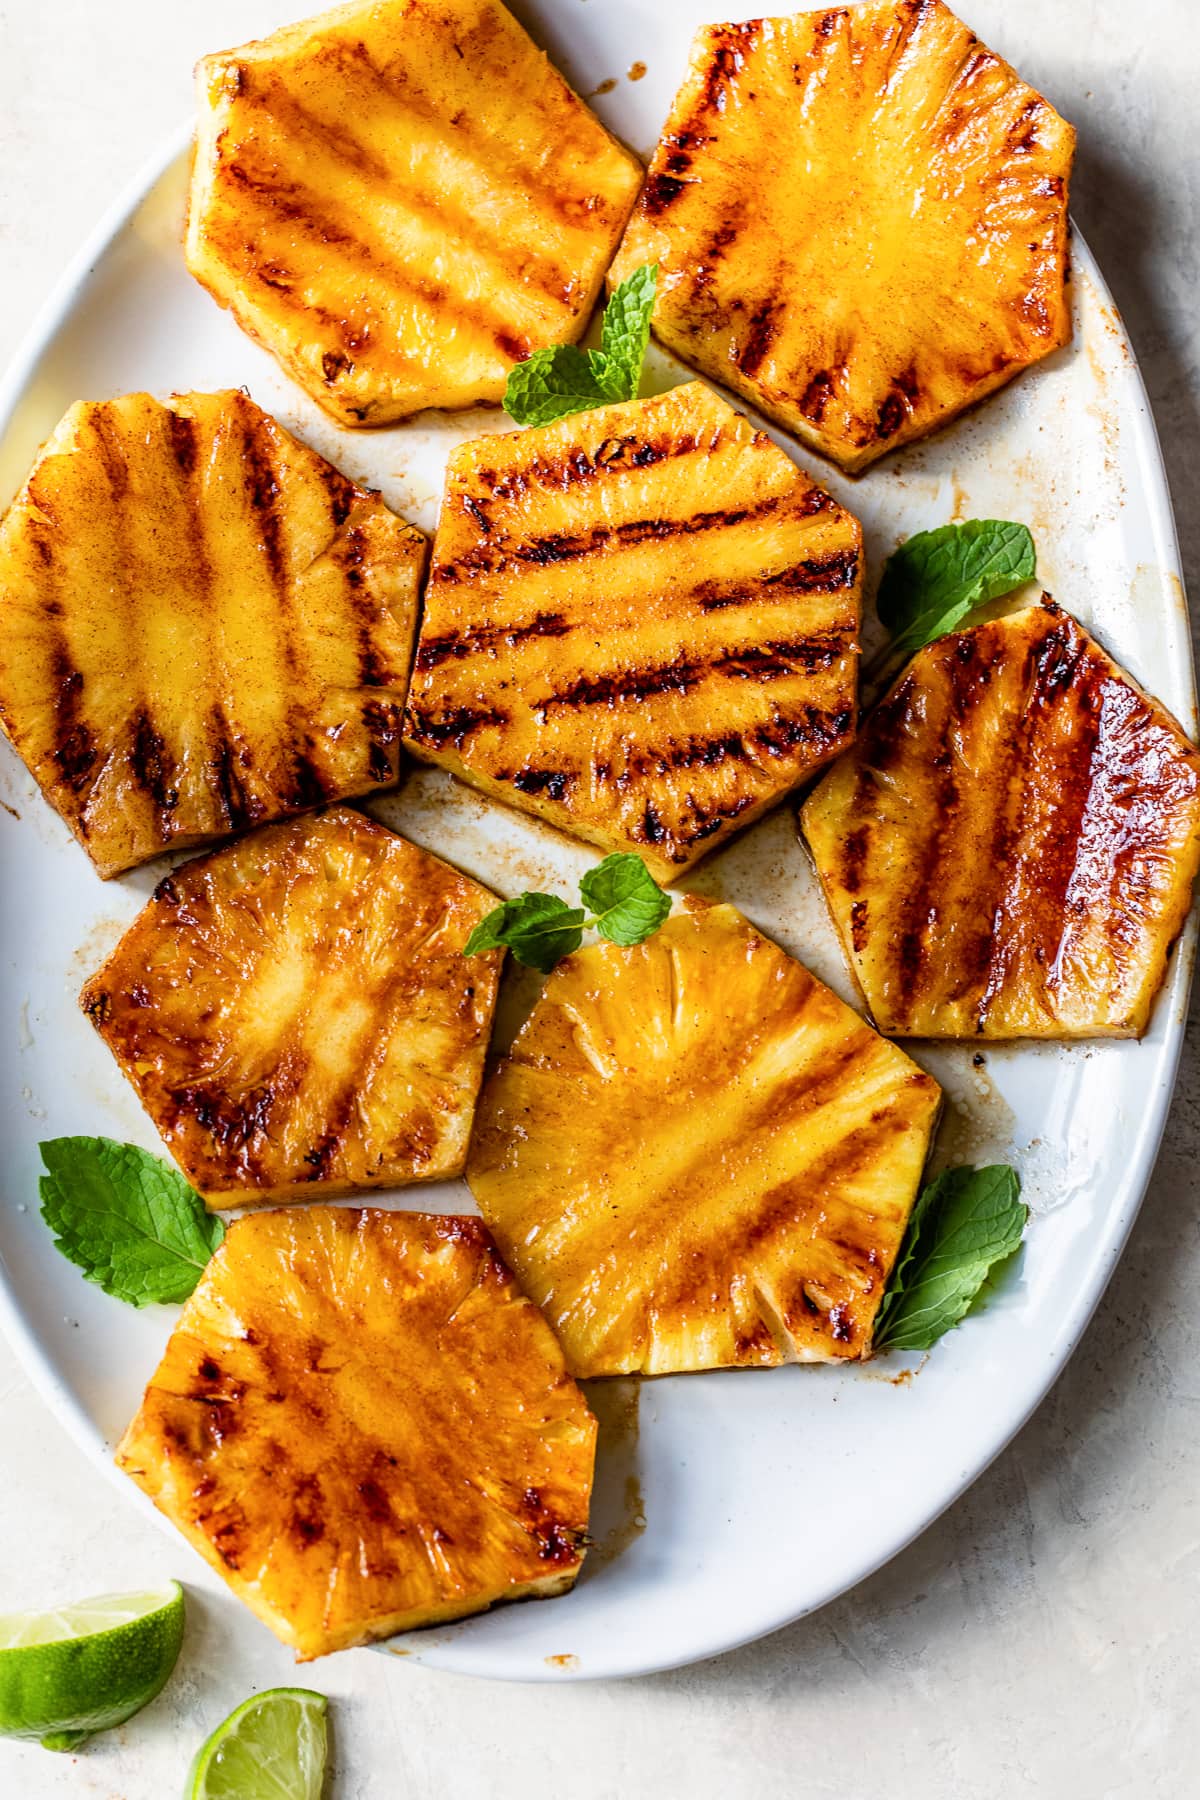
grilled pineapple dessert
Ingredients
Method
- In a small bowl, combine the honey, olive oil, lime juice, and cinnamon and whisk to blend. Set aside.
- Heat the grill or a grill pan over medium-high heat.
- When hot, lightly coat the grates with oil spray to prevent sticking.
- Lightly brush the pineapple slices with the prepared marinade.
- Grill the pineapple, turning once and basting once or twice with the remaining marinade, until tender and golden, about 3-4 minutes on each side.
- Serve warm, optionally with a scoop of ice cream.