Fudgy Chocolate Crinkles A Simple Treat
There’s something so nostalgic about the smell of freshly baked cake wafting through the house. I still remember helping my grandmother in her warm, cozy kitchen, the sound of her wooden spoon tapping gently on the bowl, and the way the air would fill with the sweetness of sugar and the earthy aroma of zucchini. Today, I want to share one of my all-time favorite recipes—this moist zucchini cake with a luscious, creamy glaze that’s just the right amount of sweet and tangy. It’s honestly become a bit of a family secret, but I can’t keep it to myself anymore. What I love most about this is how simple it is — perfect for a quick dessert or even a brunch treat when you want to impress without fuss. Plus, it’s a sneaky way to get more veggies into your day without anyone noticing. Trust me, this cake has disappeared in minutes at my house every single time I make it! You’re going to love how tender and flavorful it is, and the glaze adds just the perfect finishing touch. Let’s get baking, shall we?
What is a Moist Zucchini Cake?
This moist zucchini cake is essentially a tender, airy sponge infused with the subtle sweetness and moisture of fresh zucchini. Think of it as an upgraded carrot cake, but instead of carrots, you’re using zucchini—those hidden, watery gems that cook down into this surprisingly dense and flavorful crumb. It’s called a “cake” because it’s baked to golden perfection, with a soft texture that melts in your mouth. The name may sound modest, but once you taste it, you’ll understand—this is comfort food at its best. It’s a great way to use up summer’s bounty or on days when you want something sweet but don’t want to turn on a big oven for a complicated dessert. What makes it stand out is the balance—moist but not soggy, lightly sweet but full of flavor, and topped with that dreamy glaze I’ll show you how to make. Really, it’s a slice of home that I think everyone should have in their recipe box.
Why you’ll love this recipe?
First of all, the flavor—oh my gosh, it’s subtly sweet, with just a hint of earthiness from the zucchini that pairs beautifully with the sweet glaze. Every bite is soft, moist, and a little crumbly in the best way. I always do this when I want a cozy treat: bake this up and I instantly get happy smiles, especially from the kids—they ask for seconds before I even get the knife out! The best part? It’s incredibly easy to make. No fancy gadgets, no complicated steps. Just a few simple ingredients that you probably already have in your pantry. Plus, it’s budget-friendly; zucchini is cheap and plentiful in summer, and the rest of the ingredients are everyday staples. What I love most about this is its versatility. Want to add a handful of chopped nuts? Go ahead. Prefer lemon zest in the batter instead of vanilla? Absolutely. This cake is forgiving and adaptable—perfect for those lazy weekend mornings or when you need a dessert in a jiffy. And let’s not forget, it’s a sneaky way to get more vegetables into the family diet without any fuss. My personal trick? I tested this with almond milk once, and it actually made the cake even creamier—try it if you’re feeling adventurous!
How do I make Zucchini cake?
Quick Overview
This zucchini cake comes together surprisingly quickly. You start by shredding the zucchini and tossing it with a little salt to draw out extra moisture—this is key to keeping the cake moist but not soggy. While the zucchini drains, you whisk together your dry ingredients: flour, baking powder, baking soda, salt, and a touch of cinnamon for warmth. In a separate bowl, you mix your wet ingredients—oil, eggs, vanilla, and sugar—until smooth. Then, combine the wet and dry just until they’re barely mixed, gently folding in the zucchini and optional extras. Pour the batter into a prepared pan, swirl in a simple filling if you’d like, bake until golden, and cool before drizzling with that fantastic glaze. The whole process takes around an hour, and I promise, it’s so basic you’ll want to make it again and again. The smell alone makes the house feel cozy, and the slices keep beautifully, making it a perfect make-ahead dessert or snack.
Ingredients
For the Main Batter:
– 2 cups grated zucchini (about 2 small zucchinis)
– 1 ½ cups all-purpose flour (you can use half whole wheat for added fiber)
– 1 teaspoon baking powder
– ½ teaspoon baking soda
– ½ teaspoon salt
– 1 teaspoon ground cinnamon (or nutmeg if you prefer)
– ¾ cup sugar (white, but coconut sugar works beautifully too)
– ½ cup vegetable oil or melted butter
– 2 large eggs
– 1 teaspoon vanilla extract
For the Filling (optional but highly recommended):
– ½ cup cream cheese, softened
– 2 tablespoons powdered sugar
– 1 teaspoon vanilla
– Zest of ½ lemon (adds a lovely zing if you’re into citrus)
For the Glaze:
– 1 cup powdered sugar
– 2-3 tablespoons milk (dairy or almond, depending on preference)
– ½ teaspoon vanilla extract
– A splash of lemon juice or a sprinkle of zest for extra flavor (optional)
Step-by-Step Instructions
Step 1: Preheat & Prep Pan
Set your oven to 350°F (175°C). Grease a 9-inch round cake pan or line it with parchment paper—this helps get clean slices later. If you’re using a loaf pan, that works too! Just keep an eye on your baking time; it might need a few extra minutes.
Step 2: Mix Dry Ingredients
In a large bowl, whisk together your flour, baking powder, baking soda, salt, and cinnamon. This ensures everything’s evenly distributed and gives the cake its lift. Trust me, don’t skip this step—it makes a big difference in the final crumb.
Step 3: Mix Wet Ingredients
In another bowl, whisk the eggs, sugar, oil, and vanilla until smooth and a little frothy. You want a uniform, glossy mixture that’s ready to bring all those flavors together. If you’re feeling fancy, a dash of lemon zest here can brighten everything up.
Step 4: Combine
Pour the wet into the dry, gently folding everything together just until the batter is mostly combined. No overmixing—this keeps the cake tender. The batter will be thick but still pourable. Now, give the drained zucchini a quick squeeze to remove any excess water, then fold it into the batter. This is the secret to keeping your cake moist and vibrant.
Step 5: Prepare Filling
If you’re using the cream cheese filling, beat the softened cheese with powdered sugar, vanilla, and lemon zest until smooth. This adds a lovely tang and creaminess inside the cake—it’s honestly my favorite part.
Step 6: Layer & Swirl
Pour half of the batter into your pan. Spread the cream cheese filling over it, then top with remaining batter. Use a toothpick or a knife to swirl gently—this creates beautiful marbling, which is a fun surprise when you slice into it.
Step 7: Bake
Pop it into the oven and bake for about 45-50 minutes. Check for doneness with a toothpick—if it comes out with moist crumbs, you’re good. If not, give it a few more minutes. The top should be golden and slightly cracked, and your kitchen will smell divine!
Step 8: Cool & Glaze
Let the cake cool in the pan for 10-15 minutes, then transfer to a wire rack. Once cooled, whisk your powdered sugar with milk and vanilla until smooth. Drizzle generously over the cake—this glaze sets just enough to hold the slices together and adds that perfect sweet finish.
Step 9: Slice & Serve
Use a serrated knife for clean cuts. Serve warm or at room temperature—either way, it’s heavenly. Maybe top with fresh berries or a sprig of mint for extra flair. I love pairing this with a good cup of coffee or a glass of milk. Trust me, this slice will bring back all those cozy family memories—and, spoiler alert, it goes FAST!
What to Serve It With
This cake is a chameleon—think of it as your culinary Swiss Army knife! For breakfast, pair it with fresh fruit and a hot cup of coffee. The moist crumb and hint of cinnamon make it a lovely start to the day. I often slice it thin and slather a little extra glaze for an indulgent morning treat, especially on weekends when I have more time to enjoy. During brunch, it pairs beautifully with a glass of fresh orange juice or a mimosa—something bubbly makes everything feel special.
As a dessert, it’s pure comfort. Serve a warm slice with a dollop of whipped cream or a scoop of vanilla ice cream. The slight tang from the glaze contrasts beautifully with the sweetness—it’s a real crowd-pleaser. For casual snacking, I’ve also cut this into smaller squares and packed them in the kids’ lunchboxes, now a treasured homemade treat that my kids ask for all the time. It’s also fantastic for potlucks or picnic baskets because it travels well and keeps nicely at room temperature for several hours. My family’s tradition is to enjoy a slice while sitting around the table, sharing stories, and savoring those simple, sweet moments together.
Top Tips for Perfecting Your Moist Zucchini Cake
Over the years, I’ve learned a few tricks that totally level up this recipe. First, make sure to shred the zucchini finely and sprinkle it with a pinch of salt—this helps draw out excess moisture, preventing sogginess. I always do this and it’s a game-changer for keeping the cake tender. When mixing the batter, use a light folding motion; overmixing can make the crumb dense, and nobody wants that. Also, squeezing out extra moisture from the zucchini makes the biggest difference—I skip that and the cake ends up a little wet, so trust me on this.
For swirling the filling, I find that using a skewer or toothpick helps create a beautiful marbled effect without blending the layers completely—visuals matter! If you want to customize flavors, try adding chopped nuts, shredded coconut, or even a hint of ginger—so many possibilities. As for baking, every oven is different. I suggest starting to check for doneness around 45 minutes and adjusting accordingly. I’ve also tested adding a splash of lemon juice to the glaze, which brightens the whole dessert—a must-try for citrus lovers. One mistake I used to make is not cooling the cake long enough; patience here is key. Letting it cool thoroughly means clean slices and a better presentation.
In the end, this cake is forgiving, fun, and endlessly customizable. Once you’ve made it a couple of times, you’ll have your own tweaks and tricks that make it even more irresistible. My advice? Have fun with it and don’t overthink—baking should feel like a warm hug!
Storing and Reheating Tips
This cake stays fresh surprisingly well. Keep leftovers in an airtight container at room temperature for up to 2 days—if it’s hot or humid, better to refrigerate. To keep it soft, I like to cover it loosely with foil or a clean kitchen towel. If you want to extend it further, pop slices in an airtight container in the fridge, where they’ll last 3-4 days. Reheating is simple—microwave a slice for 10-15 seconds, or warm the whole cake at 300°F (150°C) wrapped in foil for about 10 minutes. The glaze might set a bit but softens again with gentle warming. I’ve also frozen slices wrapped tightly in plastic wrap and foil; they defrost beautifully at room temperature. Just add the glaze fresh when serving again for that just-baked shine and flavor. If the glaze has thickened over time, stir in a splash of milk to loosen it up. This cake is forgiving, sturdy, and perfect for make-ahead plans—trust me, the more days pass, the more the flavors meld into something even better!
Frequently Asked Questions
Final Thoughts
Honestly, if you’re looking for a honest-to-goodness crowd-pleaser, this moist zucchini cake is it. Its simplicity makes it accessible for novice bakers, while the flavor and texture keep even seasoned cooks coming back for more. I love how adaptable it is—you can easily add your twist, whether that’s extra lemon zest, chopped walnuts, or a splash of orange extract. It’s become one of those recipes I turn to when I want something comforting, slightly nostalgic, and guaranteed to get smiles all around. Plus, it’s a fantastic way to use up those zucchinis that are begging to be baked into something delicious. So grab your ingredients, turn on your favorite tunes, and get ready to fill your kitchen with the smell of happiness. I can’t wait to hear how yours turns out—happy baking, my friend!
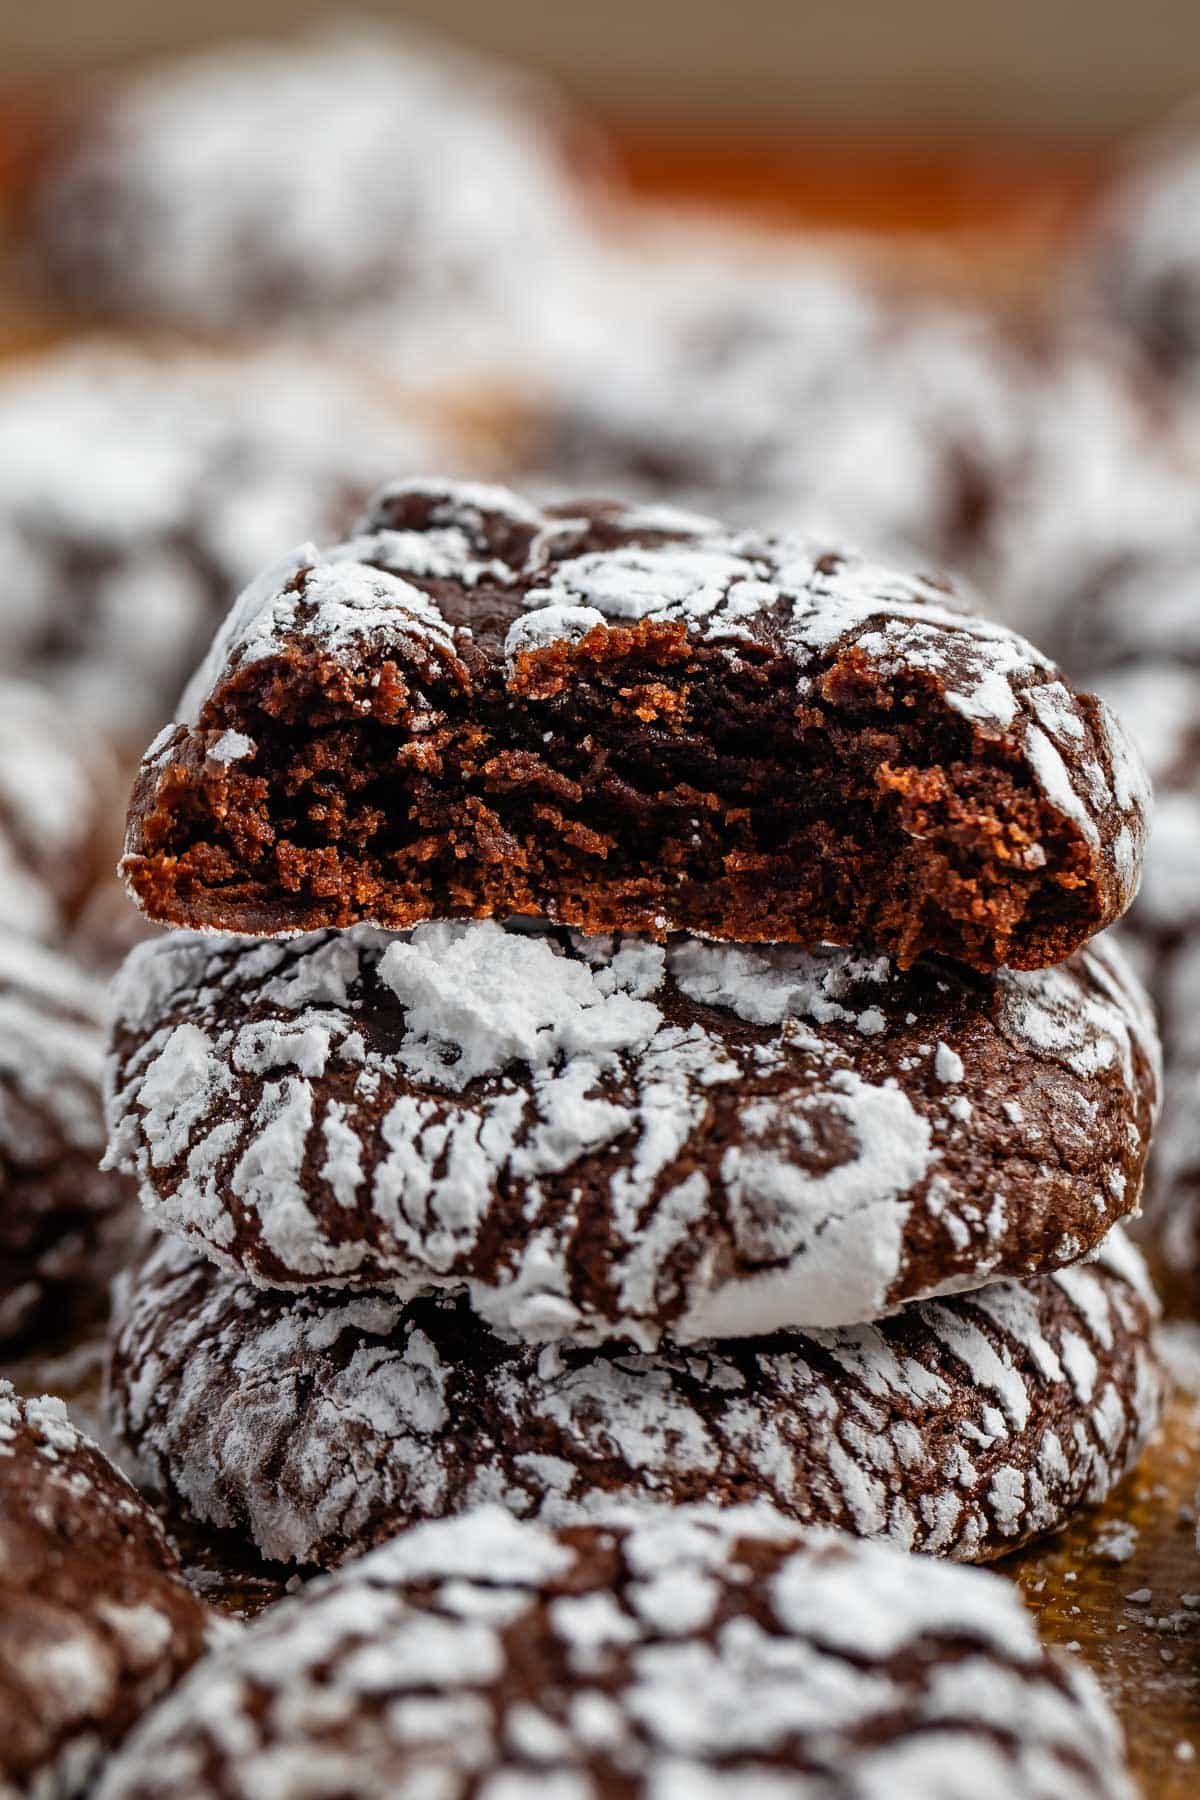
Chocolate Crinkle Cookies
Ingredients
Method
- Whisk together flour, cocoa powder, baking powder, and salt in a medium bowl. Set aside.
- Using a hand mixer, mix oil, brown sugar, eggs, and vanilla. Slowly mix in dry ingredients. The dough will be very wet.
- Chill the bowl of cookie dough for at least 30-45 minutes, or until you're able to scoop and roll the dough without it falling apart.
- Preheat oven to 350°F (175°C). Line two cookie sheets with parchment paper or silicone baking mats.
- Place powdered sugar in a small bowl. Scoop 1 or 2 tablespoon balls of dough. Roll the cookies in the powdered sugar then evenly space them on the prepared cookie sheets.
- Bake for about 7-10 minutes, depending on size, rotating pans halfway through baking. The cookies should look set but still soft.