Easy Dark Chocolate Granola Recipe
There’s something about the smell of zucchini bread baking that instantly takes me back to grandma’s kitchen — warm, slightly sweet, with a hint of spice in the air. My kids ask for this all the time, especially when I have a bumper crop of zucchinis from the garden, and honestly, it’s one of those recipes I’ve made so many times I can do it in my sleep. It’s incredibly forgiving, too, which is a lifesaver on busy nights or when I’m feeling a little less confident in the kitchen. What I love most about this zucchini bread is how moist and tender it turns out — almost like a moist cake — and that delightful swirl of cinnamon and sugar throughout just makes it unforgettable. Plus, it’s perfect for breakfast, a cozy snack, or even as a little dessert paired with coffee. Trust me on this one — once you try it, it’ll be your go-to recipe for those extra zucchinis, and I have a feeling your family will be hooked, just like mine!
What is Zucchini bread?
Think of zucchini bread as a lovely, moist quick bread that’s packed with shredded zucchini, giving it a sneaky veggie boost — and a punch of moisture. It’s essentially a sweet bread, similar in texture to banana bread, but with a more neutral flavor that’s perfect for adding spices, nuts, or even chocolate chips if you’re feeling indulgent. The name ‘zucchini bread’ might make you think it’s intimidating, but honestly, it’s about as simple to make as your classic banana bread. The zucchini keeps it tender and moist, and it’s a fantastic way to use up summer zucchinis before they get too big or start going bad. This bread is also super versatile — you can leave out the swirl if you prefer a straightforward loaf or go wild with add-ins. It’s amazing how a humble vegetable can turn into a crowd-pleasing treat!
Why you’ll love this recipe?
What I love most about this zucchini bread is how forgiving and flexible it is — you probably have most of the ingredients in your pantry right now. It’s one of those recipes that never fails me, whether I’m in a rush or have guests coming over. The flavor is simply divine; the cinnamon-sugar swirl runs like a ribbon through the soft crumb, adding a tiny touch of sweetness and warmth. Plus, it’s crazy cost-effective since zucchinis are cheap, and the ingredients are staples everyone has on hand.
This bread is also a perfect way to sneak some veggies into the kids’ diet without any fuss. I’ve tested this with almond milk, and it actually made it even creamier — trust me, experiment with what you got! It’s a delightful treat whether you slice it for breakfast, for a quick snack, or even after dinner. And if you want to dress it up for brunch, serve slices with a smear of cream cheese or a drizzle of honey. What I love most about this is how versatile and foolproof it is — it’s become a family favorite for good reason.
How do I make Zucchini Bread with a Sweet Swirl?
Quick Overview
This zucchini bread comes together in just a few simple steps: grate your zucchinis, mix the dry and wet ingredients separately, then bring everything together without overmixing (a common mistake I’ve learned the hard way). You’ll swirl a cinnamon-sugar mixture into the batter for a beautiful marbled effect, then bake until golden and springy. The result is a loaf that’s moist, tender, and just the right amount of sweet. The best part? You don’t need fancy equipment — just your favorite loaf pan and a whisk or spoon. Trust me, this is one of those recipes you’ll be making again and again!
Ingredients
For the Main Batter:
- 2 cups shredded zucchini (about 2 medium zucchinis, grated and moisture squeezed out)
- 1 1/2 cups all-purpose flour (or a gluten-free blend if you prefer)
- 1/2 teaspoon baking soda
- 1 teaspoon baking powder
- 1 teaspoon ground cinnamon
- 1/2 teaspoon salt
- 1/2 cup granulated sugar
- 1/2 cup packed brown sugar
- 1/2 cup vegetable oil or melted butter
- 3 large eggs
- 1 teaspoon vanilla extract
For the Filling:
- 1/4 cup granulated sugar
- 1 teaspoon ground cinnamon
For the Glaze:
- 1 cup powdered sugar
- 1-2 tablespoons milk or cream (adjust for consistency)
- Optional: a splash of vanilla or a pinch of cinnamon for extra flavor
Step-by-Step Instructions
Step 1: Preheat & Prep Pan
Set your oven to 350°F (175°C). Grease a standard loaf pan with butter or non-stick spray and line it with parchment paper for easy removal. It’s worth the bit of extra effort, trust me, clean slices come from a well-prepared pan. Also, grate your zucchinis and then squeeze out the excess moisture with a clean towel or paper towels — this step is crucial for preventing soggy bread. I always do this while I listen to some music — makes the process way more fun.
Step 2: Mix Dry Ingredients
In a large bowl, whisk together the flour, baking soda, baking powder, cinnamon, and salt. This ensures everything is evenly distributed and avoids clumps. I’ve learned to do this first, so everything else comes together smoothly later. The spices really bring out the flavor here — don’t skip them!
Step 3: Mix Wet Ingredients
In a separate bowl, beat the eggs, then add the sugars, oil, and vanilla. Whisk until smooth. I love how the oil makes the batter so moist — I’ve tested this with coconut oil, and it worked beautifully. Just make sure everything’s well combined, but don’t overmix at this stage.
Step 4: Combine
Pour the wet ingredients into the dry and gently fold them together with a spatula or spoon. The key here is not to overmix — just until you see no streaks of flour. Overmixing can make the bread dense and tough, and that’s definitely not what we want!
Step 5: Prepare Filling
Mix together the sugar and cinnamon in a small bowl. This will be your swirl layer. You can add chopped nuts or chocolate chips if you’re feeling adventurous, but honestly, the simple cinnamon-sugar is perfect as is.
Step 6: Layer & Swirl
Pour half of the batter into your prepared pan. Sprinkle half of the cinnamon-sugar mixture evenly over it, then add the remaining batter on top. Use a skewer or toothpick to swirl the batter — make gentle figure-eights or circles to create beautiful marbling. It’s a bit like painting with batter!
Step 7: Bake
Pop it into the oven and bake for 50-60 minutes, or until a toothpick inserted into the center comes out clean. Keep an eye out after about 45 minutes — ovens vary! If the top is browning too quickly, tent it loosely with foil. I’ve learned that patience is key here — don’t skimp on the check because underbaked bread is not fun.
Step 8: Cool & Glaze
Let the bread cool in the pan for about 15 minutes, then transfer it to a wire rack. Once cooled (but still slightly warm is fine), whisk together your glaze ingredients and drizzle over the top. The glaze adds just the right touch of sweetness and a little shiny finish that makes slices look all restaurant-worthy.
Step 9: Slice & Serve
Use a serrated bread knife for clean cuts, and slice when the bread is fully cooled — otherwise, it might be squishy. I love serving this warm with a pat of butter or a dollop of cream cheese on the side. It also tastes amazing toasted the next day, or even chilled from the fridge if you’re in a hurry. This bread disappeared in minutes at my house, I swear!
What to Serve It With
For breakfast, I like to pair this with a hot cup of coffee or a glass of milk. The cinnamon-sugar swirl makes it feel a little special, almost like a treat you’d find in a cozy bakery. If I’m entertaining, I slice it thick and serve with a spread of butter or honey, maybe add some fresh berries on the side — a pretty and simple brunch option that everyone loves.
As a cozy snack, it’s perfect on its own or with a mug of tea. I often cut thick slices and warm them up slightly — the smell alone draws everyone into the kitchen. And for dessert, don’t skip the glaze — it elevates the loaf into something close to cake territory. I love keeping a few slices in the fridge for late-night cravings or when unexpected guests drop by. It’s a real comfort food that never lets me down.
Top Tips for Perfecting Your Moist Zucchini Bread with a Sweet Swirl
Over the years, I’ve picked up a few tricks I swear by:
- Zucchini Prep: Always squeeze out as much moisture as possible. You want dry, tender shreds that won’t make your batter soggy. I’ve learned that the wetter the zucchini, the denser the bread — and nobody wants a brick.
- Mixing Advice: Gentle is key. Overmixing the batter creates tunnels and tough textures. Fold until just combined, and you’ll get that perfect tender crumb every time.
- Swirl Customization: Use a skewer or chopstick to create pretty marbling. Don’t overdo it — just enough to see the cinnamon streaks! I’ve also experimented with cocoa powder or cocoa nibs for a chocolate twist.
- Ingredient Swaps: I’ve made this with half whole wheat flour, and honestly, it’s still delicious — just a smidge denser. Substituting browned butter for oil adds richness, and swapping brown sugar for honey or maple syrup works well, too.
- Baking Tips: Check your bread early to avoid over-baking. Tent with foil if the top browns too fast. Use a toothpick to test doneness — the center should be moist but not wet.
- Glaze Variations: For a cream cheese glaze, mix softened cream cheese with powdered sugar and a splash of vanilla — divine! Or sprinkle with coarse sugar for extra crunch and sweetness.
Trust me, I’ve learned from countless batches — patience, gentle mixing, and good ingredients make all the difference. And don’t be afraid to customize with your favorite add-ins — that’s part of the fun!
Storing and Reheating Tips
This loaf stays moist well in an airtight container at room temperature for about 2 days. After that, I recommend wrapping it tightly and popping it into the fridge if you’re planning to keep it longer. It’s just as good cold or lightly reheated — I scatter slices in the toaster for a couple of minutes, and it’s like fresh out of the oven.
If you want to freeze slices, wrap them tightly in plastic wrap and then foil. They’ll last up to 3 months. To thaw, leave at room temperature or warm slices in the microwave for about 15 seconds. Add the glaze after reheating if you love that shiny topping — it’s still tasty even without it.
Just a quick tip: if you’re freezing the whole loaf, wrap it well, and defrost at room temperature for about an hour, then give it a brief warm-up in the oven or toaster oven for the best texture.
Frequently Asked Questions
Final Thoughts
If there’s one recipe I can’t stop making when zucchinis are in season, it’s this moist zucchini bread with a cinnamon swirl. It’s humble but special, simple but impressive. The best part? It’s so forgiving — a little extra zucchini, a dash more cinnamon, or a splash of vanilla, and it’s still fantastic. Plus, every time I slice into a loaf, I think about how something so easy can make such a cozy, comforting moment. I really hope you try it and love it as much as my family does! It’s great for sharing, gifting, or just keeping your kitchen smelling like home. Don’t forget to tag me if you post a picture — I’d love to see your gorgeous slices! Happy baking and enjoy every bite!
chocolate granola
Ingredients
Method
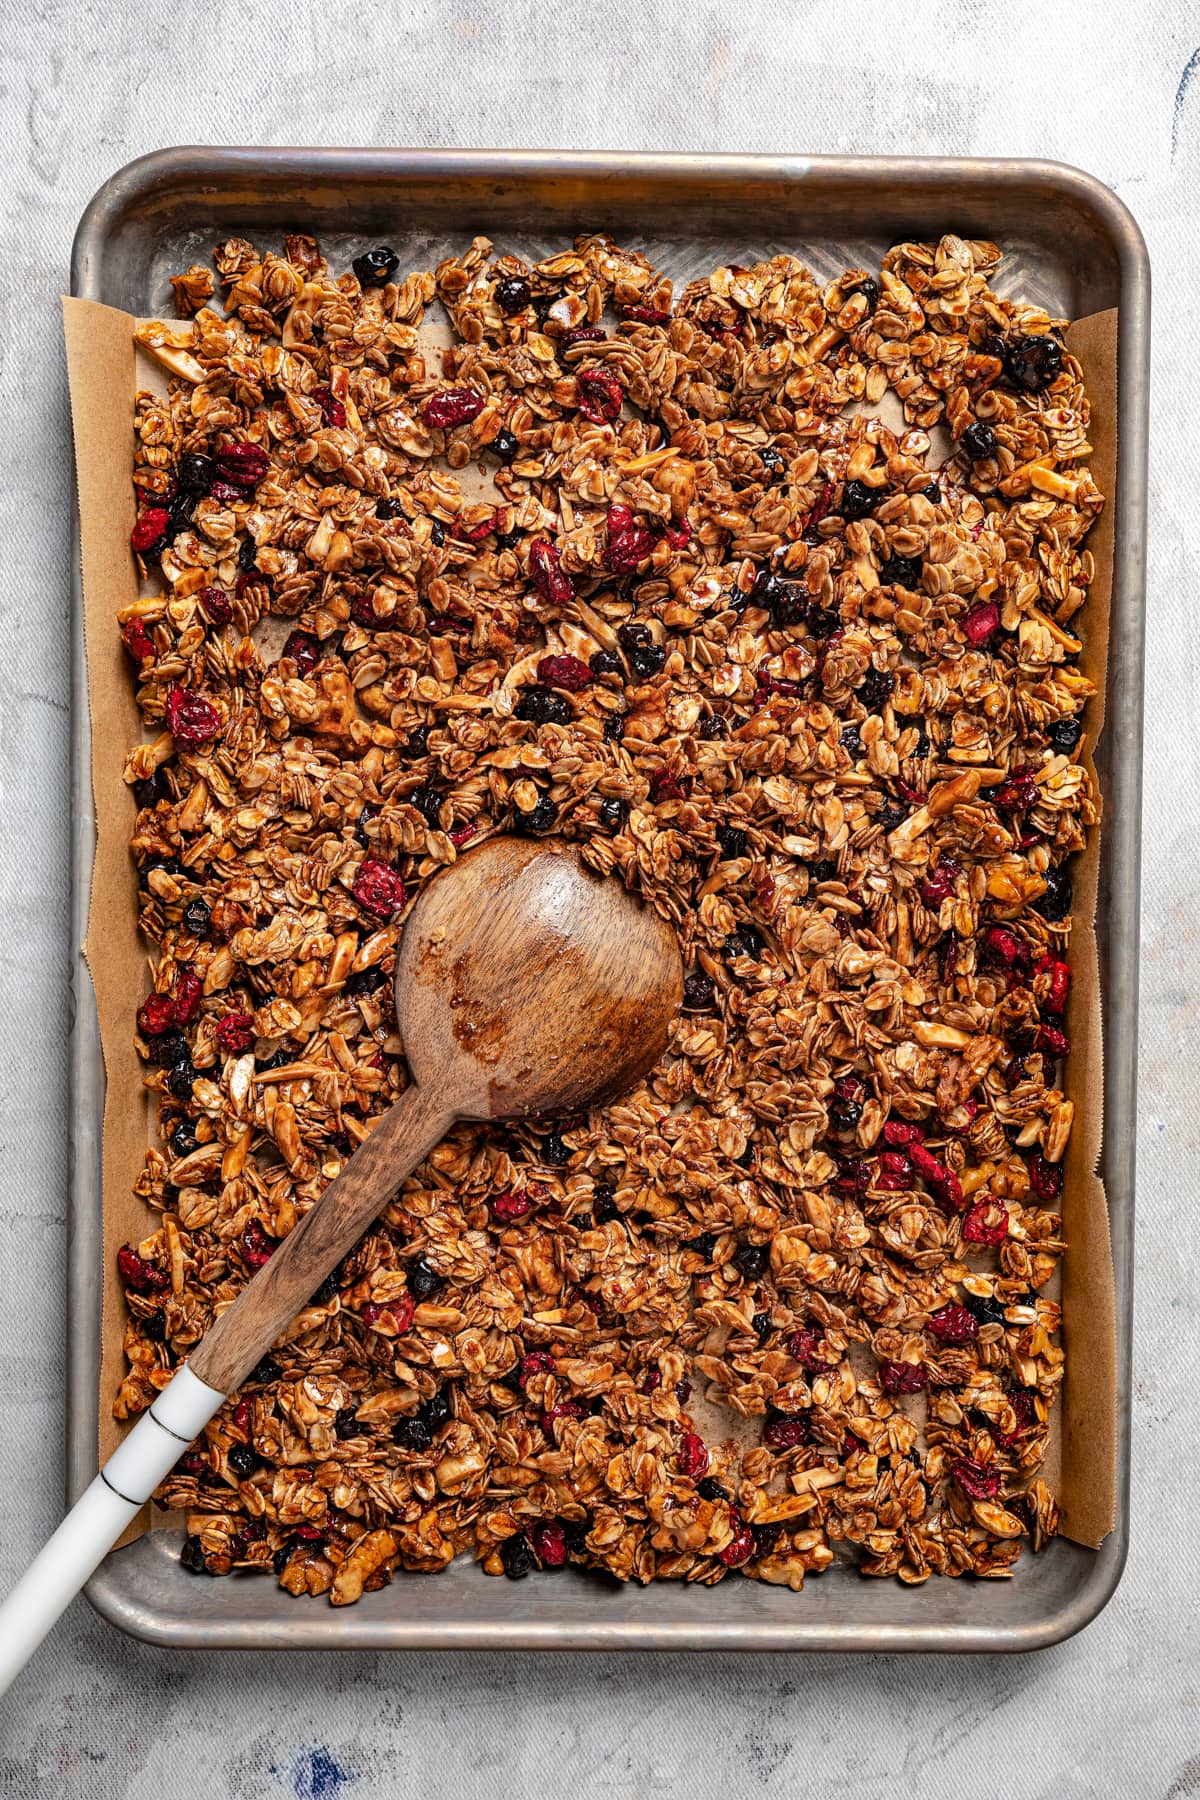
- Preheat the oven to 325°F and line a baking sheet with parchment paper. Set aside.
- In a large bowl, combine oats, cocoa powder, almonds, walnuts, wheat germ, cinnamon, salt, and dried fruit.
- In a small saucepan, combine water, oil, honey, brown sugar, and vanilla. Bring to a boil while stirring.
- Pour the honey mixture over the dry ingredients and toss to coat evenly.
- Spread the mixture evenly on the prepared baking sheet and bake for 35-40 minutes, stirring occasionally.
- Remove from the oven and cool on a wire rack. Break into clusters if desired.
- Serve with milk, yogurt, or enjoy as a snack. Store in an airtight container.