Easy Balsamic Beef in a Slow Cooker
There’s something magical about grabbing a slice of homemade zucchini bread—especially when it’s packed with chocolate. I remember my grandma’s kitchen, the smell wafting through the air, and how she always tossed in a handful of grated zucchini, just to sneak some greens into the sweetest treat. It’s mind-blowing how a simple vegetable can transform into something so indulgent. Honestly, this has become one of my family’s go-to comfort foods, especially on those days when I want something sweet but don’t want to mess around with complicated baking. My kids ask for this all the time—they love how moist and fudgy it is, and I love that they’re actually eating their veggies. Trust me, this recipe is a lifesaver on busy nights when I need to whip up something quick that everyone will devour in minutes. The best part? It’s so easy that even the most novice baker can nail it. So, pour a cup of coffee, and I’ll walk you through my favorite way to make this delicious, wholesome chocolate zucchini bread.
What is chocolate Zucchini bread?
Think of chocolate zucchini bread as a cozy hug in loaf form—a perfect blend of moist, sweet, and slightly earthy flavors. It’s essentially a quick bread that’s made with grated zucchini, which adds incredible moisture without overpowering. The name is pretty straightforward: a loaf filled with chocolate chips, making it taste more like a dessert than a vegetable-based snack. Originally, zucchini bread was created as a clever way to use up summer garden bounty, but over the years, it’s evolved into a family favorite all year round. The magic lies in how the zucchini keeps the bread irresistibly moist, while the cocoa and chocolate chips make every bite feel like an indulgence. Think of it as a healthier chocolate cake that you can enjoy for breakfast, brunch, or an evening treat. I love how versatile and forgiving this recipe is—it’s one of those dishes where you can make a few tweaks and still end up with a showstopper.
Why you’ll love this recipe?
What I love most about this chocolate zucchini bread is how effortlessly it brings smiles around the table. First, the flavor—it’s rich and chocolaty, but with a subtle earthiness from the zucchini that makes it less guilty and more satisfying. The surprise is that you don’t need fancy ingredients to make it taste like a bakery masterpiece. Regular pantry staples do the trick, which keeps this recipe budget-friendly and accessible. Plus, it’s so simple to throw together—I always do this when I need a quick dessert or a snack to stash in the freezer. The smell alone during baking is enough to make the house feel warmer and cozier.
What really makes this bread special is its versatility. Serve it sliced with a smear of butter for breakfast, or warm it up and add a scoop of vanilla ice cream for an almost-too-gourmet dessert. I’ve even experimented with adding chopped nuts or swapping the chocolate chips for dried cranberries, and honestly, each version has been a hit. This bread is a guaranteed crowd-pleaser, and it’s perfect for last-minute gatherings or when you simply need a quick pick-me-up. If you’re anything like me, you’ll find yourself making this again and again—my kids actually ask for seconds every single time.
How do I make Zucchini bread?
Quick Overview
This recipe is all about ease and flavor. You start by mixing your dry ingredients—the flour, cocoa powder, baking soda, and baking powder. In another bowl, whisk together your wet ingredients like eggs, oil, and sugar. Then, gently combine everything, fold in the grated zucchini and chocolate chips, and pour it all into a loaf pan. After about 50-60 minutes in the oven, you’ll have a fragrant, fudgy loaf. I love how forgiving this recipe is—if you overmix a little, it’s still delicious. The key is not to overbake, so always do the toothpick test before removing it from the oven. Once cooled slightly, a drizzle of glaze or just a sprinkling of extra chocolate chips makes it look almost too pretty to eat—but I promise, it tastes even better!
Ingredients
For the Main Batter:
- 2 cups all-purpose flour (I like unbleached for better flavor)
- ¾ cup unsweetened cocoa powder (make sure it’s good quality)
- 1 teaspoon baking soda
- 1 teaspoon baking powder
- ½ teaspoon salt
- 1 cup granulated sugar (you can use honey or maple syrup if you prefer natural sweeteners)
- ½ cup vegetable or olive oil
- 3 large eggs (trust me, they make a difference in texture)
- 1 teaspoon vanilla extract
- 1 cup grated zucchini (squeeze out excess moisture—don’t skip this step!)
- ½ cup mini chocolate chips (or more if you’re feeling extra indulgent!)
For the Filling:
- Optional: additional chocolate chips or chopped nuts for extra texture
For the Glaze:
- ½ cup powdered sugar
- 1-2 tablespoons milk or cream
- ¼ teaspoon vanilla (or a splash of espresso for depth)
Step-by-Step Instructions
Step 1: Preheat & Prep Pan
Set your oven to 350°F (175°C). Grease a loaf pan with butter or spray with non-stick spray, then line it with parchment paper if you like for easy removal. This one’s a lifesaver on busy mornings, as it ensures your bread comes out whole. While waiting, grate your zucchini and squeeze out all excess moisture; the drier, the better for a tender loaf.
Step 2: Mix Dry Ingredients
In a big bowl, whisk together the flour, cocoa powder, baking soda, baking powder, and salt. This step ensures everything’s evenly distributed, which is crucial for consistent rise and flavor. I always do this first—and I’ve learned the hard way that skipping this can cause uneven spots or a dense loaf.
Step 3: Mix Wet Ingredients
In a separate bowl, whisk the eggs, sugar, and vanilla until smooth. Then, pour in the oil and mix well. The consistency should look slightly frothy but smooth. Testing with a tablespoon of the batter pulled from the bowl—it should fall off easily but not be runny. I usually do this step while the oven preheats, so I don’t waste time.
Step 4: Combine
Gently fold the wet mixture into the dry ingredients. Be careful not to overmix—it’s okay if a few streaks of flour remain, as this keeps the bread tender. The batter will be thick but workable. Add the grated zucchini and chocolate chips last, gently folding them in without pressing out all the air bubbles.
Step 5: Prepare Filling
If you want an extra chocolate chunk effect, sprinkle some additional chips or chopped nuts on top before baking. I like to do this because it adds a lovely crunchy contrast to the moist crumb.
Step 6: Layer & Swirl
Pour the batter into your prepared pan. For a marbled look, I like to add a handful of chocolate chips on top, then swirl a toothpick or skewer through the batter with gentle figure-eight motions. It’s a small detail that makes the presentation prettier and the taste more exciting.
Step 7: Bake
Pop it into your preheated oven and bake for 50-60 minutes. Start checking at around 45 minutes—you want a toothpick inserted into the center to come out clean or with just a few moist crumbs. Oven tiempos vary, so don’t be discouraged if it’s a minute or two off. When it smells divine and a bit cracked on top, it’s ready!
Step 8: Cool & Glaze
Let the bread cool in the pan for about 15 minutes, then transfer it to a wire rack. Once completely cooled, whip up your glaze and drizzle it over the top. I like to keep it simple, but on special occasions, I sprinkle some additional chocolate shavings or chopped nuts for that bakery look.
Step 9: Slice & Serve
This bread is best enjoyed slightly warm or at room temperature. Use a serrated knife for clean slices, and serve with coffee, tea, or just by itself. I swear, the aroma alone makes everyone gather in the kitchen, waiting for that first cut. Trust me, it disappears in minutes at my house. Store leftovers wrapped tightly in plastic or in an airtight container, and you’re good for a few days—or longer if you pop it in the freezer.
What to Serve It With
This bread is so versatile that it can do it all—breakfast, dessert, or an indulgent snack. For a cozy morning, serve slices warm with butter or cream cheese—sometimes I like to toast it slightly to bring out the chocolate aroma even more. If you’re hosting brunch, pair it with fresh berries and a bottomless cup of coffee. My kids love it with a glass of milk or hot cocoa on cold days. As a dessert, I warm a slice and top with vanilla ice cream or whipped cream—pure comfort food. And for those late-night sweet cravings, a slice with a drizzle of extra chocolate or caramel sauce is just perfect. I’ve made this so many times, and each variation feels like a new favorite. The smell alone makes the house feel special, and I know for sure that leftovers are rare around here—they’re always devoured before the day ends.
Top Tips for Perfecting Your Chocolate Zucchini Bread
After making this countless times, I’ve picked up a few tricks that elevate it from good to irresistible. First, don’t skip squeezing out that zucchini moisture. I learned this the hard way—moisture in the batter makes the bread dense and gummy. I usually use a clean kitchen towel to press out excess liquid and even toss the grated zucchini in a little salt to draw out more water. When mixing, be gentle—overmixing can make the bread tough, so fold until just combined. If you want a deeper chocolate flavor, add a splash of brewed espresso or espresso powder—trust me, it enhances the cocoa.
I often sprinkle extra chocolate chips on top before baking because it creates a gooey crown that’s pure eye candy. For swaps, I’ve tested coconut oil instead of vegetable oil, which adds a subtle flavor boost, and it worked beautifully. If you’re gluten-free, swap the all-purpose flour with a cup-for-cup gluten-free blend—I find this works best for maintaining texture. Just note, it might take a couple of extra minutes to bake. For the glaze, adjust the thickness by adding more milk if you want it runnier, or less for a thicker drizzle. My biggest lesson? Keep a close eye on it near the end—every oven bakes a little differently, and you don’t want to overbake and lose that fudgy interior.
Honestly, I’ve made this recipe so many times that I have it memorized. But every time, I remind myself to use high-quality cocoa and good chocolate chips—those little touches make all the difference. And if you happen to have leftover zucchini from your garden or farmer’s market haul, this is the perfect way to use it up and turn it into something everyone will ask for again and again.
Storing and Reheating Tips
This bread keeps well in an airtight container at room temperature for about 2 days. Just make sure to cover it with a towel or plastic wrap to prevent it from drying out. If you want it to stay fresh longer, wrap it tightly in plastic wrap and keep it in the fridge for up to a week. The cool air actually helps keep the moisture lock-in, and I love having a slice on hand for quick snacks. If you’re planning to store it longer, slicing it first and freezing individual pieces wrapped tightly in foil or zip-top bags is best. It’s perfect for grabbing a quick breakfast or late-night treat—just pop in the microwave for about 20 seconds, and it’s like fresh from the oven.
As for the glaze, I usually add it once the bread has fully cooled so it doesn’t melt away. If you want to keep the glaze for later, store it separately, then drizzle fresh just before serving. This keeps the shiny, gooey look and prevents sogginess. A quick tip: avoid refrigerating glazed bread for too long, or the glaze can harden and get sticky when it warms up again. Trust me, simple is best when it comes to storage—this bread only gets better with age, as long as you keep it nestled in the right conditions.
Frequently Asked Questions
Final Thoughts
I truly believe everyone should have a recipe like this tucked into their baking arsenal. It’s forgiving, adaptable, and tastes like a warm hug—a sweet, chocolatey slice of history mixed with a veggie boost. Over the years, I’ve shared this with friends, family, and even neighbors, and the response is always the same: “Wow, I didn’t think zucchini could taste like this!” It’s one of those dishes that reminds me why I love to cook—turning simple ingredients into something special, all while creating memories and smiles. Whether you’re baking it for yourself, your kids, or to bring a bit of sweetness to someone you love, I hope you find as much joy in making this as I do. Happy baking!
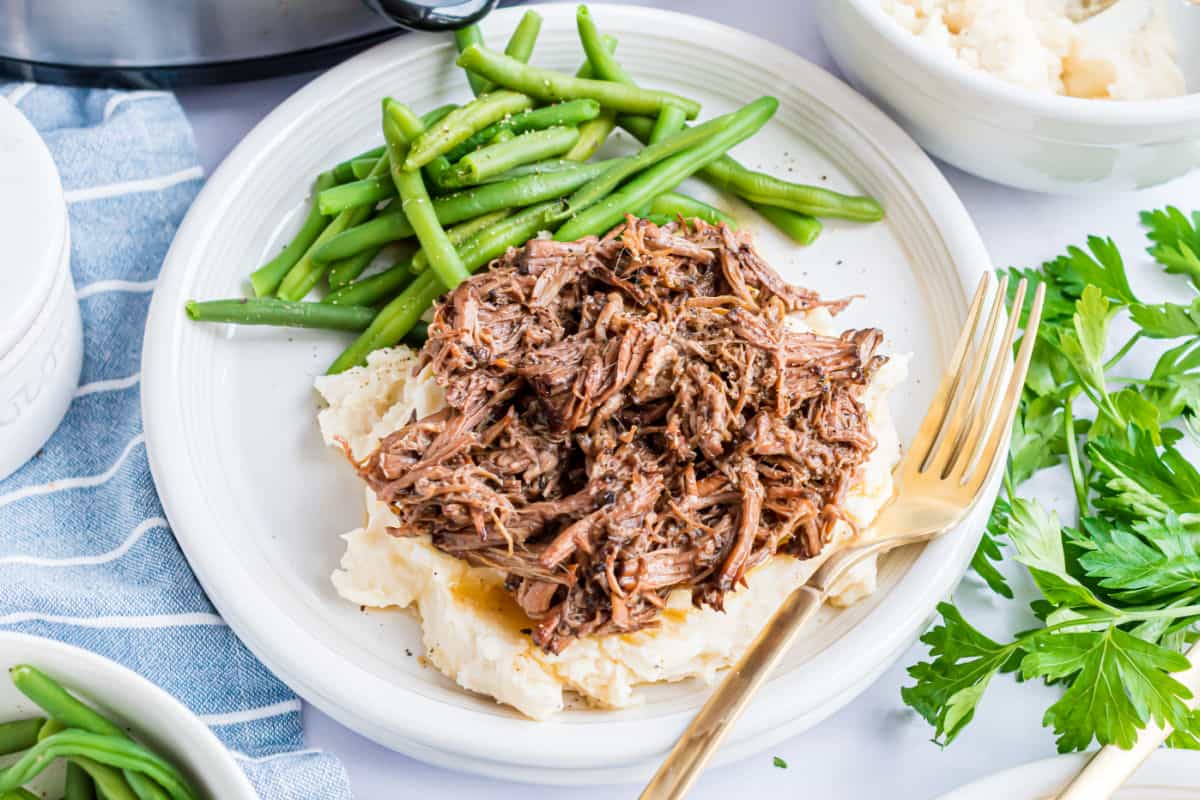
slow cooker beef
Ingredients
Method
- Whisk together all the ingredients and add to the bottom of a slow cooker. Add roast. Cover and cook on low for 6-8 hours. Remove roast and shred with a fork, return to juices.
- Serve and enjoy. The gravy is delicious with mashed potatoes too!