Deviled Strawberries
Cheesecake Deviled Strawberries
There’s something magical about turning a simple, fresh strawberry into a little bite-sized cheesecake masterpiece—and that’s exactly what these cheesecake deviled strawberries do. I first made them for a spring brunch last year, and ever since, they’ve been my go-to no-bake dessert for everything from holiday parties to cozy nights when I crave something sweet but don’t want the guilt of a full slice of pie or cake. They’re creamy, crunchy, and bursting with real strawberry flavor, all wrapped up in a form that feels both fancy and totally approachable. Plus, they’re ridiculously easy to make—no oven required for the final step—which means you can have your dessert and eat it too (literally).
What Is Cheesecake Deviled Strawberries?
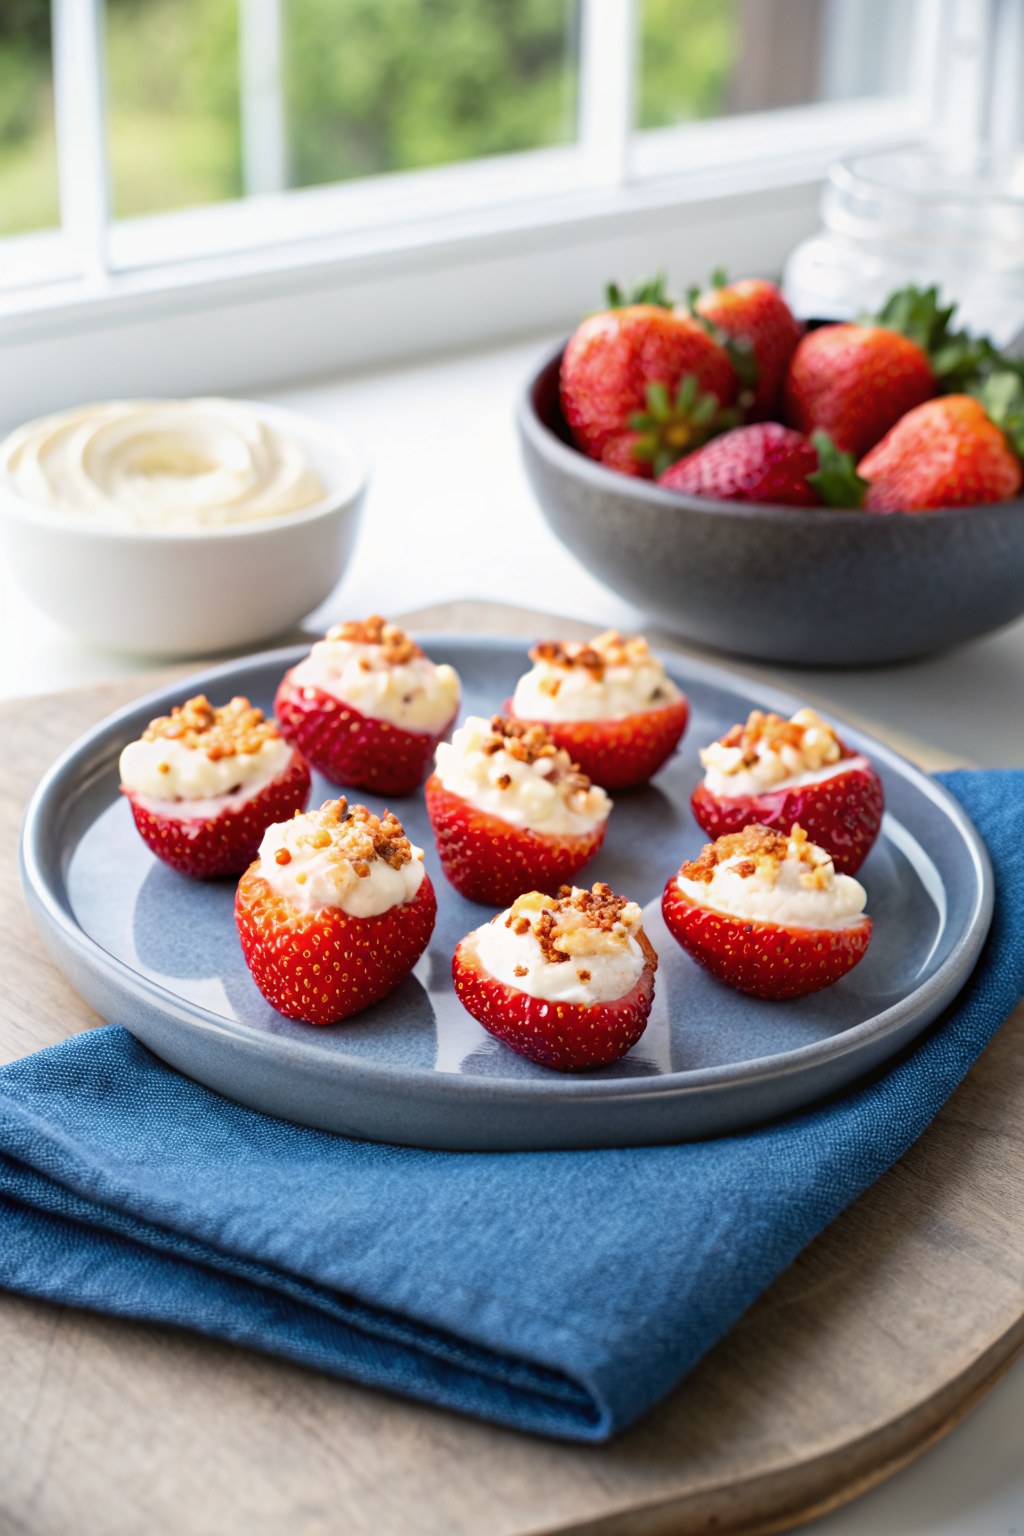
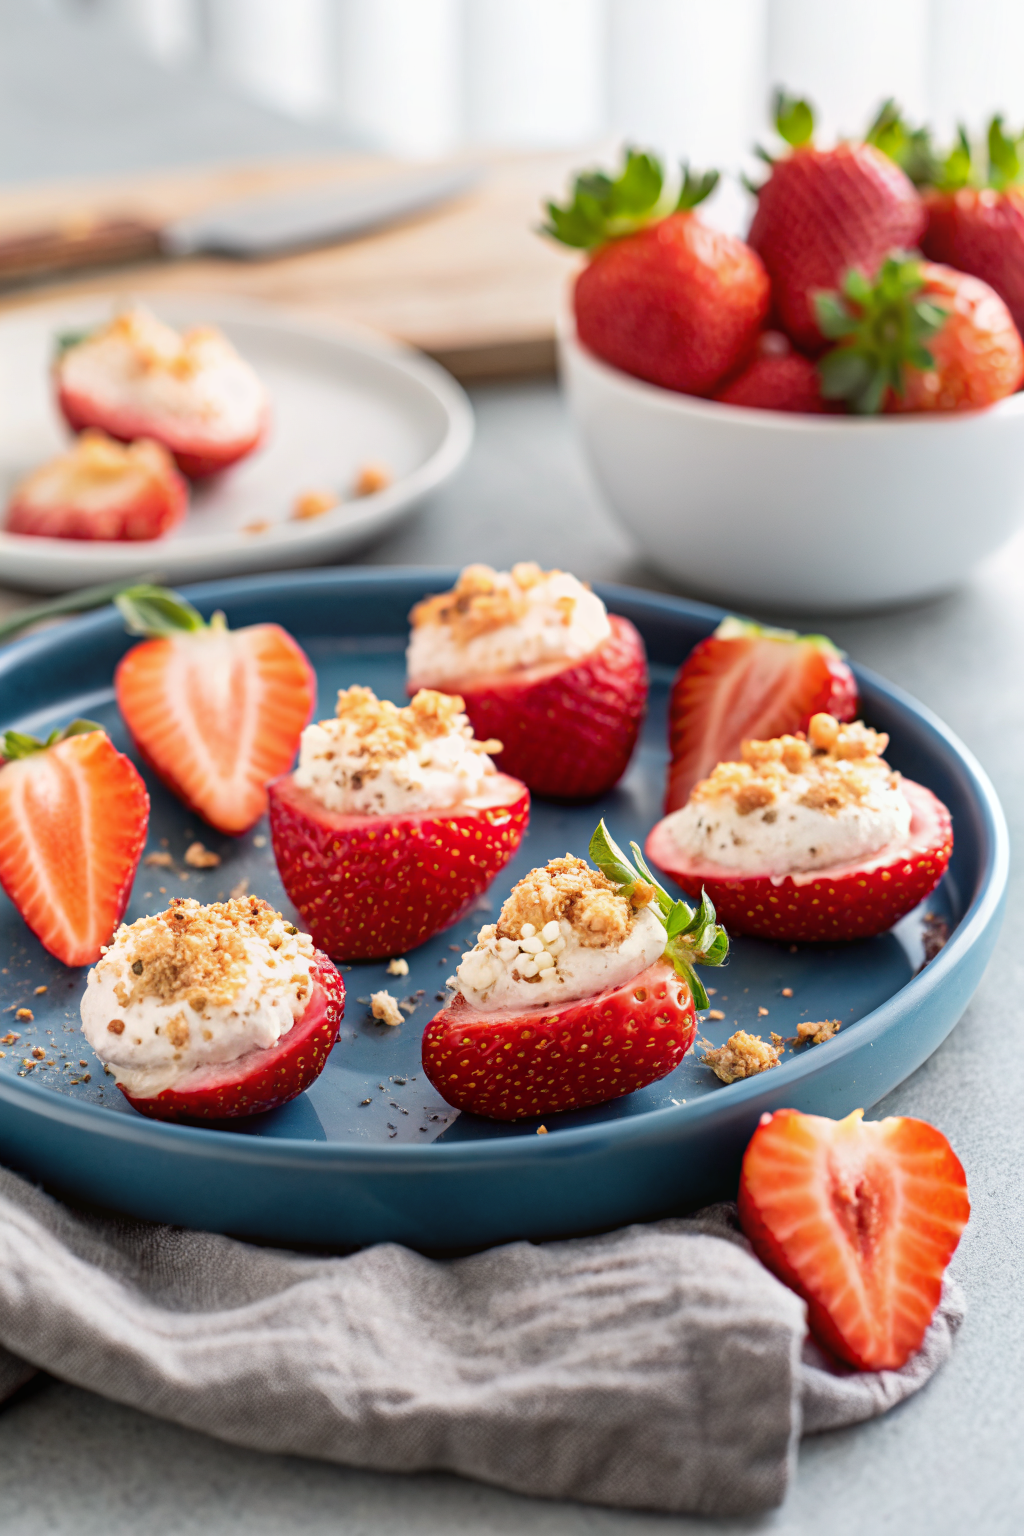
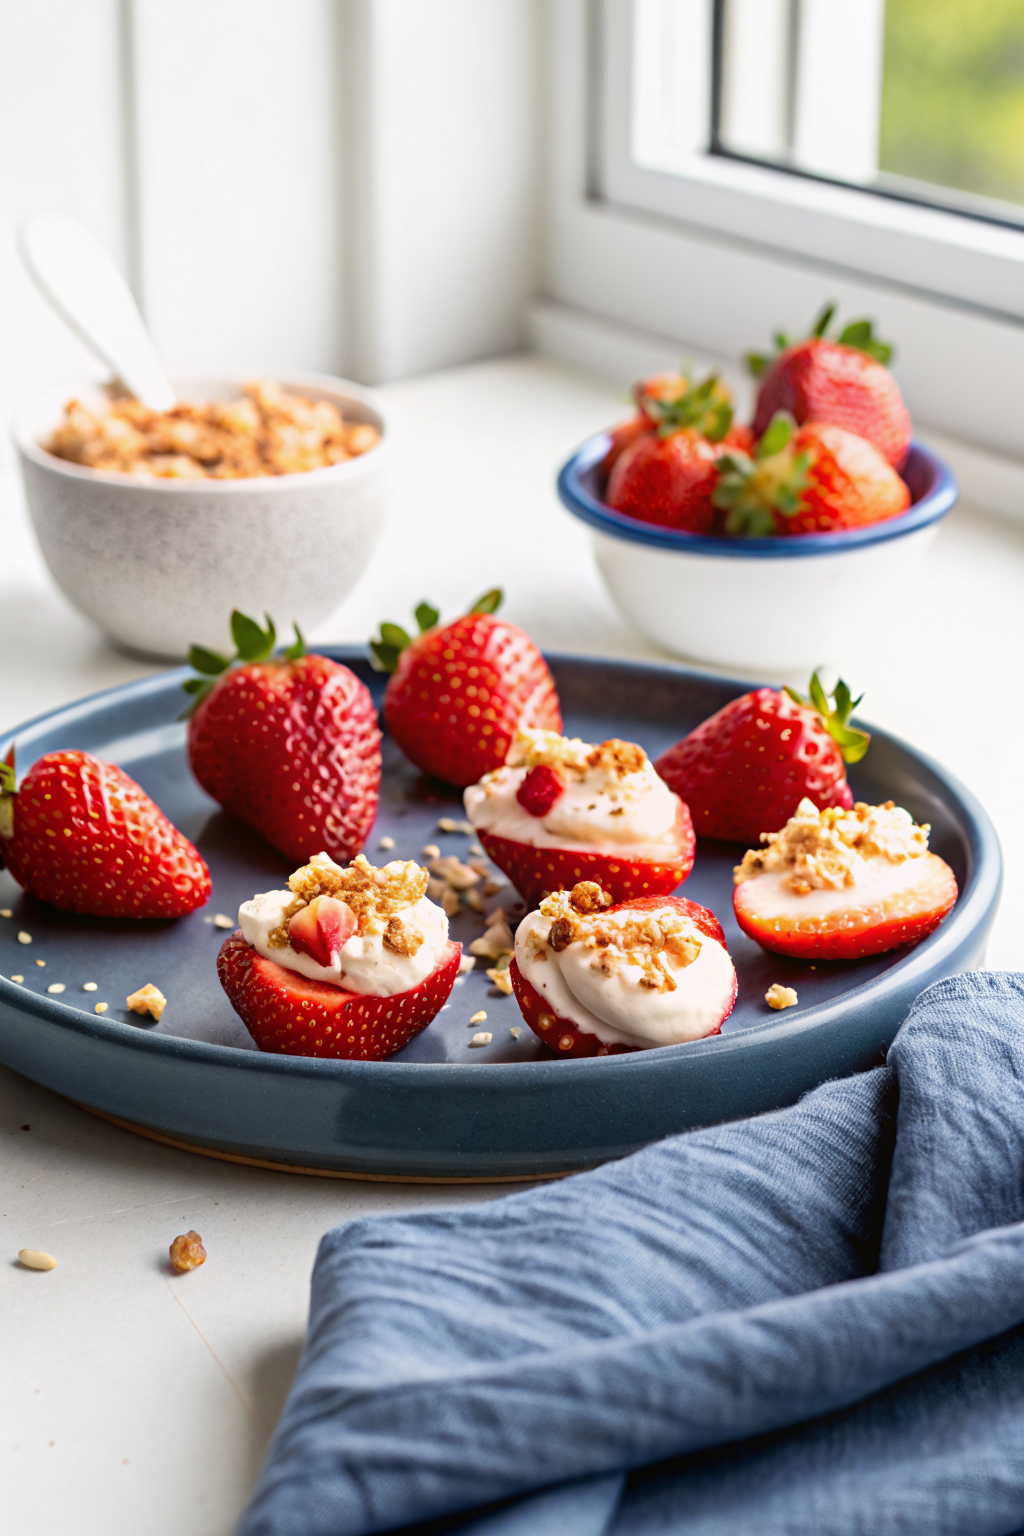
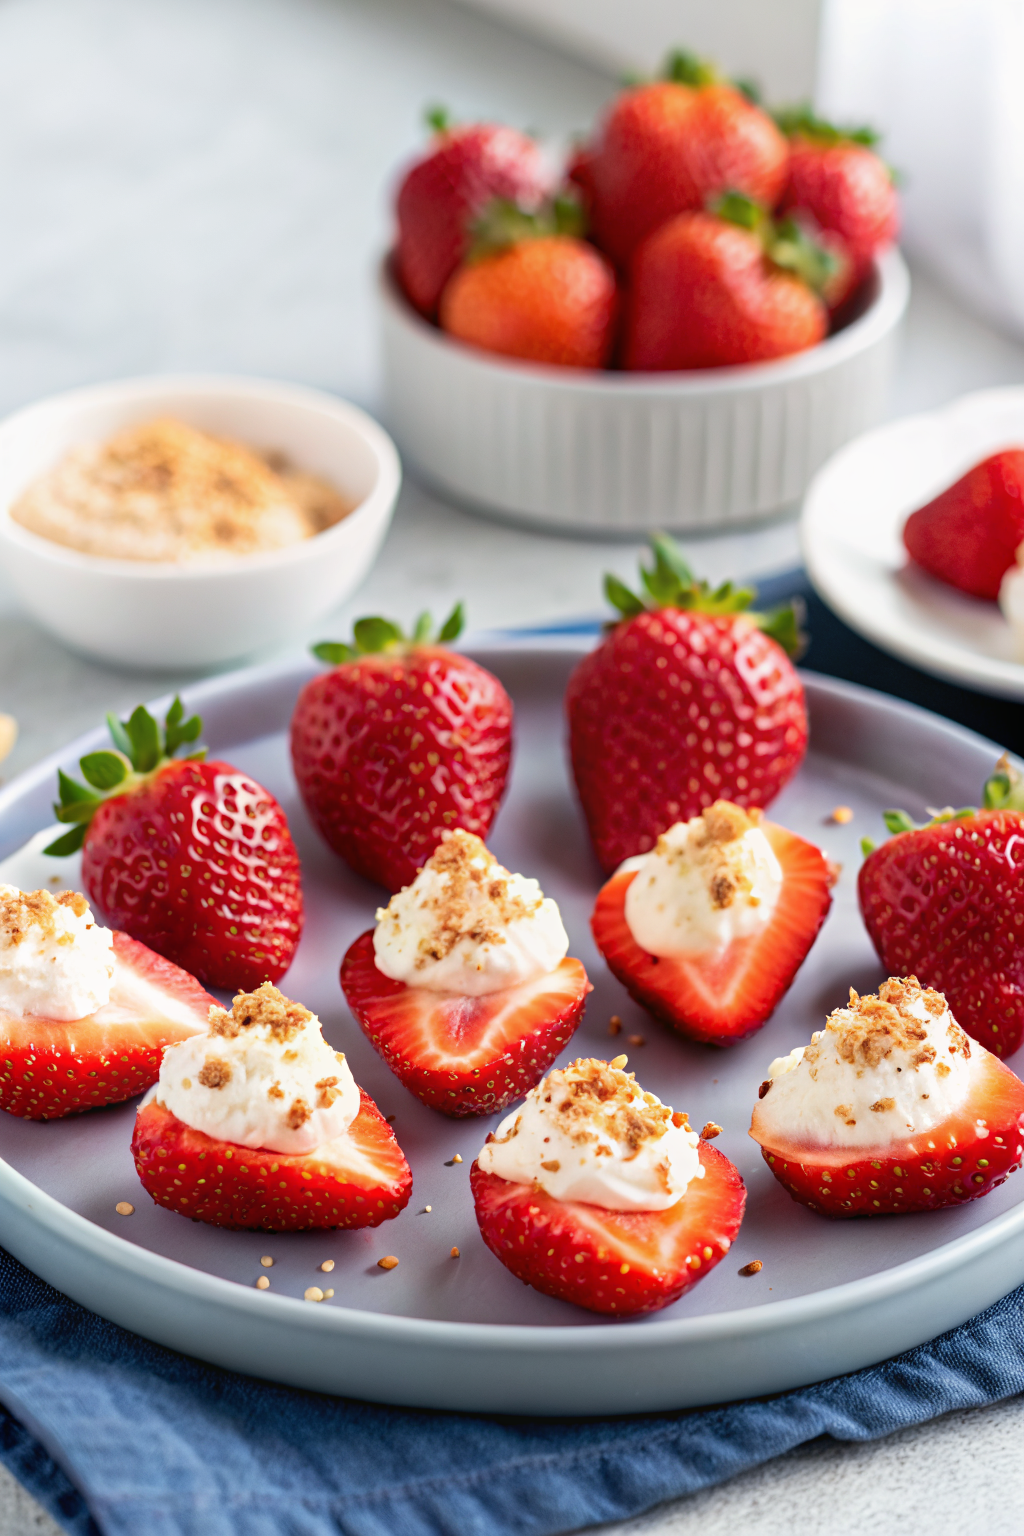
These adorable little bites are basically deviled eggs—but with strawberries! You take large, ripe berries, hollow out the centers (without removing too much flesh), and fill each half with a smooth, tangy cream cheese filling that tastes just like mini cheesecakes. Then, you top them off with a sprinkle of crunchy cookie crumbs mixed with melted butter and a touch of strawberry gelatin for extra color and zing. The result? A perfect balance of creamy, sweet, and satisfyingly textured in every single bite. They’re served chilled, look stunning on a platter, and disappear faster than you can say “pass the dip.” Whether you’re hosting guests or treating yourself, these are guaranteed crowd-pleasers.
Why You’ll Love This Recipe
If you love strawberry cheesecake but hate the idea of baking a whole cake or dealing with crusts and water baths, this recipe is your new best friend. These deviled strawberries capture all the beloved flavors—creamy, sweet, slightly tart—without any of the fuss. And honestly, there’s something so playful about seeing berries transformed into “deviled” treats; it makes dessert feel more fun and festive, especially for spring or summer gatherings. I also appreciate how light and refreshing they are compared to heavier desserts—perfect when the weather warms up.
Another reason I keep coming back to this recipe? It uses ingredients I almost always have on hand: cream cheese, powdered sugar, vanilla, heavy cream, and a box of golden Oreos. No specialty items, no complicated techniques. Just fresh strawberries, a quick mix, and less than 30 minutes of total prep time. You can even prep the filling ahead of a party (just bring it to room temperature before assembling), which saves me precious time when guests arrive.
Plus, they travel well! Want to bring dessert to a picnic or potluck? These stay intact in a covered container and still taste amazing. Leftovers? Well… let’s just say I usually run out before the night’s over. But if they do hang around, they’ll soften slightly as the berries release moisture—still delicious, just softer. So best enjoyed fresh, really.
How to Make Cheesecake Deviled Strawberries
Quick Overview
In under 20 minutes, you’ll transform fresh strawberries into show-stopping bites. First, crush golden Oreo cookies with melted butter and a bit of strawberry gelatin to create a pink-tinged crunch topping. Bake until lightly golden, then cool completely. Meanwhile, whip together cream cheese, powdered sugar, heavy cream, vanilla, and salt into a fluffy filling. Slice strawberries in half, pat dry, and fill each cavity with the cheesecake mixture. Top with the crunchy cookie bits and serve immediately. Easy, elegant, and always a hit.
Ingredients
- Strawberry Crunch Topping:
- 6 golden Oreo cookies (use whole cookies—don’t remove the filling!)
- 1 tablespoon unsalted butter, melted
- 2 teaspoons strawberry-flavored gelatin powder (Jell-O brand works great)
- Cream Cheese Filling:
- 12–15 large fresh strawberries (about 2 to 2½ inches each)
- 8 ounces full-fat block-style cream cheese, softened to room temperature
- ¾ cup sifted powdered sugar
- 2 tablespoons heavy cream
- 1 teaspoon pure vanilla extract
- ¼ teaspoon fine sea salt
Step-by-Step Instructions
- Make the crunch topping: Add golden Oreo cookies to a food processor or high-speed blender. Pulse for 30–60 seconds until finely crushed. Transfer to a bowl and set aside.
- Mix with butter and gelatin: In another small bowl, stir together melted butter and strawberry gelatin powder until fully dissolved. Pour this mixture into the cookie crumbs and stir until evenly coated. The crumbs won’t turn completely pink—this is normal and gives them a lovely two-toned texture.
- Bake the topping: Preheat oven to 350°F. Line a baking sheet with parchment paper or a silicone mat. Spread the crumb mixture in a thin, even layer on the sheet. Bake for 8–10 minutes, or until lightly golden around the edges. Remove from oven and let cool completely on the pan. Break apart any large pieces before using.
- Prepare the strawberries: Rinse strawberries just before using and pat them very dry with a clean towel. Cut each in half lengthwise and place cut-side up on a serving platter. Set aside.
- Make the filling: In a large mixing bowl, beat cream cheese with a handheld mixer on medium speed for 1–2 minutes until smooth. Gradually add powdered sugar, beating on low until incorporated. Add heavy cream, vanilla, and salt. Beat another 1–2 minutes until light and creamy.
- Assemble: Spoon about 1½ teaspoons of filling into the center of each strawberry half. Or, if you prefer neat dollops, pipe the filling using a piping bag fitted with a tip. Either way works perfectly.
- Finish and serve: Sprinkle the crunchy topping generously over the filled berries. Serve immediately or refrigerate briefly if needed. Best enjoyed fresh!
What to Serve It With
These cheesecake deviled strawberries shine as part of a larger dessert spread. Pair them with other berry-forward treats like strawberry shortcake skewers, mini lemon bars, or a fruit platter featuring peaches, kiwi, and grapes. For a savory contrast, include some charcuterie board elements—think prosciutto-wrapped figs or marinated mozzarella balls. If you’re serving at a brunch or bridal shower, they look gorgeous alongside coffee cakes, muffins, or quiches. Because they’re bite-sized and not overly rich, they won’t overwhelm your guests’ palates—yet still feel special enough for celebrations.
Top Tips for Perfecting Your Cheesecake Deviled Strawberries
- Choose the right strawberries: Look for berries that are roughly 2 to 2½ inches long—they should sit flat on the plate and resemble deviled eggs. Avoid tiny ones; they won’t hold enough filling.
- Dry them thoroughly: Moisture is the enemy here. Always rinse strawberries right before slicing and pat them completely dry. Any leftover dampness will make the filling soft or runny.
- Use full-fat cream cheese: Low-fat or whipped varieties are too soft and won’t hold their shape well after refrigeration. Block-style cream cheese gives the best stability.
- Don’t skip the gelatin: While optional, adding strawberry gelatin enhances both flavor and color. If you’re sensitive to artificial flavors, you can omit it (the topping will just be plain cookie crumbs), but I highly recommend keeping it for authenticity.
- Pipe or spoon? Both work! If piping feels intimidating, use a small spoon—it’s easier and just as effective. Just avoid overfilling, or the berries might burst when someone takes a bite.
- Serve promptly: These are best eaten within an hour of assembly. As they sit, the berries release juice, softening the filling. Still tasty, but lose the crisp crunch faster.
Storing and Reheating Tips
While these cheesecake deviled strawberries are best served fresh, you can store leftovers—but expect texture changes. Store assembled berries in the refrigerator for up to 1 day. Keep them covered loosely (like in a shallow container) to prevent drying out. Note: the crunch topping may soften slightly, and the filling might become looser as moisture transfers from the fruit.
If you need to prep ahead, make the cream cheese filling up to 24 hours early. Store it covered in the fridge, then let it come to room temperature before using. Bring it to room temp for about 15–20 minutes before assembling.
Do not freeze the assembled strawberries—the texture of the berries breaks down, and the filling loses its structure. However, the leftover crunch topping freezes beautifully! Store it in an airtight container at room temp for up to 1 week, or freeze it separately to use later on ice cream, yogurt, or oatmeal.
Reheating isn’t recommended—heat melts the cream cheese filling and ruins the crisp cookie topping. Stick to chilled servings for the best experience.
Frequently Asked Questions
Final Thoughts
These cheesecake deviled strawberries are one of those recipes that feels effortless but somehow always wows people. There’s something deeply satisfying about transforming something simple—like a humble strawberry—into a little piece of dessert magic. They’re light enough for warm days, colorful enough for holidays, and sweet enough to satisfy any craving. Plus, their bite-sized nature makes them ideal for gatherings where you want variety without excess.
I’ve made them for baby showers, Easter brunches, Valentine’s Day spreads, and even as midnight snacks straight from the fridge. Every time, they disappear quickly—and compliments follow. Whether you’re a seasoned baker or just looking for a pretty, no-fuss treat, I promise you’ll fall in love with this recipe. So grab your favorite strawberries, whip up that creamy filling, and get ready to impress everyone (including yourself!) with these irresistible little bites.
Cheesecake Deviled Strawberries
Ingredients
Method
- Preheat the oven to 350°F. Line a small baking sheet with parchment paper or a silicone mat and set aside.
- Add the golden oreo cookies to a small food processor, or high speed blender, and pulse for 30-60 seconds or until finely crushed. Transfer the crumbs to a bowl and set aside.
- In a separate bowl, stir together the melted butter and strawberry gelatin powder until dissolved and fully blended.
- Add the strawberry mixture to the cookie crumbs and stir to combine. The cookie crumbs will not turn completely pink. This is expected and creates the desired crunchy two-toned texture.
- Transfer the strawberry crunch mixture to the prepared baking sheet, spread to a thin even layer and bake for 8-10 minutes or just until lightly golden. Remove from the oven and allow to cool completely on the baking sheet while you prepare the cream cheese filling.
- Rinse the strawberries under cool water, then pat dry very well. Cut the strawberries in half lengthwise (removing any green leaves as well) and place onto a serving platter with the sliced side of the berry facing up. Set aside.
- Beat the cream cheese in a large bowl, with a handheld mixer on medium speed, for 1-2 minutes or until smooth and creamy.
- Add the powdered sugar, beat on low until fully incorporated, followed by the heavy cream, vanilla extract, and salt. Beat for an additional 1-2 minutes or just until light and creamy.
- Dollop a 1½ teaspoon sized amount of the cream cheese filling onto the cut surface of each of the strawberries.
- Once all the strawberries have been topped with the cream cheese filling, sprinkle the tops with the reserved strawberry crunch topping and serve.