Creamy Pierogi Casserole How to Make It
There’s nothing quite like the smell of a freshly baked cake filling your kitchen—it’s like a warm hug from an old friend. I remember growing up, my grandma used to make a version of this zucchini swirl cake, and the aroma alone could draw everyone to the table. Now, whenever I need something sweet but crave a little veggie boost, I whip up this recipe. It’s incredibly versatile, moist, and downright addictive. Plus, I swear, it’s one of the easiest baked goodies to throw together on a busy weeknight. My kids ask for this all the time—especially when I tell them they’re getting their secret vegetable in the dessert! Trust me, this one’s a lifesaver on hectic days, and it always disappears faster than I expect. If you love a good homemade treat with a cozy, nostalgic feel, you’ve got to give this zucchini swirl cake a try—your family will thank you! Now, let’s get into how this magic happens, shall we?
What is Zucchini Swirl Cake?
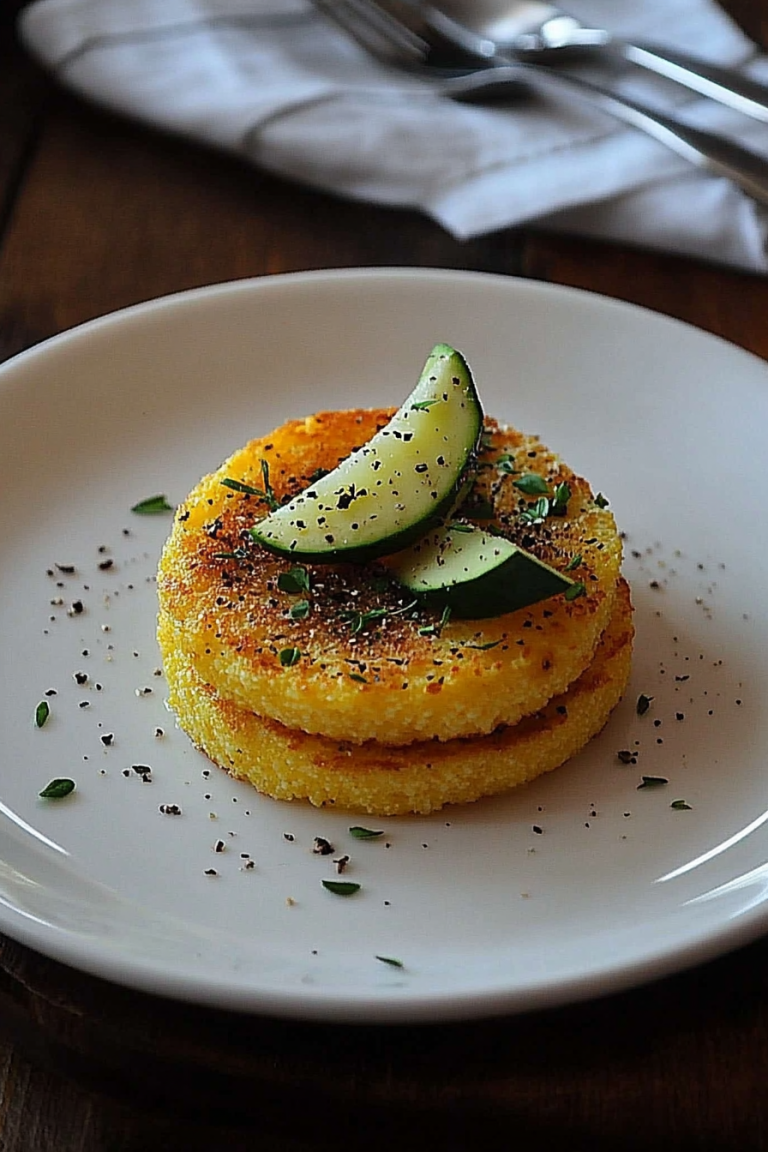
Think of zucchini swirl cake as a cozy, moist bundt or loaf cake, packed with grated zucchini that keeps it tender and subtly sweet. It’s essentially a celebration of fresh produce—think of it as a sneaky way to get your kids (or yourself!) to eat more veggies without a fuss. The swirl part comes from a ribbon of cinnamon-spiced filling that winds through the batter, like a mini cinnamon roll inside a lovely cake. The name “zucchini swirl cake” is pretty spot-on—it’s a simple combination of grated zucchini and a delicious swirl of cinnamon-sugar filling that gives each bite a little surprise. I love how it’s both rustic and elegant, perfect for everything from a cozy brunch to a quick after-dinner treat. It’s kind of like a homemade coffee cake, but with that hidden veggie boost. And best of all? It’s super forgiving and flexible—so don’t worry if you’re not a baking pro. This cake is all about feeling good about what you’re eating, with a relaxed, loving vibe.
Why you’ll love this recipe?
What I love most about this zucchini swirl cake is how it balances indulgence with a bit of wholesome goodness. The smell alone is pretty irresistible—rich cinnamon, sweet vanilla, and the hint of zucchini cooking down just enough to keep everything moist and tender. The flavor doesn’t overpower; it’s subtle but satisfying, with that lovely cinnamon ribbon winding through every slice. Plus, it’s crazy simple to make. I’ve tested this with just about every ingredient tweak possible: almond milk instead of regular milk? Yep, made it even creamier. Adding a splash of vanilla? Always recommended. What’s great is how adaptable it is—you can switch up the filling with different spices, or throw in some chopped nuts or chocolate chips if you’re feeling a little adventurous. And here’s a little secret: this cake is fantastic for sneaking in extra nutrients. My kids once asked if it was “healthier than a cookie,” and I just smiled. Honestly, it’s a crowd-pleaser that’s budget-friendly and perfect for when you want something warm, comforting, and just a little special.
How do I make Zucchini Swirl Cake?
Quick Overview
This cake is one of those recipes where you just mix everything together—no complicated steps or fancy tools needed. Grate your zucchini, mix all the batter ingredients, layer your cinnamon-sugar filling, and swirl it through the batter before baking. It’s foolproof and saves you time, making it ideal for spontaneous baking sessions or lazy Sunday mornings. The key to success is not overmixing—try to keep the batter light and airy so the cake turns out moist and fluffy. The swirl of cinnamon filling is what makes it special—think of it as a sweet, warm ribbon winding through every slice. Once it’s baked and cooled slightly, a simple glaze or dusting of powdered sugar makes it look as inviting as it tastes. I promise, once you’ve made this a couple of times, it’ll become a staple in your recipe box.
Ingredients
For the Main Batter:
- 2 cups grated zucchini (about 2 medium zucchinis, well-drained)
- 1 ½ cups all-purpose flour (or a gluten-free blend if preferred)
- 1 cup sugar (white or organic cane sugar works well)
- ½ cup vegetable or melted coconut oil
- 3 large eggs
- 1 teaspoon vanilla extract
- 1 ½ teaspoons baking powder
- ½ teaspoon baking soda
- ½ teaspoon salt
For the Filling:
- ¼ cup brown sugar or coconut sugar
- 2 teaspoons ground cinnamon
- 2 tablespoons softened butter or coconut oil
- Optional: ¼ cup chopped nuts or chocolate chips
For the Glaze:
- ½ cup powdered sugar
- 1-2 tablespoons milk (dairy or plant-based)
- A splash of vanilla (optional)
Step-by-Step Instructions
Step 1: Preheat & Prep Pan
Set your oven to 350°F (180°C). Grease your bundt pan or loaf pan generously—trust me, this step saves you from a sticky mess later. If you’re using a loaf pan, lining it with parchment paper makes removal much easier. Place a rack in the fridge or a cool place—this helps the cake cool evenly after baking.
Step 2: Mix Dry Ingredients
In a large bowl, whisk together the flour, baking powder, baking soda, salt, and cinnamon if using. This ensures all your dry ingredients are evenly distributed—no uneven bites, I promise. Set this aside for now.
Step 3: Mix Wet Ingredients
In another bowl, beat the eggs. Then add the sugar, oil, and vanilla, whisking until everything is smooth and slightly fluffy. I always do this step first because it helps the sugar dissolve nicely, and the mixture gets a little shiny. Then, gently fold in the grated zucchini—be careful not to squeeze out all the moisture. The zucchini should be well-drained so your batter doesn’t get too wet.
Step 4: Combine
Pour the wet mixture into the dry ingredients. Fold gently until just combined—don’t overmix! Overmixing can make the cake dense, and that’s not what we want. You’re aiming for a batter that’s smooth but still light.
Step 5: Prepare Filling
Mix the brown sugar, cinnamon, and softened butter until crumbly. If you’re adding nuts or chips, fold them in now. This filling should be crumbly but moist enough to create that gorgeous swirl pattern.
Step 6: Layer & Swirl
Pour about half of the batter into your prepared pan. Then sprinkle the filling evenly over the top. Add the remaining batter, smoothing it out gently. Use a skewer or a butter knife to swirl the filling into the batter—try to give it a gentle zigzag pattern, but don’t overdo it. Think of it as creating a marbled effect that’s pretty yet natural-looking.
Step 7: Bake
Pop it into the oven and bake for about 45-50 minutes. Check for doneness by inserting a toothpick into the center—it should come out clean. Every oven is a little different, so start checking around 45 minutes. If the top browns too quickly, tent with foil for the last few minutes.
Step 8: Cool & Glaze
Allow the cake to cool in the pan for 15 minutes before transferring it onto a wire rack. Once cooled slightly, mix your glaze ingredients until smooth, then drizzle it over the top. If you prefer, dust with powdered sugar for a simpler look. The glaze adds a lovely sweetness and moisture, but you can skip it if you’re keeping things light.
Step 9: Slice & Serve
Use a sharp serrated knife to cut neat slices—this cake is moist and tender, so gentle slicing is best. Serve slightly warm or at room temperature. I love it with a cup of coffee or a glass of cold milk. It’s perfect for holiday breakfast, an afternoon snack, or even as a little treat after dinner. The presentation with that beautiful swirl peeking through each slice? Absolutely Instagram-worthy!
What to Serve It With
This cake is so versatile, I almost consider it a chameleon—sweet enough as a dessert, cozy enough for breakfast, and fancy enough for brunch. Usually, I serve it with a dollop of whipped cream or a scoop of vanilla ice cream if I want to step up the indulgence. For breakfast or brunch, it pairs beautifully with a light coffee or tea, maybe topped with fresh berries or a splash of cream. My family loves it on lazy weekends where everyone lazes around with plates piled high. Sometimes, I drizzle a little extra caramel or honey if I want an extra touch of sweetness. And you know what the best part is? This cake works equally well for a casual snack or a more special occasion. Once you make it, you’ll find yourself reaching for the ingredients without a second thought—it’s just that good!
Top Tips for Perfecting Your Zucchini Swirl Cake
Every baker hits a few snags here and there, so I thought I’d share some tricks I’ve learned over countless batches. First, grated zucchini can hold a lot of water; I always squeeze out excess moisture using a clean kitchen towel or cheesecloth. This keeps the batter from becoming too soggy and ensures your cake stays moist but not heavy. When mixing the wet and dry, fold gently—overmixing is the enemy here, resulting in a denser crumb. For the swirl, I recommend dropping spoonfuls of filling in random spots and swirling once or twice—this creates a natural, marbled look that’s pretty and professional-looking without too much effort. If you want to customize, try adding a splash of lemon zest to the batter for brightness or chopped nuts to the filling for crunch. Baking is all about balance—if your oven runs hot, consider lowering the temperature slightly or checking earlier. For the glaze, if it’s too thick, add a teensy bit more milk—if too runny, a pinch of powdered sugar thickens it right up. Honestly, I’ve tested this recipe so many times that I can almost do it in my sleep now, but I still get excited every time it comes out of the oven—because that smell, I swear, never gets old.
Storing and Reheating Tips
This cake is best enjoyed fresh, but if you happen to have leftovers, don’t worry. You can store it at room temperature covered tightly with plastic wrap for about 1-2 days—just keep it in a cool place out of direct sunlight so it doesn’t dry out. For longer storage, pop it into an airtight container in the fridge—up to 4 days, if it lasts that long! Reheat slices in the microwave for about 10-15 seconds if you prefer it warm, or enjoy it chilled—either way, it’s delicious. If you plan to keep it for more than a week or want to make it ahead, I recommend freezing small portions. Wrap slices tightly in plastic wrap and then foil, and they’ll stay good for up to 3 months. When ready to eat, thaw overnight in the fridge or at room temperature, then give it a quick warm-up if you like. If you’ve added glaze, I suggest waiting to do so until just before serving—this keeps the shine fresh and prevents it from soaking into the cake too much. Trust me, this cake’s moisture level and flavor only improve with a little care in storage.
Frequently Asked Questions
Final Thoughts
If you’re looking for a fuss-free way to add a little veggie magic to your dessert repertoire, this zucchini swirl cake is it. Every time I bake it, I’m reminded how simple ingredients can come together into something so comforting and satisfying. It’s the kind of recipe that makes your house smell like sunshine and cinnamon, and the taste? Well, it’s honestly better than it looks—moist, flavorful, with just a hint of sweetness and that gorgeous swirl that makes each slice special. Over the years, I’ve shared this with friends, tested different variations, and even snuck in a few extra nuts or fruit—and it always wins hearts. My hope is that you’ll find as much joy making and sharing this as I do. If you try it, please leave a comment, share your tweaks, or send me a photo—because, honestly, nothing makes me happier than seeing someone else fall in love with this recipe. Happy baking!
chicken alfredo
Ingredients
Method
- Cook the pasta in boiling salted water according to package instructions. Drain and set aside.
- In a large skillet, heat olive oil over medium heat. Add minced garlic and sauté until fragrant.
- Add cooked chicken to the skillet and heat through, about 5 minutes.
- Pour Alfredo sauce into the skillet and stir well to combine. Cook for an additional 5 minutes.
- Add cooked pasta to the sauce and toss gently to coat.
- Serve hot, sprinkled with Parmesan cheese.