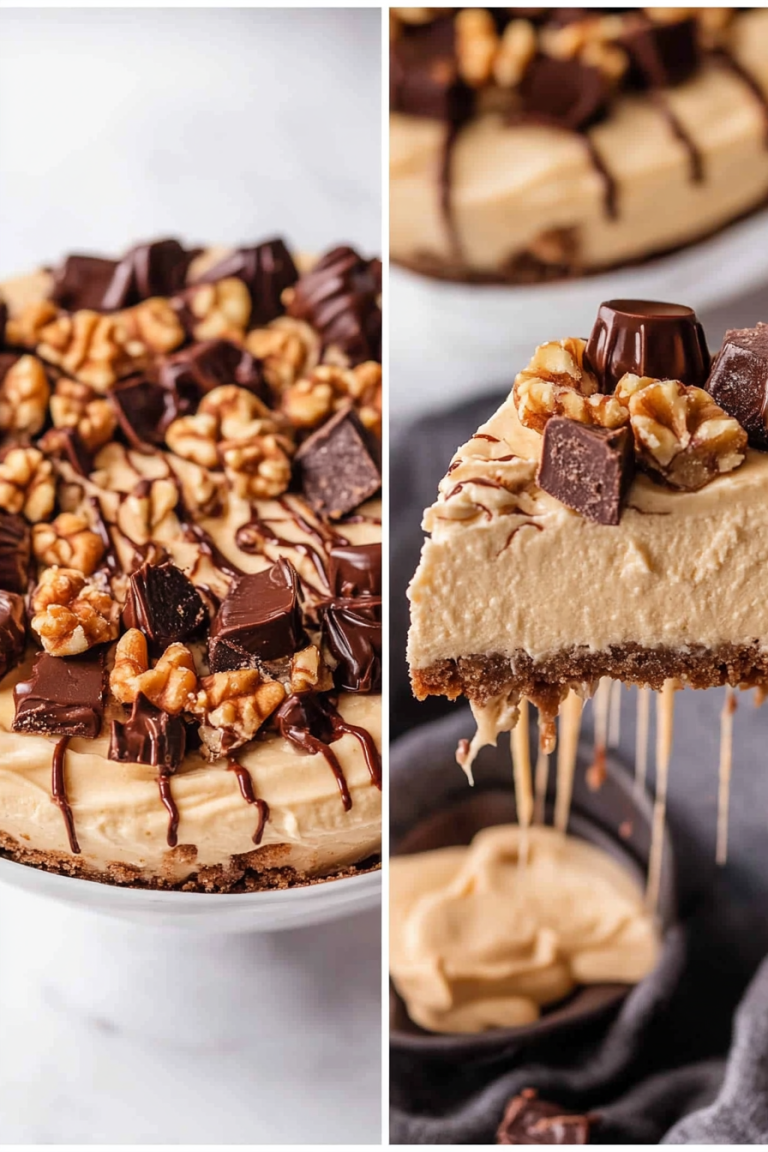
Creamy Peanut Butter Cheesecake Delight
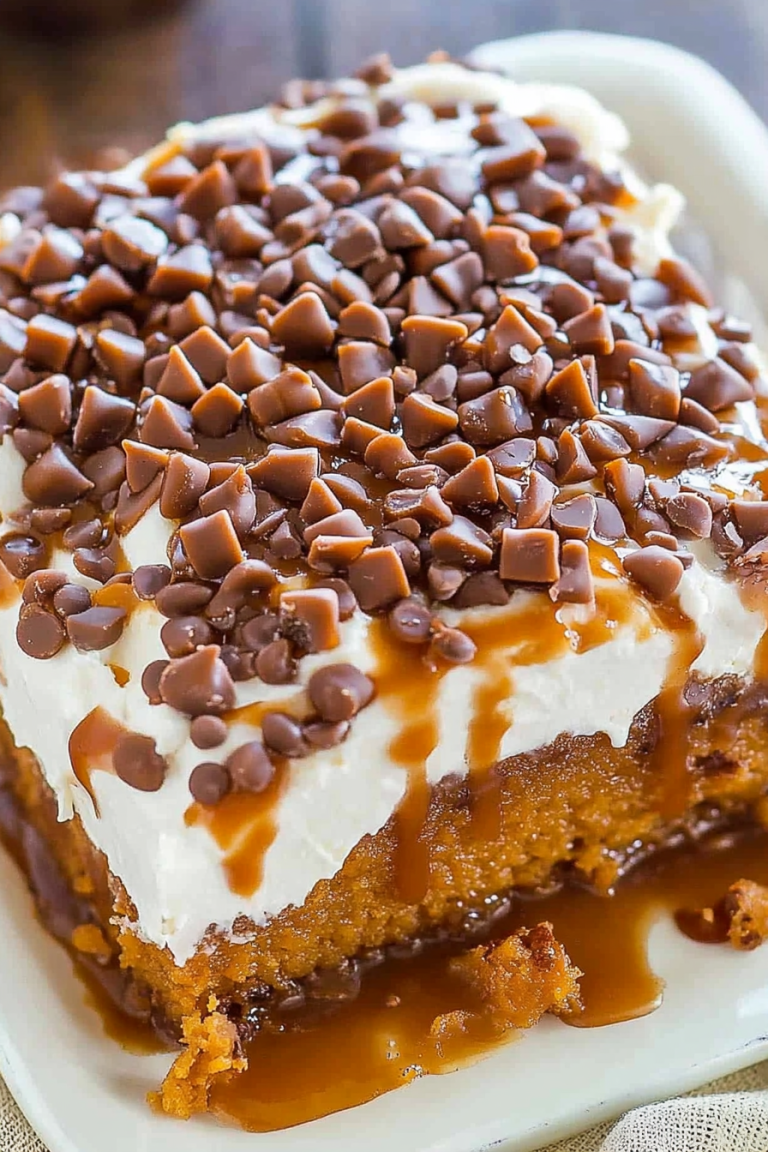
There’s something about a warm slice of zucchini swirl cake that instantly transports me back to lazy Sunday afternoons at my grandma’s house. The smell alone—rich, buttery, with just a hint of cinnamon—fills the entire kitchen and makes everyone gather around, curious and hungry. I remember my kids asking for seconds before I even finished frosting it—truthfully, this one’s a lifesaver on busy nights when I want to impress but don’t have hours to bake from scratch. It’s a recipe I’ve tested countless times, tweaking here and there until it’s just right. And honestly? I’ve never made it exactly the same way twice, but it always disappears in minutes at my house. Trust me, once you try this zucchini swirl cake, it becomes a family favorite that shows up at every celebration, mix-and-match brunch, or just when you need a little slice of happiness with your coffee. The best part? It’s forgiving, flexible, and insanely delicious—perfect for when you want a cozy, homemade treat but don’t want to spend all day in the kitchen.
What is Zucchini Swirl Cake?
Think of zucchini swirl cake as a happy marriage between a moist yellow cake and a slightly sweet, veggie-packed twist. It’s essentially a sponge-like cake with a generous swirl of cinnamon-spiced zucchini filling running through the middle and topping it off with a glistening glaze. The name? Well, it’s all about that beautiful marbled look—the way the vibrant green zucchini and cinnamon mixture winds through the golden batter. Originally, this recipe comes from back in the day when housewives wanted to get some veggies into dessert—because why not make indulgence slightly healthier, right? It’s approachable for home cooks because it only requires a handful of ingredients, most of which you probably already have in your pantry. Think of it as a comforting, slightly nostalgic treat that strikes just the right balance between sweet and savory, with a moist crumb and a gorgeous visual appeal.
Why you’ll love this recipe?
What I love most about this zucchini swirl cake is how it feels like a warm hug in every bite. The flavor—rich cinnamon mingled with the fresh, subtly sweet zucchini—really hits the spot, especially when paired with a hot cup of coffee or tea. It’s so simple to make, too. I always do this when I’ve got leftover zucchini from the garden or that tiny bit of grated zucchini languishing in the fridge, waiting to be put to good use. Because it’s made with basic ingredients—flour, sugar, eggs, and zucchini—it’s super budget-friendly, which is great when you’re feeding a crowd or just want an affordable indulgence. Plus, you can customize the layers: add nuts, swap the glaze for whipped cream, or throw in a handful of chocolate chips for extra decadence. Honestly, what I love most about this is its versatility—you can serve it as breakfast, a brunch centerpiece, or a cozy dessert. It’s a baker’s best-kept secret, perfect for practically any occasion.
How do I make Zucchini Swirl Cake?
Quick Overview
This cake comes together in just a few straightforward steps: mix your batter, prepare the zucchini filling, layer and swirl it all together before baking. The magic happens when the zucchini ribbon weaves through the batter, creating a beautiful marbled effect that’s as pretty as it is delicious. What makes this recipe special is the swirl—don’t skip it! It’s simple but transformative, giving each slice that charming look and burst of flavor. You get a moist, tender crumb with just the right amount of sweetness, topped with a shiny glaze that’s optional but totally worth it. Best of all? It’s forgiving if you overmix or if it overshoots the baking time—you’ll always end up with a tasty, satisfying treat.
Ingredients
For the Main Batter:
– 2 cups all-purpose flour (I like to do half wheat for a bit more nuttiness)
– 1 1/2 cups sugar (can reduce slightly if you want less sweet)
– 1/2 teaspoon baking powder
– 1/2 teaspoon baking soda
– 1/2 teaspoon salt
– 1 teaspoon ground cinnamon (trust me, it makes all the difference)
– 1 cup vegetable or canola oil (I’ve tested with applesauce for a lighter version)
– 3 large eggs
– 1 teaspoon vanilla extract
– 1 cup buttermilk (or regular milk + a splash of vinegar if you don’t have buttermilk)
For the Filling:
– 1 1/2 cups grated zucchini (squeeze out excess moisture—you don’t want a soggy cake)
– 1/2 cup brown sugar (adds warmth and depth)
– 1 teaspoon ground cinnamon
– Optional: a handful of chopped nuts or raisins for texture
For the Glaze:
– 1 cup powdered sugar
– 2-3 tablespoons milk (or lemon juice for a tangy twist)
– A splash of vanilla or almond extract (for flavor depth)
Step-by-Step Instructions
Step 1: Preheat & Prep Pan
Crank your oven up to 350°F (175°C) and butter or line a 9-inch square or round cake pan. Make sure it’s ready—this batter bakes quickly, so having everything in place helps avoid last-minute scrambling. I like greasing the pan and dusting it with a little flour—no sticking, no fuss.
Step 2: Mix Dry Ingredients
In a big mixing bowl, whisk together the flour, sugar, baking powder, baking soda, salt, and cinnamon. Mixing the dry stuff first ensures everything’s evenly distributed. It also boosts your baking confidence—look at that perfect, even color and texture!
Step 3: Mix Wet Ingredients
In another bowl, whisk the eggs, oil, vanilla, and buttermilk until smooth. When I do this, I make sure the eggs are fully integrated so the batter’s smooth and creamy. If your eggs are cold, just give the mixture a few extra seconds—no big deal. I tested using almond milk instead of regular milk, and honestly, it made the cake even creamier. Don’t be afraid to experiment!
Step 4: Combine
Pour the wet mixture into the dry ingredients and stir gently until just combined—no overmixing! Overworking the batter can make the cake dense, and nobody wants that. It’s okay if there are a few lumps; they’ll bake out.
Step 5: Prepare Filling
In a small bowl, mix grated zucchini with brown sugar and cinnamon. Squeeze out as much moisture as possible—this keeps your layers neat and prevents a soggy cake. Toss in nuts or raisins if you’re feeling extra indulgent. This filling is the secret to the swirl’s gorgeous marbling.
Step 6: Layer & Swirl
Pour half the batter into your pan, spread the zucchini filling evenly, then pour the remaining batter on top. Use a knife or toothpick to gently swirl the filling into the batter—don’t overmix, just a few gentle moves to create that beautiful marbled effect. Seeing the green ribbon twist through the golden batter is almost as satisfying as tasting it.
Step 7: Bake
Pop it into the oven and bake for about 40-45 minutes. Use a toothpick inserted in the center—if it comes out clean, you’re good to go! Every oven is different, so start checking around the 38-minute mark. If your cake browns too quickly on top but isn’t baked through, gently tent it with foil.
Step 8: Cool & Glaze
Let the cake cool in the pan for at least 15 minutes before transferring to a wire rack. Once it’s cool enough to handle, pour your prepared glaze over the top while it’s still slightly warm. The glaze seeps into the cracks and adds a shiny, luscious surface that makes the whole thing irresistible.
Step 9: Slice & Serve
Cut into squares or wedges with a sharp knife—treat it gently, like a precious treasure. Serve at room temperature or slightly warmed, with extra glaze or a dollop of whipped cream if you like. This cake pairs beautifully with a cup of coffee or a glass of cold milk. Honestly, I’ve made this for breakfast, brunch, and dessert—and each time, it brings smiles around the table.
What to Serve It With
While this zucchini swirl cake is perfect on its own, I love pairing it with different accompaniments depending on the occasion. For breakfast or brunch, serve a warm slice alongside a dollop of Greek yogurt or a splash of fresh cream, with a steaming mug of coffee or chai. It’s a hit when you’re hosting a casual weekend brunch and want something that looks fancy but is super easy to make. If you’re serving it as dessert, a drizzle of extra glaze or a scoop of vanilla ice cream is all you need to elevate it to showstopper status. I also love to couple this with fresh berries or a dusting of powdered sugar for that Instagram-worthy look. When my kids ask for this as a snack, I cut smaller squares and sneak in a little extra zucchini—shh—don’t tell them. It’s comfort food that feels a little healthful, enough to keep my guilty conscience at bay!
Top Tips for Perfecting Your Zucchini Swirl Cake
Over the years, I’ve learned quite a few tricks to make this cake even better. For example, always squeeze out as much moisture as possible from the zucchini—it keeps the layers neat and prevents sogginess. I’ve made this with grated carrots and even zucchini+carrot combos, and they work beautifully together. When mixing the batter, don’t overdo it—just mix until the ingredients are barely combined to keep everything light and fluffy.
For the swirl, I found that a gentle figure-eight motion with a toothpick makes the pattern look more swirled and less mixed. If you want a more vibrant layer, sprinkle some chopped pistachios, or for a friendlier kid version, add mini chocolate chips into the batter or filling. I’ve tested different flour blends—gluten-free or oat flour work beautifully, but keep an eye on the baking time, as they can vary. When baking, I position the oven rack in the middle to ensure even heat distribution, and always check a few minutes early if your oven runs hot.
If the glaze seems too runny, just add a touch more powdered sugar until you get the right consistency—thick enough to drip but not so stiff it won’t spread. Also, trust your nose: if it smells good but looks a little underdone, give it a few more minutes. Learn that by experience, and you’ll start to bake by instinct instead of a timer. My biggest lesson? The better you squeeze out your zucchini, the less water in your batter, and the easier your cake is to slice and serve beautifully.
Storing and Reheating Tips
This zucchini swirl cake is best enjoyed within a day or two—freshness is key. Store it in an airtight container at room temperature if you plan to eat it within 24 hours. However, if you want it to last a bit longer, pop it into the refrigerator for up to 3 days. Just cover it tightly to keep it moist and prevent it from drying out. When storing, try to keep the glaze or frosting separate if possible—adding it fresh keeps that shiny, appealing look intact.
If you’re freezing leftovers, wrap slices individually in plastic wrap and then tuck them inside a resealable bag or airtight container. Thaw in the fridge overnight or gently microwave for 20-30 seconds to warm it up. I find that rewarmed slices retain their moist crumb and flavor beautifully, especially if you add a drizzle of glaze or whipped cream afterward.
Pro tip: add the glaze just before serving if you’re making ahead. That way, it stays shiny and fresh. I’ve also frozen the unglazed cake, and it still comes out tender and tasty—just pop it into the oven for a few minutes at 350°F to refresh the texture. Honestly, this cake is quite resilient, which is why I keep making it over and over.
Frequently Asked Questions
Final Thoughts
If you’re looking for a cozy, fail-proof dessert that’s packed with flavor and a little bit of nostalgia, this zucchini swirl cake is your new best friend. It’s moist, flavorful, and surprisingly versatile—you can tweak ingredients, add extras, or keep it simple. Over the years, I’ve baked this so many times, I can almost do it with my eyes closed, and each batch feels like a little celebration. It’s the kind of recipe that makes your home smell amazing and your loved ones smile when they see the slice. So next time you have some zucchini—and honestly, who doesn’t?—give this one a try. It’s a little bit of joy you can enjoy anytime. Happy baking, and I can’t wait to hear how yours turns out! Be sure to share your favorite tweaks and photos—I love seeing your creations!

Peanut Butter Cheesecake Dip
Ingredients
Method
- In a large mixing bowl, combine the softened cream cheese, sweetened condensed milk, creamy peanut butter, and vanilla extract. Beat with an electric mixer on medium speed until smooth and well combined, about 2-3 minutes.
- Gently fold in the thawed Cool Whip until just incorporated into the cream cheese mixture. Be careful not to overmix.
- Stir in 1/4 cup of the chopped Reese's Peanut Butter Cups.
- Transfer the dip to a serving bowl. If desired, drizzle with chocolate sundae syrup and sprinkle the remaining chopped Reese's Peanut Butter Cups on top.
- Chill the dip for at least 30 minutes before serving. Serve with your favorite dippers like graham crackers, fruit, cookies, or pretzels.