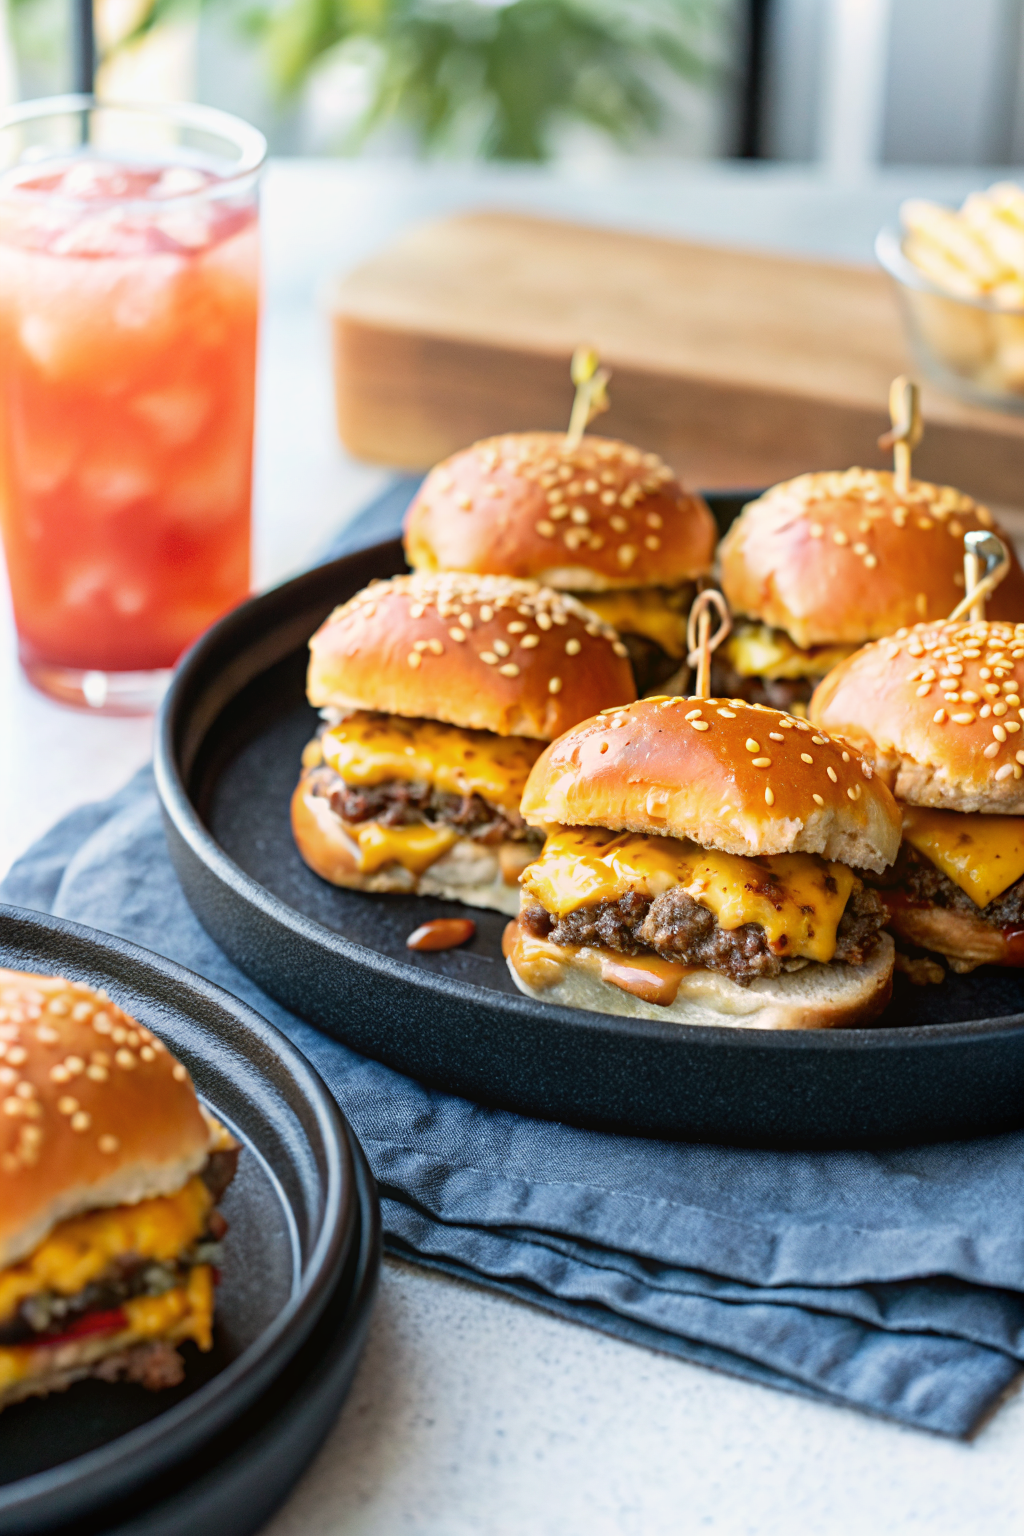
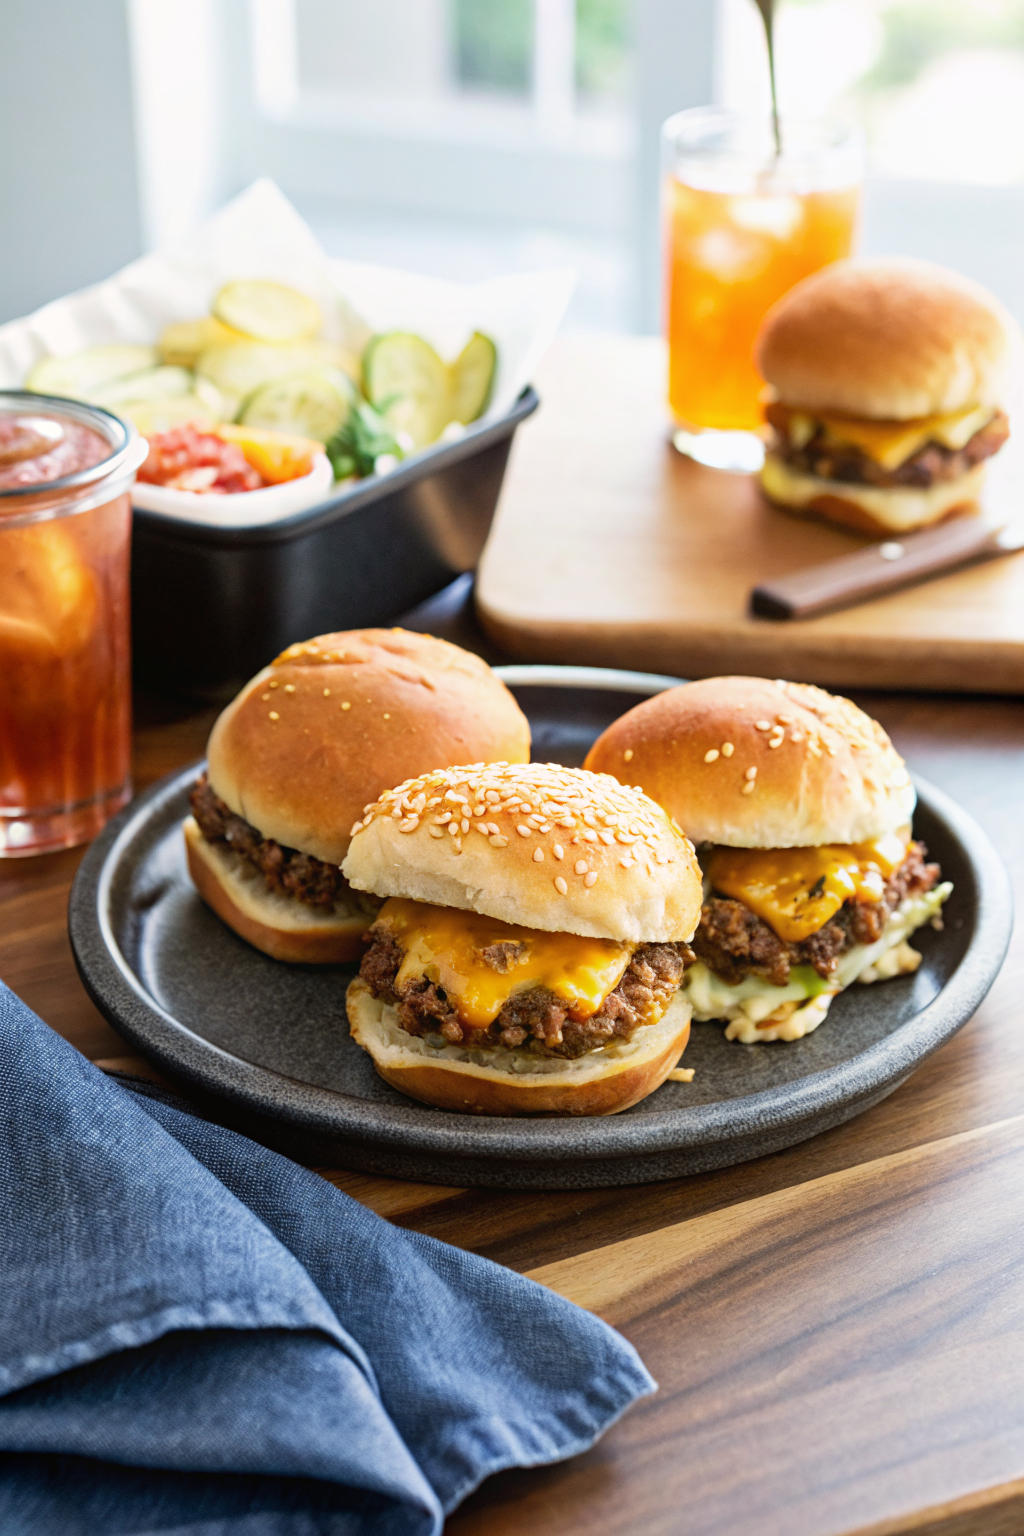
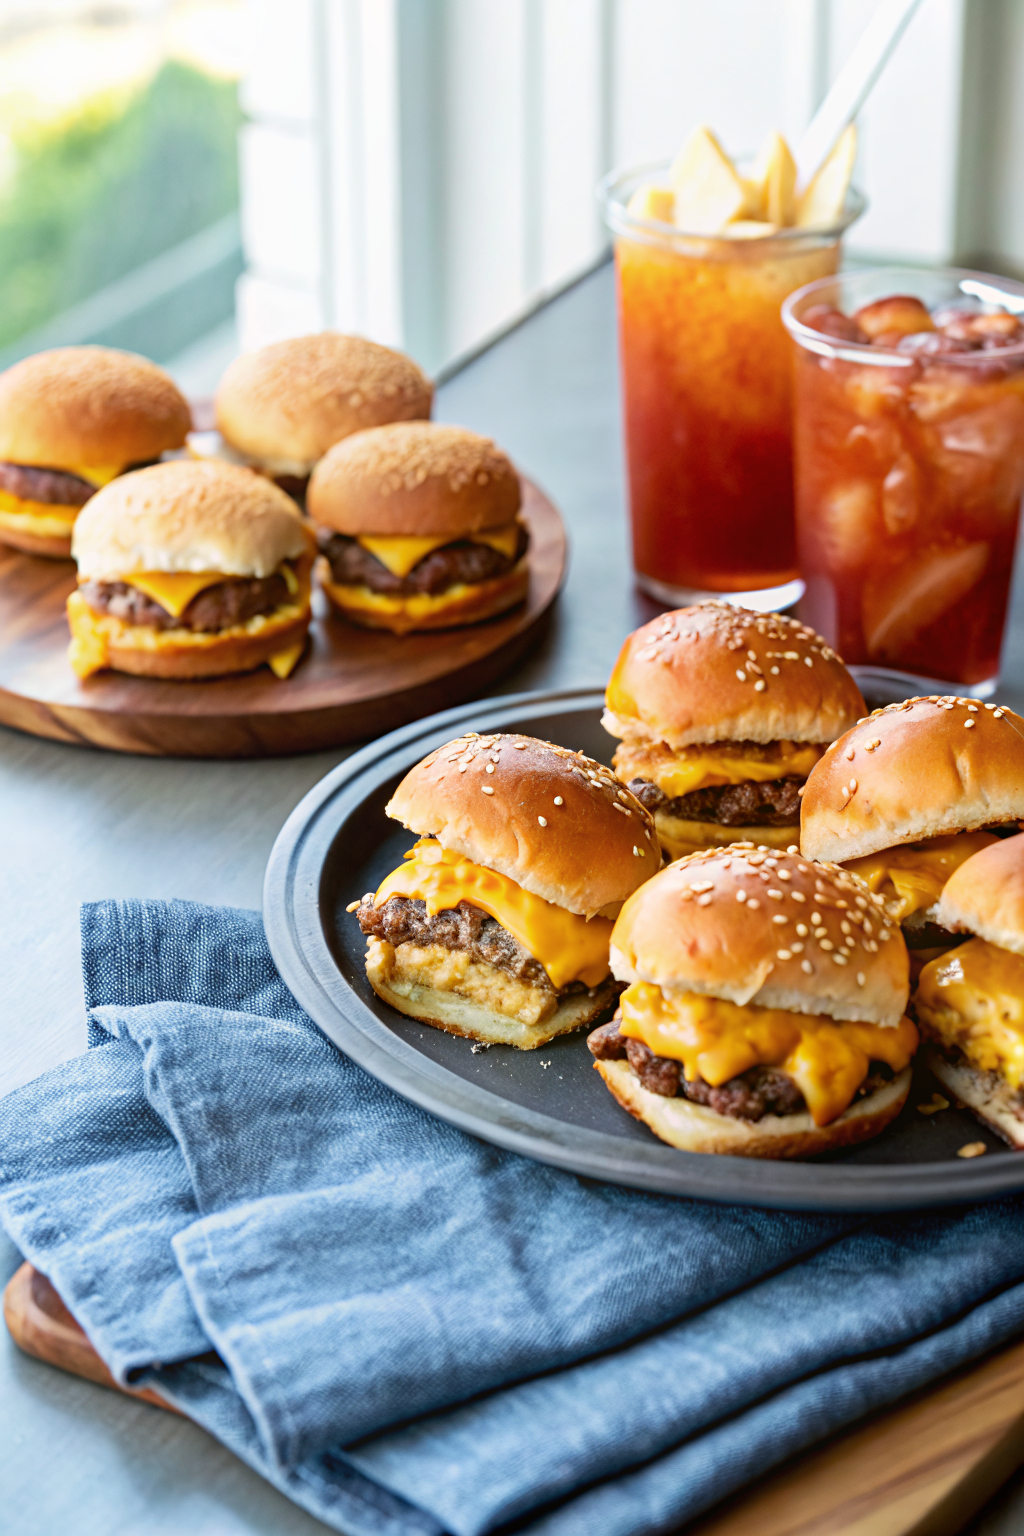
Cheeseburger Sliders
Cheeseburger Sliders
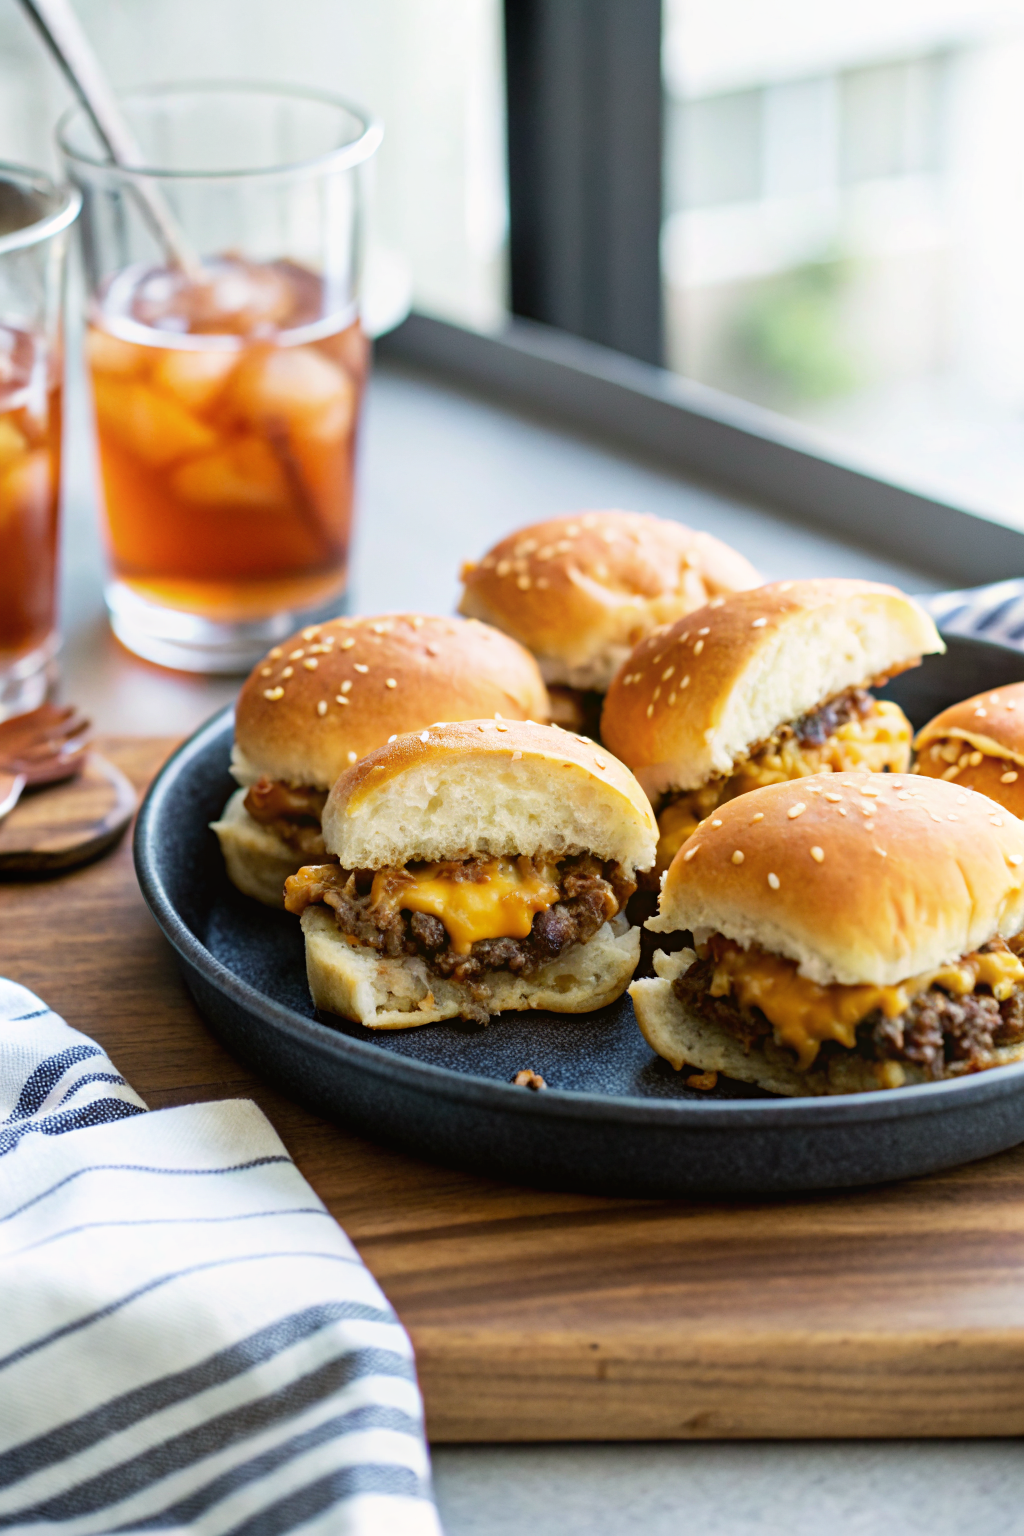
If you’ve ever craved the rich, savory taste of a classic cheeseburger—but in bite-sized form—you’re going to fall head over heels for these cheeseburger sliders. Picture this: golden-brown dinner rolls split open and loaded with juicy seasoned beef, gooey melted cheddar, tangy sauces, and just a hint of sweet caramelized onion. They’re baked until warm and melty, then topped with buttery sesame seeds that catch the light like tiny stars. These aren’t just appetizers; they’re little pockets of pure comfort food joy, perfect for game days, birthday parties, or even when you want something special for your family after a long day. I make them so often my kids beg me to double the recipe—and honestly? It’s hard to say no when every single slider disappears before I even finish slicing!
What Are Cheeseburger Sliders?
Cheeseburger sliders are miniature versions of America’s favorite burger—think mini patties nestled inside soft dinner rolls, layered with cheese, flavorful sauces, and sometimes even crispy bacon or pickles. But what makes them truly unique is how they’re assembled and baked together in one pan. Instead of grilling individual patties and assembling each slider separately (which can be messy and time-consuming), this method lets all those delicious flavors meld beautifully while the bottom half gets delightfully crisp and buttery. The result? A handheld bite that tastes like someone spent hours crafting it… except it only takes about 20 minutes from start to finish. Whether you call them burger bites, mini burgers, or simply sliders, they’re always a hit.
Why You’ll Love This Recipe
There are so many reasons why these cheeseburger sliders deserve a permanent spot in your weekly rotation. First off, they’re incredibly easy to make. With just a few simple ingredients—like ground beef, cheddar cheese, ranch dressing, and Hawaiian rolls—you can pull them together without breaking a sweat. Plus, they’re fantastic for portion control: smaller portions mean less guilt and more variety if you’re serving a crowd with different tastes. And let’s talk versatility! Want to jazz them up? Swap the cheddar for pepper jack, add some crispy bacon, or swap ketchup for barbecue sauce. The customization options are endless, making them ideal for tailgates, potlucks, or even a cozy movie night at home.
Another huge plus? They’re a total crowd-pleaser. Kids adore them because they’re fun to eat, and adults appreciate how the bold flavors come together in every single bite. Serve them hot straight from the oven, and watch as people reach for seconds—or thirds. And don’t worry if you’re short on time: prep takes only about 10 minutes, and most of that is hands-off cooking. Seriously, it doesn’t get much simpler than this.
How to Make Cheeseburger Sliders
Quick Overview
Making these cheeseburger sliders is shockingly straightforward. Start by browning seasoned ground beef with diced onions, then mix in creamy mayonnaise, ranch dressing, pickle relish, ketchup, and mustard for that classic burger flavor. Meanwhile, butter a baking sheet, slice your dinner rolls, layer them with cheese, spoon the meat mixture on top, sprinkle with more cheese, and pop everything into the oven. In under 20 minutes, you’ll have warm, melty sliders ready to devour. No flipping, no flipping again—just pure deliciousness with minimal effort.
Ingredients
- 2 tablespoons unsalted butter, divided
- ⅓ large yellow onion, finely diced
- 1 tablespoon extra virgin olive oil
- 1 pound lean ground beef
- ½ teaspoon salt
- ¼ teaspoon black pepper
- ½ teaspoon garlic powder
- 1 tablespoon mayonnaise
- 2 tablespoons ranch dressing
- 2 tablespoons pickle relish
- 2 tablespoons ketchup
- 2 tablespoons mustard (your favorite kind)
- 6 slices medium cheddar cheese
- 6 ounces shredded cheddar cheese (or use more sliced cheese)
- 12 dinner rolls (King’s Hawaiian works great)
- 2 teaspoons sesame seeds
Step-by-Step Instructions
Step One: Preheat your oven to 350°F. Butter the bottom of a rimmed baking sheet generously—this step is key for getting that perfect crispy base on your sliders.
Step Two: While the oven heats, dice your onion as finely as possible. Heat olive oil in a skillet over medium-high heat, add the onions, and cook for about a minute until they begin to soften.
Step Three: Add the ground beef to the skillet, breaking it up with a spatula. Season with salt, pepper, and garlic powder. Cook until the beef is fully browned and cooked through. Drain off any excess fat by tilting the skillet and spooning it out.
Step Four: Stir in the mayonnaise, ranch dressing, pickle relish, ketchup, and mustard. Mix well until everything is evenly coated—this blend gives each slider its signature tangy-sweet kick.
Step Five: Carefully split your dinner rolls horizontally but keep them connected so they hold their shape. Place the bottom halves on your buttered baking sheet.
Step Six: Layer each roll with a slice of cheddar cheese, then top with the seasoned beef mixture. Finish with a generous sprinkle of shredded cheddar on top.
Step Seven: Gently place the tops back on the sliders. Brush the exposed bread with melted butter and sprinkle with sesame seeds for that final touch of crunch and visual appeal.
Step Eight: Cover loosely with foil and bake for 10 minutes. Remove the foil and bake another 3–5 minutes until the cheese bubbles and the tops turn golden brown. Let cool slightly before cutting along the roll lines. Serve immediately while still warm.
What to Serve It With
These cheeseburger sliders shine brightest when paired with sides that complement their rich, savory profile. Think cool, fresh salads like cucumber or broccoli salad with homemade ranch to cut through the richness. For something fun and crunchy, air fryer potato chips or air-fried pickles make excellent companions. If you’re hosting a party, consider offering a dip station with cheeseburger dip or buffalo chicken dip alongside. And never underestimate the magic of a simple green salad tossed in vinaigrette—it balances out all that cheesy goodness perfectly.
Top Tips for Perfecting Your Cheeseburger Sliders
Want your cheeseburger sliders to be absolutely irresistible? Here are my tried-and-true tips. First, use high-quality ingredients whenever possible—fresh onions, real cheddar, and good mustard really elevate the flavor. Don’t skimp on seasoning either; those small amounts of salt, pepper, and garlic powder make a big difference. Also, remember to butter the baking sheet thoroughly—it prevents sticking and adds a lovely crunch to the bottom half. And finally, feel free to experiment! Add bacon, swap cheeses, or try different buns like pretzel or whole wheat to suit your taste. Customization is part of the fun.
Storing and Reheating Tips
Left over? Lucky you! Store leftover cheeseburger sliders in an airtight container in the fridge for up to three days. Just reheat them using your preferred method: microwave (cover with a damp paper towel), oven (wrap in foil and heat at 350°F for 10–15 minutes), or even a skillet for extra crispiness. Freezing is also an option—wrap individual sliders tightly in plastic wrap and foil, then store in the freezer for up to three months. Thaw overnight in the fridge before reheating. That said, nothing beats eating them fresh out of the oven… so maybe save leftovers for a rainy Tuesday!
Frequently Asked Questions
Final Thoughts
These cheeseburger sliders aren’t just a recipe—they’re an experience. Every time I pull them out of the oven, the smell alone brings everyone running to the kitchen. There’s something deeply satisfying about seeing the cheese bubble and the sesame seeds glisten under the oven light. They bring people together, spark conversation, and make ordinary evenings feel a little bit festive. So next time you’re craving that nostalgic taste of a backyard BBQ—without the cleanup—reach for this recipe. Trust me, once you’ve tasted one warm, melty, saucy bite, you’ll understand why they’ve become our go-to for every occasion. Now go grab those rolls and let’s make some magic!
Cheeseburger Sliders
Ingredients
Method
- Preheat the oven to 350°F. Butter the bottom of a rimmed baking sheet with a tablespoon of butter to give the sliders a crispy, buttery bottom.
- Add extra virgin olive oil to a skillet over medium-high heat. Add diced onion and cook for 1 minute. Add the ground beef and break up with a spatula.
- Season with salt, pepper and garlic powder. Continue to break up the beef until the beef is fully cooked, about 7 to 8 minutes. Drain the excess grease.
- Stir in mayonnaise, ranch dressing, relish, ketchup and mustard.
- Slice the dinner rolls in half, horizontally, while still together as one unit. Try to keep them together.
- Place the bottom half of the dinner rolls on the buttered baking sheet.
- Add the cheddar cheese slices on the bottom half of the dinner rolls.
- Spread the ground beef mixture evenly over the sliced cheese layer. Use a spatula to square off the edges.
- Add the shredded cheddar cheese on top of the ground beef.
- Place the top of the dinner rolls over the grated cheese. Brush the tops with a tablespoon of melted butter and sprinkle sesame seeds on top.
- Place a loose aluminum foil tent over the slider and place in the oven. Bake for 10 minutes. Remove the foil tent and bake an additional 3 to 5 minutes or until the cheese is melted and tops are golden brown.
- Remove from the oven and cut along dinner roll lines. Enjoy them warm.