Southwestern Black Bean Salad Simple Healthy Lunch
Okay, so confession time. I’m not usually one for baked goods that involve… well, vegetables. My younger self would be absolutely baffled that I’m about to share a recipe for zucchini bread, a loaf that sounds like it belongs in a health food store brochure rather than my cozy kitchen. But trust me, this isn’t just *any* zucchini bread. This is the kind of zucchini bread that makes people do a double-take. It’s moist, it’s packed with flavor, and dare I say, it’s borderline addictive. My kids, who are notoriously picky, devour this faster than any chocolate chip cookie I make. It’s become our go-to for everything from quick weekday breakfasts to cozy Sunday afternoon treats. If you’ve ever had a less-than-stellar experience with zucchini bread – maybe it was dry, crumbly, or just… bland – then you absolutely *have* to try this one. It’s a total game-changer and honestly, the smell alone that wafts through the house while it’s baking is pure magic. It’s like autumn in a loaf pan, even if it’s the middle of July.
What is Zucchini bread?
At its heart, zucchini bread is a quick bread, meaning it uses baking soda and/or baking powder as leavening instead of yeast, so you don’t have to wait for dough to rise. Think of it as a delicious way to use up all that extra zucchini you somehow always end up with from your garden or the farmer’s market. It’s typically made with grated zucchini, which adds incredible moisture and a subtle, almost undetectable vegetable goodness to the batter. The zucchini basically melts into the bread, leaving behind a tenderness that’s hard to replicate with other ingredients. It’s usually spiced with cinnamon, nutmeg, and sometimes even a hint of clove, giving it that warm, comforting aroma. While some might think of it as a health food, this recipe is definitely leaning towards the decadent side of things, with just the right amount of sweetness and richness to make it a true treat, not just a vehicle for your garden’s bounty.
Why you’ll love this recipe?
Oh, where do I even begin? This zucchini bread recipe is, hands down, my favorite for so many reasons. First off, the *flavor*. It’s got this perfect balance of sweetness, warm spices, and that hint of vanilla that just makes everything sing. And the texture? It’s unbelievably moist and tender. Seriously, you’ll find yourself reaching for another slice before you’ve even finished your first. I’ve tried a gazillion recipes over the years, and what sets this one apart is its consistent perfection. It’s so forgiving, which is a lifesaver on busy days when I don’t have a lot of time to fuss. Plus, it’s surprisingly budget-friendly, especially when zucchini is in season and practically given away. I love how versatile it is, too. Want to add some chopped walnuts or chocolate chips? Go for it! It’s like a blank canvas for deliciousness. It’s a far cry from those dry, crumbly versions you might have encountered. This one is rich, satisfying, and has a delightful crumb that just melts in your mouth. It truly is a culinary hug in every bite, and honestly, the fact that I can sneak in a serving of veggies for my kids without them even noticing is a huge win in my book!
How do you make Zucchini bread?
Quick Overview
The process is wonderfully straightforward. We’ll start by mixing the dry ingredients, then whip up the wet ingredients separately, and finally, bring them together gently. The grated zucchini gets stirred in, and then it’s all about getting it into the pan and into the oven. The real magic happens in the baking, where the zucchini’s moisture transforms into that signature tender crumb. It’s honestly one of the easiest quick breads to master, and the payoff is immense. You get a beautiful, fragrant loaf that smells as good as it tastes.
Ingredients
For the Main Batter:
This is the foundation for our moist, flavorful bread.
- 3 cups all-purpose flour: I usually go for a good quality all-purpose flour. For a slightly nuttier flavor, you could experiment with substituting a small portion with whole wheat, but I always stick to all-purpose for that classic tender crumb.
- 1 teaspoon baking soda: This helps the bread rise beautifully and gives it a lovely texture. Make sure it’s fresh!
- 1/2 teaspoon baking powder: A little extra lift never hurt anyone, right?
- 1 teaspoon ground cinnamon: This is key for that warm, cozy flavor. I love using freshly ground cinnamon for the most potent aroma.
- 1/4 teaspoon ground nutmeg: Just a pinch adds so much depth!
- 1/4 teaspoon ground cloves (optional but highly recommended): This really elevates the spice profile and gives it that bakery-shop aroma.
- 1 teaspoon salt: Balances out all the sweetness and brings out the other flavors.
- 1 1/2 cups granulated sugar: Don’t skimp here! This is crucial for moisture and that lovely golden crust. You can slightly reduce it if you’re adding very sweet add-ins, but I find this amount perfect.
- 3 large eggs: At room temperature, they incorporate much better into the batter.
- 1 cup vegetable oil: This is my secret weapon for ultimate moisture! You can also use melted, unsalted butter for a richer flavor, but oil guarantees moistness. I’ve even tested this with a mild olive oil, and it was surprisingly good!
- 1/4 cup unsweetened applesauce: Another moisture booster and a way to slightly reduce the oil if you’re feeling adventurous.
- 1 teaspoon vanilla extract: Always use pure vanilla extract; it makes a world of difference.
- 2 cups grated zucchini, squeezed dry: This is the star! About two medium zucchinis should do it. Squeezing out the excess water is super important, I’ll explain how below.
For the Filling:
This is where we add extra layers of flavor and texture.
- 1/2 cup chopped walnuts or pecans (optional): For a delightful crunch!
- 1/2 cup chocolate chips (semi-sweet or dark are my favorites!): Because who doesn’t love chocolate in their bread?
- 1/4 cup brown sugar: Just a touch to sweeten and add a caramel note.
- 1 teaspoon cinnamon: To tie in with the main batter spices.
For the Glaze:
This is the crowning glory that takes it from great to absolutely irresistible.
- 1 cup powdered sugar: Sifted to avoid lumps.
- 2-3 tablespoons milk or cream: You can use dairy or non-dairy milk. I love using heavy cream for a richer glaze.
- 1/2 teaspoon vanilla extract: For that classic sweet flavor.
Step-by-Step Instructions
Step 1: Preheat & Prep Pan
First things first, let’s get that oven fired up to 350°F (175°C). While it’s heating, grab a standard 9×5 inch loaf pan. I like to grease it generously with butter or cooking spray, and then give it a light dusting of flour. This is my tried-and-true method for ensuring the loaf slides out perfectly without any sticking. You can also use parchment paper for an even easier release, just let it overhang the sides like handles.
Step 2: Mix Dry Ingredients
In a large bowl, whisk together the flour, baking soda, baking powder, cinnamon, nutmeg, cloves (if using), and salt. Give it a really good whisk; this aerates the flour and ensures all those leavening agents are evenly distributed. You don’t want any dense pockets in your beautiful bread! Then, stir in the granulated sugar. Make sure it’s well combined with the dry ingredients.
Step 3: Mix Wet Ingredients
In a separate medium bowl, whisk together the eggs until they’re lightly beaten. Then, pour in the vegetable oil, unsweetened applesauce, and vanilla extract. Whisk everything together until it’s smooth and well incorporated. This is also a good time to start thinking about your zucchini. If you haven’t already, grate your zucchini using the large holes of a box grater. Then, wrap the grated zucchini in a clean kitchen towel or a few layers of paper towels and squeeze out as much liquid as you possibly can. This step is CRUCIAL for preventing a soggy loaf!
Step 4: Combine
Now, pour the wet ingredients into the bowl with the dry ingredients. Using a spatula or a wooden spoon, gently fold them together just until no dry streaks of flour remain. This is where you need to be careful not to overmix! Overmixing develops the gluten in the flour, which can lead to a tough, dense bread. Once the wet and dry are *just* combined, add your squeezed-dry grated zucchini. Fold it in gently until it’s evenly distributed throughout the batter.
Step 5: Prepare Filling
If you’re adding walnuts, chocolate chips, or the brown sugar/cinnamon mix, now’s the time to prepare them. Simply place them in a small bowl and toss them together. This helps prevent the add-ins from sinking to the bottom of the loaf.
Step 6: Layer & Swirl
Pour about half of the batter into your prepared loaf pan and spread it evenly. If you’re using add-ins, sprinkle about half of your chosen mixture evenly over the batter. Then, spoon the remaining batter on top and spread it out. Sprinkle the rest of your add-ins over the top. If you’re feeling fancy, you can take a knife or a skewer and gently swirl the add-ins into the top layer of batter for a marbled effect. Don’t over-swirl; just a couple of gentle passes will do!
Step 7: Bake
Pop that loaf pan into your preheated oven. Bake for about 50-65 minutes. Now, oven temperatures can vary wildly, so this is where you need to trust your instincts a bit. The best way to check for doneness is to insert a toothpick or a thin knife into the center of the loaf. If it comes out clean, or with just a few moist crumbs attached, it’s ready! If it comes out with wet batter, give it another 5-10 minutes and check again. If the top is browning too quickly before the inside is cooked, you can loosely tent it with aluminum foil.
Step 8: Cool & Glaze
Once baked, remove the loaf from the oven and let it cool in the pan for about 10-15 minutes. This allows it to set up a bit more. Then, carefully invert the loaf onto a wire rack to cool completely. Resist the urge to glaze it while it’s warm; the glaze will just melt and drip right off. Once the loaf is *completely* cool, it’s time for the glaze! In a small bowl, whisk together the sifted powdered sugar, vanilla extract, and 2 tablespoons of milk or cream. Add more milk/cream, a teaspoon at a time, until you reach your desired drizzling consistency. It should be thick enough to coat the bread but thin enough to pour easily. Drizzle it generously over the top of the cooled loaf.
Step 9: Slice & Serve
Once the glaze has set slightly (about 15-20 minutes), slice your magnificent zucchini bread using a serrated knife for clean cuts. Serve and enjoy the moist, flavorful goodness!
What to Serve It With
This zucchini bread is so wonderfully versatile, it really fits in anywhere! For a casual breakfast, I love serving it alongside a hot cup of coffee or a tall glass of cold milk. It’s just so comforting and satisfying to start the day with. For a more elegant brunch, I might slice it a little thinner and arrange it on a pretty platter, maybe with some fresh berries or a dollop of Greek yogurt. It pairs beautifully with mimosas or a light fruit juice. As a dessert, it’s fantastic on its own, but a small scoop of vanilla bean ice cream or a drizzle of caramel sauce takes it to a whole new level – perfect for satisfying those late-night sweet cravings without the fuss of baking a whole cake. And for those cozy afternoon snack times? It’s the ultimate comfort food. I often pair it with a warm cup of tea, maybe some chamomile or a chai blend. My family also loves it toasted and slathered with a little extra butter. It’s a recipe that truly adapts to any moment, making it a staple in my kitchen.
Top Tips for Perfecting Your Zucchini Bread
Over the years, I’ve learned a few tricks that have really elevated my zucchini bread game. Here are my top tips:
Zucchini Prep: This is non-negotiable! Always, always, *always* squeeze the moisture out of your grated zucchini. If you skip this, you’ll end up with a wet, dense loaf that’s more like a brick than a cake. I use a clean kitchen towel, but paper towels work too. Just twist and squeeze with all your might. Grating it on the large holes of your grater is usually best, as it gives you nice little shreds that distribute well. Make sure your zucchini is fresh; older, watery zucchini can be trickier to get dry.
Mixing Advice: The golden rule for quick breads is “don’t overmix!” Once you combine the wet and dry ingredients, stir *just* until they’re incorporated. A few little streaks of flour are okay; they’ll disappear during baking. Overmixing develops the gluten, which results in a tough, rubbery texture. When you add the zucchini, fold it in gently – again, just until it’s distributed.
Swirl Customization: If you’re adding nuts or chocolate chips, or even just want a prettier look, the swirl technique is fun. After you’ve poured all the batter into the pan and added your fillings on top, take a butter knife or a skewer and make a few zig-zagging motions through the batter. You don’t need to go all the way to the bottom. Just a few passes will create lovely swirls and help distribute those goodies. Don’t overdo it, though!
Ingredient Swaps: I’ve experimented a lot! For a richer flavor, you can absolutely substitute melted unsalted butter for the vegetable oil, but I find oil yields a consistently moister bread. If you’re out of applesauce, you can use an equal amount of plain yogurt or sour cream. For a dairy-free version, use a plant-based milk and oil. I haven’t tried it with gluten-free flour blends, but I imagine a good 1:1 blend would work, though you might need to adjust liquid slightly.
Baking Tips: Always preheat your oven properly. I usually place my rack in the center of the oven. Keep an eye on the loaf towards the end of the baking time. Ovens really do vary. The toothpick test is your best friend. If the top starts to look too dark, a loose tent of aluminum foil can work wonders to prevent burning while the inside finishes cooking.
Glaze Variations: While my favorite is a simple vanilla glaze, you can get creative! Add a tiny bit of lemon zest for brightness, or a pinch of cinnamon to the glaze itself. If you prefer less sweetness, you can skip the glaze altogether and just dust the cooled loaf with a little powdered sugar. Or, for a more rustic look, a cream cheese frosting is divine!
Storing and Reheating Tips
This zucchini bread is a dream for leftovers because it stays incredibly moist. Here’s how I keep it tasting fresh:
Room Temperature: Once completely cooled, you can store the loaf at room temperature, tightly wrapped in plastic wrap or aluminum foil, or in an airtight container. It will stay wonderfully fresh for about 2-3 days. The moisture from the zucchini really helps preserve it.
Refrigerator Storage: If you won’t get through it in a few days, or if your kitchen is particularly warm, storing it in the refrigerator is a great option. Wrap it well to prevent it from drying out, and it should last for up to a week. The texture might firm up slightly in the fridge, but don’t worry, it’s easily fixed.
Freezer Instructions: For longer storage, freezing is your best bet. Let the loaf cool completely, then wrap it tightly in a layer of plastic wrap, followed by a layer of aluminum foil, or place it in a freezer-safe bag. It will keep well for up to 2-3 months. To thaw, simply unwrap it and let it come to room temperature on the counter, or thaw overnight in the refrigerator. If you prefer it warm, you can slice it and gently reheat individual slices.
Glaze Timing Advice: The best time to add the glaze is when the bread is completely cool and you plan to serve it relatively soon. If you’re storing it for more than a day or two, especially in the fridge or freezer, I recommend storing the bread *without* the glaze. Then, glaze it just before serving to keep the glaze looking fresh and vibrant. If you do freeze it with the glaze, it might get a bit sticky upon thawing, but it will still taste delicious!
Frequently Asked Questions
Final Thoughts
So there you have it – my absolute favorite zucchini bread recipe. It’s more than just a recipe; it’s a little slice of comfort that brings my family together. It’s proof that sometimes, the most unassuming ingredients can transform into something truly extraordinary. The moisture, the warm spices, that delightful texture… it’s everything I love about baking. I really hope you give this a try, especially if you’ve been hesitant about baking with zucchini before. It’s forgiving, it’s delicious, and the aroma alone is worth it. If you love this, you might also enjoy my Moist Banana Bread recipe or my Classic Apple Crumble – they’ve got that same cozy, home-baked feel. I can’t wait to hear what you think! Let me know in the comments below how yours turns out, and if you have any special add-ins or variations you love. Happy baking!
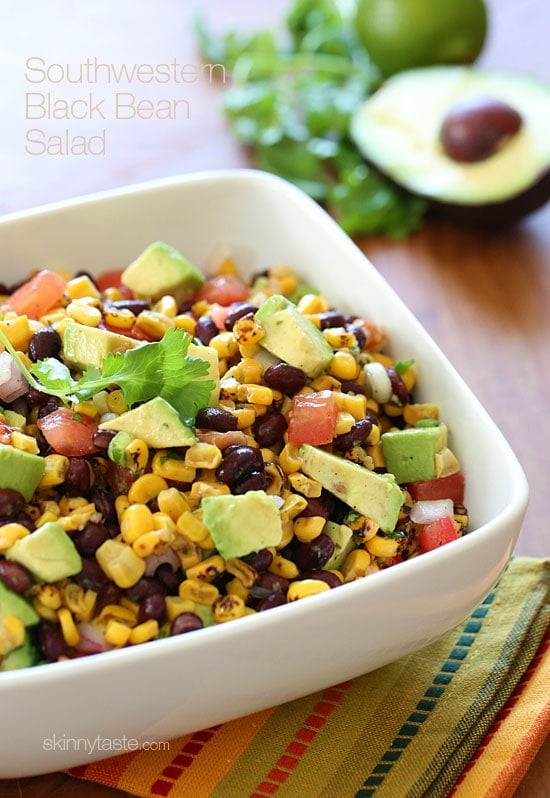
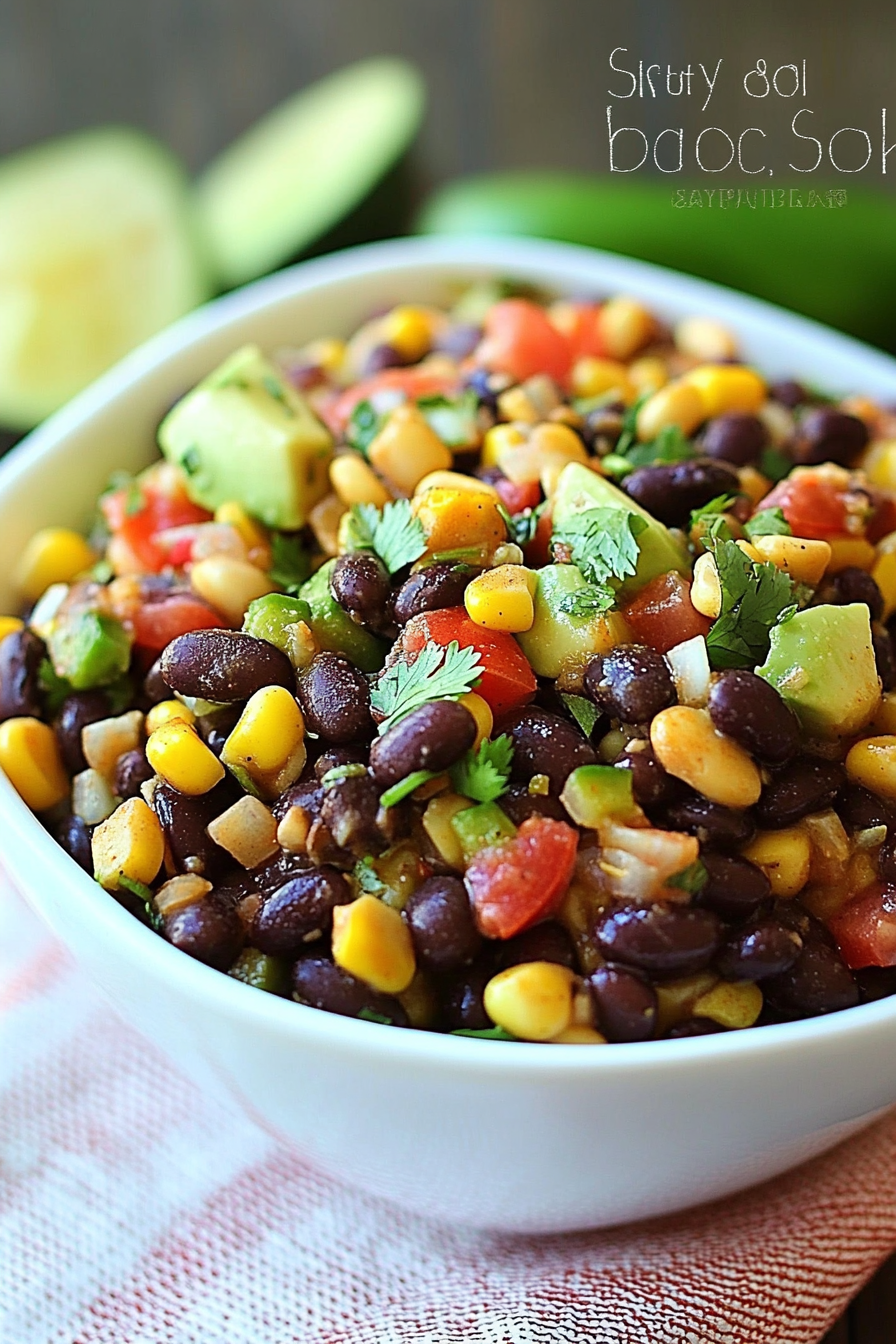
southwestern black bean salad
Ingredients
Method
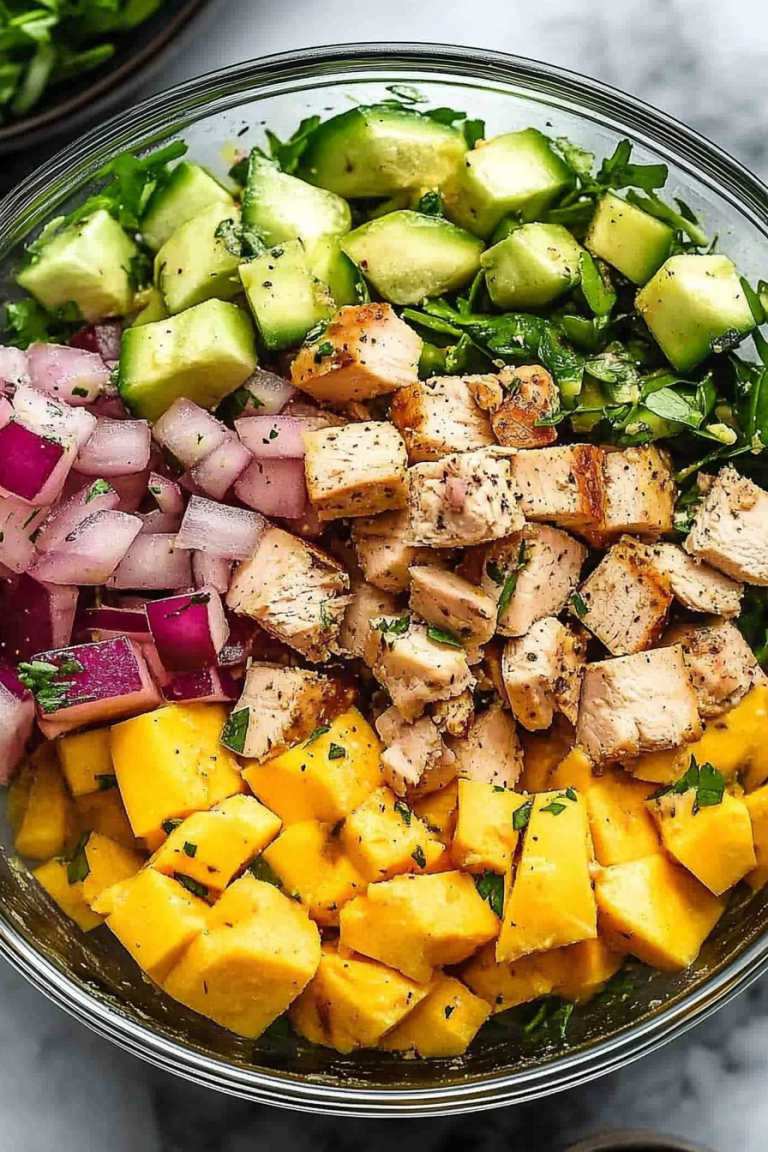
- In a large bowl, combine black beans, corn, tomato, red onion, scallion, cilantro, salt, and pepper.
- Squeeze fresh lime juice to taste over the mixture and stir in the olive oil.
- Marinate the salad in the refrigerator for 30 minutes to allow flavors to meld.
- Just before serving, gently fold in the diced avocado.