Easy Pumpkin Bars The Best Fall Treat
You know those recipes that just…feel like home? The ones that smell amazing while they’re baking, fill the whole house with warmth, and somehow always disappear in minutes? This zucchini bread is one of those for me. It’s not just a quick bread; it’s a hug in edible form. I first started making this on a whim years ago when I had a surplus of zucchini from my little garden, and honestly, I was skeptical. Zucchini in a sweet bread? But oh, was I wrong! It’s moist, tender, perfectly spiced, and the best part is, you can barely taste the zucchini itself – it just lends this incredible texture and moisture. It’s like my Secret Weapon Zucchini Bread, but it’s so good, I can’t keep it a secret any longer. It’s become my go-to for bake sales, potlucks, or just when I need a little something sweet to brighten my day. If you’ve ever loved a good banana bread, I promise you’re going to adore this zucchini version.
What is Zucchini bread?
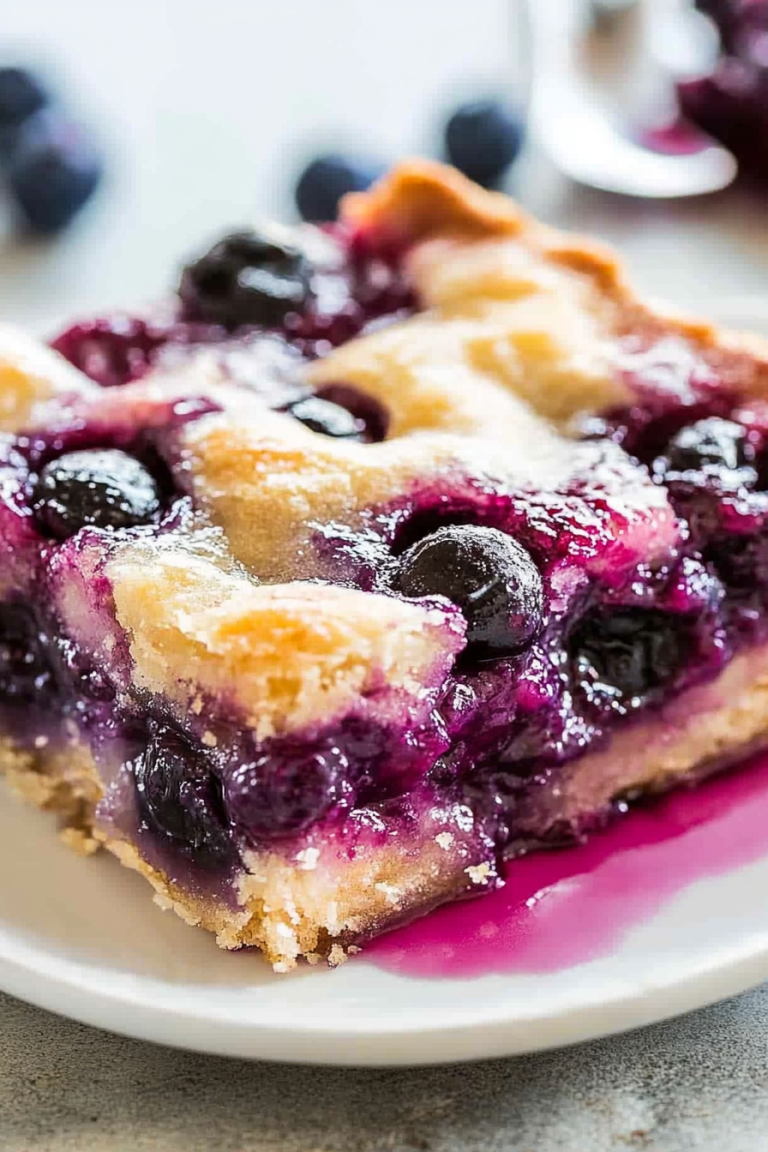
So, what exactly *is* zucchini bread? Think of it as the ultimate moist and tender quick bread, where grated zucchini is the star ingredient that you don’t even realize is there! It’s not really a cake, and it’s not really bread in the yeasted sense. It’s that magical in-between, a quick bread that comes together with minimal fuss, often using the creaming method or just a simple stir of wet and dry ingredients. The zucchini melts into the batter as it bakes, creating an unbelievably tender crumb and keeping it from drying out for days. The name itself is pretty straightforward – it’s a bread made with zucchini. But oh, the magic it performs is anything but ordinary. It’s comforting, familiar, and surprisingly sophisticated, especially with a lovely glaze drizzled over the top. It’s like a muffin and a cake had a delicious baby, and everyone wants a slice.
Why you’ll love this recipe?
Let me tell you, there are a million reasons why this zucchini bread recipe has earned a permanent spot in my recipe box. First off, the FLAVOR! It’s perfectly sweet without being cloying, with a warm hug of cinnamon and nutmeg that just sings. It’s ridiculously SIMPLE to make; I’m talking less than 15 minutes of active prep time, which is a lifesaver on busy weeknights when the craving strikes or when unexpected guests pop by. And talk about COST-EFFECTIVE! Zucchini is usually pretty affordable, and the rest of the ingredients are pantry staples. Plus, it’s so VERSATILE. Serve it for breakfast with a smear of cream cheese, pack it as a snack for the kids’ lunchboxes, or dress it up with ice cream for a delightful dessert. What I love most about this recipe is how forgiving it is. Even if you’re not an experienced baker, you can whip this up and have a stunning loaf. It’s miles better than any store-bought version, and you get that incredible aroma filling your kitchen as it bakes – that alone is worth it. It’s a classic for a reason, and this version is, in my humble opinion, the absolute best.
How do you make Zucchini bread?
Quick Overview
The beauty of this zucchini bread lies in its simplicity. You’ll whisk together your dry ingredients, mix your wet ingredients separately, then combine them, fold in the star – the grated zucchini – and bake until golden and fragrant. The whole process is so straightforward, you can genuinely whip this up when a craving hits. No fancy equipment needed, just a couple of bowls, a whisk, and a loaf pan. It’s designed to be incredibly approachable, and the results are always fantastic, giving you a perfectly moist and flavorful loaf every single time.
Ingredients
For the Main Batter:
1 ½ cups all-purpose flour (I’ve tried a blend with some whole wheat and it works, but all-purpose is classic)
1 teaspoon baking soda (crucial for the lift!)
½ teaspoon salt (enhances all those lovely flavors)
1 teaspoon ground cinnamon (the heart of the flavor profile)
½ teaspoon ground nutmeg (just a pinch adds so much warmth)
¾ cup granulated sugar (you can reduce this slightly if you prefer, but this is my sweet spot)
⅓ cup vegetable oil (or any neutral oil like canola; melted butter works too for a richer flavor, about ½ cup)
2 large eggs, at room temperature (room temp eggs incorporate better)
1 teaspoon vanilla extract (don’t skimp on good vanilla!)
For the Zucchini:
1 ½ cups grated zucchini (about 2 medium zucchinis – make sure to squeeze out excess moisture! I’ll explain why later).
For the Optional Glaze:
1 cup powdered sugar
2-3 tablespoons milk (or almond milk for an even creamier texture!)
½ teaspoon vanilla extract
Step-by-Step Instructions
Step 1: Preheat & Prep Pan
First things first, get that oven preheating to 350 degrees Fahrenheit (175 degrees Celsius). It’s super important to let your oven come up to temperature fully, so your bread bakes evenly. While that’s heating up, grab a standard 9×5 inch loaf pan. Grease it really well with butter or cooking spray, and then lightly dust it with flour. You can also line it with parchment paper, leaving some overhang on the sides – this makes lifting the baked loaf out a breeze! I often do this and it’s a lifesaver.
Step 2: Mix Dry Ingredients
In a medium-sized bowl, whisk together the all-purpose flour, baking soda, salt, cinnamon, and nutmeg. Give it a good whisk until everything is evenly distributed. This ensures that your leavening agents and spices are spread throughout the batter, so you don’t get pockets of baking soda or clumps of cinnamon. It seems simple, but it really makes a difference in the final texture and flavor.
Step 3: Mix Wet Ingredients
In a separate, larger bowl, add the granulated sugar, vegetable oil, and the room temperature eggs. Whisk these together until they’re well combined and the mixture looks a little lighter in color. Stir in the vanilla extract. I always make sure my eggs are at room temperature for this step; it helps them emulsify better with the oil and sugar, leading to a more uniform batter.
Step 4: Combine
Now, here’s where it all comes together. Pour the dry ingredients into the bowl with the wet ingredients. Using a spatula or a wooden spoon, gently fold the dry ingredients into the wet until *just* combined. It’s really important not to overmix here. A few streaks of flour are okay; they’ll disappear as you add the zucchini. Overmixing can develop the gluten in the flour too much, leading to a tougher bread, and nobody wants that!
Step 5: Prepare Filling
This is the crucial step for that amazing moisture: the zucchini! Make sure you’ve grated your zucchini (I usually use the medium holes on a box grater). Once grated, place it in a clean kitchen towel or cheesecloth and squeeze out as much liquid as humanly possible. Seriously, wring it out like you mean it! This step prevents your bread from becoming soggy and dense. Once you’ve squeezed it dry, gently fold the grated zucchini into your batter until it’s just incorporated. Don’t go crazy mixing; just get it distributed evenly.
Step 6: Layer & Swirl
Spoon the batter into your prepared loaf pan, smoothing the top a little. This recipe is for a classic, delicious loaf, but if you wanted to add some swirls, this is your moment! You could mix a tablespoon or two of extra cinnamon and sugar, or even some melted chocolate chips into a portion of the batter, spoon it on top, and swirl gently with a knife. For this basic recipe, just get it evenly spread in the pan.
Step 7: Bake
Pop that loaf pan into your preheated oven. Bake for about 50-65 minutes. The exact time can vary depending on your oven, so keep an eye on it. You’ll know it’s done when a wooden skewer or toothpick inserted into the center comes out clean, or with just a few moist crumbs attached (no wet batter!). The top should be golden brown and it should smell heavenly.
Step 8: Cool & Glaze
Once it’s baked, let the loaf cool in the pan for about 10-15 minutes. This allows it to set up properly. Then, carefully invert it onto a wire rack to cool completely. If you’re adding the glaze, wait until the bread is totally cool. In a small bowl, whisk together the powdered sugar, 2 tablespoons of milk, and vanilla extract until smooth. If it’s too thick, add a tiny bit more milk, a teaspoon at a time, until you get a pourable consistency. Drizzle it over the cooled loaf and let it set a bit before slicing.
Step 9: Slice & Serve
Once the glaze has set (or if you skipped it!), slice your beautiful zucchini bread and enjoy! It’s best served at room temperature. I love a thick slice, maybe with a cup of coffee or tea. The texture is just divine – moist, tender, and bursting with flavor. It’s honestly one of my favorite things to bake because the payoff is just so huge for so little effort.
What to Serve It With
This zucchini bread is incredibly versatile and truly shines in so many settings. For a cozy BREAKFAST, I love a warm slice with a generous smear of cream cheese or a dollop of Greek yogurt. It pairs perfectly with a freshly brewed cup of coffee or a soothing cup of herbal tea. When I’m hosting BRUNCH, it’s always a hit. I usually arrange slices on a nice platter, maybe with some fresh berries on the side to add a pop of color and freshness. A sparkling mimosa or a glass of fresh orange juice is the perfect accompaniment. As a simple DESSERT, it’s wonderful on its own, but you can elevate it by serving a warm slice with a scoop of vanilla bean ice cream or a drizzle of caramel sauce. For those spontaneous COZY SNACKS, just grab a slice (or two!) and a glass of cold milk. My kids practically inhale it this way. Honestly, it’s good anytime, anywhere, with anything – or even nothing at all!
Top Tips for Perfecting Your Zucchini Bread
After making this dozens of times, I’ve picked up a few tricks that I think really elevate it from good to absolutely stellar. For ZUCCHINI PREP, the squeezing part is non-negotiable! If you skip it, you’ll end up with a gummy, dense loaf. Grating it fresh is best; pre-shredded zucchini from the grocery store often has too much moisture and sometimes a slightly bitter taste. For MIXING ADVICE, remember that gentle is key. You’re not making playdough; you’re making a tender bread. Overmixing gluten is the enemy of a tender crumb. Stop as soon as you don’t see dry flour streaks. When it comes to SWIRL CUSTOMIZATION, get creative! I love adding a swirl of chopped nuts (walnuts or pecans are fantastic!) or even some dark chocolate chips. Just fold them into the batter before pouring into the pan. For INGREDIENT SWAPS, I’ve had success using almond milk or oat milk in the glaze, and it makes it extra creamy. You can also substitute half the all-purpose flour with whole wheat flour for a slightly heartier loaf, though it might be a touch denser. For BAKING TIPS, make sure your oven rack is in the center of the oven for even heat distribution. If the top is browning too quickly before the inside is cooked, you can loosely tent a piece of aluminum foil over the loaf for the last 15-20 minutes. For GLAZE VARIATIONS, if you’re not a fan of a sweet glaze, you can simply dust the cooled loaf with a little powdered sugar or even just serve it plain. A cream cheese frosting is also divine if you want to go all out!
Storing and Reheating Tips
One of the best things about this zucchini bread is how well it keeps. Store it at ROOM TEMPERATURE in an airtight container or wrapped tightly in plastic wrap for up to 3 days. It actually tends to get even more moist and flavorful by the second day. If you need to store it for longer, place it in the REFRIGERATOR. Wrap it well in plastic wrap and then foil, or keep it in an airtight container. It will stay good in the fridge for about a week, though the texture can become a little firmer. To revive it, you can gently warm a slice in the microwave for about 15-20 seconds. For longer storage, FREEZER INSTRUCTIONS are your best friend. Wrap the cooled loaf (or slices) tightly in plastic wrap, then in a layer of aluminum foil, or place in a freezer-safe bag. It will keep well in the freezer for up to 3 months. Thaw it overnight at room temperature or gently warm slices in the oven or microwave. For the GLAZE, I always recommend applying it *after* the bread has completely cooled and just before serving, especially if you plan on storing it for more than a day. If you’re freezing it, it’s best to freeze the loaf *without* the glaze and add it after thawing and reheating.
Frequently Asked Questions
Final Thoughts
There you have it – my go-to zucchini bread recipe that’s become a true staple in my kitchen. It’s more than just a recipe; it’s a little bit of comfort, a taste of home, and a guaranteed crowd-pleaser. The way it stays so wonderfully moist and tender, all thanks to that hidden zucchini, is just pure baking magic. It’s the perfect way to use up those garden veggies and the reward is a loaf that’s incredibly satisfying. If you loved my banana bread or any other simple quick bread, I know you’re going to fall head over heels for this one. I truly hope you give this zucchini bread a try – and when you do, I can’t wait to hear all about it! Let me know in the comments how yours turned out, or if you’ve got any fun variations to share. Happy baking, friends!
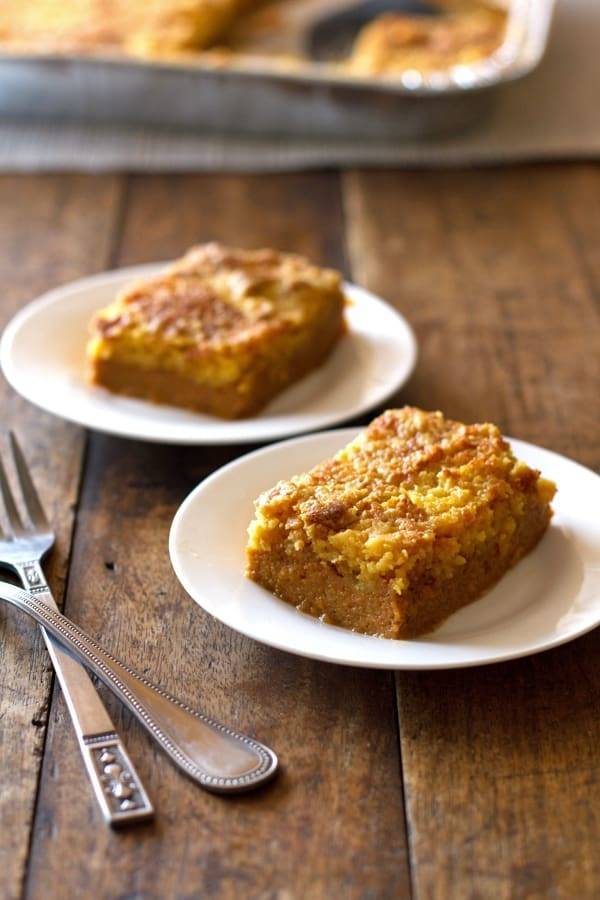
Easy Pumpkin Bars
Ingredients
Method
- Preheat your oven to 375 degrees Fahrenheit (190 degrees Celsius).
- In a large mixing bowl, combine the pumpkin puree, evaporated milk, white sugar, brown sugar, beaten eggs, cinnamon, salt, ginger, and cloves. Mix until well combined.
- Pour the pumpkin mixture evenly into a 9x13 inch baking pan.
- Sprinkle the dry yellow cake mix evenly over the top of the pumpkin mixture. Do not mix it in.
- Carefully pour the melted butter evenly over the dry cake mix layer.
- Bake for about 1 hour and 30 minutes, or until the center is set and a toothpick inserted comes out clean. The top should be golden brown.
- Let the bars cool completely before serving. You can chill them in the refrigerator for an even firmer texture. Cut into squares and enjoy!