You know those recipes that just *feel* like home? The ones you can whip up with your eyes half-closed, the ones that fill your kitchen with the most comforting aroma, and the ones that your family devours before they’ve even cooled? This Zucchini Bread is exactly that for me. Honestly, if you’ve never tried baking with zucchini before, you might be a little skeptical. I was too, at first! But trust me, it’s not like eating a salad in cake form. The zucchini adds the most incredible moisture and a subtle sweetness that just makes everything *sing*. It’s a classic for a reason, but this is my version, the one I’ve tweaked over years of baking, and it’s become my absolute favorite. It’s honestly way more satisfying and less fuss than trying to make a fancy layer cake, especially when that 10 pm sweet craving hits!
What is Zucchini bread?
So, what exactly is zucchini bread? At its heart, it’s a quick bread, meaning it uses baking soda and/or baking powder as leavening instead of yeast, which makes it super fast to get into the oven. The star ingredient, of course, is shredded zucchini. Now, don’t let that scare you! When it bakes, the zucchini practically melts into the batter, lending an unbelievable moistness and tenderness without any discernible zucchini flavor. It’s kind of like magic. Think of it as a super moist, subtly spiced cake that happens to be packed with a healthy dose of veggies you probably wouldn’t even guess are there. It’s the perfect way to use up that surplus zucchini from your garden or farmer’s market haul, and it’s a fantastic alternative to a denser, more complicated dessert when you just need something comforting and delicious.
Why you’ll love this recipe?
Oh, where do I even begin with why I adore this zucchini bread? First off, the flavor and texture are just out of this world. It’s incredibly moist, almost fudgy, with a tender crumb that practically melts in your mouth. The hint of cinnamon and nutmeg makes it smell like autumn even in the middle of summer, and it’s just perfectly sweet – not too much, not too little. It’s the kind of treat that makes you feel good about what you’re eating, even though it’s undeniably a dessert (or a fantastic breakfast!).
Beyond the taste, the simplicity is a lifesaver. I can honestly mix this up in about 15 minutes, especially on a busy weeknight. It’s my go-to when I need to bring something to a potluck or a friend’s house with very little notice. And let’s talk about cost-efficiency – zucchini is usually super affordable, and the other ingredients are pantry staples. You get a massive amount of deliciousness for very little expense.
Versatility is another huge plus! While I love it plain, it’s also amazing with a handful of chocolate chips folded into the batter, or even some chopped walnuts for a bit of crunch. Serve it warm with a smear of butter, or top it with a simple cream cheese glaze, and you’ve got a dessert fit for company. It’s also a fantastic canvas for other flavors; I’ve tried adding a bit of orange zest, and it was divine. Honestly, it’s this combination of incredible taste, ease of preparation, budget-friendliness, and adaptability that makes this my absolute favorite quick bread recipe. It’s the kind of recipe that becomes a staple, the one you reach for again and again.
How do you make Zucchini bread?
Quick Overview
This recipe is all about bringing together simple ingredients to create something truly special. You’ll mix your dry ingredients, then your wet ingredients, combine them gently, fold in your zucchini (and any extras!), pour it into a prepared loaf pan, and bake until golden and fragrant. It’s a straightforward process designed for busy bakers, ensuring a moist, delicious loaf with minimal fuss. The key is not to overmix, and to get that zucchini prepped just right to ensure optimal moisture distribution.
Ingredients
For the Main Batter:
You’ll need all-purpose flour – about 2 cups. I always make sure my flour is spooned and leveled, not scooped directly from the bag, to avoid packing too much in. This makes a big difference in texture. Baking soda (1 teaspoon) and baking powder (1 teaspoon) are our leavening agents, working together for a nice rise. A pinch of salt (1/2 teaspoon) enhances all the other flavors. And for that warm, cozy spice, we’ll use ground cinnamon (1 teaspoon) and a touch of nutmeg (1/4 teaspoon). Some folks like to add cloves, but I tend to stick to cinnamon and nutmeg for a classic taste.
For the Wet Ingredients & Sweetness:
We’ll use granulated sugar (1 cup) for sweetness, but you can always adjust this slightly based on your preference. For richness and moisture, we need large eggs (2), lightly beaten. And the fat! Melted unsalted butter (1/2 cup) is my preference for flavor, but a neutral oil like vegetable or canola oil (1/2 cup) works beautifully too, and it often makes for an even moister loaf. I even tested this once with melted coconut oil, and it was delicious! Vanilla extract (1 teaspoon) is a must for that classic baked good aroma. And of course, the star: shredded zucchini (2 cups, packed). Make sure it’s fresh and not too watery!
For Optional Add-ins:
This is where you can have some fun! Chocolate chips (1 cup) are a no-brainer for a crowd-pleaser. Chopped walnuts or pecans (1 cup) add a lovely crunch. Sometimes I even toss in a handful of dried cranberries for a bit of tartness.
For the Simple Glaze (Optional but Highly Recommended!):
A simple glaze is just powdered sugar (1 cup) whisked with a liquid. I usually use milk (2-3 tablespoons), but lemon juice can add a lovely zing if you’re feeling adventurous. You can also use a bit of water. The key is to get the consistency just right – thick enough to coat but thin enough to drizzle.
Step-by-Step Instructions
Step 1: Preheat & Prep Pan
First things first, get your oven preheated to 350 degrees F (175 degrees C). This ensures it’s nice and hot and ready when your batter is. Next, grab a standard 9×5 inch loaf pan. Grease it really well with butter or non-stick spray, and then dust it lightly with flour. I like to go a step further and line the bottom and long sides with a piece of parchment paper, leaving a little overhang on each side. This is my secret weapon for getting the loaf out of the pan *every single time* without any sticking. It makes life so much easier, trust me!
Step 2: Mix Dry Ingredients
In a large mixing bowl, whisk together your all-purpose flour, baking soda, baking powder, salt, cinnamon, and nutmeg. Whisking them together now ensures that the leavening agents and spices are evenly distributed throughout the dry ingredients. This is important for an even rise and consistent flavor in your final loaf. Give it a good whisk until everything looks uniformly combined.
Step 3: Mix Wet Ingredients
In a separate medium bowl, whisk together the granulated sugar, eggs, melted butter (or oil), and vanilla extract. Whisk until everything is well combined and the mixture is smooth. If you’re using oil, you’ll notice it emulsifies nicely. If using melted butter, make sure it’s not too hot, so it doesn’t scramble the eggs.
Step 4: Combine
Now, pour the wet ingredients into the bowl with the dry ingredients. Using a spatula or a wooden spoon, gently fold them together until *just* combined. It’s super important not to overmix here. You’ll still see a few streaks of flour, and that’s perfectly okay! Overmixing can develop the gluten too much, leading to a tough, dense bread. We want tender and moist, so stop as soon as you don’t see any big pockets of dry flour.
Step 5: Prepare Filling (Zucchini!)
This is where the magic happens! Take your shredded zucchini. If it looks really wet, you can gently squeeze out some of the excess moisture using your hands or by pressing it in a fine-mesh sieve. You don’t want to wring it bone-dry, as the moisture is key to its tenderness, but you don’t want a soggy batter either. Gently fold the shredded zucchini into the batter. If you’re adding chocolate chips or nuts, fold them in now too. Again, be gentle and just fold until they’re distributed.
Step 6: Layer & Swirl (If Adding Extras)
Pour the batter into your prepared loaf pan, spreading it evenly. If you’re adding something like a swirl of cinnamon sugar or a bit of cocoa powder for a chocolate variation, now’s the time to do it! You can sprinkle it over the top and use a knife or skewer to swirl it gently into the batter. For a simple loaf, just ensure the top is relatively smooth.
Step 7: Bake
Place the loaf pan in the center of your preheated oven. Bake for 50-65 minutes. The exact time will vary depending on your oven. You’ll know it’s done when a wooden skewer or toothpick inserted into the center comes out clean, or with just a few moist crumbs attached (no wet batter!). The top should be golden brown and firm to the touch. If the top is browning too quickly before the center is cooked, you can loosely tent it with aluminum foil for the last 15-20 minutes of baking.
Step 8: Cool & Glaze
Once baked, remove the loaf pan from the oven and let it cool in the pan for about 10-15 minutes. This allows it to set up properly. Then, use the parchment paper overhang to lift the loaf out of the pan and place it on a wire rack to cool completely. This is crucial – if you try to glaze a warm loaf, the glaze will melt right off! Once it’s totally cool, you can prepare your glaze by whisking together the powdered sugar and liquid until smooth. Drizzle it over the top of the cooled loaf.
Step 9: Slice & Serve
Once the glaze has set a bit, it’s time to slice and enjoy! I find a serrated knife works best for clean cuts. Serve yourself a generous slice, maybe with a cup of coffee or tea. This bread is fantastic slightly warm, or at room temperature. Enjoy every moist, delicious bite!
What to Serve It With
This zucchini bread is so wonderfully versatile, it fits into so many parts of the day and occasions. For a simple, satisfying breakfast, I love it toasted lightly and served with a smear of cream cheese or just plain. It’s hearty enough to keep you going, and that hint of spice is the perfect way to wake up your taste buds. It pairs beautifully with a hot cup of coffee or a steaming mug of chai tea.
When it comes to brunch, it’s a welcome addition to any spread. I like to cut it into slightly smaller, elegant slices and arrange it on a pretty platter. It’s a wonderful counterpoint to more savory dishes like quiches or breakfast casseroles. For beverages, think mimosas, fresh orange juice, or a nice brunch punch. It’s always a hit!
As a dessert, it’s simply divine. I often serve it with a dollop of whipped cream, a scoop of vanilla bean ice cream, or even a light berry compote. The subtle sweetness of the bread makes it a perfect canvas for richer accompaniments. It’s an excellent choice when you want something sweet after a meal but don’t want to go through the trouble of a whole cake. It feels a bit more rustic and approachable, yet still special.
And for those cozy, I-just-need-a-little-something-sweet moments? This is it. It’s perfect for an afternoon snack with a glass of milk, or that late-night craving when you want something comforting. My kids absolutely love it for their after-school snack, and I don’t feel guilty about them having a slice because of the zucchini! It’s that perfect balance of treat and wholesome goodness.
Top Tips for Perfecting Your Zucchini Bread
After making this countless times, I’ve picked up a few tricks that I think make a big difference, so let me share them with you! These are the things I learned through trial and error, and they’re what make this recipe so consistently wonderful for me.
Zucchini Prep is Key: This is probably the most crucial step. You want about 2 cups of *shredded* zucchini. Don’t use a food processor unless you want mush; a box grater or the shredding disc on a food processor is best. Now, the moisture. While the zucchini *needs* its moisture for tenderness, too much can make the bread dense and heavy. I usually give my shredded zucchini a gentle squeeze in my hands over the sink. You don’t need to wring it dry like a sponge, just get rid of the really watery liquid. If you have a lot of zucchini, I’ve found that even just letting it sit in a colander for 10-15 minutes will release enough excess moisture.
Mixing Advice – Don’t Overdo It!: I cannot stress this enough: gentle mixing is your friend! When you combine the wet and dry ingredients, stop as soon as they’re *almost* combined. Those little streaks of flour you see? They’ll disappear during baking. Overmixing develops gluten, which leads to a tough, chewy texture, and we absolutely don’t want that in a tender quick bread. Think of it as stirring just enough to bring everything together, not beating it into submission.
Swirl Customization: If you like adding a swirl, like a cinnamon-sugar mixture, do it *after* you’ve poured the batter into the pan. Sprinkle your mixture over the top, then use a butter knife or a skewer to gently swirl it down into the batter. Don’t over-swirl, or you’ll just blend it all in. A few gentle passes are all you need to create beautiful pockets of flavor. It adds a lovely visual appeal and an extra flavor dimension.
Ingredient Swaps: I’ve experimented a lot! For a dairy-free version, I’ve successfully used a neutral oil like canola or vegetable oil instead of butter, and almond milk or oat milk for the glaze. For a richer loaf, you can swap half the granulated sugar for brown sugar. And of course, the add-ins are endless – blueberries, chopped dates, or even a handful of mini M&Ms for the kids!
Baking Tips: Always use the middle rack in your oven for the most even baking. If your oven runs hot, you might need to reduce the temperature by 10-15 degrees or reduce the baking time slightly. The toothpick test is your best friend for checking doneness. If the top is browning too fast, don’t be afraid to loosely tent the loaf with foil. This allows the center to cook through without burning the outside.
Glaze Variations: For a thicker glaze, use less liquid; for a thinner, more drippy glaze, add more liquid a teaspoon at a time. A bit of lemon zest or a drop of almond extract can add another layer of flavor to your glaze. If you’re not a fan of glaze, a dusting of powdered sugar or a sprinkle of cinnamon sugar on top once it’s cooled is also lovely.
Storing and Reheating Tips
One of the best things about this zucchini bread is how well it keeps, making it perfect for baking ahead. If you’re planning to eat it within a couple of days, storing it at room temperature is perfectly fine. Just make sure to wrap it tightly in plastic wrap or place it in an airtight container. It usually stays wonderfully moist for about 2-3 days this way. I often leave a portion of it on the counter, tightly covered, for easy snacking.
If you need it to last a bit longer, the refrigerator is your best bet. Wrap the cooled loaf well in plastic wrap, then place it in an airtight container or a resealable bag. It will stay good in the fridge for up to a week. The texture might firm up slightly in the fridge, but don’t worry, it’s easy to bring it back to life.
For longer storage, freezing is fantastic. Once the loaf is completely cool, wrap it very tightly in plastic wrap, then in a layer of aluminum foil or place it in a heavy-duty freezer bag. This double-wrapping prevents freezer burn. It can stay frozen for up to 3 months. Thawing is simple: just let it thaw at room temperature for a few hours, or if you’re in a hurry, you can carefully reheat slices in the oven or microwave.
Glaze Timing Advice: For room temperature or refrigerator storage, it’s best to apply the glaze *after* the bread has completely cooled and just before serving or storing. If you plan to freeze the loaf *with* glaze, be aware that the glaze might become a bit sticky or slightly uneven upon thawing, but it will still taste delicious. Often, I’ll glaze it *after* thawing if I’m freezing it for an extended period. For best results, if freezing, consider freezing the plain loaf and glazing it once it’s thawed and ready to eat.
Frequently Asked Questions
Final Thoughts
So there you have it – my absolute favorite, foolproof zucchini bread recipe. It’s more than just a recipe; it’s a memory maker, a kitchen staple, and a genuine crowd-pleaser. I really hope you give this a try. It’s the kind of recipe that makes you feel incredibly accomplished in the kitchen without any of the stress. The incredible moisture, the comforting spice, and that little hint of sweetness – it all comes together to create something truly special.
If you love this, you might also enjoy my Lemon Blueberry Scones recipe, which is another one of my go-to’s for a burst of fresh flavor! Or if you’re looking for another way to use up garden zucchini, my Roasted Zucchini with Garlic is a fantastic side dish.
I can’t wait to hear how your zucchini bread turns out! Please leave a comment below and let me know if you tried any fun variations, or just tell me how much you and your family loved it. Happy baking, my friends!
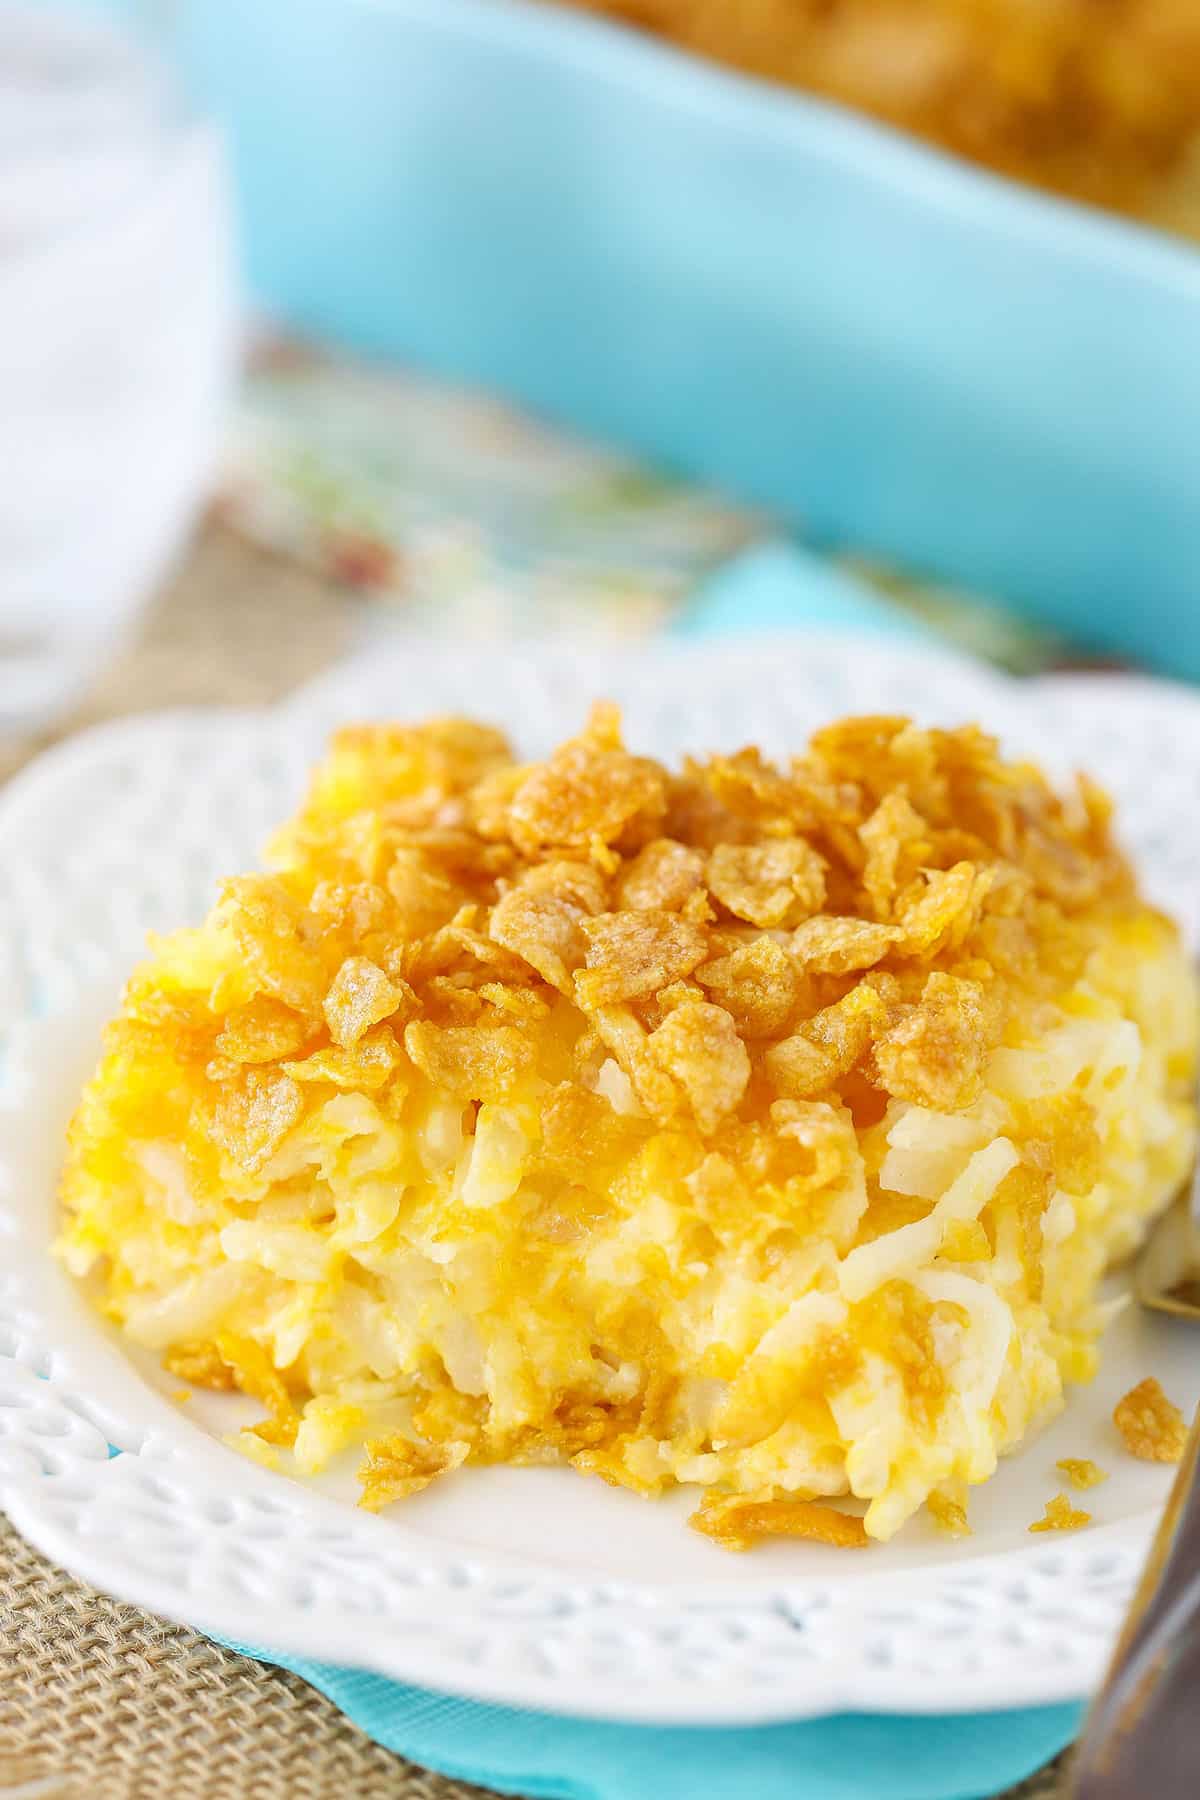
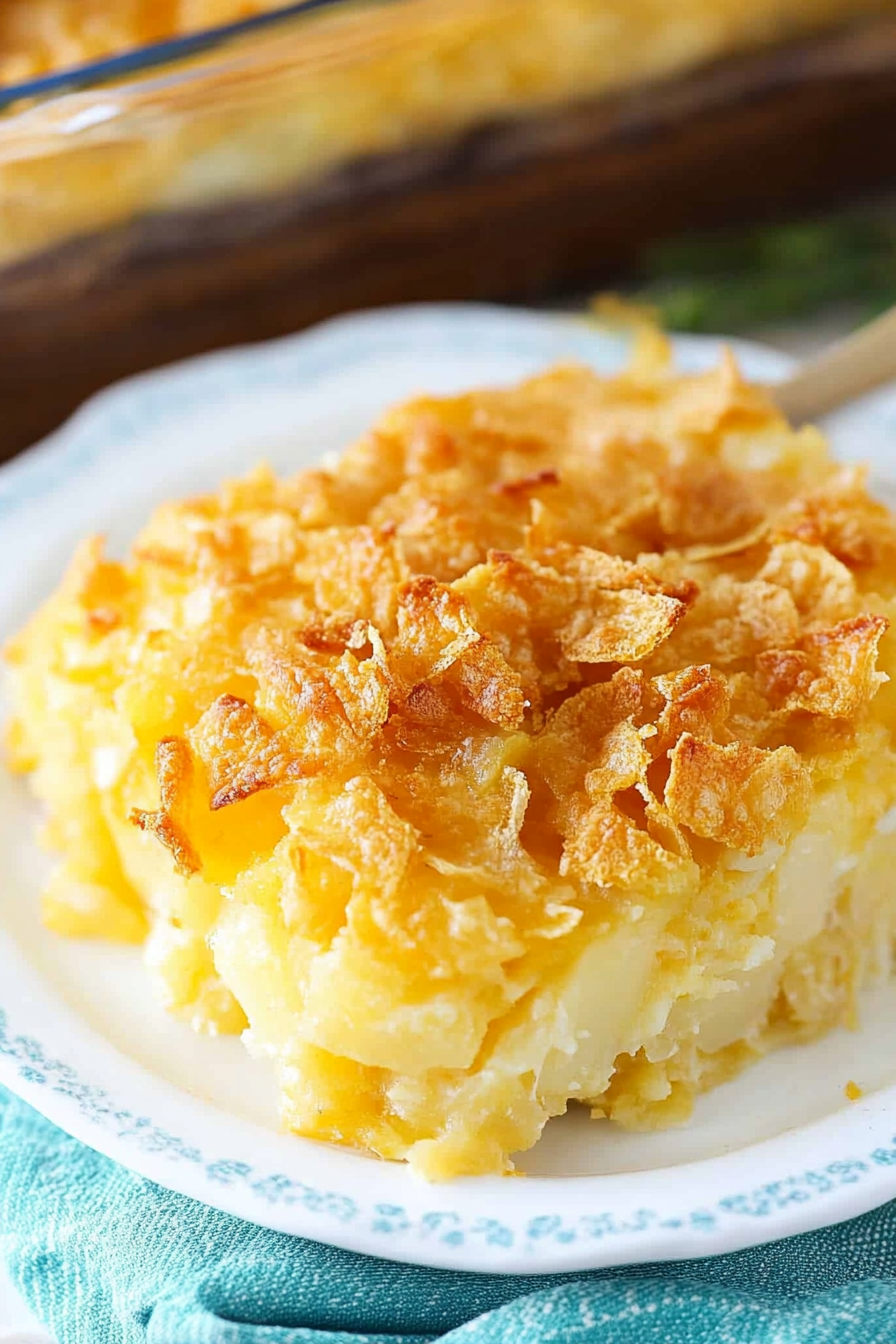
cheesy potato casserole
Ingredients
Method
- Preheat oven to 350°F (175°C).
- In a large bowl, combine the thawed hash browns, shredded cheddar cheese, sour cream, salt, chopped onion, cream of chicken soup, and 0.5 cup of melted butter. Mix well until all ingredients are evenly combined.
- Spread the mixture evenly into a 9x13 inch casserole dish.
- Combine the crushed Frosted Flakes and the remaining 0.5 cup of melted butter in a separate small bowl. Sprinkle this mixture evenly over the top of the casserole.
- Bake for 30-45 minutes, or until the casserole is heated through and the topping is golden brown and crunchy.