Stacked Cabbage Rolls How to Make Them
There’s something just magical about pulling a warm cake out of the oven, especially one that’s packed with sneaky veggies and bursts of cinnamon and sugar. I remember those early weekend mornings at my grandma’s house—the smell of fresh baking filling the entire kitchen, making everything feel cozy and right. This zucchini coffee cake is a little like that memory, but with a modern twist. It’s honestly my go-to recipe when I want something indulgent yet easy — perfect for brunch, snack time, or even a late-night treat when I’m craving something sweet but don’t want to turn on the oven for hours. I always do this when I need a little comfort, and trust me, it disappears in minutes at my house. My kids ask for this all the time — I swear, it’s like their new favorite dessert. The best part? It’s straightforward enough that I can whip it up on a busy weekday or make it ahead for the weekend. It’s a recipe that feels special but is totally family-friendly. So, grab your zucchini, and let’s get baking!
What is Zucchini Coffee Cake?
Think of zucchini coffee cake as a cross between your favorite morning muffin and a rich, comforting dessert. It’s essentially a moist, tender cake that’s layered with a cinnamon-sugar swirl, topped with a glossy glaze, and brimming with tiny bits of zucchini. The name is pretty straightforward — “coffee cake” because it’s perfect for breakfast or brunch, and “zucchini” because those sneaky green bits keep it incredibly moist without overpowering the flavor. This dish has become a family staple in my kitchen because it’s not only delicious but also sneaky nutritious—my kids don’t even notice the zucchini! It’s a humble yet impressive treat that feels like a warm hug. Plus, it’s super forgiving—you can customize the filling, toppings, or even skip the glaze if you’re feeling casual. Think of it as a versatile, cozy cake that’s equally great with coffee in the morning or as a sweet ending to dinner. It’s a recipe I’ve perfected over the years, and I promise, once you try it, it’ll be part of your baking repertoire too.
Why you’ll love this recipe?
There are so many reasons why this zucchini coffee cake has a special place in my baking lineup, and I bet you’ll love it just as much as I do. First off, the flavor—it’s like a cinnamon-spiked hug, with a subtle sweetness that’s not cloying. The cinnamon swirl running through the middle adds a lovely warmth and a hint of crunch that keeps every bite interesting. The cake itself is supremely moist, thanks to the zucchini—and I’ve tested with various amounts, but I always say, don’t skimp! It really does keep the cake tender, no matter what. What I love most about this is how simple it is—no fancy techniques, just good old-fashioned mixing—and it’s a great way to sneak some extra veggies into the kids’ diet without a fuss. Plus, it’s budget-friendly: most ingredients are pantry staples. Another perk is how versatile it is—you can serve it warm with a dollop of whipped cream or drizzle with a rich glaze. It’s a lifesaver on busy nights when you want a comforting treat without too much effort. Honestly, I’ve made this countless times, and it never fails to bring a smile. It’s like a warm, edible hug, and I’m pretty sure it’ll do the same in your house.
How do I make Zucchini Coffee Cake?
Quick Overview
This cake is as straightforward as baking gets. You start by preheating your oven to a cozy 350°F (175°C) and lining your pan. Then, you mix together your dry ingredients—the flour, sugar, baking powder, cinnamon—and set them aside. In a separate bowl, mix your wet ingredients: eggs, oil, vanilla, and grated zucchini (yes, the secret veggie!). You combine them gently and fold everything together without overmixing. The cinnamon-sugar swirl gets layered in, creating beautiful marbled pockets of flavor, and the batter quietly bakes into a moist, flavorful cake. Once it’s done, you let it cool just a bit before glazing it with a simple, sweet icing. Trust me, the smell alone will have everyone coming to the kitchen. My trick is to be patient—don’t cut into it too early; let it rest for 10-15 minutes after baking. The result is a slice of pure comfort, with a tender crumb, cinnamon accents, and that luscious glaze on top. It’s hard to beat how you can throw this together with minimal fuss and still get a show-stopping treat!
Ingredients
For the Main Batter:
– 2 cups all-purpose flour (I like unbleached for extra flavor)
– ¾ cup granulated sugar (or coconut sugar for a healthier touch)
– 1 tablespoon baking powder
– 1 teaspoon ground cinnamon
– ½ teaspoon salt
– ½ cup vegetable oil or melted coconut oil
– 3 large eggs
– 1 teaspoon vanilla extract
– 1 cup grated zucchini (squeeze out excess moisture so it’s just juicy but not soggy)
For the Filling:
– ¼ cup brown sugar
– 1 teaspoon ground cinnamon
– 2 tablespoons softened butter (or coconut oil if you prefer)
– Optional: chopped nuts or chocolate chips for extra indulgence
For the Glaze:
– 1 cup powdered sugar
– 2-3 tablespoons milk (dairy or almond works fine)
– ½ teaspoon vanilla
– A pinch of salt (to balance sweetness)
Step-by-Step Instructions
Step 1: Preheat & Prep Pan
Set your oven to 350°F (175°C). Grease a 9-inch round or square baking pan, or line it with parchment paper. I always do this early so I can relax while everything mixes. If you prefer, you can use a springform pan—anything with high sides works. Just make sure the pan is prepared well so the cake doesn’t stick. Now, grate your zucchini—you want enough to measure about 1 cup. Then, gently squeeze out excess moisture using a clean kitchen towel or paper towel—trust me, this step is key to keeping your cake moist without ending up with a soggy mess.
Step 2: Mix Dry Ingredients
In a large bowl, whisk together the flour, sugar, baking powder, cinnamon, and salt. I like to do this first because it evenly distributes everything and helps prevent clumping. This is a quick step but makes sure your baking powder gets evenly spread out, which is crucial for that perfect rise.
Step 3: Mix Wet Ingredients
In a separate bowl, whisk the eggs, oil, and vanilla until smooth. Then, fold in the grated zucchini. I always test with a spoon if the zucchini is well incorporated—look for a shiny batter with tiny green flecks. If your zucchini is super watery, just give it a quick squeeze beforehand—it’s a small step but makes a big difference. Trust me, I messed this up once and had a wet, heavy cake; now I avoid that mistake every time!
Step 4: Combine
Pour the wet mixture into the dry ingredients. Use a spatula or wooden spoon to gently fold everything together—don’t overmix! You want just combined batter with a few lumps. Overmixing can lead to a dense, tougher cake, and nobody wants that. The batter should be thick but pourable—think of pancake batter consistency.
Step 5: Prepare Filling
Mix the brown sugar, cinnamon, and softened butter until crumbly and evenly combined. If you’re adding nuts or chocolate chips, fold them in now. This filling adds a wonderful cinnamon crunch that pairs beautifully with the moist cake. You can be generous with the filling—it’s what makes this cake special.
Step 6: Layer & Swirl
Pour about half of the batter into your prepared pan. Smooth it out gently, then sprinkle the cinnamon-sugar filling evenly over the surface. Top with the remaining batter—spread it softly so you don’t disturb the filling too much. Use a knife or skewer to gently swirl through the batter, creating beautiful marbled streaks. Don’t go overboard—just enough to get a nice swirl that hints at the cinnamon layer inside.
Step 7: Bake
Pop it into your preheated oven and bake for about 30-35 minutes. Keep an eye on it after 30 minutes—insert a toothpick in the center; if it comes out clean, your cake is ready. Remember, every oven is different, so I’ve learned it’s smart to start checking a little early. When the top is golden and a bit domed, and the smell is heavenly, you’re good. Let it cool in the pan for 10-15 minutes before transferring or slicing.
Step 8: Cool & Glaze
Transfer the cake to a wire rack or serve straight from the pan if you’re in a hurry. Mix your powdered sugar, vanilla, and milk into a smooth glaze—you want it thick enough to hold some shape but runny enough to drizzle. Drizzle it generously over the warm cake; the heat will melt it slightly and create a glossy finish. If you prefer a less sweet topping, skip the glaze or dust with powdered sugar instead.
Step 9: Slice & Serve
Once cooled, slice with a sharp serrated knife for neat pieces. This cake is wonderful served warm or at room temperature. I love pairing a piece with a strong cup of coffee or a glass of cold milk. For an extra touch, add a dollop of whipped cream or a sprinkle of chopped nuts. Trust me, this one’s a crowd-pleaser that feels special but is honestly so simple you’ll want to make it all the time.
What to Serve It With
This zucchini coffee cake is so versatile that you can enjoy it in many ways. For breakfast, it pairs beautifully with your morning coffee or a latte—even a chai spice tea if you’re feeling cozy. My family loves it on lazy weekend mornings, served with fresh fruit on the side. For brunch, it doubles as a stunning centerpiece—slice it up and present it alongside scrambled eggs or breakfast sausages. As a dessert, I like to serve it warm with a scoop of vanilla ice cream or a dollop of Greek yogurt—trust me, the contrast of hot and cold makes it even better. If you’re craving a quick snack, a single slice with tea is basically heaven. I’ve also made mini muffin versions when I needed a portable treat—just adjust the baking time to around 20-25 minutes. This cake has a way of making ordinary days feel special, and I love how adaptable it is to whatever occasion I’m hosting or just craving myself.
Top Tips for Perfecting Your Zucchini Coffee Cake
Over the years, I’ve learned a few tricks that make all the difference in this recipe. First, always squeeze out excess moisture from the zucchini; I’ve made the mistake of rushing through this step, which led to a dense, heavy cake. Trust me—light, well-drained zucchini is the secret to moistness without sogginess. When mixing the batter, fold gently—overmixing is a common rookie mistake and it can make your cake tough, which nobody wants. For the swirl pattern, don’t be afraid to be a little messy—aim for a marbled look rather than perfect streaks; it’s more charming that way. When preparing the filling, soft butter is key—you want it crumbly but able to spread evenly. You can swap out the sugar for honey or maple syrup, but I recommend adding a tiny splash of extra vanilla to keep things balanced. For baking, I’ve found that oven placement matters—middle rack is best for even heat. If your oven runs hot or cold, do my trick of testing doneness with a toothpick—better safe than overcooked. The glaze is my personal favorite—play with flavors by adding a hint of lemon juice or a sprinkle of cinnamon. My biggest lesson has been to let the cake sit for at least 15 minutes after baking—patience pays off, and you’ll end up with slices that hold together perfectly. This cake is forgiving, and each time I make it, I tweak a little, making it more delicious than the last. It’s a warm, slightly messy process that yields consistently impressive results—trust me, with just a few notes, it’ll become a family favorite!
Storing and Reheating Tips
This cake keeps surprisingly well, which is great because I often bake a double batch just to have leftovers. If you’re enjoying it the same day, leave it at room temperature covered with a towel, and it’ll stay moist for a couple of days. For longer storage, I recommend wrapping it tightly in plastic wrap or placing it in an airtight container and refrigerate for up to 3 days. Just remember, the glaze might soften a bit in the fridge—no worries, a quick microwave zap (about 15 seconds) brings it back to life. If you want to keep it longer, freezing is your friend. Wrap slices individually in plastic wrap and store in a freezer-safe bag for up to a month. Thaw at room temp or microwave briefly—just enough to warm the slice without overdoing it. I like to add the glaze right before serving if I’ve stored it in the fridge or freezer, so it’s fresh and shiny. A tip: if the cake feels a little dry after reheating, a tiny drizzle of milk or cream can revive it. Honestly, leftovers are almost better the next day—the flavors meld beautifully, and the cinnamon swirl gets even more pronounced. Just make sure to keep it sealed tight, so it doesn’t dry out or pick up fridge odors. This cake is one of those treats that keeps giving—each slice just gets better, and that glaze is the finishing touch that makes everyone ask for seconds.
Frequently Asked Questions
Final Thoughts
Honestly, this zucchini coffee cake has become one of my all-time favorites because it combines simplicity with incredible flavor. It’s a testament to how you can turn humble ingredients—like zucchini and pantry staples—into something special that tastes like a celebration. Every time I bake it, I feel a little nostalgic, remembering my family gathering around the table or a quiet weekend morning. It’s such a versatile recipe—adjacent to a breakfast treat, a family dessert, or even a quick coffee break indulgence. I love that I can customize the filling, swap out ingredients, or skip the glaze if I want a lighter version. Most of all, I hope you get to enjoy making and sharing this as much as I do. Whenever I see my kids eagerly waiting for the first slice, I know I’ve created something they’ll ask for again and again. So, gather your zucchini, throw on your apron, and make this cozy, flavorful cake—the kind that makes ordinary days feel just a little more special. Can’t wait to hear how yours turns out—happy baking!
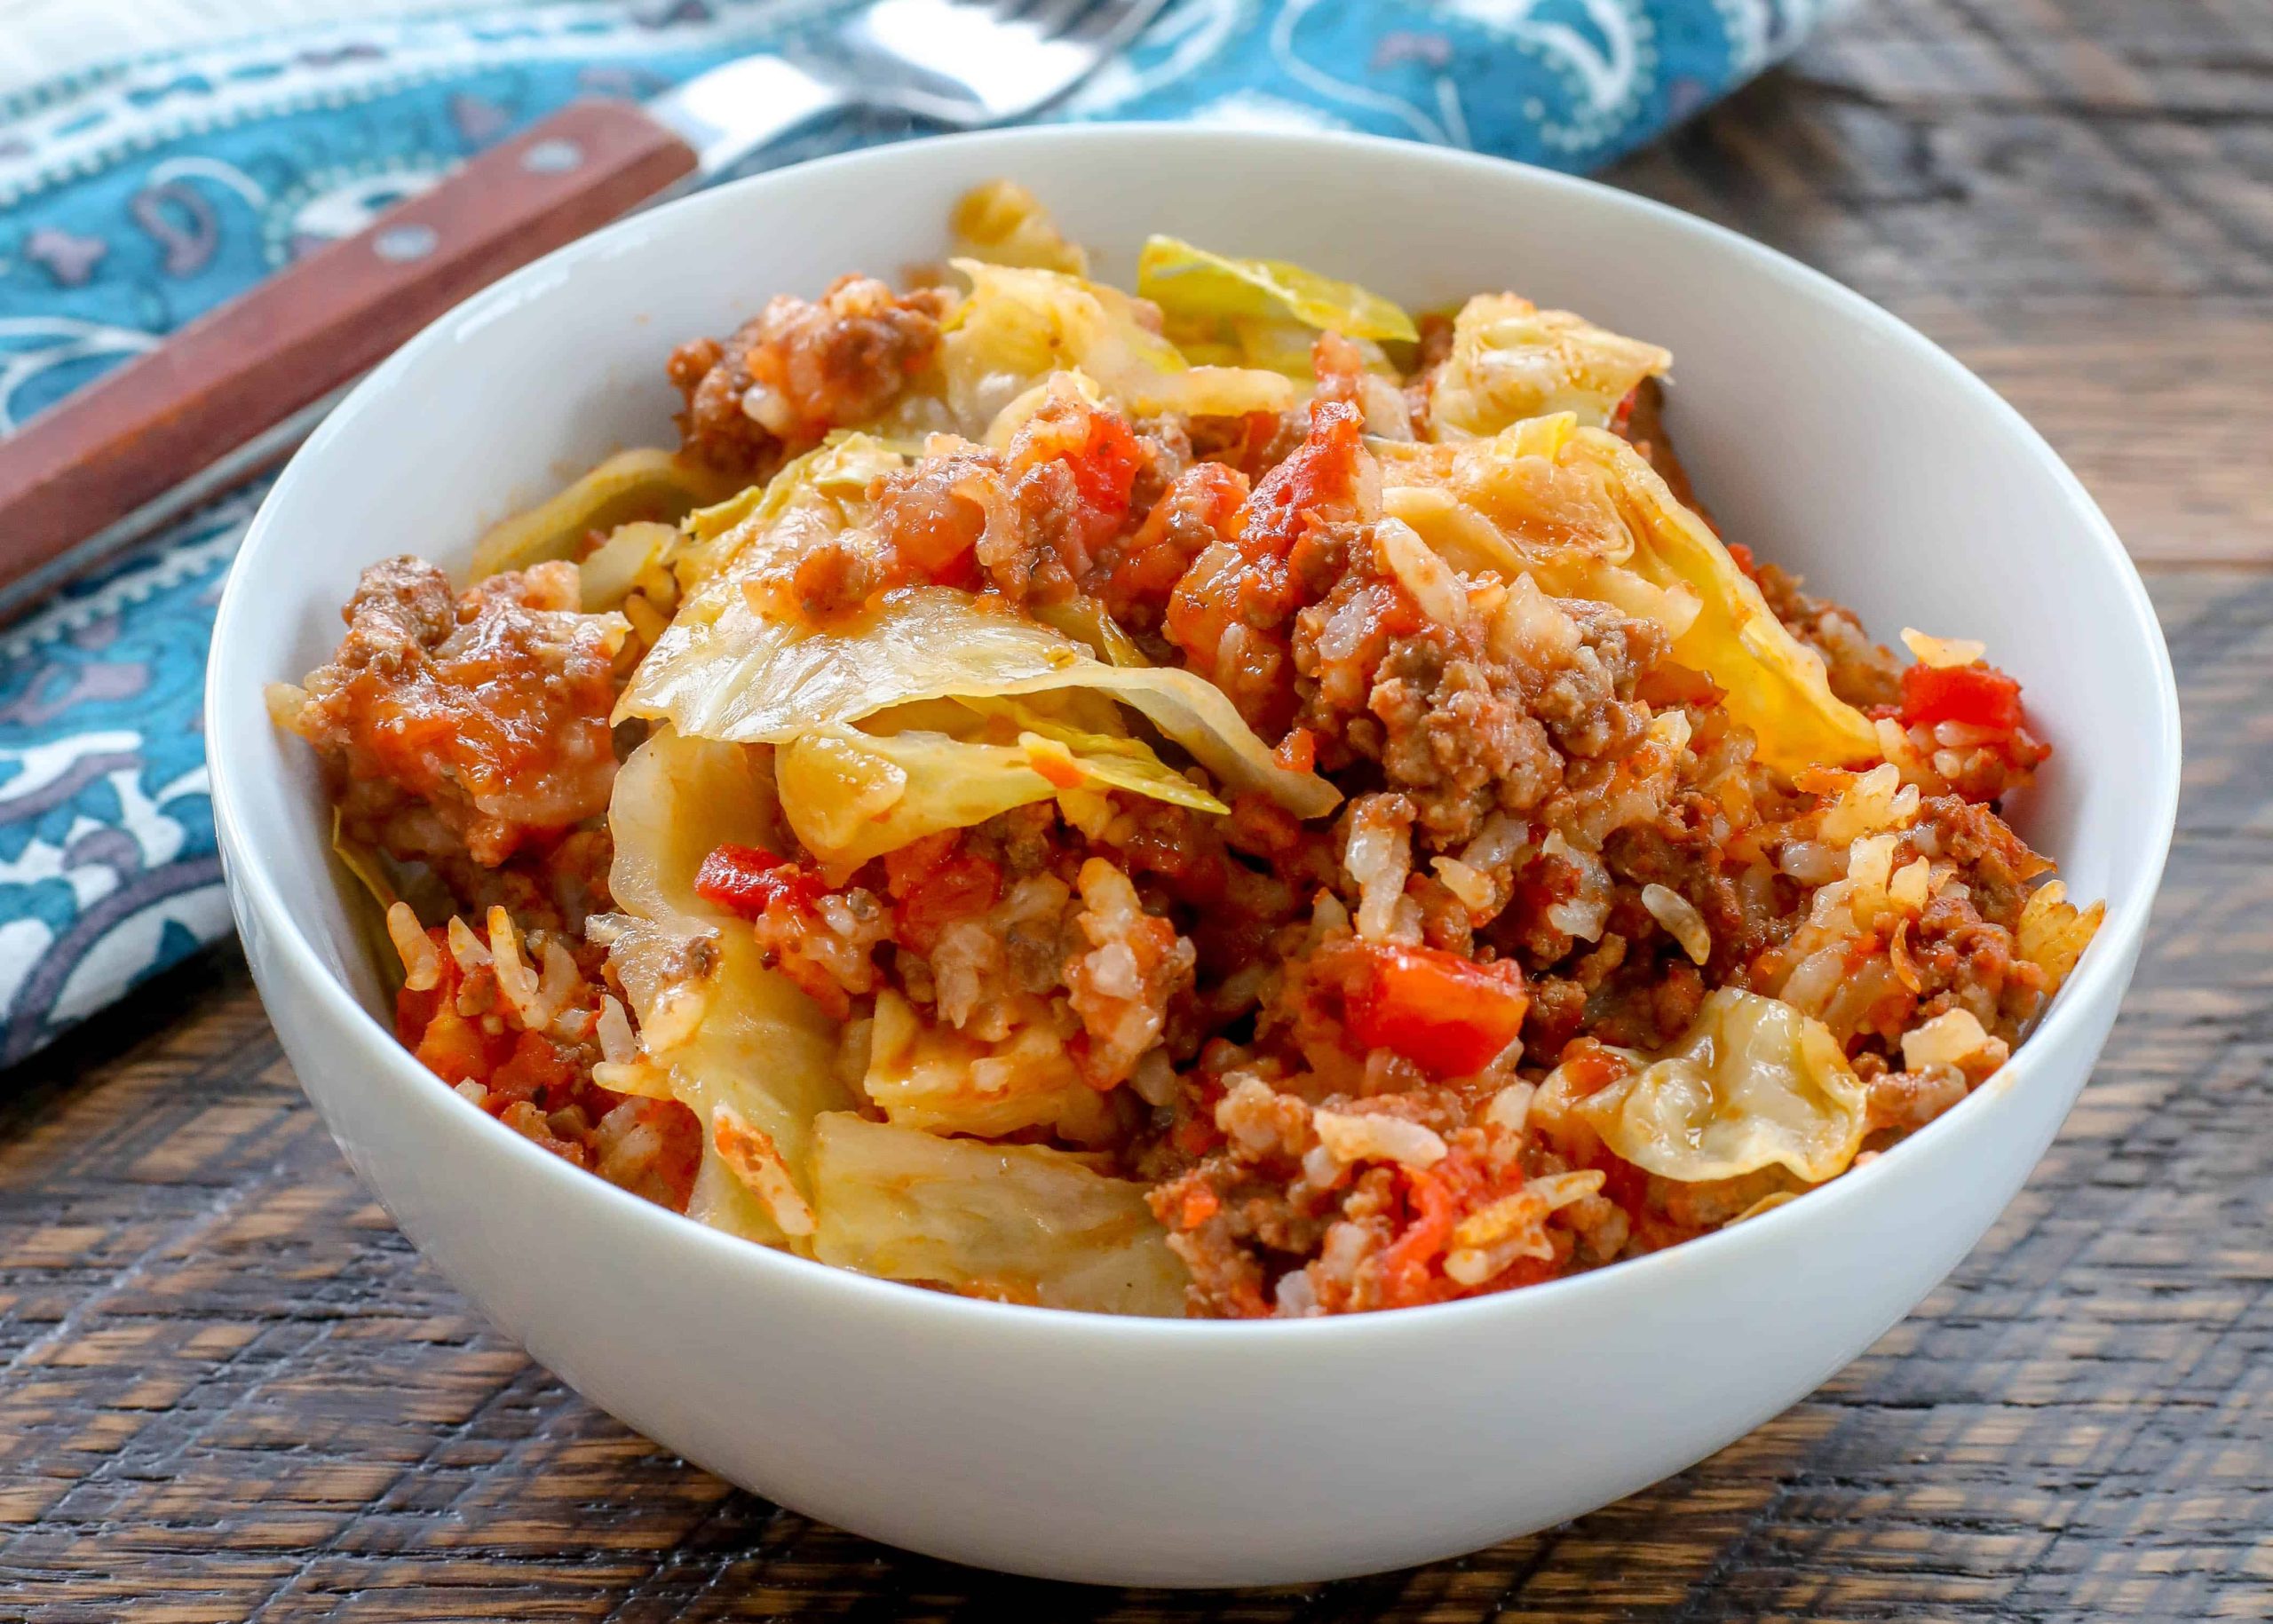
cabbage rolls
Ingredients
Method
- Preheat the oven to 350°F. Spread the cabbage across the bottom of a 9x13 dish. In a large skillet, cook the ground beef with the chopped onion over medium heat until browned.
- Drain excess fat from the skillet. Add rice, chili powder, garlic powder, salt, and pepper to the skillet. Stir in crushed tomatoes and mix well. Spread the meat mixture over the cabbage in the baking dish.
- Mix tomato sauce, brown sugar, and vinegar together and pour over the meat and cabbage layers. Cover the dish with foil and bake for 90 minutes. Uncover and let rest for 5-10 minutes before serving.