Golden Syrup Walnut Ice Cream Recipe
Oh, this one’s a true comfort in my kitchen. I remember the first time I made zucchini bread—my grandma’s old recipe—except I kept tweaking it over the years until I landed on this version that’s just right. The smell alone when it’s baking is enough to bring everyone running to the kitchen. It’s perfectly moist, just the right sweetness, and that dreamy cream cheese swirl? Total game-changer. Honestly, I make this at least once a month because it’s that good—and because my kids ask for seconds every single time. Plus, it’s so simple and forgiving, making it a lifesaver on busy nights when I need that warm, homemade treat in a jiffy. And here’s a fun tip: I’ve tested this with almond milk, and it made it even creamier—trust me on this one. This loaf is incredible fresh out of the oven, but it also rewarms beautifully, which makes it perfect for breakfast, snacks, or a cozy afternoon with coffee. I’ll admit, I still get a little nostalgic every time I bake it. It’s like a little slice of family memory with every bite.
What is Moist Zucchini Bread with Cream Cheese Swirl?
Think of this as a cozy, homemade loaf that celebrates the humble zucchini in the most delicious way. It’s essentially a moist, tender bread—kind of like a hybrid between a cake and a muffin—that’s packed with shredded zucchini. The zucchini keeps it unbelievably moist, so you don’t need butter or oil drenched in sugar to get that perfect bite. What makes it even more special is the swirl of creamy, slightly tangy cream cheese running through the middle—kind of like a surprise inside every slice. The name might sound fancy, but honestly, it’s just a delightful way to sneak in some veggies while satisfying that sweet craving. It originated in the American Midwest, where zucchini was abundant in summer, but I’ve seen variations around that use apples or bananas. It’s one of those recipes that feels fancy but is truly simple enough for a busy weeknight—or a lazy weekend baking marathon.
Why you’ll love this recipe?
What I love most about this zucchini bread is the way it hits all the right notes—moist, fluffy, with a little zing of sweetness, and that rich swirl of cream cheese that just elevates everything. The flavor is subtly sweet with hints of vanilla and cinnamon—perfectly balanced, not overpowering. Plus, it’s honestly so forgiving. I’ve made it countless times, swapping ingredients, and it never fails. It’s a crowd-pleaser for breakfast, brunch, or even as a comforting snack with a cup of tea. And don’t get me started on how budget-friendly it is—those zucchinis are practically free when they’re in season, and the ingredients are pantry staples. This loaf is versatile, too; I’ve experimented with adding walnuts or raisins, and both work beautifully depending on my mood. What I really love is that it doesn’t just taste good—it makes my kitchen smell like heaven, especially when baking. And the best part? It’s pure, honest baking—no fancy equipment needed, just a bowl, a spoon, and a little love.
How do I make Zucchini bread with cream cheese swirl?
Quick Overview
This zucchini bread requires only a handful of ingredients and a few simple steps. You start by shredding the zucchini—remember to squeeze out some excess moisture so it doesn’t make the bread too wet. Next, you mix the dry ingredients in one bowl, and the wet ingredients in another. Combine them gently—overmixing can make the bread dense. Pour half of the batter into your loaf pan, spread a generous layer of creamy, sweetened cream cheese, then top with the remaining batter. Using a skewer or knife, swirl through the layers to create beautiful marbling. Bake until golden and a toothpick inserted into the center comes out clean. While it’s cooling, I always prepare the glaze—just powdered sugar, vanilla, and a splash of milk—drizzle it on warm or cool loaf. This method keeps things simple, quick, and totally forgiving—plus, the end result is an irresistible, moist loaf with a stunning swirl that makes even the pickiest eaters ask for seconds.
Ingredients
For the Main Batter:
– 2 cups grated zucchini (about 2 medium zucchinis, shredded and drained)
– 1 1/2 cups all-purpose flour (preferably unbleached for better flavor)
– 1 teaspoon baking powder
– 1/2 teaspoon baking soda
– 1 teaspoon ground cinnamon
– 1/2 teaspoon salt
– 1/2 cup granulated sugar
– 1/2 cup packed brown sugar
– 3 large eggs (or 2 eggs + 2 tbsp applesauce for a dairy-free version)
– 1/2 cup vegetable oil (or melted coconut oil for a tropical twist)
– 1 teaspoon vanilla extract
For the Filling:
– 4 oz cream cheese (softened)
– 2 tablespoons powdered sugar
– 1/2 teaspoon vanilla extract
– Optional: a pinch of cinnamon or lemon zest for extra flair
For the Glaze:
– 1 cup powdered sugar
– 1-2 teaspoons milk or lemon juice
– Splash of vanilla extract
Step-by-Step Instructions
Step 1: Preheat & Prep Pan
Set your oven to 350°F (175°C). Grease your loaf pan well with butter or non-stick spray, then line it with parchment paper if you like—it makes slicing a breeze. While it’s warming up, grab your grated zucchini and squeeze out some of that excess moisture—it can make your bread soggy if you leave it. Trust me, I’ve made that mistake!
Step 2: Mix Dry Ingredients
In a large bowl, whisk together the flour, baking powder, baking soda, cinnamon, and salt. This ensures everything is evenly distributed and gives your bread that perfect rise. I always do this first so I don’t forget—especially if I’m multitasking in the kitchen.
Step 3: Mix Wet Ingredients
In another bowl, beat the eggs, then stir in the oil, sugars, and vanilla. It’s fun watching the mixture turn silky and glossy—kind of like a little magic. I’ve tested substituting half the oil with apple sauce, and it makes a slightly healthier version—still super moist!
Step 4: Combine
Pour the wet into the dry ingredients and fold gently—don’t overmix, or your bread might end up dense. Just fold until they’re just combined. It’s okay if there are a few streaks—better than overworking your batter.
Step 5: Prepare Filling
In a small bowl, beat the softened cream cheese with powdered sugar, vanilla, and spices if using. It should be smooth and spreadable, not runny. If it’s too soft, pop it in the fridge for a few minutes—this helps it hold its shape during layering.
Step 6: Layer & Swirl
Pour half the batter into your prepared pan. Spread the cream cheese mixture evenly over the top, then cover with the remaining batter. Using a toothpick or butter knife, swirl through the layers—think of it as creating a marble effect. This part’s fun and makes each slice a little work of art!
Step 7: Bake
Pop your loaf in the oven and bake for about 55-60 minutes. Start checking around 55 minutes—insert a toothpick in the center, and if it comes out clean, you’re good. If it’s still wet, give it a few more minutes. The top should be golden and fragrant.
Step 8: Cool & Glaze
Let the bread cool in the pan for about 15 minutes before transferring to a wire rack. I find cooling helps set the swirl and makes slicing easier. Meanwhile, whisk together your glaze ingredients—pour it over the loaf while it’s still slightly warm for that glossy finish. Trust me, it’s irresistible.
Step 9: Slice & Serve
Use a serrated knife to cut even slices. I like to serve this slightly warm or at room temperature—either way, it’s divine. For an extra touch, sprinkle with chopped nuts or a dusting of powdered sugar. Pair with coffee or tea, and enjoy the compliments from your family or guests—this loaf disappears faster than you’d think!
What to Serve It With
This loaf is incredibly versatile; I’ve served it in so many ways over the years. For breakfast, I love it toasted with a smear of butter and a drizzle of honey—my kids ask for this all the time. It’s also fantastic on a brunch table alongside fresh fruit and a pot of strong coffee. When I’m craving a sweet treat after dinner, a slice topped with whipped cream or a dollop of Greek yogurt feels fancy enough for guests. Sometimes, I serve it as a casual snack with a glass of cold milk or hot cocoa, especially during fall and winter months. And if I want to make it feel extra special, I’ll add a handful of chopped walnuts or chocolate chips into the batter—that’s a secret weapon for my family’s taste buds. Basically, this zucchini bread has earned its spot in our recipe rotation because it tastes like a little slice of heaven—and makes any day feel a bit more cozy.
Top Tips for Perfecting Your Moist Zucchini Bread with Cream Cheese Swirl
Here’s a bunch of wisdom I’ve gathered over making this bread dozens of times. First, always squeeze out as much moisture from the zucchini as possible—wet zucchini can turn your loaf into a soggy mess. I like to use a clean dish towel or a cheesecloth to wring out the excess. When mixing the batter, remember: fold gently. Overmixing is the enemy of fluffy, tender bread. If your batter feels too thick, a splash of milk or almond milk can loosen it up—trust me, I’ve tested this with different kinds of milk, and it’s fun how it can change the texture slightly. Swirling is my favorite part—play around with your pattern, maybe a spiral or a zigzag—just make sure you don’t disturb the bottom layer too much. For ingredient swaps, I’ve tried coconut sugar, and it adds a lovely richness—just watch the sweetness levels, as coconut sugar can be quite strong. Baking on the lower rack helps develop that golden crust, but if your oven tends to cook unevenly, rotate the loaf halfway through. Lastly, the glaze you make at the end isn’t just for looks—it adds a layer of sweetness and moisture that complements the bread so beautifully. Feel free to experiment with lemon zest in the glaze or a splash of maple syrup instead of vanilla. This recipe is truly forgiving and adaptable—just like a good friend in your kitchen.
Storing and Reheating Tips
Once you’ve cut into this loaf, I recommend eating it pretty quickly—like within 2-3 days for the best freshness. Wrap it tightly in plastic wrap or store in an airtight container at room temperature if you plan to eat it soon, but keep in mind it’s best fresh to preserve its moist texture. If you have leftovers, refrigerate it for up to a week; just warm slices in the microwave for 10-15 seconds before serving—they taste almost like fresh-baked. If you want to keep it longer, this bread freezes beautifully. Wrap it tightly in foil or plastic wrap, then slide into a freezer bag—good for up to 3 months. When you’re ready, thaw it overnight in the fridge or on the counter. When reheating, I’ll pop a slice in the microwave with a damp paper towel over it—this keeps it soft and moist. And about that glaze—my rule of thumb is to add it last, just before serving, because it can soften or melt if stored with the bread. Trust me, a little planning makes this zucchini bread taste as fresh as when it just came out of the oven, even days later.
Frequently Asked Questions
Final Thoughts
This moist zucchini bread with its luscious cream cheese swirl has become a favorite in my family for good reason. It’s easy to make, endlessly adaptable, and doesn’t leave you feeling heavy afterward—just a slice of pure comfort. Every time I bake it, I feel a little nostalgic, recalling summer zucchinis from my garden and long Sunday mornings in my grandma’s kitchen. It’s that warm, homey feeling that makes baking such a joy. Whether you’re looking for a breakfast treat, a snack, or a sweet gift for a friend, this loaf fits perfectly into any occasion. I hope you give it a try and let me know how it turns out—or even share your tweaks! After all, the best part of baking is making a recipe your own. Happy baking, and I can’t wait to hear how yours turns out!
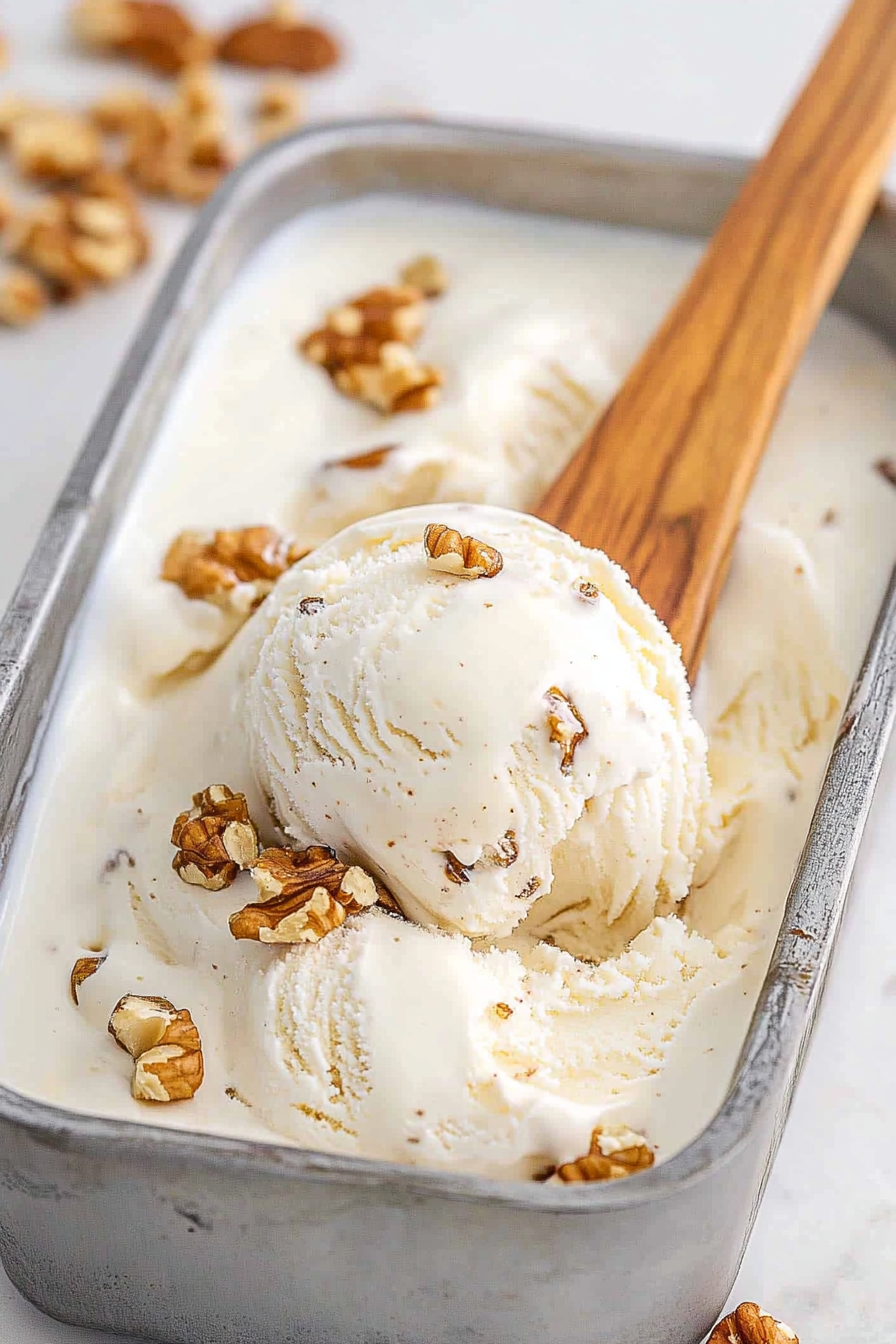
Maple Walnut Ice Cream
Ingredients
Method
- In a large bowl, combine the sweetened condensed milk, heavy whipping cream, and maple syrup.
- Using an electric mixer on medium speed, beat the mixture until it is whipped and creamy.
- Gently stir in the chopped walnuts.
- Pour the mixture into a freezer-safe container. Cover and freeze for at least 6 hours, or until firm. It can be stored in the freezer for up to 2 weeks.