Zinger Chicken Burger Recipe Easy Delicious
You know those recipes that just feel like a warm hug? The ones you can whip up without even looking at a recipe card because you’ve made them so many times? For me, that’s this zucchini bread. It’s not just *any* zucchini bread; it’s the kind that fills your kitchen with the most comforting, sweet cinnamon scent, and then disappears in about five minutes flat. Seriously, the moment it comes out of the oven, my kids are hovering like little chefs, ready to snag the first slice. It’s that good. It’s the perfect answer when you’ve got a couple of extra zucchinis from the garden (or the farmer’s market!) and you’re craving something sweet but don’t want the fuss of a big cake. It’s incredibly moist, perfectly spiced, and honestly, it’s my secret weapon for busy mornings. Forget those dry, bland muffins you’ve tried – this is the real deal, and I can’t wait to share it with you!
What is Zucchini bread?
So, what exactly *is* zucchini bread, you might be asking? At its heart, it’s a quick bread, meaning it doesn’t use yeast and comes together super fast. Think of it as a more wholesome, incredibly moist cake that just happens to have zucchini in it. Don’t let the “zucchini” part fool you – you don’t taste it at all! The zucchini is like a flavorless magician, adding unbelievable moisture and a tender crumb without any vegetable-y hint. It’s essentially a delicious canvas for warm spices like cinnamon and nutmeg, often studded with nuts or chocolate chips, and finished with a simple glaze or just a dusting of powdered sugar. It’s the ultimate comfort bake, perfect for breakfast, a snack, or even a light dessert. It’s humble, it’s forgiving, and it’s always a crowd-pleaser.
Why you’ll love this recipe?
Okay, let’s talk about *why* this specific zucchini bread recipe is my absolute favorite and why I think you’re going to adore it too. First off, the flavor and texture are just spot-on. It’s incredibly moist, thanks to the zucchini (which, remember, you won’t taste!), and has this perfect tender crumb that just melts in your mouth. The blend of cinnamon and nutmeg is just the right amount of cozy, without being overpowering. Then there’s the simplicity. I can literally start this when I’m making my morning coffee and have it baking before I even finish my first cup. It uses basic pantry staples that most of us have on hand, making it super cost-efficient too, especially when zucchini is in season and practically free! What I love most, though, is its versatility. You can add chocolate chips, walnuts, pecans, or keep it plain – it’s always delicious. It’s so much better than a store-bought loaf, and honestly, it gives even the fanciest coffee cake a run for its money. It’s just pure, unadulterated comfort in every bite, and that’s something pretty special.
How do you make Zucchini bread?
Quick Overview
Making this zucchini bread is surprisingly simple! You’ll basically whisk together your dry ingredients, then mix your wet ingredients, combine them gently, fold in the zucchini, and bake until golden and fragrant. The whole process from start to finish, including prep and baking time, is usually under an hour. It’s the kind of recipe that makes you feel like a baking superhero, even on your busiest days. It truly is that easy, and the results are always spectacular.
Ingredients
For the Main Batter:
You’ll need all-purpose flour, baking soda, salt, cinnamon, and a pinch of nutmeg. I always sift my flour to make sure there are no lumps, but if you’re in a hurry, just whisk it really well. For the spices, I like to use fresh ground cinnamon; it really makes a difference in the aroma and flavor. You’ll also need granulated sugar and a bit of brown sugar for that extra depth of flavor and moisture. And of course, eggs, a good quality vanilla extract, and melted unsalted butter. I sometimes use a neutral oil like canola or vegetable oil if I’m out of butter, and it works just as well!
For the Filling:
This is where you can get a little creative! The star here is grated zucchini. Make sure you squeeze out as much liquid as you can – this is KEY for a non-soggy bread! I usually grate mine on the large holes of a box grater. If you’re feeling fancy, you can add about a cup of chocolate chips (semi-sweet or dark work best!), chopped walnuts, or pecans. They add a wonderful texture and flavor boost.
For the Glaze:
This is optional, but oh-so-worth-it! It’s super simple: powdered sugar, a splash of milk (or almond milk for a slightly different flavor – I tested this and it actually made it even creamier!), and a tiny bit of vanilla extract. You want it thick enough to coat, but still pourable.
Step-by-Step Instructions
Step 1: Preheat & Prep Pan
First things first, get your oven preheated to 350 degrees F (175 degrees C). This ensures it’s nice and hot when the batter is ready. Then, grab a standard 9×5 inch loaf pan. I like to grease it really well with butter or non-stick spray, and then dust it with a little flour. You can also line it with parchment paper, leaving an overhang on the sides – this makes lifting the loaf out super easy. I learned this trick after I had a loaf stick once, and it’s a lifesaver!
Step 2: Mix Dry Ingredients
In a large bowl, whisk together your all-purpose flour, baking soda, salt, cinnamon, and nutmeg. Whisking them together ensures that the leavening agents and spices are evenly distributed throughout the batter. This is important so you don’t end up with pockets of baking soda or uneven spice flavor. If you see any lumps, just give it a good whisk until it’s all smooth.
Step 3: Mix Wet Ingredients
In a separate medium bowl, whisk together your granulated sugar, brown sugar, eggs, vanilla extract, and melted butter (or oil). Whisk until everything is well combined and slightly thickened. I usually use room temperature eggs; I find they incorporate better. If your melted butter is too hot, let it cool for a minute or two before adding it to the eggs so you don’t scramble them!
Step 4: Combine
Now, pour the wet ingredients into the bowl with the dry ingredients. Use a spatula or a wooden spoon to gently fold everything together until just combined. Be careful not to overmix! Overmixing develops the gluten in the flour, which can lead to a tough, dense bread. Stop mixing as soon as you no longer see streaks of dry flour. It’s okay if the batter looks a little lumpy – that’s exactly what you want.
Step 5: Prepare Filling
If you’re adding any mix-ins like chocolate chips or nuts, gently fold them into the batter now. If you’re using zucchini, make sure you’ve squeezed out as much moisture as possible before adding it to the batter. Grate your zucchini, place it in a clean kitchen towel or cheesecloth, and squeeze firmly over the sink. This step is CRUCIAL! Add the squeezed zucchini to the batter and fold it in gently until just incorporated. Don’t overwork it!
Step 6: Layer & Swirl
Pour the batter evenly into your prepared loaf pan. If you’re adding chocolate chips or nuts, I like to sprinkle a few extra on top for good measure. For a really pretty look, you can sometimes create a slight swirl on top with your spatula, but honestly, this bread is more about taste than appearance. Just get it in the pan smoothly!
Step 7: Bake
Place the loaf pan in the preheated oven. Bake for about 50-65 minutes. The exact time will vary depending on your oven. You’ll know it’s done when a wooden skewer or toothpick inserted into the center comes out clean, or with just a few moist crumbs attached. The top should be golden brown and it should smell absolutely amazing. If the top starts browning too quickly, you can loosely tent it with foil for the last 15-20 minutes of baking.
Step 8: Cool & Glaze
Once baked, let the zucchini bread cool in the pan for about 10-15 minutes. This allows it to set up a bit. Then, carefully invert it onto a wire rack to cool completely. If you lined your pan with parchment, you can just lift it straight out. Once it’s completely cool – and this is important for the glaze! – you can whisk together your powdered sugar, milk, and vanilla for the glaze. Start with a tablespoon of milk and add more as needed until you get your desired consistency. Drizzle it over the top and let it set.
Step 9: Slice & Serve
Once the glaze is set (or if you skipped the glaze!), slice the bread with a serrated knife for clean cuts. This bread is absolutely divine served at room temperature. It’s perfect on its own, or you can enjoy it with a smear of butter. It’s a treat any time of day!
What to Serve It With
This zucchini bread is so versatile, it’s practically a meal in itself! For a quick and easy breakfast, I love just having a slice with my morning coffee or tea. The cinnamon and vanilla are so comforting to wake up to. If you’re planning a brunch spread, it’s a welcome addition to any buffet. It looks lovely sliced and arranged on a platter alongside fruit salad and maybe some quiche. For dessert, it’s surprisingly satisfying. A small slice after dinner, perhaps with a dollop of whipped cream or even a scoop of vanilla ice cream, is pure bliss. And for those cozy, rainy afternoons (or frankly, any afternoon!), it’s perfect for a relaxed snack. My kids love it with a glass of cold milk. It’s the kind of treat that makes any occasion feel a little more special, whether it’s a fancy brunch or just a quiet moment to yourself.
Top Tips for Perfecting Your Zucchini Bread
Over the years, I’ve learned a few tricks that have made this recipe absolutely foolproof. For the zucchini prep, remember that squeezing out the moisture is non-negotiable. I’ve tried it without squeezing, and while it’s still edible, the texture just isn’t as good – it can be a bit gummy. Grating it on the large holes of a box grater is my go-to, and it works like a charm. When it comes to mixing, the golden rule is: don’t overmix! Just combine until you don’t see dry flour. A few lumps in the batter are perfectly fine and actually desirable for a tender crumb. I learned this the hard way after making a few loaves that were a bit tough. For swirl customization, if you’re adding chocolate chips or nuts, folding them in gently is key. If you want to get fancy, you can reserve a tablespoon of batter, mix it with a tiny bit of cocoa powder, and swirl that on top for visual appeal. When it comes to ingredient swaps, I’ve experimented a lot! If you don’t have butter, vegetable oil works wonderfully. I’ve also tested this with almond milk instead of regular milk in the glaze, and it actually made it even creamier! For baking, always use the middle rack in your oven for even heat distribution. If your oven tends to run hot, a quick check with a toothpick around the 50-minute mark is a good idea. For glaze variations, if you don’t want to make a glaze, a simple dusting of powdered sugar is lovely, or you can even drizzle melted chocolate over the top. Trust me on these tips – they’ve saved me from many a baking mishap!
Storing and Reheating Tips
This zucchini bread is delightful for days, making it a great make-ahead treat. If you’re planning to eat it within two or three days, storing it at room temperature is perfectly fine. Just wrap it tightly in plastic wrap or place it in an airtight container. This keeps it wonderfully moist. If you think it will take longer than three days to disappear (which, let’s be honest, is rare in my house!), pop it in the refrigerator. It will last for about a week this way. To reheat, you can pop a slice in the microwave for about 15-20 seconds, or warm it gently in a toaster oven. For longer storage, freezing is an excellent option. Wrap the completely cooled loaf (or individual slices) tightly in plastic wrap, then in aluminum foil, or place in a freezer bag. It should last for up to three months. To thaw, simply leave it at room temperature for a few hours or overnight. For the glaze, I always recommend adding it *after* the bread has completely cooled and *before* storing if you’re eating it within a day or two. If you’re freezing it, it’s best to add the glaze after thawing to prevent it from getting sticky in the freezer.
Frequently Asked Questions
Final Thoughts
Honestly, this zucchini bread recipe is more than just a recipe to me; it’s a little bit of kitchen magic. It’s proof that you can create something incredibly delicious and comforting with humble ingredients. It’s the perfect balance of sweet, moist, and wonderfully spiced, and the fact that it uses up zucchini you might otherwise let go to waste is just a bonus! If you love this recipe, you might also enjoy my Moist Banana Bread Recipe or my Easy Blueberry Muffin Recipe – they share that same “comfort bake” vibe. I really hope you give this zucchini bread a try. It’s a recipe that’s brought so much joy to my table, and I’m confident it will do the same for yours. I can’t wait to hear how yours turns out in the comments below! Happy baking!
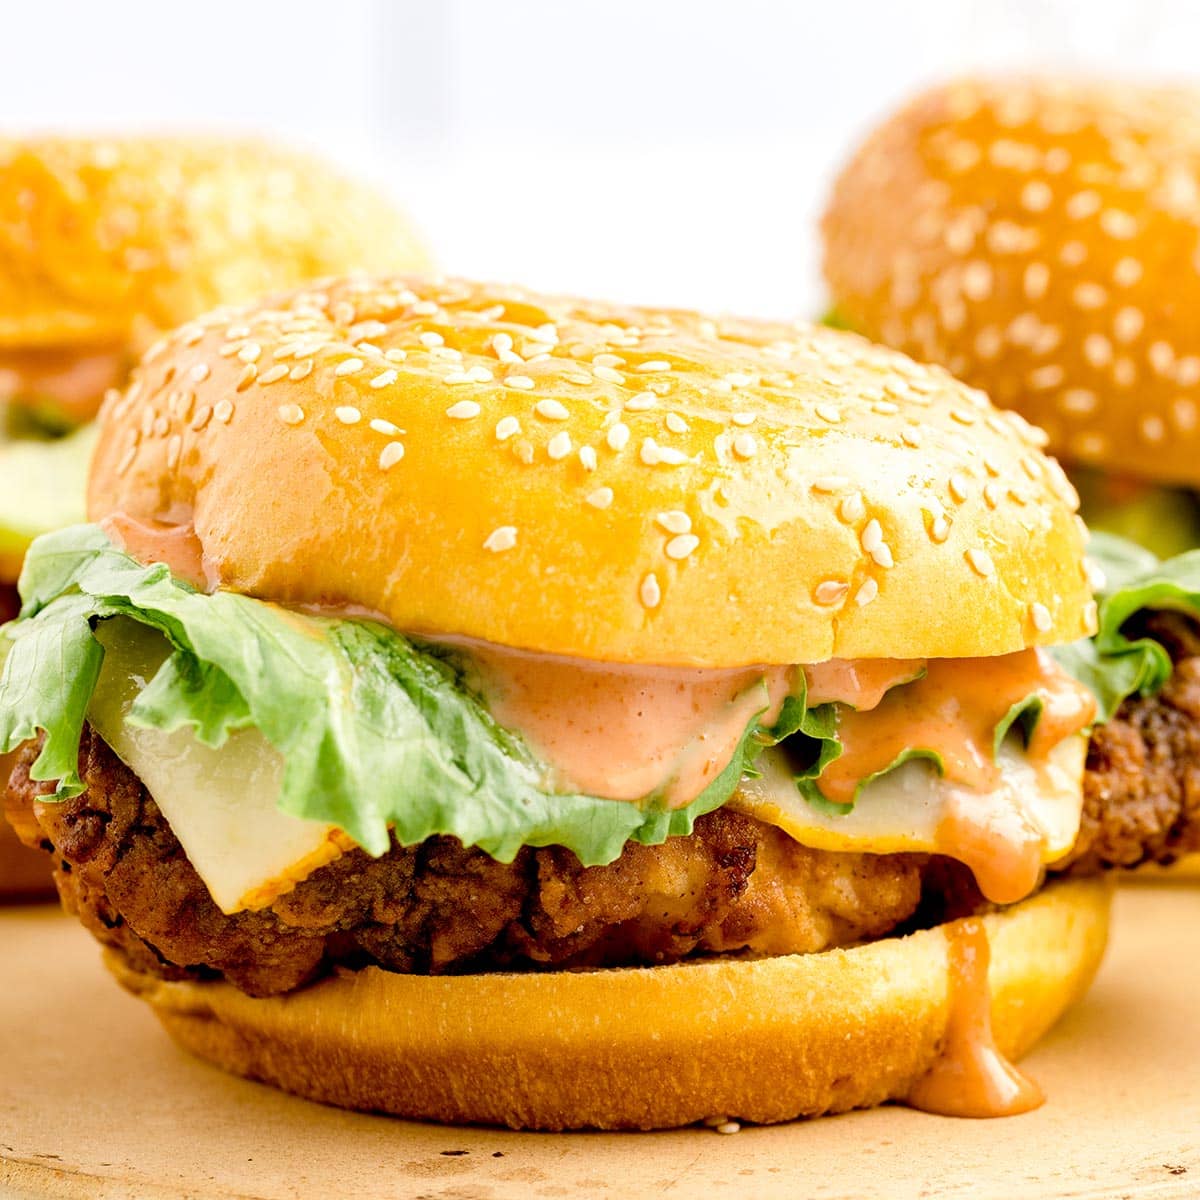
zinger chicken burger recipe
Ingredients
Method
- Add the buttermilk, hot sauce, kosher salt, and white pepper to a small mixing bowl. Whisk the marinade to combine.
- Place the chicken in either a sealable container or a gallon-size ziplock bag. Pour the marinade over the chicken. If using a container, turn the chicken over to completely coat. If using the ziplock, tightly seal the bag and 'massage' the chicken to completely coat. Place in the refrigerator for at least 4 hours or overnight.
- Add the mayonnaise, ketchup, and sriracha to a small bowl. Whisk to completely incorporate. Cover and chill in the refrigerator until ready for garnishing the sandwiches.
- Just before frying the chicken, add the self-rising flour, onion powder, kosher salt, white pepper, paprika, and cayenne pepper to a shallow bowl or baking dish. Whisk to combine and set aside.
- Add the oil to a 4-5 quart stock pot. Heat the oil over medium-high to high heat. Use a candy/deep frying thermometer to monitor the temperature. Heat the oil to 330-350°F (340°F seems to be the sweet spot).
- Just before the oil reaches 325°F, remove 1 piece of chicken at a time from the marinade. Allow some of the marinade to drip off. Dredge the coated chicken in the flour mixture, ensuring it's fully coated.
- Immediately add the coated chicken to the heated oil. You should be able to cook 2 pieces of chicken at a time. Keep a close eye on the temperature, adjusting the stovetop temp up and down to keep the oil at the appropriate temperature (the oil temp will fluctuate when you add the chicken). Fry the chicken for 5-7 minutes per side.
- Once the chicken is a deep golden brown and the internal temperature reaches 165°F, remove the chicken to a baking dish lined with paper towels. Repeat the steps for the remaining 2 pieces of chicken.
- While the 1st batch of chicken is draining, lay 2 slices of Muenster cheese over the hot chicken.
- Once all the chicken pieces have been cooked and cheese has been added, spread the Zinger sauce on the top bun. Place the chicken on the bottom bun and top with iceberg lettuce. Top with the bun and serve immediately.