Whiskey Fudge Cake Heavenly Layers
You know those days? The ones where the kitchen calls to you, but you’re secretly hoping for something that doesn’t involve a two-hour commitment and a mountain of dishes? Yeah, those are my favorite days for THIS zucchini bread. Seriously, it’s the recipe I pull out when I need a guaranteed win, something that smells like pure comfort and tastes like a little slice of heaven. My kids? They inhale it. My neighbors rave about it. And the best part? It’s ridiculously easy, uses up that garden zucchini that’s threatening to take over your counter, and it’s so wonderfully moist, you’d swear it was packed with butter and sugar. If you’ve ever made a dry, crumbly quick bread and felt that pang of disappointment, this is your antidote. This isn’t just any zucchini bread; it’s the one that will make you a believer.
What Is This Magical Zucchini Bread?
Okay, so the name says “zucchini bread,” and yes, zucchini is the star ingredient. But don’t let that fool you into thinking it tastes like a vegetable! Think of it as a supremely moist, subtly sweet, incredibly tender loaf cake that just happens to have a secret superfood. It’s essentially a wonderfully forgiving quick bread that uses the moisture from the grated zucchini to create an almost impossibly tender crumb. It’s not dense or heavy like some zucchini breads can be; it’s light, airy, and just melts in your mouth. The “magic” comes from a few simple tricks I’ve picked up over the years, ensuring it’s always a success. It’s the kind of baked good that feels both wholesome and decadent, all at once.
Why you’
Honestly, where do I even begin? First off, the flavor is just divine. It’s warm, slightly spiced (but not overwhelmingly so!), and the subtle sweetness is absolutely perfect. It’s like a hug in bread form. Then there’s the texture – oh, the texture! It’s unbelievably moist, thanks to that star zucchini ingredient, and incredibly tender. You will never, ever find a dry bite in this loaf. I’ve made it with both regular all-purpose flour and a gluten-free blend, and it’s fantastic either way, which is a huge win in my book.
Beyond the taste and texture, it’s incredibly simple to whip up. We’re talking minimal fuss, minimal bowls, and a process so straightforward that even if you’re new to baking, you’ll nail it. I often make this on a Tuesday afternoon when I realize we have no snacks for the next day. It’s my lifesaver! And let’s talk cost-efficiency. Zucchini is usually super affordable, especially when it’s in season, and the other ingredients are pantry staples. This is a recipe that doesn’t break the bank but delivers major deliciousness.
What I love most, though, is its versatility. It’s not just for breakfast! It’s perfect as an afternoon pick-me-up with a cup of tea, a lovely addition to a weekend brunch spread, or even a light dessert with a dollop of whipped cream. If you’re a fan of banana bread, you’ll adore this. It has that same comforting, homey vibe, but with a unique twist. Trust me, once you try this, it’ll become your go-to zucchini bread recipe too.
How to Make This Incredible Zucchini Bread
Quick Overview
This recipe is all about simplicity and maximum flavor payoff. We’ll be combining dry ingredients in one bowl, wet in another, then bringing them together without overmixing. The grated zucchini gets folded in, creating that signature moistness. After a brief bake in a prepared loaf pan, we’ll finish it off with a simple, sweet glaze. The whole process, from start to finish, takes about an hour, with most of that being hands-off baking time. It’s designed to be foolproof, so don’t stress about it!
Ingredients
For the Main Batter:
Here’s where we build that tender, flavorful base. I always try to use medium-sized zucchini for this – they have the best moisture-to-seed ratio, in my opinion. Make sure they’re fresh and firm! You’ll need about 2 cups, finely grated. Don’t pack it down when you measure; just scoop it into your measuring cup.
- 2 cups all-purpose flour (or a 1:1 gluten-free baking blend)
- 1 teaspoon baking soda
- ½ teaspoon baking powder
- ½ teaspoon salt
- 1 teaspoon ground cinnamon
- ¼ teaspoon ground nutmeg (optional, but highly recommended!)
- ¾ cup granulated sugar
- ¼ cup packed light brown sugar
- 2 large eggs, at room temperature
- ½ cup neutral-flavored oil (like vegetable or canola)
- ¼ cup unsweetened applesauce (this is a secret weapon for moisture!)
- 1 teaspoon vanilla extract
- 2 cups finely grated zucchini (about 2 medium zucchini)
For the Filling (Optional, but SO good!):
This is where you can really play! I usually go for a simple cinnamon-sugar swirl, but chocolate chips are always a hit, especially with the kiddos. Or maybe some chopped walnuts for a bit of crunch? You do you!
- 2 tablespoons granulated sugar
- 1 teaspoon ground cinnamon
- ½ cup chopped walnuts or pecans (optional)
- ½ cup chocolate chips (optional)
For the Glaze:
This glaze is super simple and ties everything together beautifully. It’s not too sweet, just the perfect hint of sugary goodness. I like to make sure it’s pourable but not watery – think the consistency of thin honey.
- 1 cup powdered sugar
- 2-3 tablespoons milk (or almond milk for extra creaminess!)
- ½ teaspoon vanilla extract
Step-by-Step Instructions
Step 1: Preheat & Prep Pan
First things first, get that oven preheating to 350°F (175°C). This is crucial for an even bake. While it’s heating up, grease and flour a standard 9×5 inch loaf pan. I usually use butter or non-stick baking spray, then a light dusting of flour. You can also line it with parchment paper for extra insurance against sticking – that’s my favorite trick. Make sure the parchment hangs over the sides a bit so you can easily lift the bread out later.
Step 2: Mix Dry Ingredients
Grab a medium-sized mixing bowl. Sift in your flour, baking soda, baking powder, salt, cinnamon, and nutmeg (if you’re using it). Give it a good whisk. Whisking helps to evenly distribute all the leavening agents and spices, ensuring every bite is just as delicious as the last. This step is super important for a good rise and uniform flavor.
Step 3: Mix Wet Ingredients
In a larger bowl, whisk together the granulated sugar and brown sugar until they’re combined. Then, add in the eggs, one at a time, beating well after each addition. Pour in your oil, applesauce, and vanilla extract. Whisk everything together until it’s smooth and well combined. The applesauce might seem a little odd, but trust me, it’s a game-changer for moisture!
Step 4: Combine
Now, pour the dry ingredients into the wet ingredients. Gently fold them together using a spatula or wooden spoon until *just* combined. It’s really important not to overmix here! A few streaks of flour are perfectly fine at this stage. Overmixing develops the gluten too much, which can lead to a tough loaf, and we definitely don’t want that. Once it’s mostly mixed, gently fold in your grated zucchini until it’s evenly distributed.
Step 5: Prepare Filling
If you’re adding a swirl, mix the 2 tablespoons of sugar and 1 teaspoon of cinnamon together in a small bowl. If you’re adding nuts or chocolate chips, have them ready. This part is super quick.
Step 6: Layer & Swirl
Pour about half of the batter into your prepared loaf pan. If you’re using a swirl, sprinkle half of your cinnamon-sugar mixture (or chocolate chips/nuts) evenly over the batter. Then, carefully spoon the remaining batter on top, spreading it gently to cover. Sprinkle the rest of your chosen filling over the top. If you’re doing a cinnamon swirl, you can take a knife and gently swirl it through the batter. Don’t overdo it, just a few passes will create beautiful ribbons of flavor.
Step 7: Bake
Pop that loaf pan into your preheated oven. Bake for 50-65 minutes. Now, ovens can be a bit finicky, so keep an eye on it. The best way to tell if it’s done is to insert a toothpick or a thin knife into the center. If it comes out clean (or with a few moist crumbs attached, but no wet batter), it’s ready. If it’s still wet, give it another 5-10 minutes and check again. I usually place my loaf pan on the middle rack for the most even cooking.
Step 8: Cool & Glaze
Once it’s baked, take the loaf out of the oven and let it cool in the pan for about 10-15 minutes. This is important! It allows the bread to set up a bit more. Then, carefully invert it onto a wire rack to cool completely. Once it’s fully cooled (and I mean *fully* cooled, otherwise the glaze will melt off!), whisk together the powdered sugar, 2 tablespoons of milk, and vanilla extract for the glaze. Add more milk, a teaspoon at a time, until you reach your desired pouring consistency. Drizzle it over the top of the cooled loaf. Let the glaze set for about 15-20 minutes before slicing.
Step 9: Slice & Serve
Now for the best part! Use a sharp serrated knife to slice the bread. The clean cuts will make it look so pretty. This bread is absolutely delicious served at room temperature, especially with that lovely glaze. It’s perfect on its own, or you can serve it with a smear of cream cheese or butter if you’re feeling extra indulgent. Enjoy every single moist, delicious bite!
What to Serve It With
This zucchini bread is incredibly versatile, making it a perfect addition to any meal or snack time. For breakfast, it’s simply divine alongside a hot cup of coffee or a steaming mug of tea. I love having a slice with my morning coffee before the rush of the day begins. It feels like a treat without being too heavy. The subtle sweetness is just enough to perk you up!
When it comes to brunch, this bread is a star. It’s elegant enough to impress guests, yet so easy to make. I often serve it on a nice platter, maybe with a few fresh berries on the side for a pop of color. A glass of fresh orange juice or even a mimosa pairs beautifully. It’s always the first thing to disappear!
As a dessert, it’s a lighter option than a rich cake but still incredibly satisfying. A warm slice with a small scoop of vanilla bean ice cream is absolute heaven. Or, for a slightly more refined touch, a light dusting of powdered sugar instead of the glaze can look lovely. It’s also fantastic with a rich hot chocolate on a chilly evening.
And for those cozy snack moments? This bread is my absolute go-to. It’s perfect for an afternoon slump or a late-night craving. I’ll often just grab a slice while I’m catching up on a book or watching a movie. It’s comforting, familiar, and always hits the spot. Honestly, my family traditions often revolve around this bread – it’s appeared at countless birthday breakfasts, holiday gatherings, and just plain old Tuesday afternoons. It’s become a staple in our home, and I have a feeling it will in yours too!
Top Tips for Perfecting Your Zucchini Bread
Over the years, I’ve learned a few little tricks that take this zucchini bread from good to absolutely phenomenal. These are the tips I swear by:
Zucchini Prep: The most crucial step is getting the zucchini ready. You want to grate it using the fine side of a box grater or a food processor with a fine shredding disk. After grating, I *always* give it a gentle squeeze in my hands or wrap it in a clean kitchen towel and wring out the excess moisture. This step is non-negotiable! Too much water can make the bread gummy. Don’t worry about squeezing out all the liquid; just enough to prevent a soggy loaf. Fresh zucchini is always best; avoid any that looks old or soft.
Mixing Advice: Remember that “just combined” rule? It’s gold! When you add the dry ingredients to the wet, mix only until you don’t see large streaks of dry flour anymore. A few small lumps are fine. Overmixing is the quickest way to a tough, dense bread. I use a spatula and a gentle folding motion. It’s better to slightly undermix than overmix, I promise!
Swirl Customization: For that beautiful marbled effect, don’t go crazy with the swirling. Just a few gentle passes with a knife or skewer will do the trick. You want distinct ribbons, not a muddy mess. For chocolate chips or nuts, just make sure they are evenly distributed within the batter, especially when you add the second half of the batter.
Ingredient Swaps: I’ve experimented with a few things! If you don’t have applesauce, unsweetened Greek yogurt or even mashed banana can work in a pinch, though applesauce gives the best neutral moisture. For the oil, I’ve used melted coconut oil (about ½ cup) and it adds a lovely subtle flavor. For the sugars, you can reduce the granulated sugar slightly if you prefer it less sweet, but don’t go too low, as sugar contributes to moisture and tenderness. If you’re using a gluten-free blend, make sure it’s a good quality one that contains xanthan gum.
Baking Tips: Always use the middle rack of your oven for even heat distribution. If you notice the top is browning too quickly before the inside is cooked, you can loosely tent it with aluminum foil. And that toothpick test is your best friend! Don’t be afraid to give it a few extra minutes if needed. Every oven is a little different.
Glaze Variations: If you’re not a fan of the powdered sugar glaze, you can skip it entirely. The bread is delicious on its own. Alternatively, a simple dusting of powdered sugar through a sieve looks elegant. You could also add a tiny bit of lemon zest to the glaze for a bright, fresh flavor, or even a touch of maple extract instead of vanilla. Just play with the milk-to-sugar ratio until it’s perfect for you!
Storing and Reheating Tips
One of the best things about this zucchini bread is how well it stores. It stays wonderfully moist for several days, making it perfect for meal prep or just having on hand for unexpected cravings.
Room Temperature: Once the bread is completely cool and the glaze has set, you can store it at room temperature. I usually keep it in an airtight container or wrapped tightly in plastic wrap. It will stay fresh and moist for about 3-4 days this way. Just make sure it’s not in direct sunlight or a warm spot, as that can affect its texture.
Refrigerator Storage: If you live in a very warm or humid climate, or if you want it to last a bit longer, you can store it in the refrigerator. Wrap it tightly in plastic wrap, then place it in an airtight container. It should keep well for up to a week. I find that the texture is best when brought back to room temperature before serving, so just let it sit out for about 15-20 minutes after taking it out of the fridge.
Freezer Instructions: This bread freezes beautifully! If you plan to freeze it, I highly recommend freezing it *before* you add the glaze. Once the loaf is completely cooled, wrap it very tightly in plastic wrap, then in aluminum foil, or place it in a freezer-safe airtight container. It can be stored in the freezer for up to 3 months. To thaw, unwrap it and let it sit at room temperature for several hours, or overnight. You can also gently warm slices in the oven or a toaster oven.
Glaze Timing Advice: If you’re storing the bread at room temperature or in the fridge for a few days, add the glaze just before serving or the day you plan to eat it. If you’re freezing the bread, definitely wait to add the glaze until *after* it’s thawed. If you must glaze before freezing, be aware that condensation can form, potentially making the glaze a bit sticky.
Frequently Asked Questions
Final Thoughts
So there you have it – my absolute favorite, go-to moist zucchini bread recipe. It’s the one that’s saved me on countless busy afternoons and always brings smiles to faces. What I love most is that it truly is as easy as it looks, and the results are consistently spectacular. It’s proof that you don’t need complicated techniques or fancy ingredients to bake something truly wonderful. The combination of tender texture, comforting spice, and that gorgeous subtle sweetness makes it utterly irresistible.
If you’re looking for other easy, delicious quick bread recipes, you might also love my Banana Bread Bliss or my Lemon Poppy Seed Loaf. They have that same comforting, homemade feel that’s perfect for any occasion.
I truly hope you give this zucchini bread a try. Let me know in the comments below how yours turns out, what variations you try, or any fun memories you have associated with zucchini bread! I can’t wait to hear all about it. Happy baking, friends!
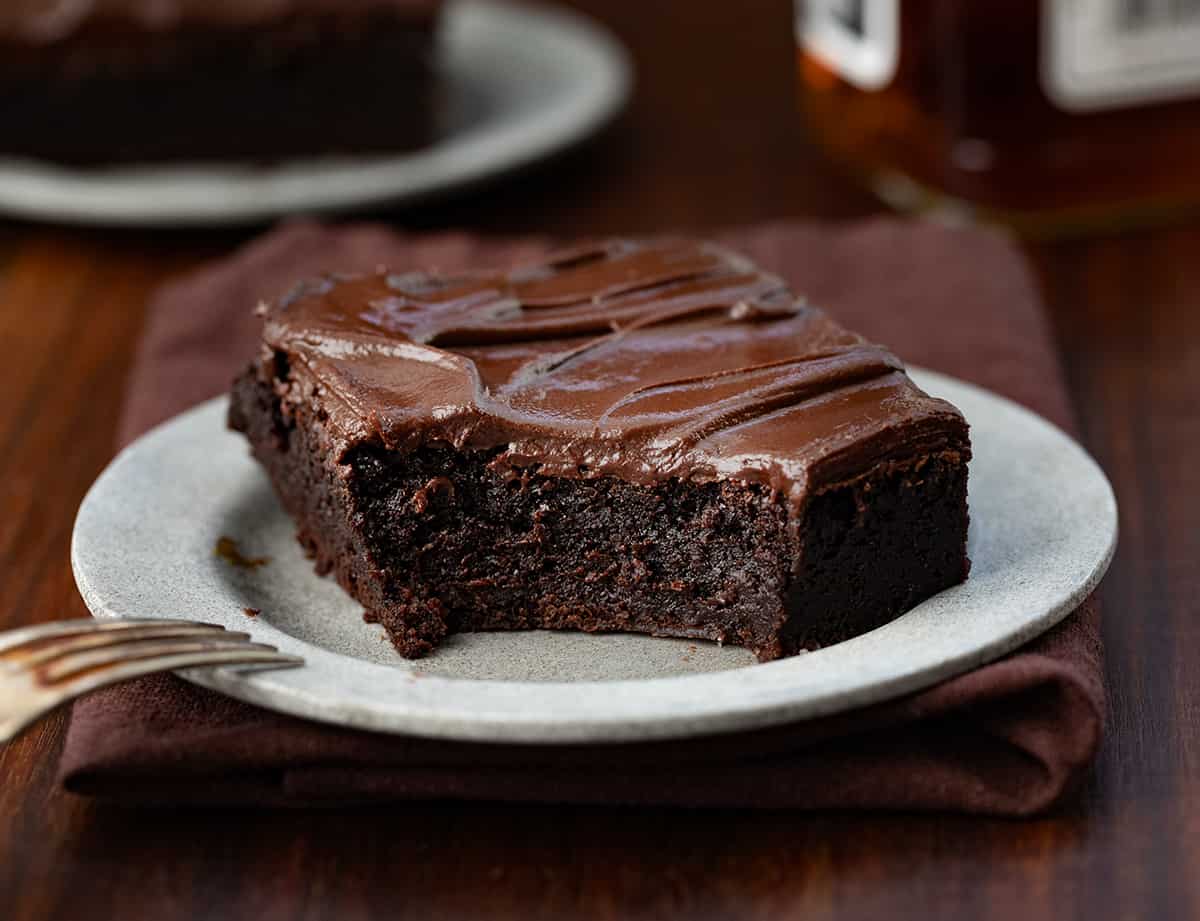
whiskey fudge cake
Ingredients
Method
- Preheat the oven to 325°F (160°C) and spray a 9x13-inch metal baking dish with nonstick cooking spray. Set aside.
- To a medium, microwave-safe bowl, add the milk chocolate chips. Microwave in 30-second intervals, stirring in between, until the chips are melted and smooth. Set aside to cool slightly while you prepare the dry ingredients.
- In a medium bowl, whisk together the all-purpose flour, Dutch-processed cocoa powder, kosher salt, and baking soda. Set aside.
- To the bowl of a stand mixer with a paddle attachment, add the eggs and granulated sugar. Mix at medium speed until light and fluffy, about 5 minutes.
- With the mixer on low, add the melted chocolate, vegetable oil, water, and whiskey. Mix until smooth.
- Gradually add the dry ingredients to the wet ingredients, mixing until no lumps remain.
- Pour the batter into the prepared pan. Bake for 46-48 minutes, or until a toothpick inserted into the center of the cake comes out with a few crumbs, but no wet batter.
- While the cake is cooling, make the ganache.
- To a small saucepan over low heat, add the semi-sweet chocolate chips, heavy cream, and whiskey. Stir until all the chocolate chips have melted and the mixture is smooth. Remove from heat.
- Allow the ganache to cool for about 5 minutes before pouring it over the cake. This will help it thicken slightly and ensure a smooth, even coating.