Tuscan Chicken Balls Easy Dinner Recipe
Oh my goodness, I’m so excited to finally share this recipe with you! This isn’t just any zucchini bread; it’s the one that smells like childhood summers and feels like a warm hug on a chilly afternoon. It’s the recipe I’ve made hundreds of times, tweaking it just so, until it reached pure, unadulterated perfection. My family devours it every single time, and honestly, it’s become our unofficial “welcome home” treat after a long day. It’s surprisingly simple, yet yields a flavor so rich and comforting, it’s often compared to a decadent chocolate cake but with that lovely, moist texture only zucchini can provide. If you’ve ever felt intimidated by baking, or just crave something truly special without a whole lot of fuss, then you are in for a treat. This is my absolute favorite way to use up those garden zucchini, and let me tell you, it’s a lifesaver on busy weeknights when everyone suddenly needs a sweet something. We’re talking about a moist, tender loaf with a luscious, secretly swirled center that’s just divine. It’s the kind of baked good that makes your kitchen smell incredible and instantly lifts everyone’s spirits. Trust me, you’re going to want to bookmark this one!
What is the best Zucchini bread?
So, what exactly makes this zucchini bread *my* ultimate comfort bake? Well, it’s a classic quick bread at its heart, meaning it relies on chemical leaveners like baking soda and baking powder instead of yeast, which makes it super fast to whip up. But it’s the addition of shredded zucchini that’s the real magic here. Don’t worry, you won’t taste the zucchini itself – it’s not like eating a vegetable! Instead, it lends an unparalleled moisture and tenderness to the loaf, making it incredibly forgiving and almost impossible to dry out. The “secret swirl” is my personal touch, a ribbon of spiced, slightly sweet goodness that adds an extra layer of flavor and visual appeal. Think of it as a delightful surprise waiting in every slice. It’s essentially a more exciting, deeply satisfying version of your grandma’s zucchini bread, elevated just enough to feel special, but still wonderfully down-to-earth. It’s the kind of recipe that brings joy, pure and simple, and I can’t wait for you to experience it.
Why you’ll love this recipe?
What is the best zucchini bread recipe?flavor is just out of this world. It’s perfectly spiced – cinnamon and a hint of nutmeg dance together beautifully – with a deep, comforting sweetness that’s never cloying. The zucchini keeps it incredibly moist and tender, giving it a melt-in-your-mouth quality that’s addictive. And the swirl? Oh, the swirl adds that extra punch of flavor that makes people ask, “What *is* that amazing flavor in the middle?” It’s a little bit of decadence hidden within.
What is the second category?simplicity. Seriously, you don’t need any fancy equipment or advanced baking skills. If you can stir ingredients together, you can make this bread. It’s the perfect weekend baking project or even a weeknight endeavor when that sweet craving hits. I’ve whipped this up countless times when I’ve had unexpected guests drop by, and it always feels impressive without the stress.
And let’s talk cost-efficiency! Zucchini is often super affordable, especially when it’s in season, and the rest of the ingredients are pantry staples. This recipe delivers big on taste and satisfaction without breaking the bank. It’s a budget-friendly way to create something truly delicious and comforting.
The versatility is another huge plus. While it’s absolutely divine on its own, you can easily customize it. Add chocolate chips, walnuts, or pecans for extra texture and flavor. Serve it warm with a smear of butter, or let it cool completely and drizzle it with a simple glaze. It’s perfect for breakfast, a delightful afternoon snack, or even a light dessert. It’s honestly one of my favorite things to bring to potlucks because it’s universally loved. What I love most about this recipe is that it feels like a labor of love, but it’s surprisingly low-effort. It’s the perfect balance of impressive and easy, and that’s exactly what I look for in a go-to baking recipe. It’s even better than some of those fancy bakery loaves, in my humble opinion!
How to Make My Ultimate Comfort Zucchini Bread
Quick Overview
This recipe is all about creating a tender, moist zucchini base and then swirling in a warm, spiced filling for an extra burst of flavor. You’ll start by combining your dry and wet ingredients separately, then gently mix them together, fold in the grated zucchini, and finally, spoon in the filling and create beautiful swirls before baking. The whole process from start to finish, including prep and baking, is remarkably straightforward, making it perfect for any skill level. It’s a one-bowl wonder for the batter, which always makes clean-up a breeze!
Ingredients
For the Main Batter:
2 cups all-purpose flour: I always use unbleached all-purpose flour for the best texture. Make sure to spoon and level your flour rather than scooping directly from the bag to avoid a dense loaf.
1 teaspoon baking soda: This helps give the bread its lift and tender crumb.
1/2 teaspoon baking powder: A little extra insurance for that perfect rise.
1 teaspoon ground cinnamon: The heart of our warm spice blend. Don’t skimp on this!
1/4 teaspoon ground nutmeg: Just a whisper to complement the cinnamon and add depth.
1/2 teaspoon salt: Balances the sweetness and enhances all the other flavors.
1 1/2 cups granulated sugar: You can reduce this slightly if you prefer, but this amount gives it that perfect sweet balance.
2 large eggs: Room temperature eggs incorporate better, so take them out a little before you start.
1 cup vegetable oil: Or any neutral-flavored oil like canola or grapeseed oil. This is key for moisture!
1 teaspoon vanilla extract: Pure vanilla extract makes a world of difference.
2 cups grated zucchini (about 2 medium zucchinis): This is the star! I always use fresh zucchini, and it’s best to grate it using the larger holes of a box grater. You don’t need to peel it, but you do need to squeeze out as much excess moisture as you can.
For the Filling:
1/2 cup packed light brown sugar: The brown sugar adds a wonderful caramel note that plays beautifully with the spices.
1 teaspoon ground cinnamon: More cinnamon goodness!
1/2 teaspoon ground ginger (optional, but so good!): Adds a little zing.
1/4 cup chopped walnuts or pecans (optional): For a delightful crunch.
For the Glaze (Optional, but highly recommended!):
1 cup powdered sugar: Sifted to ensure a smooth glaze.
2-3 tablespoons milk or heavy cream: You can also use buttermilk or even a bit of orange juice for a citrusy twist!
1/2 teaspoon vanilla extract: Just for that extra little hint of flavor.
Step-by-Step Instructions
Step 1: Preheat & Prep Pan
First things first, preheat your oven to 350 degrees Fahrenheit (175 degrees Celsius). Grab a standard 9×5 inch loaf pan and grease it really well with butter or cooking spray. Then, dust it lightly with flour, tapping out any excess. This ensures your beautiful loaf won’t stick. I always find a good grease and flour is the best insurance policy for a clean release!
Step 2: Mix Dry Ingredients
In a large bowl, whisk together the all-purpose flour, baking soda, baking powder, cinnamon, nutmeg, and salt. Make sure everything is well combined so your leavening agents are evenly distributed. This is the foundation for a perfectly risen loaf!
Step 3: Mix Wet Ingredients
In a separate medium bowl, whisk together the granulated sugar, eggs, vegetable oil, and vanilla extract until everything is nice and smooth. This combination will make the batter incredibly moist and tender.
Step 4: Combine
Pour the wet ingredients into the dry ingredients. Stir gently with a spatula or wooden spoon until just combined. Don’t overmix here! A few streaks of flour are totally okay. Overmixing can lead to a tough bread, and we definitely don’t want that. Now, gently fold in your grated and squeezed zucchini until it’s evenly distributed throughout the batter.
Step 5: Prepare Filling
In a small bowl, combine the brown sugar, cinnamon, and ginger (if using). If you’re adding nuts, stir them in now. This simple mixture is what creates that wonderful spiced ribbon throughout the bread.
Step 6: Layer & Swirl
Spoon about half of the zucchini batter into your prepared loaf pan, spreading it out evenly. Sprinkle half of the brown sugar filling mixture over the top. Then, spoon the remaining batter over the filling, and top with the rest of the filling mixture. Now comes the fun part! Take a knife or a skewer and gently swirl the filling into the batter. You don’t want to mix it all in, just create nice ribbons. I like to make a few back-and-forth motions, but don’t overdo it – we want distinct layers!
Step 7: Bake
Place the loaf pan in the preheated oven and bake for 50-65 minutes. The exact time will depend on your oven, but you’ll know it’s done when a wooden skewer or toothpick inserted into the center comes out clean. If the top starts to brown too quickly, you can loosely tent it with aluminum foil for the last 15-20 minutes of baking.
Step 8: Cool & Glaze
Once baked, let the bread cool in the pan for about 10-15 minutes before carefully inverting it onto a wire rack to cool completely. This is super important – if you try to glaze it while it’s still warm, the glaze will just melt away! Once it’s completely cool, whisk together the powdered sugar, milk (start with 2 tablespoons and add more until you reach your desired drizzling consistency), and vanilla extract. Drizzle this glorious glaze over the top of the cooled loaf.
Step 9: Slice & Serve
Once the glaze has set a bit, slice into thick, comforting pieces. This bread is absolutely divine served at room temperature. Enjoy every bite!
What to Serve It With
This zucchini bread is so versatile, it can truly be enjoyed at any time of day and for any occasion! For a simple, satisfying breakfast, a thick slice toasted and slathered with butter is pure bliss. It pairs wonderfully with a hot cup of coffee or a glass of milk. If you’re planning a leisurely brunch, elevate it by serving it with a dollop of fresh whipped cream or a light Greek yogurt. It looks beautiful on a platter alongside fresh fruit like berries or sliced peaches.
As a dessert, it’s surprisingly elegant. A warm slice with a scoop of vanilla bean ice cream is simply heavenly. The spices in the bread complement the creaminess of the ice cream perfectly. For those times when you just need a little something sweet, this bread is ideal for cozy snacks. It’s comforting and delicious all on its own, making it the perfect accompaniment to a good book and a cup of tea. My family tradition is to have a slice with a big glass of cold milk after dinner, especially on movie nights. It’s always a hit!
Top Tips for Perfecting Your Zucchini Bread
After making this countless times, I’ve picked up a few tricks that really make a difference. Here are my top tips to ensure your zucchini bread turns out absolutely perfect every single time:
Zucchini Prep: This is CRUCIAL! Grate your zucchini using the large holes of a box grater. After grating, take a handful (or several handfuls!) and squeeze out as much excess water as humanly possible. You can use your hands, or I find a clean kitchen towel or cheesecloth works wonders. The drier the zucchini, the more moist your bread will be without becoming heavy or soggy. Don’t skip this step; it’s a game-changer!
Mixing Advice: Remember, with quick breads, *gentle* mixing is key. Mix the wet and dry ingredients until they are *just* combined. A few flour streaks are fine; they’ll disappear as you fold in the zucchini. Overmixing develops gluten, which can make your bread tough and dense. We’re aiming for tender and light!
Swirl Customization: Don’t be afraid to play with the swirl! For a more intricate pattern, you can use a toothpick to draw wavy lines through the filling and batter before baking. You can also adjust the amount of filling you use. If you’re a true cinnamon lover, feel free to add a little more to the filling, but be mindful not to add too much liquid if you were to add, say, applesauce. My kids love when I add a few chocolate chips to the swirl mixture too!
Ingredient Swaps: While this recipe is perfection as is, feel free to experiment! For a richer flavor, you can substitute half of the vegetable oil with melted butter. I’ve also tested this with almond milk instead of regular milk in the glaze, and it made it even creamier. If you don’t have allspice, a little extra cinnamon or a pinch of cardamom works beautifully. For added texture, chopped apples or even a handful of dried cranberries can be folded into the batter along with the zucchini.
Baking Tips: Ovens can be finicky, so trust your instincts (and the toothpick test!). If your loaf starts browning too quickly on top before the inside is cooked, loosely tent it with aluminum foil. This traps the heat and allows the center to cook through without burning the crust. I usually bake mine on the middle rack of the oven for even heat circulation.
Glaze Variations: The glaze is optional but adds such a lovely finish. For a richer glaze, use heavy cream. If you want a thinner glaze for a lighter drizzle, add a touch more milk or even a squeeze of lemon juice for a bright, fresh flavor. You can also skip the glaze altogether and simply dust the cooled loaf with powdered sugar for a more rustic look.
Storing and Reheating Tips
One of the best things about this zucchini bread is how well it keeps! It stays wonderfully moist and flavorful for days. Here’s how I like to store it:
Room Temperature: Once the bread has cooled completely and any glaze has set, I like to store it at room temperature. Wrap the loaf tightly in plastic wrap or place it in an airtight container. It will stay delicious and moist for about 3-4 days. This is my preferred method because I love having slices readily available for spontaneous snacking!
Refrigerator Storage: If you live in a very warm or humid climate, or if you want it to last a bit longer, storing it in the refrigerator is a great option. Wrap it tightly as you would for room temperature storage, but place it in an airtight container. It should stay good for up to a week. The texture might be slightly firmer when cold, but it thaws out beautifully.
Freezer Instructions: This bread freezes like a dream! You can freeze the whole loaf or individual slices. First, wrap the cooled loaf or slices very securely in plastic wrap, making sure there are no air pockets. Then, wrap it again in aluminum foil or place it in a freezer-safe bag. It will keep well in the freezer for up to 3 months. To thaw, simply unwrap it and let it come to room temperature on the counter, or gently warm individual slices in the toaster oven or microwave.
Glaze Timing Advice: For room temperature and refrigerator storage, I always glaze the bread *after* it’s completely cooled. If you plan to freeze the loaf with glaze, I would advise glazing it *after* thawing and bringing it back to room temperature to prevent the glaze from becoming sticky or clumpy in the freezer. Alternatively, you can freeze the plain bread and then make a fresh glaze to add once it’s thawed and ready to serve.
Frequently Asked Questions
Final Thoughts
Honestly, this zucchini bread is more than just a recipe to me; it’s a little slice of comfort and joy that I love to share. It’s that perfect balance of easy to make but impressive to serve, and the incredible moistness and flavor just never get old. The secret swirl is like a delightful surprise waiting in every bite, making it special enough for guests but comforting enough for a quiet afternoon treat. If you’re looking for a recipe that will reliably wow your friends and family, and fill your kitchen with the most wonderful aroma, then this is it!
I truly hope you give this recipe a try. It’s become a staple in my kitchen, and I’m so excited for it to become one in yours too. Don’t be shy about experimenting with add-ins like chocolate chips or nuts if you feel adventurous! I can’t wait to hear what you think, and I’d absolutely love to see your creations. If you make this, please leave a comment below and let me know how it turned out, or share your own favorite zucchini bread memories! Happy baking!
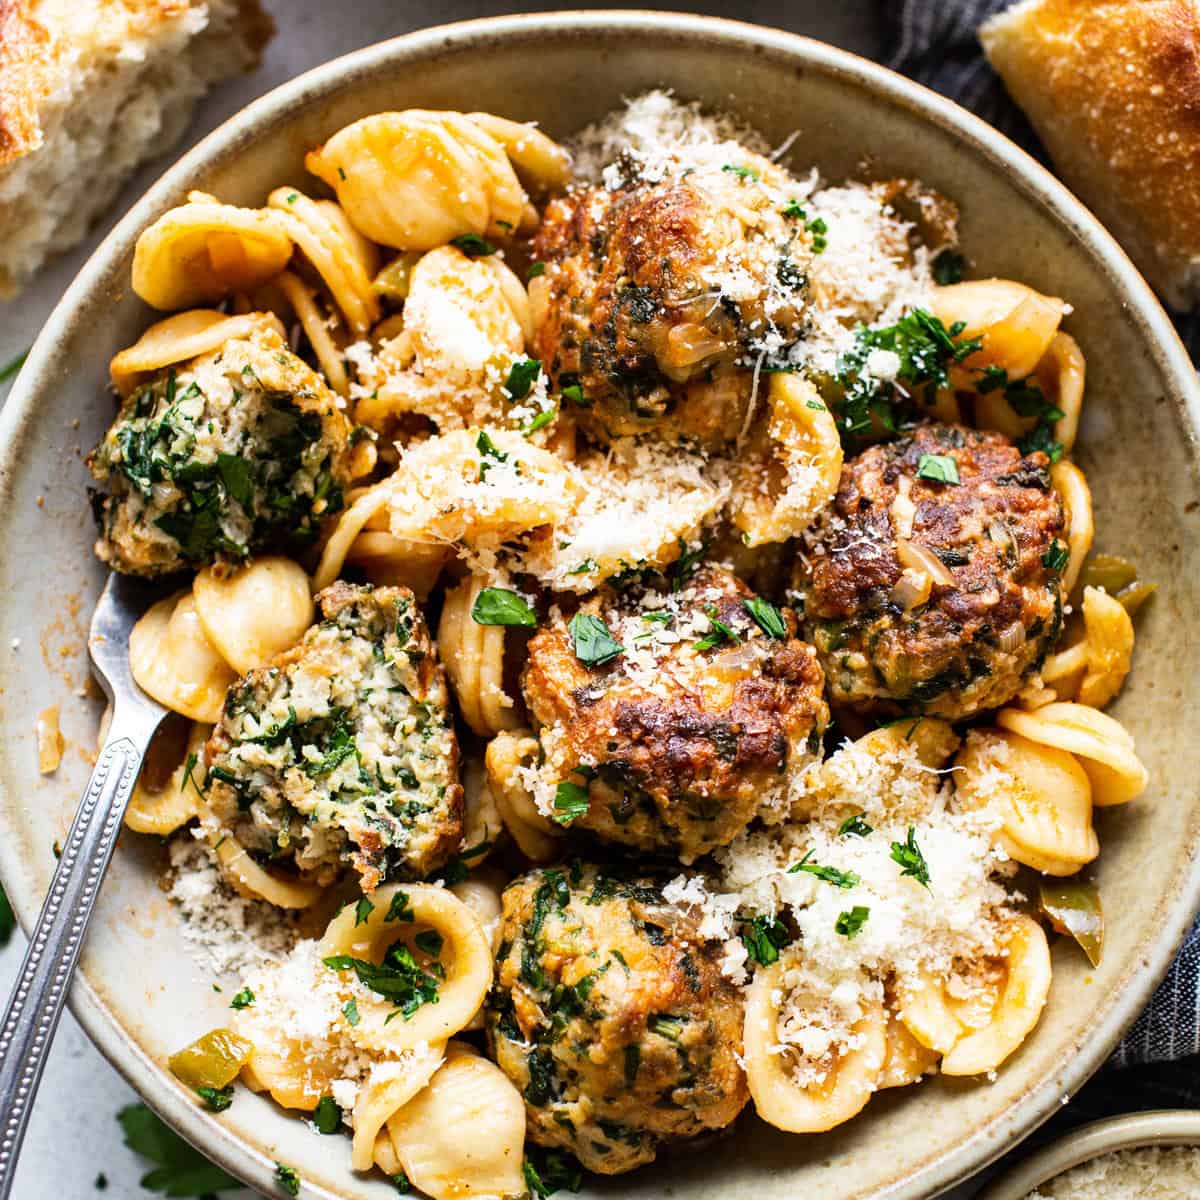
Tuscan chicken balls
Ingredients
Method
- First, cook the pasta. Bring a large Dutch oven full of salted water to a boil. Add pasta and cook until al dente. Set aside 2 cups of pasta water for later. Strain and rinse the noodles with water. Set aside.
- Add 2 tablespoons of the pasta water to the Dutch oven and add the spinach. Heat over medium heat and cover until the spinach is wilted. Strain excess water and transfer the spinach into a mixing bowl.
- Prepare the meatballs. Add 3 tablespoons of olive oil, egg, garlic, breadcrumbs, Italian seasoning, salt, and parsley to the spinach and mix until just combined with a spatula or hands. Do not overmix, it will cause the meatballs to be tough.
- Wet your hands and use a tablespoon and scoop a heaping tablespoon of the meat mixture into your hands and roll the meat into a ball. Transfer it to a plate. Repeat until all the mixture has been made into meatballs.
- Heat the remaining olive oil in the Dutch oven over medium/high heat. When the olive oil is fragrant, add the meatballs. Cook the meatballs for 1-2 minutes on each side until browned. Use tongs to gently move the meatballs so they don’t stick to the Dutch oven during the cooking time. This will take about 6 minutes. The meatballs will not be fully cooked. They will continue to cook in the sauce. Remove the meatballs from the pot.
- Turn the heat to medium and deglaze the pot with white wine. Scrape the brown bits from the bottom of the pot with a spatula.
- Heat the olive oil in the pot with the wine over medium/high heat. Add the onion and season with 0.25 teaspoon of salt. Saute for 3-4 minutes. Add the garlic and saute for an additional 1 minute or until fragrant.
- Add the green pepper and sauté for 2-3 minutes, and add the tomato paste and 1.5 cups of starchy pasta water to the pot. Whisk the tomato paste into the starchy water.
- Transfer the meatballs, remaining salt, and pepper to the pot and bring the sauce to a simmer over medium/high heat.
- Then, turn the heat to medium/low and simmer until it thickens to the desired consistency. If you would like a thinner sauce (or more sauce), add the remaining pasta water and simmer.
- When the internal temperature of the meatballs is 165ºF, gently toss the pasta with the sauce and meatballs. Heat until warmed through, and enjoy.