Spicy Ranch Pasta Salad Simple Recipe
Oh, you HAVE to try this zucchini bread! I know, I know, zucchini bread. Sounds a bit… health-nutty, right? But trust me on this one. This isn’t just *any* zucchini bread. This is *the* zucchini bread. The one that makes my whole family light up when they smell it baking. It’s got this perfect balance of moistness and spice, and you’d never guess the star ingredient is actually a vegetable that’s usually reserved for grilling! My Grandma used to make this for us every summer, and honestly, the smell alone brings me right back to her sun-drenched kitchen. It’s the kind of comforting, soul-warming bake that feels like a warm hug. Forget those dry, bland loaves you might have encountered; this one is a game-changer. It’s so good, people usually ask for the recipe before they even finish their first slice. It’s a real crowd-pleaser, and surprisingly simple to whip up, which is a lifesaver on those busy weeknights when everyone’s craving something sweet but you’re running on fumes.
What is Grandma’s Zucchini Bread?
So, what exactly *is* this magical zucchini bread? Think of it as the ultimate comfort bake, elevated. It’s essentially a quick bread, meaning there’s no fussy yeast or long proving times. It’s moist, tender, and packed with warm spices like cinnamon and nutmeg. The “secret” is, of course, the zucchini. But don’t let that fool you! When grated and baked into the batter, the zucchini doesn’t impart any overwhelming vegetable flavor. Instead, it works wonders, adding an incredible moistness and a subtle sweetness that makes the bread unbelievably tender. It’s like a moist vanilla cake met a spiced muffin and they decided to have a delicious baby. Grandma always called it her “happy bread” because it always made us happy. It’s the perfect example of how simple, humble ingredients can create something truly extraordinary when put together with a little bit of love.
Why you’ll love this recipe?
Honestly, where do I even begin with why this recipe is my absolute go-to? First off, the flavor is just out of this world. It’s perfectly spiced – not too much, not too little – with a delicate sweetness that’s never cloying. The texture is what truly sets it apart; it’s unbelievably moist and tender, thanks to that clever addition of zucchini. I’ve tried so many zucchini breads over the years, and most are either too dry or too dense, but this one hits that perfect sweet spot every single time. And the simplicity! This recipe is incredibly forgiving, making it perfect for even beginner bakers. I can whip this up in about 15 minutes of prep time, and then the oven does the rest of the magic. Plus, it’s super cost-effective. Zucchini is usually pretty inexpensive, especially when it’s in season, and the other ingredients are pantry staples. It’s also wonderfully versatile. You can toss in some chopped walnuts or pecans for a little crunch, or even some chocolate chips for an extra decadent treat. But honestly, even plain, it’s pure perfection. It’s the kind of recipe that makes you feel like a baking superhero without breaking a sweat. It’s a lifesaver when unexpected guests pop over, or when that 3 pm craving hits and you need something satisfying.
How do I make Zucchini bread?
Quick Overview
This recipe is all about ease and incredible flavor. You’ll start by whisking together your dry ingredients, then mixing your wet ingredients in a separate bowl. Combine them gently, fold in the grated zucchini, and pour into a prepared loaf pan. Bake until golden brown and a tester comes out clean. That’s it! The beauty of this recipe is its straightforward nature. It proves that you don’t need fancy techniques or complicated steps to create something truly delicious and memorable. It’s rustic, it’s comforting, and it’s guaranteed to be a hit.
Ingredients
For the Main Batter:
Here’s what you’ll need for the base of our delicious bread. The key here is to use fresh, good-quality ingredients. For the flour, all-purpose works perfectly, but I’ve also had success using a gluten-free blend if you need to avoid gluten – just make sure it’s a 1:1 baking blend! For the sugar, granulated is standard, but I sometimes use a mix of granulated and brown sugar for a deeper flavor. Unsalted butter is my preference because it gives you control over the saltiness, but you can use salted and just reduce the added salt a bit. And of course, the star: fresh zucchini! Make sure it’s not watery; a medium-sized zucchini is usually perfect.
- 2 cups all-purpose flour
- 1 teaspoon baking soda
- 1/2 teaspoon baking powder
- 1 teaspoon ground cinnamon
- 1/4 teaspoon ground nutmeg
- 1/2 teaspoon salt
- 1 cup granulated sugar (or 1/2 cup granulated + 1/2 cup packed brown sugar)
- 1/2 cup unsalted butter, softened
- 2 large eggs, at room temperature
- 1 teaspoon vanilla extract
- 1 cup grated zucchini (about 1 medium zucchini), squeezed of excess moisture
For the Filling (Optional, but highly recommended!):
This is where you can really customize it! My Grandma always added a simple cinnamon-sugar swirl, and it makes such a difference. It adds another layer of texture and flavor that’s just heavenly. You can also mix in chocolate chips, chopped nuts like walnuts or pecans, or even some dried cranberries. For the cinnamon-sugar swirl, it’s super easy: just mix sugar and cinnamon together. It’s that simple, but it adds so much!
- 1/2 cup chopped walnuts or pecans (optional)
- 1/2 cup chocolate chips (optional)
- For the Cinnamon-Sugar Swirl: 2 tablespoons granulated sugar + 1 teaspoon ground cinnamon, mixed
For the Glaze (Optional, but oh-so-good!):
I love a simple glaze to finish it off. It adds a little extra sweetness and makes it look so pretty. My go-to is a basic powdered sugar glaze, but you can get creative here too! A lemon glaze would be lovely, or even a cream cheese frosting if you’re feeling fancy. For the basic glaze, it’s just powdered sugar, a splash of milk (or almond milk for extra creaminess – I tested this and it was amazing!), and a touch of vanilla. Whisk it until it’s smooth and drizzly.
- 1 cup powdered sugar
- 2-3 tablespoons milk (or almond milk, or lemon juice for a tangier glaze)
- 1/2 teaspoon vanilla extract
Step-by-Step Instructions
Step 1: Preheat & Prep Pan
First things first, let’s get our oven all warmed up. Set it to 350°F (175°C). Now, grab your favorite 9×5 inch loaf pan. You’ll want to grease it really well, and then flour it. I like to use butter or cooking spray to grease it, then sprinkle in a tablespoon of flour and tilt the pan around until it’s all coated. Tap out any excess flour. This makes sure your beautiful bread doesn’t stick one bit! If you have parchment paper, you can also line the bottom and sides of the pan, leaving a little overhang for easy lifting later – that’s a trick I learned after one too many loaves that were stubbornly stuck!
Step 2: Mix Dry Ingredients
In a large bowl, whisk together your flour, baking soda, baking powder, cinnamon, nutmeg, and salt. Giving these a good whisk ensures all the leavening agents and spices are evenly distributed. Nobody wants a bite that’s all cinnamon or a strangely flat spot from uneven baking powder! Make sure there are no little clumps of baking soda or powder. This is also the time I usually throw in any nuts or chocolate chips if I’m using them – just toss them with the dry ingredients so they don’t all sink to the bottom. It’s a little trick to help them distribute more evenly.
Step 3: Mix Wet Ingredients
In a separate medium bowl, cream together the softened butter and sugar until it’s light and fluffy. This usually takes a couple of minutes with an electric mixer, or a bit more elbow grease by hand. Then, beat in the eggs one at a time, making sure each one is fully incorporated before adding the next. Stir in the vanilla extract. The mixture should look smooth and emulsified. Using room temperature eggs helps everything come together beautifully.
Step 4: Combine
Now, pour the wet ingredients into the bowl with the dry ingredients. Mix them together *just* until they’re combined. Seriously, don’t overmix! A few streaks of flour are okay; they’ll disappear as you add the zucchini. Overmixing develops the gluten too much, which can make your bread tough. We want tender and moist, not chewy! Then, gently fold in your grated zucchini. Make sure it’s squeezed dry first – this is super important to avoid a soggy loaf. The batter will be thick but pourable.
Step 5: Prepare Filling
If you’re doing the cinnamon-sugar swirl (and I highly recommend it!), now’s the time to mix up those 2 tablespoons of sugar with 1 teaspoon of cinnamon in a tiny bowl. Keep it separate for now. If you’re adding chocolate chips or nuts and didn’t toss them with the dry ingredients, you can fold them in now too, but be gentle!
Step 6: Layer & Swirl
Pour about half of the batter into your prepared loaf pan and spread it evenly. Now, sprinkle about half of your cinnamon-sugar mixture (or chocolate chips/nuts) over the batter. Dollop the remaining batter on top and spread it gently. Sprinkle the rest of the cinnamon-sugar mixture over the top. If you want to create a swirl, take a butter knife or a skewer and gently swirl it through the batter a few times. Don’t go too deep or you’ll just mix everything together. A few gentle passes are all you need to create those pretty ribbons of flavor.
Step 7: Bake
Pop that pan into your preheated oven. Bake for about 50-65 minutes. The exact time will vary depending on your oven, so start checking around the 50-minute mark. You’ll know it’s done when a wooden skewer or toothpick inserted into the center comes out clean, with maybe a few moist crumbs attached but no wet batter. The top should be golden brown and the edges should be pulling away slightly from the sides of the pan. If the top is browning too quickly but the inside isn’t cooked, you can loosely tent it with aluminum foil.
Step 8: Cool & Glaze
Once it’s baked, take the loaf pan out of the oven and let it cool in the pan for about 10-15 minutes. This allows it to set up properly. Then, carefully invert the pan onto a wire rack to release the bread. Let it cool completely on the wire rack before glazing. If you try to glaze it while it’s still warm, the glaze will just melt and run off! For the glaze, whisk together the powdered sugar, milk (or your liquid of choice), and vanilla until it’s smooth and has a pourable consistency. If it’s too thick, add a tiny bit more liquid; if it’s too thin, add a bit more powdered sugar. Drizzle it over the cooled loaf, letting it drip down the sides. It’s so satisfying to watch!
Step 9: Slice & Serve
Once the glaze has set a bit (or if you skipped the glaze), it’s time to slice! Use a serrated knife for clean cuts. I love serving this slightly warm, but it’s also absolutely delicious at room temperature. It’s perfect with a cup of coffee or tea, or even a cold glass of milk. The smell that fills your kitchen as it bakes is honestly half the experience – pure cozy bliss!
What to Serve It With
This zucchini bread is so versatile, it’s practically a chameleon in the kitchen! For a cozy breakfast, I love a thick slice toasted and slathered with a little butter. It’s the perfect companion to a steaming mug of coffee, or even a refreshing glass of orange juice. The subtle sweetness is just enough to start your day without being overpowering. If you’re planning a brunch spread, this bread is a fantastic addition. It adds that homemade touch that guests always appreciate. I like to arrange it on a nice platter, perhaps with some fresh berries or a dollop of whipped cream on the side for an elegant presentation. And as for dessert? Oh, it shines here! A slice of this warm zucchini bread, maybe with a scoop of vanilla bean ice cream, is pure indulgence. It’s also fantastic alongside a fruit salad. For those moments when you just need a comforting snack, it’s the ultimate treat. My kids especially love it as an after-school snack, usually with a big glass of milk. I’ve even had friends tell me they’ve served it as a sweet end to a casual dinner party, and it was a huge hit. It’s just one of those recipes that fits in anywhere!
Top Tips for Perfecting Your Grandma’s Zucchini Bread
I’ve been making this recipe for years, and I’ve picked up a few tricks along the way that I think are really worth sharing. They’re the little things that make a big difference between a good zucchini bread and a truly spectacular one.
Zucchini Prep: This is arguably the most crucial step for that perfect moist texture without a soggy bottom. When you grate your zucchini, don’t just dump it in the batter. Place the grated zucchini in a fine-mesh sieve over a bowl, or wrap it in a clean kitchen towel or cheesecloth. Gently squeeze out as much excess liquid as you can. You’ll be amazed at how much water comes out! This step ensures your bread bakes up beautifully without being wet or dense. Fresh zucchini is best, but if you have some frozen, thaw it completely and squeeze out the water even more thoroughly.
Mixing Advice: I can’t stress this enough: do NOT overmix the batter once you combine the wet and dry ingredients. Mix until *just* combined, meaning you don’t see any large dry streaks of flour. A few small lumps are perfectly fine! Overmixing develops the gluten in the flour, which leads to a tough, chewy bread. We want tender and melt-in-your-mouth, not like a dense brick. Gentle folding is your friend here.
Swirl Customization: The cinnamon-sugar swirl is a game-changer! For the most dramatic effect, don’t over-swirl. Just a few passes with a knife or skewer are enough to create those beautiful ribbons. You can also experiment with other flavor swirls. A swirl of jam (raspberry or apricot are divine!), or even a dollop of Nutella, can add a fun twist. For a more vibrant look, you could even mix a little food coloring into the cinnamon-sugar mixture.
Ingredient Swaps: I’ve played around with this recipe a lot! For a richer flavor, try using half all-purpose flour and half whole wheat flour. If you’re out of eggs, you can use a flax egg (1 tablespoon ground flaxseed + 3 tablespoons water, let sit for 5 minutes) for each egg, though the texture might be slightly different. As mentioned before, a gluten-free 1:1 baking blend works well, but be aware that GF baked goods can sometimes be a little drier, so maybe add an extra tablespoon or two of milk if needed. And for the sweetener, you can certainly play with brown sugar for a deeper molasses note, or even a touch of maple syrup (reduce other liquids slightly if using liquid sweeteners).
Baking Tips: Ovens can be quirky! My oven tends to run a little hot, so I often find myself baking it for the lower end of the time range. Always trust the skewer test over the clock. Make sure your oven rack is in the middle position for even heat distribution. If you notice the top browning too quickly, loosely tent the loaf pan with aluminum foil for the remainder of the baking time. This allows the inside to cook through without scorching the top.
Glaze Variations: The basic glaze is simple and delicious, but feel free to get creative! For a citrusy kick, swap the milk for fresh lemon or orange juice. For a richer glaze, use cream cheese instead of powdered sugar and milk – just whip softened cream cheese with powdered sugar and a splash of vanilla until smooth. If you prefer no glaze, a light dusting of powdered sugar or a sprinkle of cinnamon-sugar after baking is also lovely!
Storing and Reheating Tips
One of the best things about this zucchini bread is how well it keeps! It stays incredibly moist and delicious for several days. For short-term storage, I usually leave it right in the loaf pan on the counter if I know we’ll be finishing it within a day or two. If you’ve already removed it from the pan, wrap it tightly in plastic wrap or aluminum foil, or pop it into an airtight container. It should stay fresh at room temperature for about 3-4 days. If you live in a very warm or humid climate, or if you won’t be eating it within a few days, it’s best to store it in the refrigerator. Wrap it well to prevent it from drying out, and it will keep for up to a week. The flavor actually seems to deepen a bit in the fridge, which is a nice bonus!
Now, if you’re lucky enough to have leftovers that need to last even longer, the freezer is your best friend! I often bake a few loaves and freeze one for a future craving emergency. Let the bread cool completely, then wrap it very tightly in a double layer of plastic wrap, followed by a layer of aluminum foil or a freezer-safe bag. It will keep beautifully in the freezer for up to 2-3 months. To reheat, you can simply let it thaw at room temperature, or pop a slice in the toaster or a low oven (around 300°F/150°C) for a few minutes until warmed through. If you’ve frozen it with the glaze, it’s best to add the glaze *after* thawing and reheating, as the glaze can sometimes get sticky or melt unevenly when frozen and thawed.
Frequently Asked Questions
Final Thoughts
This zucchini bread is more than just a recipe to me; it’s a little piece of my childhood, a memory baked into every slice. It represents those warm, fuzzy feelings of family, comfort, and simple pleasures. It’s proof that sometimes, the most ordinary ingredients can create something truly extraordinary. The way it stays so incredibly moist, the perfect balance of spices, and that subtle sweetness that just sings – it’s all part of its magic. If you’re looking for a reliable, delicious, and genuinely easy bake that will impress everyone, look no further. I promise, once you try this, it will become a staple in your kitchen too.
If you love this recipe and are looking for other comforting bakes, you might want to check out my (Link to another recipe, e.g., Classic Chocolate Chip Cookies) or my famous (Link to another recipe, e.g., Easy Apple Crumble). They’re equally delightful and perfect for cozy afternoons. I would absolutely love to hear how your Grandma’s Zucchini Bread turns out! Tag me in your photos on social media or leave a comment below – I can’t wait to see your creations and read about your family’s reactions. Happy baking, everyone!

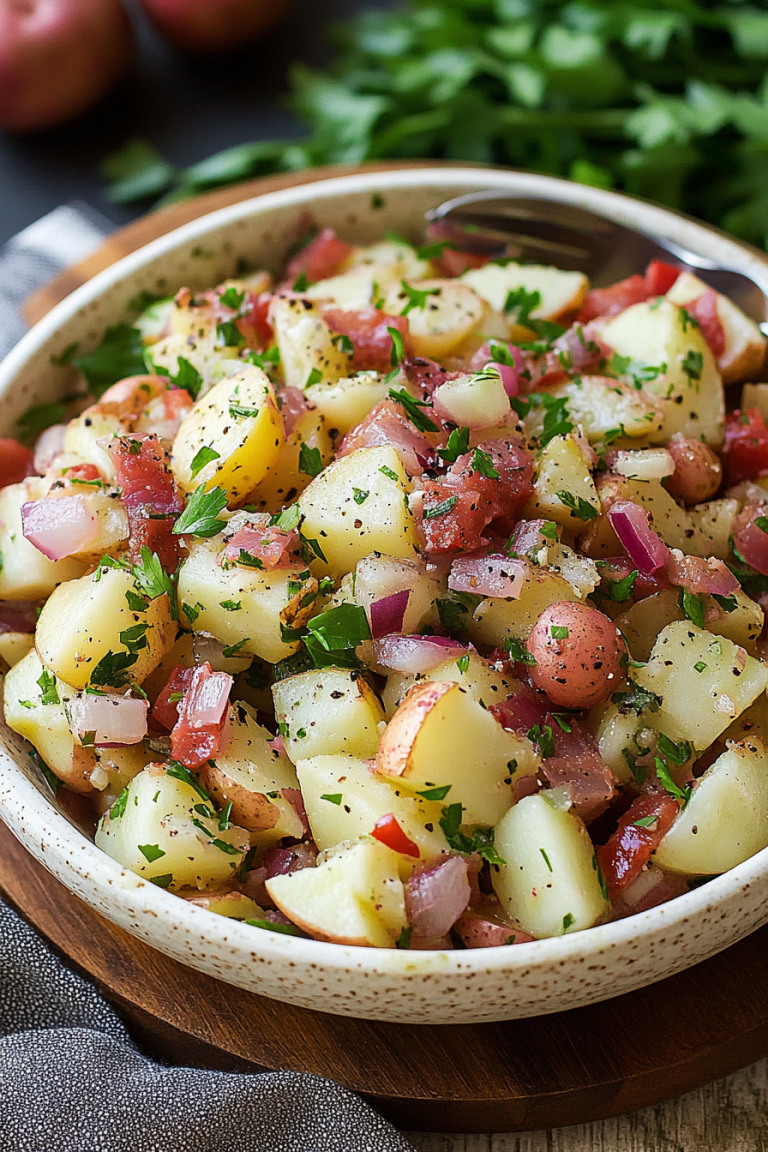
Jalapeno Ranch Pasta Salad
Ingredients
Method
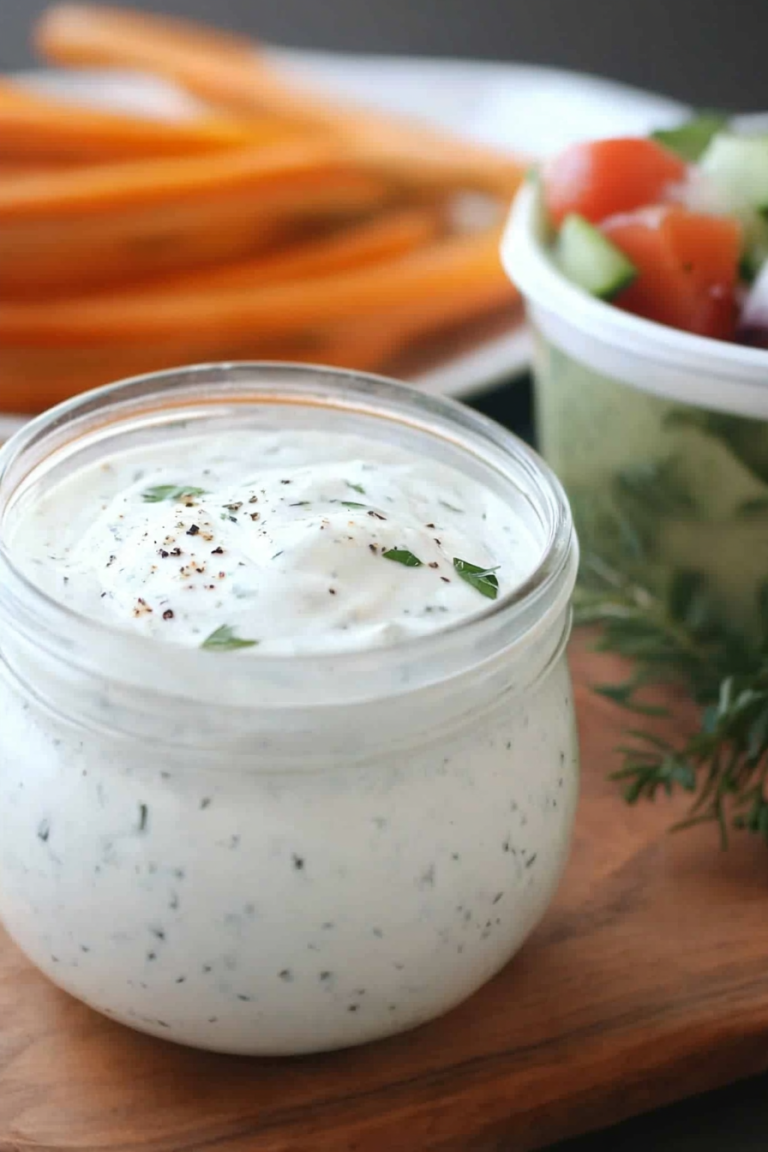
- In a food processor, add milk, mayonnaise, ranch seasoning, and jalapenos; process for 30 seconds, scrape down sides, and process for a few more seconds. Place bowl into fridge while you continue making the salad (this needs to set at least 20 minutes in the fridge – can easily be made ahead of time and stored in fridge).
- Cook pasta according to package directions, making sure not to overcook. Add black beans last minute of cooking. Drain, rinse with cold water, set aside.
- In a large bowl, add cucumbers, red pepper, tomatoes, and corn; stir gently to combine. Add pasta and black beans, fold to combine. Add cheese, green onions, salt and pepper; folding again to combine.
- Pour 1 cup of the jalapeno ranch dressing into the salad, fold carefully to evenly coat salad ingredients. Taste and add additional salt and pepper, if desired.
- Refrigerate for at least 1 hour before serving. Squeeze lime juice over the top before serving. Garnish with fresh cilantro if desired.