Peanut Butter Cookie Dough Dip Bliss
Oh, zucchini bread. It sounds so… virtuous, doesn’t it? Like something you should be eating for breakfast to balance out the inevitable slice of cake later. But trust me, this isn’t your grandmother’s overly dense, slightly dry loaf that tastes vaguely of garden. This is the zucchini bread that dreams are made of. It’s moist, it’s tender, it’s packed with that subtle sweetness that just makes you happy, and then there’s the hidden treasure: a ribbon of tangy, luscious cream cheese swirled right through the middle. It’s like a regular zucchini bread decided to have a little party with a cheesecake, and we are all invited! My kids, who are usually pretty picky about “vegetables” in their baked goods (yes, I’m looking at you, zucchini), absolutely gobble this up. It’s the kind of recipe that makes you feel like a kitchen wizard, even if you’re just whipping it together on a Tuesday evening. It’s hands-down one of my favorite things to bake, right up there with my classic chocolate chip cookies, but with that extra little je ne sais quoi.
What is Zucchini bread with cream cheese swirl?
So, what exactly *is* this magical creation? At its heart, it’s a classic quick bread, meaning it uses chemical leaveners (like baking soda and baking powder) instead of yeast, so you don’t have to wait for dough to rise. This makes it incredibly approachable for even the most novice baker. We take grated zucchini, which might sound a little unusual, but it’s the secret to that incredible moisture and tenderness. It practically melts into the batter! Now, for the star of the show – the cream cheese swirl. This isn’t just some afterthought; it’s a rich, tangy counterpoint to the sweet, spiced bread. Think of it as the ultimate flavor upgrade. It’s essentially a super simple batter, enriched with the goodness of zucchini, and then elevated with a decadent cream cheese mixture that creates beautiful marbled patterns and bursts of creamy delight in every bite. It’s cozy, it’s comforting, and it’s ridiculously delicious.
Why you’ll love this recipe?
Honestly, where do I even begin? This recipe is a lifesaver, a crowd-pleaser, and just downright delightful. First off, the FLAVOR. It’s a beautiful balance of warm spices – cinnamon, nutmeg, maybe a hint of cardamom if you’re feeling fancy – mingling with the natural sweetness of the zucchini and sugar. And that cream cheese swirl? It’s a tangy, creamy dream that cuts through the sweetness and adds a luxurious texture. It’s like biting into a slice of heaven. Then there’s the SIMPLICITY. I’m not kidding when I say this comes together so easily. No fancy equipment, no complicated steps. You can literally have this mixed up and in the oven in about 15 minutes. It’s the perfect recipe for those weeknights when you want something special but don’t have hours to spare. Plus, it’s surprisingly COST-EFFECTIVE. Zucchini is often abundant and inexpensive, especially in the summer months. You probably already have most of the other ingredients in your pantry. The VERSATILITY is another huge plus. While it’s incredible on its own, I love serving this in so many ways. It’s fantastic for breakfast with a cup of coffee, perfect as a decadent dessert with a scoop of vanilla ice cream, or just a comforting afternoon snack with a glass of milk. What I love most about this is that it always feels like a special treat without being overly fussy. It’s the kind of dessert that makes people ask for the recipe, and then act surprised when you tell them how easy it was. It’s a winner in my book, every single time.
How do you make Zucchini bread with cream
Quick Overview
Get ready for the easiest, most delicious zucchini bread you’ve ever baked! We’re talking about a straightforward process: whisking dry ingredients, mixing wet ingredients, gently combining them, preparing a simple cream cheese filling, layering it all into a loaf pan, and baking until golden and fragrant. The magic happens with the swirling technique, which creates those gorgeous ribbons of cream cheese. It’s foolproof, I promise, and the results are so rewarding. You’ll be amazed at how such simple steps can lead to such a moist and flavorful treat.
Ingredients
For the Main Batter:
You’ll need about 2 cups of grated zucchini – this is key for moisture! Don’t worry about peeling it; the skin adds nutrients and color. Just make sure to squeeze out as much excess water as you can after grating. I find that a fine or medium grate works best. For the flour, all-purpose is perfect, and I usually use about 2 ½ cups. Granulated sugar and a bit of brown sugar give it that lovely sweetness and soft texture. Eggs are essential for binding, and I always use large ones. Melted butter is my go-to for richness, but a good quality neutral oil like vegetable or canola works too. Vanilla extract is a non-negotiable for that comforting aroma. And for the spices, ground cinnamon and a pinch of nutmeg are a must. Baking soda and baking powder are our leaveners, ensuring a nice lift.
For the Filling:
This is where the magic really happens. You’ll need one 8-ounce block of cream cheese, softened to room temperature. This is super important so it mixes smoothly. I also add a bit of granulated sugar to sweeten it slightly and an egg yolk to make it extra rich and help it set beautifully. A splash of vanilla extract here complements the main batter perfectly. Sometimes, I’ll even add a tiny pinch of salt to balance the sweetness.
For the Glaze:
This is totally optional, but oh-so-worth it if you want that extra touch of sweetness and elegance. It’s just powdered sugar whisked with a little milk or water until it reaches a pourable but not too runny consistency. You can add a little vanilla extract or even a touch of lemon juice for a brighter flavor. I usually aim for something that drizzles nicely without completely disappearing into the bread. It’s also really pretty if you add a few drops of food coloring to make it pop, especially if the kids are involved!
Step-by-Step Instructions
Step 1: Preheat & Prep Pan
First things first, get your oven preheating to 350°F (175°C). This ensures an even bake from the moment the bread goes in. While the oven heats up, prepare your loaf pan. I like to use a standard 9×5 inch loaf pan. Grease it really well with butter or non-stick spray, and then lightly flour it. This extra step prevents any sticking, and nobody likes a bread that’s glued to the pan! You can also line it with parchment paper, leaving some overhang on the sides; this makes lifting the baked loaf out a breeze.
Step 2: Mix Dry Ingredients
In a large bowl, whisk together your all-purpose flour, granulated sugar, brown sugar, baking soda, baking powder, cinnamon, and nutmeg. Whisking them all together now ensures that the leaveners and spices are evenly distributed, which means you won’t get pockets of unmixed spice or baking soda in your finished bread. It also helps to aerate the flour a bit, contributing to a lighter texture.
Step 3: Mix Wet Ingredients
In a separate medium bowl, whisk together your eggs, melted butter (make sure it’s cooled slightly so it doesn’t cook the eggs!), vanilla extract, and of course, your well-drained grated zucchini. Give it a good whisk until everything is well combined and the zucchini is distributed throughout. I find that using a fork to gently press on the zucchini helps break it up a bit more.
Step 4: Combine
Now, pour the wet ingredients into the bowl with the dry ingredients. Here’s where you need to be gentle. Use a spatula or a wooden spoon to mix just until combined. It’s really important not to overmix! A few streaks of flour are okay; they’ll disappear as it bakes. Overmixing develops the gluten in the flour too much, which can lead to a tough, dense bread, and we definitely don’t want that. We’re aiming for a thick, slightly lumpy batter.
Step 5: Prepare Filling
In another clean bowl, beat the softened cream cheese with the granulated sugar until it’s smooth and creamy. This is best done with an electric mixer, but you can certainly do it by hand with a whisk if you’re feeling ambitious! Beat in the egg yolk and vanilla extract until everything is just combined and smooth. You want this mixture to be thick but still spreadable.
Step 6: Layer & Swirl
Now for the fun part! Spoon about half of the zucchini bread batter into your prepared loaf pan. Dollop about half of the cream cheese filling over the top. Use a knife or a skewer to gently swirl the cream cheese into the batter – don’t overdo it, you want distinct ribbons, not a uniform mix. Repeat with the remaining batter and then the remaining cream cheese filling. Again, swirl gently to create a beautiful marbled effect. I like to make sure the swirls go down a bit into the batter for that surprise creamy pocket.
Step 7: Bake
Pop that beautifully swirled loaf into your preheated oven. Bake for about 55-65 minutes. The exact time can vary depending on your oven, so start checking around the 55-minute mark. You’ll know it’s done when a toothpick inserted into the center (avoiding any cream cheese pockets) comes out clean, and the top is golden brown. If the top starts to get too dark before the inside is cooked, you can loosely tent it with foil.
Step 8: Cool & Glaze
Once baked, take the loaf pan out of the oven and let it cool in the pan for about 10-15 minutes. This allows it to set up properly. Then, carefully invert the loaf onto a wire rack to cool completely. I know it’s tempting to slice into it immediately, but it really does need to cool fully, especially before you add the glaze. Once completely cool, you can whisk together your glaze ingredients (powdered sugar, a little liquid, vanilla) and drizzle it over the top. Let the glaze set for a few minutes before slicing.
Step 9: Slice & Serve
Once the glaze is set, or if you’re skipping the glaze, it’s time to slice! Use a serrated knife for the cleanest cuts. Admire those gorgeous swirls! Serve at room temperature for the best flavor and texture. This bread is so good on its own, you don’t need much else, but a little dusting of powdered sugar or a dollop of whipped cream never hurt anyone!
What to Serve It With
This zucchini bread is so versatile, it fits into almost any meal or occasion. For a simple BREAKFAST, I love it toasted and served with a hot cup of coffee or a steaming mug of tea. It’s just comforting and satisfying to start the day. For a slightly more elegant BRUNCH spread, I’ll slice it a bit thinner and arrange it on a platter with fresh berries and maybe a small bowl of Greek yogurt for dipping. It pairs beautifully with mimosas or a light, bubbly sparkling cider. As a DESSERT, it’s a showstopper. I sometimes serve it slightly warm with a scoop of good quality vanilla bean ice cream, or a drizzle of caramel sauce. It’s decadent and satisfying without being overly heavy. And for those COZY SNACKS, my favorite way is just a thick slice with a tall glass of cold milk. It’s pure comfort food. My family also loves having it as an after-school treat, especially on a rainy day. It brings everyone into the kitchen just from the smell alone!
Top Tips for Perfecting Your Zucchini Bread with Cream Cheese Swirl
After making this countless times, I’ve picked up a few tricks that make all the difference. For ZUCCHINI PREP, squeezing out the water is absolutely crucial. Use a fine-mesh sieve and your hands, or wrap the grated zucchini in cheesecloth and wring it out. This prevents a soggy bread. Don’t stress too much about grating size; medium or fine works well, but avoid anything too coarse. For MIXING ADVICE, remember the golden rule: don’t overmix! Just combine the wet and dry ingredients until no dry streaks remain. A few lumps are fine; they mean you haven’t overworked the batter. Overmixing is the number one culprit for tough quick breads. When it comes to SWIRL CUSTOMIZATION, get creative! You can add a pinch of cocoa powder to the cream cheese filling for a chocolate swirl, or even a few drops of berry puree. For patterns, try a zigzag motion with your knife or skewer, or even a more intricate figure-eight. The goal is beautiful ribbons, not a homogenous mix. INGREDIENT SWAPS are my jam! I’ve tested this with almond milk in place of regular milk in the glaze, and it made it even creamier. For the bread batter, I’ve successfully used a gluten-free all-purpose flour blend (use a 1:1 baking substitute) – the texture is slightly different but still delicious. If you don’t have brown sugar, you can use more granulated sugar, but the brown sugar adds a lovely depth of flavor and moisture. For BAKING TIPS, always trust your oven’s temperature and get to know its quirks. If your oven tends to run hot, reduce the temperature by 25 degrees. Using a metal loaf pan conducts heat well, giving you a nice golden crust. You can also bake it in two smaller loaf pans for faster baking time. For GLAZE VARIATIONS, if you prefer a less sweet topping, just reduce the amount of powdered sugar or add a little lemon zest for brightness. A simple dusting of powdered sugar is also lovely if you’re short on time.
Storing and Reheating Tips
This bread is so good, it rarely lasts long, but when it does, here’s how to keep it fresh. At ROOM TEMPERATURE, it will stay wonderfully moist for about 3 days if stored properly. I like to wrap it tightly in plastic wrap or place it in an airtight container. If you live in a warm, humid climate, or if it’s very hot where you are, popping it in the refrigerator might be a better option. For REFRIGERATOR STORAGE, it will keep well for up to a week. Just make sure it’s in an airtight container to prevent it from drying out. When you want to enjoy a slice, you can eat it cold, or gently warm it up in a toaster oven or microwave for a few seconds for that freshly baked feel. The FREEZER INSTRUCTIONS are fantastic if you’ve made an extra loaf (or if your family has devoured the first one too quickly and you want to have some on hand!). Let the loaf cool completely, then wrap it tightly in plastic wrap, followed by a layer of aluminum foil, or place it in a heavy-duty freezer bag. It can be frozen for up to 3 months. To thaw, remove the foil and plastic wrap and let it sit at room temperature for a few hours, or gently warm it in a low oven. For the GLAZE TIMING ADVICE, I always recommend adding the glaze *after* the bread has completely cooled, especially if you’re planning to freeze it. If you glaze it before freezing, the glaze can become sticky or crack during thawing. If you plan to eat it within a day or two, you can glaze it before storing at room temperature.
Frequently Asked Questions
Final Thoughts
So there you have it – my absolute favorite zucchini bread with that irresistible cream cheese swirl. It’s more than just a recipe; it’s a little slice of cozy happiness. It’s the perfect way to use up that garden zucchini, a treat that impresses without demanding hours in the kitchen, and a guaranteed hit with pretty much everyone you share it with. I hope you give this a try and fall in love with it as much as my family and I have. If you enjoyed this, you might also love my recipe for Spiced Apple Crumble Muffins or my Easy Banana Bread – they’re all in that same cozy, comforting baking vein. Don’t be shy about leaving a comment below to let me know how yours turned out, or if you have any special additions you love to include! Happy baking, and enjoy every delicious bite!
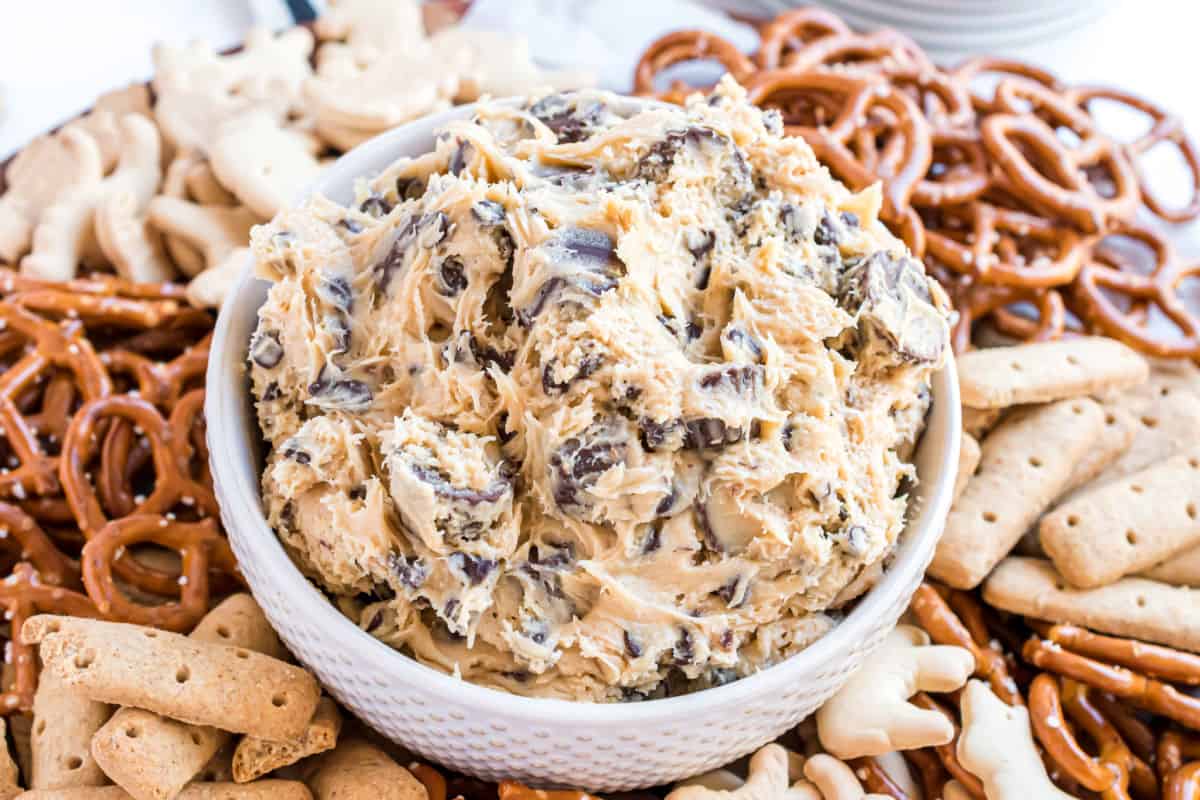
Peanut Butter Cookie Dough
Ingredients
Method
- In a small saucepan over medium heat, melt butter and whisk in the brown sugar and peanut butter. Heat until sugar dissolves (about one minute). Remove from heat immediately and allow to cool to room temperature (very important).
- In a large mixing bowl, beat cream cheese with powdered sugar until creamy (about 3-4 minutes, don't skimp on the beating time). On low, add in brown sugar mixture (that has cooled to room temperature). Mix until combined.
- Fold in mini chocolate chips and mini Reese's cups. Serve immediately or store in refrigerator until ready to serve. Enjoy with pretzels, animal cracker and graham sticks.