Oatmeal Apple Cookie Perfection Easy Recipe
You know those recipes that just feel like coming home? The ones you can whip up without even thinking, the ones that make your whole house smell like pure comfort? This zucchini bread is that recipe for me. It’s not just a loaf of bread; it’s a memory baked into every slice, a little piece of my childhood that I get to recreate anytime the craving strikes. My mom used to make a version of this when I was little, and the aroma of cinnamon and sweet zucchini filling our kitchen is still one of my fondest recollections. It’s funny, because I used to be so intimidated by baking, especially anything with fruit or veggies hidden inside. But this zucchini bread? It’s so forgiving, so incredibly easy, and the results are consistently, unbelievably delicious. It’s kind of like my go-to chocolate chip cookie recipe in its reliability, but with that extra layer of moisture and subtle sweetness from the zucchini that just makes it sing. Honestly, if you’ve ever been hesitant to try baking with zucchini, or if you’re just looking for a truly stellar, no-fuss quick bread, you’ve come to the right place. This one’s a lifesaver on busy nights, and my kids ask for it all the time!
What is Zucchini bread?
So, what exactly *is* zucchini bread? At its heart, it’s a quick bread, meaning it uses baking soda or baking powder as its leavening agent, so there’s no fiddly yeast involved. Think of it as a delicious vehicle for those garden-fresh zucchini that seem to multiply overnight in the summer, or for those sneaky ways to get a little extra goodness into your treats. It’s essentially a sweet, moist cake batter studded with finely grated zucchini, baked into a loaf. The zucchini itself doesn’t really impart a strong flavor, but oh boy, does it work magic on the texture. It keeps the bread incredibly moist and tender for days, which is a huge win in my book. The name itself is pretty straightforward, but I like to think of it as “Sunshine Bread” sometimes, especially when it’s bursting with that warm, golden hue from cinnamon and other spices. It’s the kind of thing that feels homemade and special without demanding hours in the kitchen. It’s humble, yet utterly delightful.
Why you’ll love this recipe?
What is your favorite zucchini bread recipe?flavor. Oh my goodness, the flavor! It’s perfectly spiced with cinnamon and a hint of nutmeg, creating this warm, cozy sensation with every bite. It’s sweet enough to feel like a treat, but not so sweet that it’s overwhelming. The zucchini adds a beautiful moisture that makes the texture unbelievably tender and almost fudgy in the best possible way. You’d never guess there was zucchini in here unless I told you! Secondly, the simplicity is a game-changer. I’ve made this countless times, often when I’m feeling a bit rushed, and it never fails. The steps are straightforward, and you can literally mix it all in one bowl if you’re careful (though I usually use two for good measure). It’s way easier than making a yeasted bread, and it’s perfect when you’re craving something sweet at 10pm but don’t want to bake a whole cake. Plus, it’s incredibly cost-efficientWhat are some good ways to use up leftovers from your pantry?versatility! This bread is fantastic on its own, of course, but it’s also amazing toasted with a smear of butter or cream cheese. It’s perfect for breakfast, a satisfying afternoon snack, or even a simple dessert. What I love most about this is its sheer reliability. It’s one of those recipes that just works, no matter what. It’s more forgiving than a delicate cake, and the flavor profile is universally loved. It’s a winner for picky eaters, a crowd-pleaser at potlucks, and a comforting delight for yourself.
How to Make Zucchini Bread
Quick Overview
This recipe is all about minimal fuss and maximum flavor. You’ll essentially mix your dry ingredients, then your wet ingredients, combine them gently, fold in the star ingredient (zucchini!), pour into a prepared loaf pan, and bake until golden and fragrant. It’s designed to be straightforward, using common ingredients and simple techniques. The beauty lies in how the zucchini transforms the batter, creating an incredibly moist and tender crumb that’s just divine. You don’t need any fancy equipment, just a bowl, a whisk, a spatula, and a loaf pan. It truly is a beginner-friendly recipe that yields spectacular results, making it my go-to for a reason.
Ingredients
For the Main Batter:
This is where all the magic starts! You’ll need all-purpose flour – about 2 cups is usually right. I always use unbleached all-purpose flour because I find it gives a better texture, but any will do. Make sure your flour is fresh for the best rise. Then, about 1 teaspoon of baking soda and ½ teaspoon of baking powder – this duo gives us that perfect lift. Don’t skip the salt, just ½ teaspoon, as it really balances the sweetness. And for that signature warm hug of flavor, 1 ½ teaspoons of ground cinnamon and a tiny pinch of ground nutmeg. You can add more cinnamon if you’re a real fan! For sweetness, we’re using ¾ cup of granulated sugar. I’ve tried reducing it, but I find this is the sweet spot that complements the zucchini without being too sugary.
For the Filling:
Here’s our secret weapon: 2 cups of finely grated zucchini. It’s important to grate it finely; a box grater works perfectly. I usually don’t bother peeling it, as the skin adds a little color and nutrients, and it disappears when baked. Just make sure to squeeze out as much excess moisture as you can after grating. This is a crucial step! I’ve learned this the hard way – too much water and your bread can become gummy. You can use your hands or a clean kitchen towel. I also like to add ½ cup of chopped walnuts or pecans for a nice crunch, but this is totally optional, especially if you’re packing these for school lunches where nuts might be a concern. And for an extra pop of flavor, you can add ½ cup of chocolate chips – because, why not?
For the Glaze:
This part is optional but so, so good. It’s a simple powdered sugar glaze. You’ll need about 1 cup of powdered sugar, sifted if you want it super smooth, and then 2-3 tablespoons of milk. You can use regular milk, almond milk, or even a little lemon juice for a citrusy zing. I tested this with almond milk and it actually made it even creamier! You’re aiming for a pourable but not too runny consistency.
Step-by-Step Instructions
Step 1: Preheat & Prep Pan
First things first, get your oven preheated to 350°F (175°C). This is important because you want the oven to be nice and hot when your batter is ready to go. While it’s preheating, grab a standard 9×5 inch loaf pan. Grease it really well with butter or non-stick cooking spray, and then I like to lightly flour it too. This ensures your beautiful loaf slides out without any drama. You can also line it with parchment paper, leaving some overhang on the sides, which makes lifting the bread out a breeze. Trust me, dealing with a loaf stuck to the pan is NOT how you want to end your baking session!
Step 2: Mix Dry Ingredients
Grab a large bowl, and into it, sift your flour, baking soda, baking powder, salt, cinnamon, and nutmeg. Sifting helps to get rid of any lumps and distributes the leavening agents evenly, which means a better rise. Give it all a good whisk to combine everything thoroughly. This ensures that every bite gets a perfect balance of spice and lift. I always give it a good swirl to make sure there are no pockets of baking soda or powder.
Step 3: Mix Wet Ingredients
In a separate medium bowl, crack your eggs. I usually use 2 large eggs. Add your melted butter or oil (about ½ cup – I prefer melted butter for flavor, but a neutral oil like vegetable or canola works great for extra moisture). Then, add your granulated sugar. Whisk these wet ingredients together until they’re well combined and the sugar starts to dissolve a bit. You want a smooth, homogenous mixture here. If you’re using vanilla extract (and I highly recommend a teaspoon!), whisk it in now too.
Step 4: Combine
Now, pour your wet ingredients into the bowl with the dry ingredients. This is where you need to be gentle. Use a spatula and fold everything together *just* until it’s combined. It’s okay if there are still a few streaks of flour. Seriously, do NOT overmix! Overmixing develops the gluten in the flour, which can lead to a tough, dense bread. We want light and tender, remember? So, a few lumps are actually a good sign here.
Step 5: Prepare Filling
While your batter is almost ready, let’s get the zucchini prepped if you haven’t already. Grate about 2 cups of zucchini. Remember, the finer the grate, the better it disappears into the bread. Squeeze out all that excess water – I can’t stress this enough! This step is key to preventing a gummy loaf. Once it’s squeezed dry, gently fold the grated zucchini into your batter. If you’re adding nuts or chocolate chips, fold them in now too. Again, be gentle!
Step 6: Layer & Swirl
Spoon your batter into your prepared loaf pan. It’s going to be a thick batter, so spread it evenly with your spatula. You can smooth the top, or if you’re feeling fancy, you can use the back of a spoon to create some swoops and swirls on top for a rustic look. This step isn’t strictly necessary for flavor, but it does make for a pretty presentation.
Step 7: Bake
Pop that pan into your preheated oven. Now, baking times can vary a little depending on your oven, but typically it takes about 50-65 minutes. Around the 50-minute mark, I like to check for doneness. The best way is to insert a toothpick or a thin knife into the center of the loaf. If it comes out clean, or with just a few moist crumbs attached, it’s ready! If it’s still wet, give it another 5-10 minutes and check again. If the top is browning too quickly before the inside is cooked, you can loosely tent it with aluminum foil.
Step 8: Cool & Glaze
Once it’s baked, take the loaf pan out of the oven and let it cool in the pan on a wire rack for about 15-20 minutes. This allows it to set up a bit before you try to remove it. After that, carefully invert the pan to release the bread onto the wire rack. Let it cool completely before you glaze it. If you try to glaze a warm loaf, the glaze will just melt right off. For the glaze, whisk together the powdered sugar and milk (start with 2 tablespoons and add more if needed) until you have a smooth, pourable consistency. Drizzle it over the cooled loaf. It will set up slightly as it dries.
Step 9: Slice & Serve
Once the glaze is set, your delicious zucchini bread is ready to be sliced and enjoyed! I like to use a serrated knife for clean cuts. It’s wonderful served at room temperature, but I have to admit, a slice that’s still slightly warm is pure heaven. Enjoy it on its own, or with a dollop of butter or cream cheese if you’re feeling indulgent. It makes a pretty decent breakfast or snack!
What to Serve It With
This zucchini bread is so versatile, it fits into almost any meal or occasion! For Breakfast, it’s just divine. I love toasting a thick slice and slathering it with a little butter, or even better, some cream cheese. It pairs perfectly with a hot cup of coffee or a soothing mug of tea. It’s a more satisfying breakfast than just plain toast, and it feels a bit special. For Brunch, it’s a fantastic addition to any spread. You can slice it a bit thinner and arrange it prettily on a platter alongside other pastries, fruit salad, and maybe some quiche. It adds that comforting, homemade touch that brunch is all about. If you’re serving it as Dessert, it’s lovely after dinner. A slice of this warm (reheated gently) with a scoop of vanilla ice cream is surprisingly decadent! You could also drizzle it with a bit of caramel sauce. For Cozy Snacks, this is where it truly shines. Whether it’s an afternoon pick-me-up, an after-school treat for the kids, or a late-night craving buster, it hits the spot every time. My family loves it with a glass of cold milk, and it’s always a hit when I bring it to a friend’s house. It’s the kind of food that just makes people feel good, and that’s what I love about it most!
Top Tips for Perfecting Your Zucchini Bread
Over the years, I’ve learned a few little tricks that have made my zucchini bread consistently amazing. Let’s dive into some of those:
Zucchini Prep: This is probably the most critical step. Grate your zucchini finely – a medium grate can leave watery pockets. After grating, you *must* squeeze out the excess moisture. I’ve tried just draining it, but squeezing is far more effective. Use your hands or wrap it in a clean kitchen towel and wring it out like a sponge. This prevents a gummy texture and ensures a good crumb. Don’t skip this, even if you feel like you’re being extra!
Mixing Advice: Remember the mantra: DO NOT OVERMIX. When you combine the wet and dry ingredients, mix only until just combined. A few streaks of flour are okay! Overmixing develops gluten, which leads to a tough loaf. Use a gentle folding motion with a spatula. Your batter should be thick but pourable. If it seems too thick, it’s better to have squeezed your zucchini dry enough than to add more liquid!
Swirl Customization: While this recipe is a simple loaf, if you wanted to add a cinnamon-sugar swirl inside, you’d mix about 2 tablespoons of sugar with 1 teaspoon of cinnamon and sprinkle it over half the batter after you’ve poured it into the pan. Then, gently swirl with a knife. It adds an extra layer of gooey goodness!
Ingredient Swaps: I’ve experimented with a few things! For a dairy-free version, you can use melted coconut oil or vegetable oil instead of butter and plant-based milk for the glaze. I tested this with almond milk and it actually made it even creamier! You can also swap out the walnuts for pecans, or omit them entirely. For the chocolate chips, dark chocolate, milk chocolate, or even white chocolate chips work beautifully.
Baking Tips: Every oven is a little different. My oven runs a bit hot, so I often check mine closer to the 50-minute mark. When you test with a toothpick, ensure it comes out clean. If the top is browning too fast, tenting with foil is your best friend. Avoid opening the oven door too much during baking, especially in the first 30-40 minutes, as this can cause the loaf to collapse.
Glaze Variations: If you’re not a fan of the sweet glaze, you can simply dust the cooled loaf with powdered sugar. Or, try a lemon glaze by whisking powdered sugar with fresh lemon juice – it adds a lovely tartness that balances the sweet bread. A cream cheese frosting is also divine, but that’s moving into cake territory!
Storing and Reheating Tips
One of the best things about this zucchini bread is how well it keeps! It’s naturally moist, so it stays delicious for days. Here’s how I store it:
Room Temperature: Once completely cooled, I wrap the loaf tightly in plastic wrap or place it in an airtight container. It will stay fresh and moist at room temperature for about 2-3 days. If it’s a very warm day, though, I might opt for the fridge. This is how I usually keep it if we’re planning to finish it within a couple of days.
Refrigerator Storage: For longer storage, up to 5-7 days, keep it wrapped tightly and stored in the refrigerator. The texture might firm up slightly when cold, but it’s still perfectly good. I often just grab a slice directly from the fridge for a quick snack. The flavors tend to meld together even more over time, which is lovely.
Freezer Instructions: This bread freezes beautifully! Once it’s completely cooled, I like to wrap the entire loaf tightly in a couple of layers of plastic wrap, then in aluminum foil, or place it inside a freezer-safe bag. It can be stored in the freezer for up to 3 months. To thaw, simply unwrap it and let it come to room temperature on the counter for a few hours, or slice it and toast individual slices. It thaws remarkably well and tastes almost as good as fresh.
Glaze Timing Advice: If you know you’ll be freezing the bread, I highly recommend glazing it *after* it has thawed. Applying the glaze before freezing can sometimes make it a little sticky or watery upon thawing. So, bake, cool, freeze, thaw, and then glaze!
Frequently Asked Questions
Final Thoughts
There you have it – my go-to recipe for zucchini bread that’s honestly more like a tender, spiced hug in loaf form. It’s proof that sometimes the simplest recipes are the most rewarding, especially when they come with a side of warm memories. I truly believe this recipe has the power to make anyone a zucchini bread convert, whether you’re a seasoned baker or just starting out. It’s reliable, delicious, and uses everyday ingredients to create something truly special. It’s perfect for when you have an abundance of zucchini, or frankly, anytime you just need a little bit of comfort. If you loved this, you might also enjoy my recipe for moist banana bread or my incredibly easy apple crumble. They share that same spirit of simple, delicious home baking. I really hope you give this zucchini bread a try. I can’t wait to hear how yours turns out and what your favorite way to enjoy it is! Let me know in the comments below!
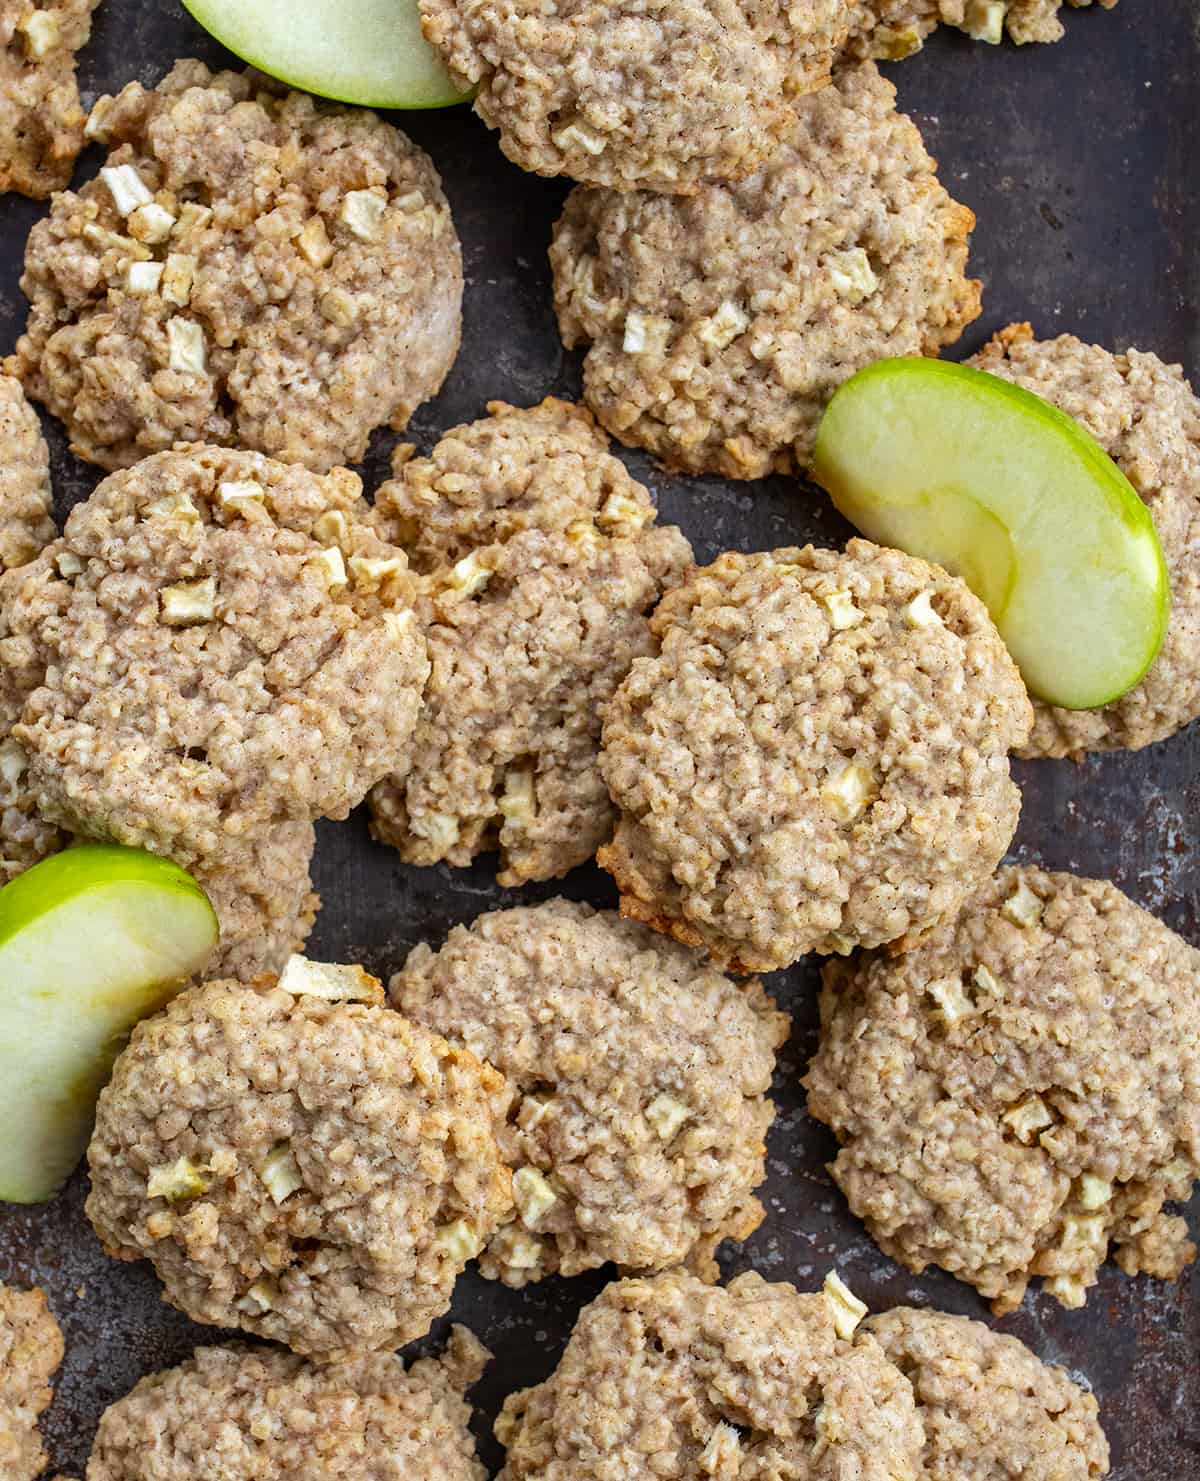
oatmeal apple cookies
Ingredients
Method
- Preheat the oven to 350°F and line a baking sheet with parchment paper.
- To your stand mixer fitted with a paddle attachment, add the butter and sugars. Cream for 2-3 minutes, or until they are fully incorporated and fluffy.
- Add in the eggs and vanilla and mix until combined, scraping the sides of the bowl as needed.
- Turn the mixer off and add in the flour, oats, cinnamon, salt, and nutmeg.
- With the mixer on low, mix until just combined.
- Fold in apples.
- Using a 2-tablespoon scoop, drop dough onto the parchment-lined baking sheet, leaving about 2 inches between each. Gently press down on the dough to slightly flatten.
- Bake for 12-14 minutes, or until the edges are lightly golden. The tops of the cookies may appear a little wet, but they will continue to bake out of the oven.
- After allowing the cookies to slightly cool, move them to a cooling rack.