Mint Puppy Chow the Best Treat
Okay, so I’ve been meaning to share this with you for ages. You know how sometimes you stumble upon a recipe that just *works*? Like, it becomes your go-to, the one you make when you need something comforting, something impressive, or just something downright delicious? This Zucchini Bread is that for me. It’s not just any quick bread; it’s the kind of thing that makes your whole house smell amazing and disappears in about ten minutes flat at my place. My kids, who can be the pickiest eaters on the planet, actually ask for this all the time. It’s kind of a miracle, honestly! It’s so much better than those dense, dry versions you sometimes find. Think of it as the perfect hug in a loaf, or a sweet little slice of sunshine on a cloudy day. If you’ve ever tried making zucchini bread and ended up with something a little… meh… trust me, this one’s different. It’s truly the best zucchini bread recipe I’ve ever tried, and I’ve made a lot of them!
What is Zucchini bread?
So, what exactly *is* this magical zucchini bread we’re talking about? At its heart, it’s a quick bread, meaning it uses baking soda or baking powder as its leavening agent, not yeast. That’s why it’s so easy and quick to whip up – no waiting for dough to rise! The “zucchini” part is what gives it its incredible moisture and a subtle, earthy sweetness that you wouldn’t even guess is there if you didn’t know. It’s essentially a sweet, spiced cake batter that happens to have shredded zucchini baked into it. Why zucchini, you ask? Because it’s a moisture powerhouse! It melts into the batter as it bakes, leaving you with the most tender, fudgy crumb imaginable. It’s a genius way to sneak in some extra veggies, and honestly, you’d never know it was there unless you were looking for it. It’s just a fantastic, wholesome, and ridiculously tasty treat.
Why you’ll love this recipe?
There are so many reasons why this recipe has earned a permanent spot in my recipe binder, and why I’m so excited to share it with you! First off, the flavor is just out of this world. It’s perfectly spiced with cinnamon and a hint of nutmeg, making it incredibly warm and inviting. The zucchini adds this subtle sweetness that complements the spices beautifully, and if you add in some chocolate chips or walnuts (my personal favorite!), it just elevates everything. It’s not overly sweet, which I really appreciate, but it’s sweet enough to feel like a real treat.
Then there’s the simplicity. Honestly, this is a lifesaver on busy weeknights or when unexpected guests pop over. You can probably whip it up with ingredients you already have in your pantry. It takes less than 20 minutes of active prep time, and then the oven does all the hard work. No fancy equipment needed, just a couple of bowls and a whisk.
Cost-efficiency is another big plus! Zucchini is often super affordable, especially when it’s in season. This recipe makes a generous loaf (or two smaller ones!), so it’s a great way to feed a crowd or have snacks for days without breaking the bank.
And versatility? Oh yes! This zucchini bread is incredibly versatile. I’ve made it plain, I’ve added nuts, chocolate chips, even a swirl of cream cheese. It’s fantastic on its own, but it’s also amazing toasted and slathered with a bit of butter. It’s perfect for breakfast, a midday snack, or even a light dessert. It’s really the perfect sweet bite anytime you need it. What I love most about this recipe, compared to others I’ve tried, is that guaranteed moistness. No dry, crumbly messes here, just pure, tender, deliciousness every single time. It’s like my secret weapon for baking success!
How do you make Zucchini bread?
Quick Overview
This is truly a simple bake. You’ll whisk together your dry ingredients, then your wet ingredients in separate bowls, combine them gently, fold in your add-ins, and bake until golden and a toothpick comes out clean. The zucchini is grated and squeezed slightly to remove excess moisture, ensuring a perfect texture without making the bread soggy. It’s a foolproof method that yields incredibly moist and flavorful results every single time. Even if you’re a beginner baker, you can totally nail this!
Ingredients
For the Main Batter:
2 cups all-purpose flour (spooned and leveled – don’t scoop directly from the bag!)
1 teaspoon baking soda
1/2 teaspoon salt
1 teaspoon ground cinnamon
1/4 teaspoon ground nutmeg (optional, but I love it!)
1 1/2 cups granulated sugar (you can reduce this slightly if you prefer, but it helps with moisture)
2 large eggs, at room temperature
3/4 cup vegetable oil (or melted coconut oil for a subtle flavor)
1/4 cup milk (any kind works, I’ve tested this with almond milk and it actually made it even creamier!)
1 teaspoon vanilla extract
2 cups grated zucchini (from about 2 medium zucchinis, packed lightly)
For Optional Add-ins (Highly Recommended!):
1 cup chopped walnuts or pecans
1 cup chocolate chips (milk, dark, or semi-sweet – your call!)
A swirl of cream cheese (about 4 oz cream cheese, softened, mixed with 1 tbsp sugar and 1 tsp vanilla)
For the Simple Glaze (Optional, but so good!):
1 cup powdered sugar
2-3 tablespoons milk or lemon juice (lemon juice adds a lovely tang!)
1/2 teaspoon vanilla extract
Step-by-Step Instructions
Step 1: Preheat & Prep Pan
First things first, get your oven preheating to 350°F (175°C). This is crucial for even baking. Then, grab a standard 9×5 inch loaf pan. Grease it really well with butter or cooking spray, and then dust it with a little flour. You can also line it with parchment paper, leaving some overhang on the sides – this makes lifting the bread out so much easier later. Give that pan a little tap to spread the flour evenly and get rid of any excess.
Step 2: Mix Dry Ingredients
In a large bowl, whisk together the flour, baking soda, salt, cinnamon, and nutmeg (if you’re using it). Make sure everything is thoroughly combined. This step ensures that your leavening and spices are evenly distributed throughout the batter, so you don’t get pockets of baking soda or bland bites. Give it a good whisk for about 30 seconds.
Step 3: Mix Wet Ingredients
In a separate medium bowl, whisk together the granulated sugar, eggs, vegetable oil, milk, and vanilla extract until everything is smooth and well combined. You want it to be a lovely, uniform color and consistency. Don’t over-beat it, just get it all mixed up nicely.
Step 4: Combine
Now, pour the wet ingredients into the bowl with the dry ingredients. Use a spatula or wooden spoon to gently fold them together. This is where you need to be careful not to overmix! Mix just until you no longer see streaks of dry flour. A few small lumps are perfectly okay. Overmixing develops the gluten in the flour too much, which can lead to a tough, dense bread. We want tender and moist!
Step 5: Prepare Filling
If you’re adding nuts or chocolate chips, now’s the time to gently fold them into the batter. Just use your spatula to incorporate them. If you’re doing a cream cheese swirl, dollop spoonfuls of the softened cream cheese mixture over the batter and then gently swirl it in with a knife or skewer, but don’t overdo it – we want distinct swirls, not a completely mixed batter.
Step 6: Layer & Swirl
Pour about half of the batter into your prepared loaf pan. If you’re doing a cream cheese swirl, dollop half of the cream cheese mixture on top and gently swirl it into the batter. Then, pour the remaining batter on top and add the rest of the cream cheese dollops, swirling again. If you’re not using cream cheese, just pour all the batter into the pan. You can give the pan a gentle tap on the counter to help settle the batter.
Step 7: Bake
Pop that pan into your preheated oven. Bake for about 50-65 minutes. The exact time will vary depending on your oven, so start checking around the 50-minute mark. You’ll know it’s done when the top is golden brown and a wooden skewer or toothpick inserted into the center comes out clean (or with a few moist crumbs attached, but no wet batter). If the top starts to brown too quickly, you can loosely tent it with aluminum foil for the last 15-20 minutes of baking.
Step 8: Cool & Glaze
Once it’s baked, let the zucchini bread cool in the pan on a wire rack for about 15-20 minutes. This is important because it allows the bread to set up properly. After that, carefully invert the loaf onto the wire rack to cool completely. While it’s cooling, you can whip up the glaze if you’re using it. Whisk together the powdered sugar, milk (or lemon juice), and vanilla until you have a smooth, pourable consistency. If it’s too thick, add a tiny bit more liquid; if it’s too thin, add a bit more powdered sugar. Once the bread is completely cool, drizzle the glaze over the top. Let the glaze set for a few minutes before slicing.
Step 9: Slice & Serve
Once the glaze has set (or if you skipped the glaze!), use a serrated knife to slice your beautiful zucchini bread. It slices best when it’s completely cool, but I’ll admit, I’ve definitely snuck a warm slice before, and it’s divine! Serve it as is, or with a smear of butter. Enjoy your masterpiece!
What to Serve It With
This zucchini bread is so wonderfully versatile, it fits into pretty much any meal or snack time you can think of! For a cozy breakfast, I love it toasted and served with a strong cup of coffee. It’s not too sweet first thing in the morning, and that hint of spice is just perfect. It looks so pretty on a breakfast plate, especially if you’ve got a few chocolate chips peeking out.
For a lovely brunch spread, I often serve slices alongside fresh fruit salad or yogurt parfaits. It adds a beautiful, homemade touch that guests always appreciate. A glass of orange juice or even a mimosa pairs wonderfully with it, making it feel a little more special.
As a dessert, it’s a lighter option than a rich chocolate cake, but still incredibly satisfying. I’ll sometimes serve it with a dollop of whipped cream or a light dusting of powdered sugar if I’m feeling fancy. It’s also lovely with a scoop of vanilla bean ice cream – talk about decadent!
And then there are those lazy afternoons or late-night cravings. This is perfect when you’re craving something sweet at 10pm but don’t want to bake a whole cake. Just grab a slice (or two!) with a glass of milk. It’s pure comfort food. My family tradition is to have a slice with hot chocolate on chilly evenings. It’s just the best. Honestly, it’s a crowd-pleaser no matter how you serve it!
Top Tips for Perfecting Your Zucchini Bread
I’ve made this recipe more times than I can count, and through all those loaves, I’ve picked up a few tricks that really make a difference. Here are my top tips to ensure your zucchini bread turns out perfectly moist and delicious every single time:
Zucchini Prep: This is arguably the most crucial step. You want to grate your zucchini using the medium holes on a box grater. After grating, place the shredded zucchini in a fine-mesh sieve or cheesecloth and gently press out as much excess moisture as possible. Don’t go crazy and wring it out completely dry; you still want some moisture for tenderness, but you don’t want it to make your batter watery. I usually give it a good squeeze with my hands. Also, make sure your zucchini is fresh! Older zucchini can be a bit watery and less flavorful.
Mixing Advice: Remember what I said about not overmixing? It’s worth repeating! Once you add the wet ingredients to the dry, mix *just* until combined. A few lumps in the batter are your friends. Overmixing leads to a tough, chewy texture, which is the opposite of what we want in a tender quick bread. I always stop mixing as soon as I can’t see any dry flour anymore, even if there are a few little lumps. Trust me on this one!
Swirl Customization: If you’re doing a cream cheese swirl, don’t try to make perfect patterns. Just dollop it onto the batter and give it a few gentle swirls with a knife or skewer. The goal is streaks of deliciousness, not a homogenous mix. You can also experiment with other swirls! A caramel sauce or even some melted chocolate swirled in can be amazing. For visual appeal, try to get some of the swirl on top so it’s visible when you slice it.
Ingredient Swaps: This recipe is pretty forgiving! If you don’t have vegetable oil, melted butter (about 3/4 cup) works, though it can make the bread slightly less moist over time. For the milk, any dairy or non-dairy milk is fine; I’ve had great success with almond and oat milk. If you want to reduce the sugar, you can try cutting it down to 1 cup, but be aware it might make the bread a bit less moist and less sweet. For the nuts, feel free to use whatever you have on hand – pecans, walnuts, even slivered almonds.
Baking Tips: Always preheat your oven properly! A few extra minutes to let it reach temperature makes a big difference. Don’t place your loaf pan on the very bottom rack, as this can sometimes cause the bottom to brown too quickly. The middle rack is usually best. Keep an eye on the bread towards the end of baking; ovens can vary! The toothpick test is your best friend here. If the top is browning too fast, loosely tent it with foil.
Glaze Variations: The simple powdered sugar glaze is my go-to, but you can customize it! For a tangier glaze, use lemon juice instead of milk. A splash of orange juice can add a nice citrus note. If you want a chocolate glaze, melt some chocolate chips with a teaspoon of butter and a splash of milk. For a super simple topping, just a dusting of powdered sugar is lovely, especially if you’ve added chocolate chips or nuts to the batter.
Storing and Reheating Tips
Keeping your delicious zucchini bread fresh is super easy, and honestly, it’s usually gone before we even need to worry about long-term storage! But if you do have leftovers, here’s how to keep them tasting as good as they did on day one.
Room Temperature: Once the bread is completely cooled, you can store it at room temperature. The best way is to wrap it tightly in plastic wrap or aluminum foil, or place it in an airtight container. It will stay wonderfully moist and delicious for about 2-3 days. I often find it tastes even better on the second day as the flavors meld together.
Refrigerator Storage: If your kitchen is particularly warm or humid, or if you want it to last a bit longer, you can store it in the refrigerator. Again, make sure it’s in an airtight container or well-wrapped. It should keep well for up to a week. Just a heads-up, though: refrigerating can sometimes make baked goods a *tiny* bit drier, but the zucchini in this bread really helps combat that!
Freezer Instructions: For longer storage, the freezer is your best friend! Once the loaf is completely cooled, wrap it tightly in plastic wrap, then in a layer of aluminum foil, or place it inside a freezer-safe bag. It can stay frozen for up to 2-3 months. To thaw, unwrap it and let it come to room temperature on the counter. You can also warm slices gently in the oven or microwave if you prefer.
Glaze Timing Advice: This is important! Only apply the glaze *after* the bread has completely cooled. If you glaze a warm loaf, the glaze will melt and become a sticky mess. If you plan to freeze the loaf with glaze, I’d recommend glazing it *after* thawing, just before serving, to keep the glaze looking its best. If you’re storing it at room temperature or in the fridge, glazing it once cooled is perfectly fine.
Frequently Asked Questions
Final Thoughts
So there you have it! My absolute favorite Zucchini Bread recipe. I really hope you give this one a try. It’s more than just a recipe to me; it’s a little piece of comfort, a reliable friend in the kitchen that always delivers. It’s that perfect balance of moist, tender, and deliciously spiced that makes you want to savor every bite. It’s amazing how something so simple and made with such humble ingredients can be so incredibly satisfying.
If you love this recipe, you might also enjoy my Ultimate Banana Bread or my Lemon Blueberry Muffins – they’re in a similar vein of comforting, easy-to-make baked goods.
I’m so excited for you to experience this zucchini bread magic! Please, if you make it, come back and leave a comment below and tell me how it turned out. I’d love to hear if your family loves it as much as mine does, or if you tried any fun add-ins. Sharing your creations and variations truly makes my day! Happy baking, friends!
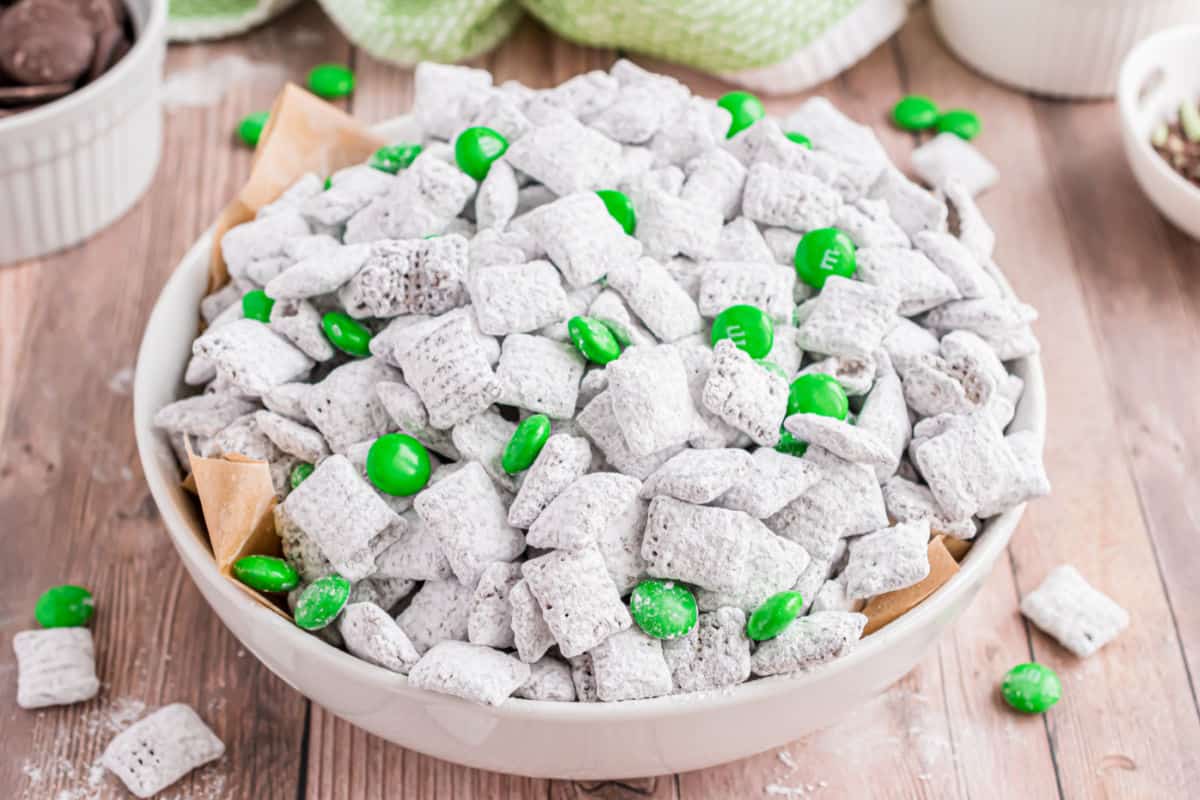
mint puppy chow
Ingredients
Method
- In the microwave, melt chocolate wafers with mint candy together for one minute. Stir, and continue melting in 30-second intervals until the mixture is smooth (this usually takes a total of 2 minutes).
- In a large mixing bowl, combine the cereal with the melted chocolate mixture. Fold gently with a large wooden spoon until all the cereal is evenly coated.
- In a large, gallon-sized Ziploc bag, add the powdered sugar. Spoon in the chocolate-coated cereal mixture. Seal the bag and shake vigorously until the powdered sugar completely coats all the cereal. Pour onto a large piece of wax paper and allow the chocolate to set (about 20 minutes). Once set, combine with Mint M&M candies and store in an airtight container. Enjoy!