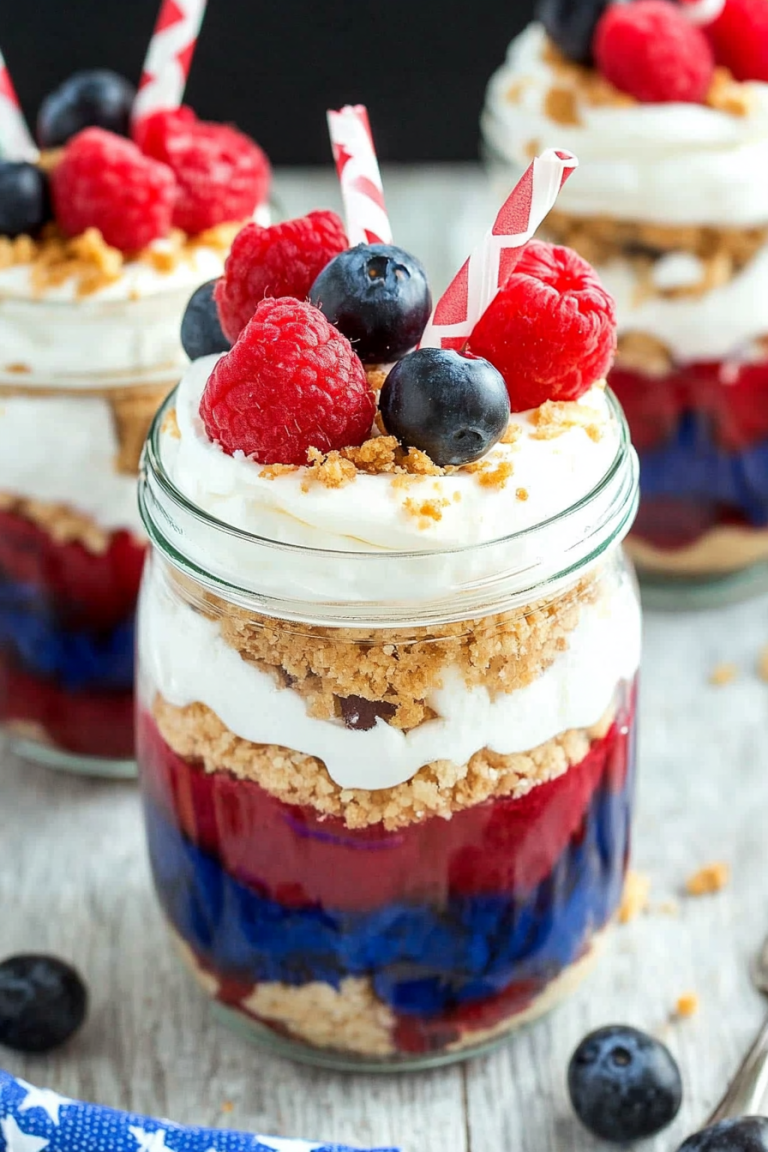
Mini Apple Pies Simply Delicious
You know those recipes that just feel like a warm hug? The ones you whip up when you need a little bit of sunshine on a gloomy day, or when unexpected guests pop by and you want to offer them something truly special? This Zucchini Bread with Cream Cheese Swirl is exactly that for me. It’s not just any zucchini bread; it’s the one I’ve tinkered with for years, the one my family devours faster than I can bake it, and honestly, it’s the one that finally convinced my skeptical dad that zucchini in baked goods is a culinary miracle. It’s kind of like a fudgy brownie meets a tender muffin, all wrapped up in this comforting, spiced loaf. It’s the perfect antidote to that 3 pm sweet craving when you really don’t want to deal with a full cake, and let me tell you, the secret creamy swirl takes it from great to absolutely unforgettable. Forget those dry, bland loaves you might have encountered; this one is moist, packed with flavor, and surprisingly simple to pull off. It’s the kind of bake that makes your kitchen smell absolutely divine and brings everyone running.
What is Zucchini bread with cream cheese swirl?
So, what exactly is this magical concoction I keep raving about? At its heart, it’s a classic quick bread, meaning it relies on baking soda and baking powder for leavening rather than yeast, which makes it super speedy. The “zucchini” part comes from the star vegetable itself, which, believe it or not, adds incredible moisture and a subtle sweetness without any discernible vegetable flavor once it’s baked. It’s kind of like baking with applesauce or mashed banana – it just makes everything so wonderfully tender! The “cream cheese swirl” is where the real party starts. It’s a simple, slightly tangy mixture of cream cheese, a touch of sugar, and an egg yolk that gets swirled into the zucchini batter before baking. This creates beautiful marbled patterns and pockets of creamy, rich goodness throughout the loaf. Think of it as giving a humble zucchini bread a decadent, cheesecake-like upgrade. It’s essentially the best of both worlds: the comforting familiarity of quick bread with an extra layer of luxurious flavor and texture.
Why you’ll love this recipe?
Honestly, there are so many reasons why this zucchini bread has earned a permanent spot in my recipe binder. First off, the flavor profile is just *chef’s kiss*. You get that comforting warmth from the cinnamon and nutmeg, a hint of sweetness from the sugar, and then bam – that utterly delightful tang and creaminess from the cream cheese swirl. It’s perfectly balanced, never too sweet, and just feels incredibly satisfying. And can we talk about simplicity? I’ve made this on frantic weeknights when I needed a last-minute dessert or breakfast treat, and it’s genuinely so easy. The batter comes together in one bowl, and the swirl is just a quick mix. It’s the kind of recipe that makes you feel like a baking pro without actually breaking a sweat. Plus, it’s incredibly budget-friendly! Zucchini is usually quite affordable, and the other ingredients are pantry staples. You get a gorgeous, impressive-looking loaf for a fraction of the cost of store-bought baked goods. And the versatility! This bread is a chameleon. It’s perfect for a quick breakfast on the go, a lovely addition to a weekend brunch spread, or a delightful dessert with a cup of tea. It truly shines in any scenario. What I personally love most about this recipe, though, is how it transforms simple ingredients into something so comforting and crave-worthy. It’s a testament to how the right combination of flavors and textures can create pure magic in your own kitchen. It reminds me a bit of my mom’s spice cake, but with that wonderful, unexpected creaminess. It’s a crowd-pleaser, for sure.
How do you make Zucchini bread with cream cheese swirl?
Quick Overview
This recipe is all about layering simple steps to create something extraordinary. We’ll start by creaming together our wet and dry ingredients for the zucchini bread base, making sure it’s perfectly moist and tender. Then, we’ll whip up a quick, luscious cream cheese mixture that’s destined to become our signature swirl. Finally, it’s all about layering and swirling for that beautiful, marbled effect before baking. It’s a straightforward process that yields spectacular results, proving that you don’t need to be a pastry chef to create something truly delicious. This method ensures every bite is a perfect balance of spiced zucchini cake and rich, tangy cream cheese.
Ingredients
For the Main Batter:
2 cups all-purpose flour (I always use unbleached, it just has a better texture!)
1 teaspoon baking soda
1/2 teaspoon baking powder
1/2 teaspoon salt
1 teaspoon ground cinnamon
1/4 teaspoon ground nutmeg (freshly grated is amazing if you have it!)
1 3/4 cups granulated sugar (you can reduce this slightly if you prefer, but it helps with moisture)
2 large eggs, at room temperature
1 cup vegetable oil (or a neutral oil like canola or grapeseed)
1 teaspoon vanilla extract
2 cups grated zucchini, squeezed dry (this is key! About 2 medium zucchinis)
1/2 cup sour cream or plain Greek yogurt (adds extra moisture and tenderness!)
For the Filling:
4 ounces cream cheese, softened to room temperature (don’t skip the softening part, it makes it smooth!)
1/4 cup granulated sugar
1 large egg yolk (save the white for another use!)
1/2 teaspoon vanilla extract
For the Glaze:
1 cup powdered sugar, sifted (sifting prevents lumps!)
2-3 tablespoons milk or heavy cream (start with 2, add more for desired consistency)
1/4 teaspoon vanilla extract
A tiny pinch of salt (enhances sweetness)
Step-by-Step Instructions
Step 1: Preheat & Prep Pan
First things first, let’s get our oven fired up to 350°F (175°C). This gives it plenty of time to heat up evenly. Now, grab a standard 9×5 inch loaf pan. I like to grease mine really well with butter or non-stick spray, and then dust it lightly with flour. This ensures our beautiful bread will slide right out when it’s done. Alternatively, you can line it with parchment paper, leaving some overhang on the sides – it makes lifting the loaf out a breeze. Trust me, wrestling a stuck loaf is no fun!
Step 2: Mix Dry Ingredients
In a large bowl, whisk together the flour, baking soda, baking powder, salt, cinnamon, and nutmeg. Give it a good whisk to make sure everything is evenly distributed. This step is super important for even leavening and flavor throughout your loaf. No one wants a bite that’s just cinnamon, right?
Step 3: Mix Wet Ingredients
In a separate, slightly smaller bowl, beat the granulated sugar and eggs together until they’re nice and fluffy. This usually takes a minute or two with a whisk or an electric mixer. Then, slowly drizzle in the vegetable oil while whisking constantly until it’s fully incorporated. Stir in the vanilla extract and the sour cream (or Greek yogurt). The mixture might look a little separated or curdled at this stage, and that’s totally okay! It will all come together.
Step 4: Combine
Now, pour the wet ingredients into the bowl with the dry ingredients. Using a spatula or a wooden spoon, gently fold everything together until *just* combined. Don’t you dare overmix this! Overmixing develops the gluten in the flour, which can make your bread tough. A few streaks of dry flour are perfectly fine; they’ll disappear when you add the zucchini.
Step 5: Prepare Filling
In a medium bowl, beat together the softened cream cheese and the 1/4 cup of sugar until smooth and creamy. You really want to make sure that cream cheese is soft so there are no lumps. Then, stir in the egg yolk and the vanilla extract until everything is well combined and the mixture is glossy. This filling is pure decadence!
Step 6: Layer & Swirl
Gently fold the squeezed, grated zucchini into the main batter until it’s just incorporated. Now, spoon about half of the zucchini batter into your prepared loaf pan. Dollop about half of the cream cheese filling over the batter. Use a knife or a skewer to gently swirl the cream cheese into the batter, creating a marbled effect. Don’t over-swirl, you want distinct ribbons! Repeat with the remaining zucchini batter and then dollop the rest of the cream cheese filling on top, swirling again. Aim for pretty patterns, but don’t stress about perfection!
Step 7: Bake
Pop that beautiful pan into your preheated oven. Bake for 50-65 minutes. The baking time can vary quite a bit depending on your oven, so keep an eye on it. You’ll know it’s done when a toothpick inserted into the center comes out clean, or with just a few moist crumbs attached (not wet batter!). If the top starts to brown too quickly before the center is cooked, you can loosely tent it with aluminum foil.
Step 8: Cool & Glaze
Once baked, let the loaf cool in the pan for about 10-15 minutes. This allows it to set up properly. Then, carefully invert it onto a wire rack to cool completely. Resist the urge to glaze it while it’s hot – the glaze will just melt off! For the glaze, whisk together the sifted powdered sugar, vanilla, a pinch of salt, and 2 tablespoons of milk or cream until smooth. Add more liquid a teaspoon at a time if you want a thinner glaze. Once the bread is completely cool, drizzle that lovely glaze all over the top. Let the glaze set for about 15-20 minutes before slicing.
Step 9: Slice & Serve
Once the glaze has set, you can slice into your masterpiece! I find a serrated knife works best for a clean cut. Serve slices at room temperature. The contrast between the moist, spiced bread and the creamy, tangy swirl is just out of this world. Enjoy every single bite!
What to Serve It With
This Zucchini Bread with Cream Cheese Swirl is so wonderfully versatile, it fits into almost any meal or occasion. For a classic breakfast, I love pairing a warm slice with a strong cup of coffee. The richness of the bread is perfectly balanced by the bitterness of the coffee. Sometimes, I’ll even toast a slice lightly and add a tiny smear of butter for extra indulgence. For a more elaborate brunch spread, it’s a star player. It looks so elegant sliced on a tiered stand, and it pairs beautifully with fresh fruit salads, quiches, or even a side of crispy bacon. For a dessert situation, it’s fantastic on its own, but if you want to go the extra mile, a small scoop of vanilla bean ice cream alongside it is pure heaven. The warm bread with the cold, creamy ice cream is a match made in dessert paradise. And for those cozy, quiet moments, when you just need a comforting snack? A slice with a warm cup of herbal tea is my go-to. It’s just so homey and satisfying. My kids also love it as an after-school snack, often asking for a second piece, which is always the highest praise in my book!
Top Tips for Perfecting Your Zucchini Bread with Cream Cheese Swirl
After making this a gazillion times, I’ve picked up a few tricks that I think make a world of difference. For the zucchini, the most crucial step is squeezing out as much moisture as you possibly can. I use a clean kitchen towel or cheesecloth for this. If you don’t squeeze it enough, you’ll end up with a gummy, wet bread, and nobody wants that! Grating the zucchini on the large holes of a box grater is usually my preferred method; it gives you nice little shreds that integrate well. When it comes to mixing the batter, I can’t stress enough: do NOT overmix. Overworking the flour creates tough gluten strands. Mix until you *just* see no more dry flour streaks. It’s better to have a few tiny streaks than to mix it into a dense paste. For that beautiful swirl, don’t go crazy with it. Gentle swirls are key. You want distinct ribbons of cream cheese running through the bread, not a fully blended mixture. This adds visual appeal and pockets of that delightful creaminess. I’ve experimented with ingredient swaps over the years, too. If you’re out of sour cream, full-fat plain Greek yogurt is an excellent substitute – it adds a nice tang and incredible moisture. I’ve even tested this with almond milk in the glaze, and it works beautifully, just might need a touch more powdered sugar to thicken. For baking, always use the middle rack of your oven for the most even heat distribution. And that toothpick test is your best friend; it’s the most reliable way to know your bread is cooked through without being dried out. Don’t be afraid to adjust baking time based on your oven; they all have their quirks! Finally, for the glaze, always start with less liquid than you think you need. You can always add more to thin it out, but it’s much harder to thicken it if you add too much at once. Consistency is key for that perfect, drizzly finish.
Storing and Reheating Tips
One of the best things about this zucchini bread is how well it keeps, making it perfect for making ahead. At room temperature, it’ll stay wonderfully fresh for about 2-3 days, especially if you keep it well-wrapped in plastic wrap or in an airtight container. This is my preferred method for everyday enjoyment. If you’ve made a larger batch or want to keep it for longer, the refrigerator is your best friend. Tightly wrapped, it can last for up to a week. I often find the flavors even deepen a bit after a day or two in the fridge. When you’re ready to enjoy it again, you can just let it come to room temperature, or for a little treat, pop a slice in the toaster oven for a few minutes until it’s slightly warm and fragrant – it’s divine! Freezing is also a fantastic option if you want to have this on hand for weeks to come. Let the bread cool completely, then wrap it tightly first in plastic wrap, and then in a layer of aluminum foil or place it in a freezer-safe bag. It should keep well in the freezer for up to 2-3 months. When you’re ready to thaw, simply unwrap it and let it come to room temperature, or thaw it in the refrigerator overnight. For reheating, a gentle warming in the oven or toaster oven brings back that fresh-baked magic. I usually wait to add the glaze until after the bread has cooled completely, especially if I know I’ll be storing or freezing it. If you plan to glaze it right away and then store it, make sure the glaze is fully set before wrapping, otherwise, it can stick and become messy.
Frequently Asked Questions
Final Thoughts
So there you have it – my beloved Zucchini Bread with Cream Cheese Swirl! I really hope you give this a try. It’s more than just a recipe for me; it’s a source of comfort, a way to use up garden abundance, and a guaranteed hit whenever I serve it. It embodies everything I love about home baking: simple ingredients transformed into something truly special, a little bit of effort yielding a whole lot of deliciousness, and the joy of sharing a homemade treat with loved ones. It’s the kind of recipe that makes you feel good from start to finish. If you enjoy this recipe, you might also love my recipe for Moist Blueberry Muffins or my Classic Banana Bread – they have a similar comforting vibe! I can’t wait to hear what you think, and I’d absolutely love it if you shared your own twists and turns in the comments below. Happy baking, my friends!
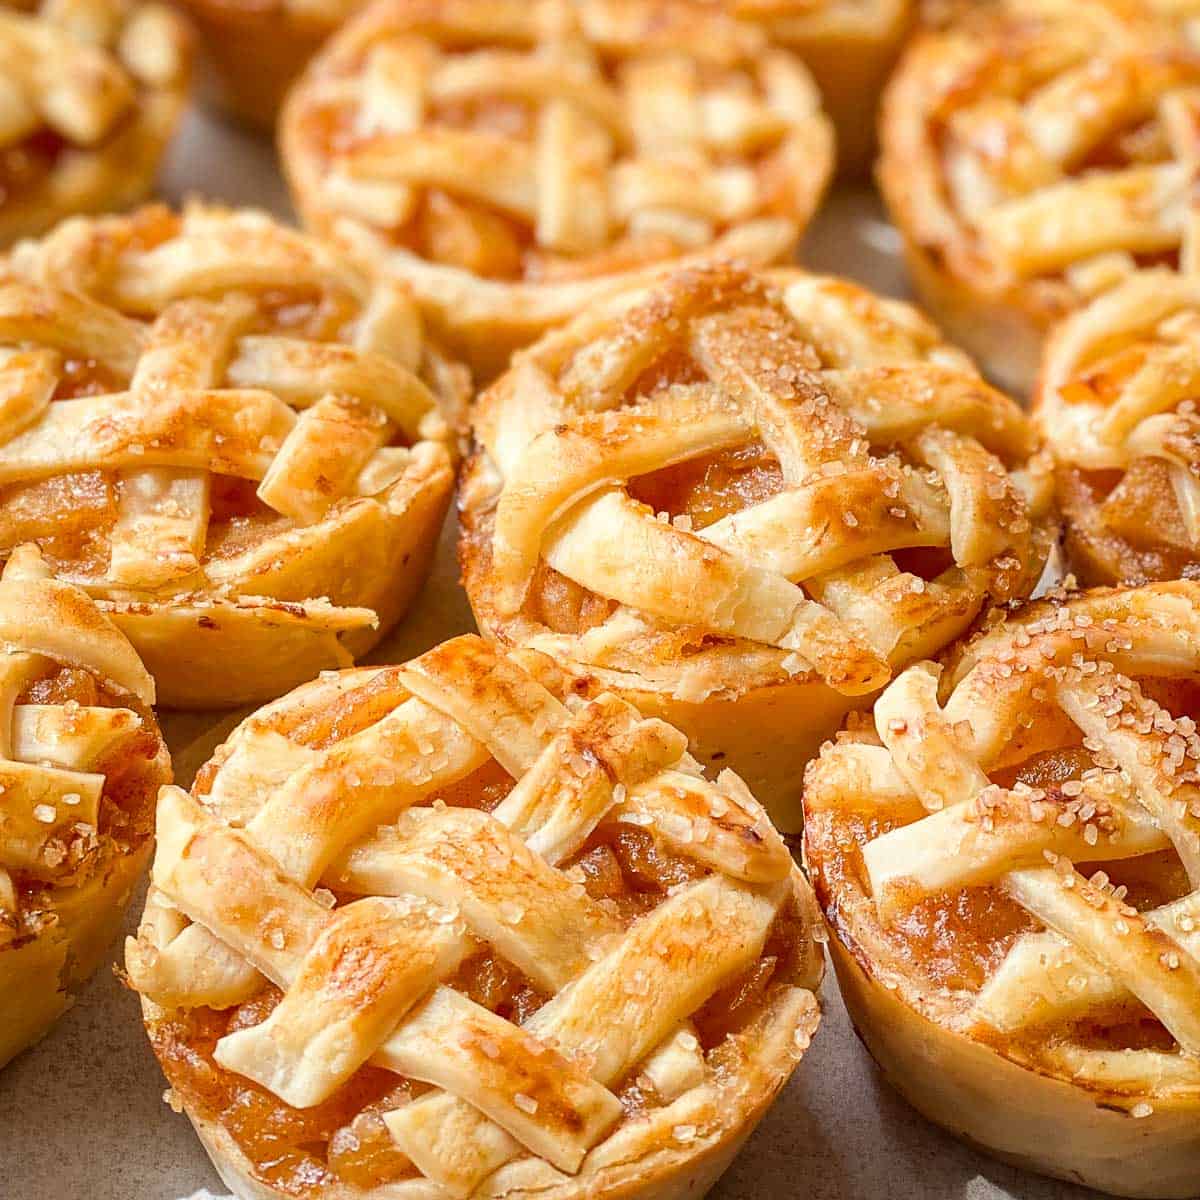
mini apple pies
Ingredients
Method
- Preheat oven to 400°F (200°C). Take store-bought pie crust out of the refrigerator and let it sit on the counter for 15 minutes.
- Peel, core, and slice 4 apples into 0.25 inch slices. Place the apples into a large bowl.
- Toss apples with lemon juice.
- Mix cinnamon, 0.25 cup granulated sugar, and 0.25 cup all-purpose flour in with the apples, so that all the apples are coated evenly.
- Transfer apple mixture to a medium-sized pan, add butter on top, and cover with a lid. Over medium heat, bring the apples up to a simmer and stew them until they are soft.
- Take 2 discs of store-bought pie crust and carefully unroll them. They should be easy to roll out without breaking the dough.
- Using a large, 3.25-3.5 inch biscuit cutter, cut 12 circles out of the dough.
- Carefully press a dough circle into the bottom and sides of a muffin tin. Do this to line all 12 muffin tin cups.
- Fill each muffin tin with 2 tablespoons of the prepared apple pie filling.
- Cut 0.25 inch strips from the remaining dough for the lattice top. Remove every other strip and weave them cross-wise with the other strips.
- Using a 2.5 inch biscuit cutter, cut 12 lattice top circles and place each on top of a mini pie in the muffin tin.
- Whisk together 1 egg and 1 tablespoon water to make an egg wash. Use a pastry brush to dab a little on the top of each mini pie.
- Sprinkle the top of each mini pie with a little turbinado sugar for that finishing touch.
- Place the muffin tin pan on a baking sheet lined with parchment paper to catch any baking spills. Bake for 15 minutes at 400°F (200°C).