Iced Oatmeal Cookies a Simple Delight
Oh, where do I even begin with this zucchini bread? It’s more than just a recipe to me; it’s a hug in cake form, a comforting aroma that instantly makes my kitchen feel like home, and honestly, the best way to use up all that extra zucchini that seems to appear magically in my garden every summer. I remember my grandma making something similar when I was a kid, and her version always had this incredible moistness and just the right touch of sweetness. This one, though, this is the one I’ve tweaked and perfected over years, and it’s the one my own kids now beg for. It’s honestly so good, it can go head-to-head with any classic quick bread out there, and I’m not just saying that! If you’ve ever found yourself with a surplus of zucchini and a craving for something homemade, you’re in for a treat. This easy zucchini bread is a lifesaver, seriously.
What is Zucchini bread?
So, what exactly is zucchini bread? At its heart, it’s a quick bread, meaning it uses chemical leaveners like baking soda and baking powder instead of yeast, so you don’t have to wait for dough to rise. The star ingredient, of course, is grated zucchini. Now, don’t let that scare you! You absolutely cannot taste the zucchini in the finished product, I promise. What it does is add an incredible amount of moisture, making the bread unbelievably tender and soft. Think of it as nature’s secret ingredient for the perfect crumb. It’s usually spiced with cinnamon, sometimes nutmeg, and often studded with nuts or chocolate chips. It’s the kind of comforting, homey bake that feels special enough for company but is simple enough for a weeknight treat. It’s not cake, it’s not a muffin, it’s that perfect middle ground of a truly satisfying quick bread.
Why you’ll love this recipe?
There are so many reasons why this zucchini bread recipe has earned a permanent spot in my recipe binder and, more importantly, in my family’s hearts. First off, the flavor is just divine. It’s perfectly spiced with cinnamon, with a subtle sweetness that isn’t overpowering. The texture? Oh my goodness, the texture! Thanks to that secret ingredient (the zucchini!), it’s incredibly moist and tender. It’s the kind of bread that melts in your mouth. And the best part? It’s ridiculously easy to make. I’ve had nights where I’m scrambling to find a dessert or breakfast option, and this comes to the rescue every single time. It uses pantry staples, most of which I always have on hand. It’s also surprisingly budget-friendly, especially when zucchini is in season and practically free at the farmer’s market. What I love most is its versatility. You can toss in chocolate chips, walnuts, or pecans. I even once experimented with adding a swirl of cream cheese filling, and it was heavenly! It’s the kind of recipe that feels like a classic, but you can totally make it your own. It’s like the cozy sweater of the baking world – familiar, comforting, and always a good idea.
How do you make Zucchini bread?
Quick Overview
This recipe is all about simple steps that come together quickly. You’ll whisk your dry ingredients, then your wet ingredients, combine them gently, fold in any goodies you like, and bake it all up. The zucchini gets grated, squeezed slightly, and then it works its magic. It’s genuinely foolproof, even for beginners. The whole process, from mixing to getting it into the oven, takes about 15-20 minutes. What makes this method so special is how it ensures that incredibly moist crumb without any fuss.
Ingredients
For the Main Batter:
This is where all the magic starts. You’ll need all-purpose flour, baking soda, baking powder, salt, and of course, cinnamon for that cozy warmth. I always recommend using a good quality cinnamon; it really makes a difference in the aroma and flavor. Make sure your baking soda and baking powder are fresh, too – that’s crucial for a good rise!
For the Filling:
The star here is grated zucchini. You’ll want about two cups, which usually comes from about two medium zucchinis. Don’t worry about peeling them; the skin adds nutrients and a lovely subtle fleck of green. The key is to give it a good squeeze to remove excess moisture. This prevents your bread from becoming too dense or soggy. You can also add chopped walnuts or pecans for a nice crunch, or chocolate chips if you’re feeling extra decadent.
For the Glaze:
This is optional, but I rarely skip it! A simple powdered sugar glaze made with powdered sugar, a splash of milk or cream, and a tiny bit of vanilla extract. It adds a touch of sweetness and a pretty finish. You can also add a tiny pinch of cinnamon to the glaze for an extra flavor kick.
Step-by-Step Instructions
Step 1: Preheat & Prep Pan
First things first, get that oven preheating to 350 degrees Fahrenheit (175 degrees Celsius). This is important so your bread bakes evenly from the moment it goes in. I like to use a standard 9×5 inch loaf pan. Grease it really well with butter or cooking spray, and then dust it with a little flour, tapping out any excess. This ensures your beautiful loaf doesn’t stick. You can also line it with parchment paper for extra insurance – I learned this trick after one too many close calls!
Step 2: Mix Dry Ingredients
In a large bowl, whisk together your all-purpose flour, baking soda, baking powder, salt, and cinnamon. Whisking them together helps distribute the leavening agents evenly, which means a more consistent rise. You want to see no clumps of baking powder or soda. This is a quick step, but it’s foundational for great texture.
Step 3: Mix Wet Ingredients
In a separate medium bowl, whisk together your eggs, granulated sugar, brown sugar (I love using brown sugar for that extra moistness and depth of flavor), melted butter or vegetable oil, and vanilla extract. Whisk until everything is well combined and smooth. Make sure your melted butter isn’t too hot, or it could cook the eggs.
Step 4: Combine
Now, here’s the most important part: gently pour the wet ingredients into the dry ingredients. Use a spatula or wooden spoon and fold them together until *just* combined. It’s super important not to overmix here! You’ll still see a few streaks of flour, and that’s okay. Overmixing develops the gluten too much, which can lead to a tough loaf. We want tender, moist bread, remember?
Step 5: Prepare Filling
While you’re mixing the batter, or just before, make sure your grated zucchini is ready. Place the grated zucchini in a clean kitchen towel or cheesecloth and give it a good, firm squeeze over the sink to wring out as much liquid as possible. This step is NON-NEGOTIABLE for perfect zucchini bread. Then, gently fold this squeezed zucchini into the batter, along with any nuts or chocolate chips you’re using. Be careful not to stir too vigorously.
Step 6: Layer & Swirl
Pour the batter into your prepared loaf pan. If you’re feeling fancy and want a little swirl effect (which I totally recommend for visual appeal!), you can spoon some of your favorite jam or a quick cream cheese mixture on top and gently swirl it in with a knife. It looks so impressive, and who doesn’t love a surprise swirl?
Step 7: Bake
Pop that pan into your preheated oven. Bake for about 50-65 minutes. The exact time will vary depending on your oven, so keep an eye on it. You’ll know it’s done when a wooden skewer or toothpick inserted into the center comes out clean, or with just a few moist crumbs attached. If the top is browning too quickly before the inside is cooked, you can loosely tent it with aluminum foil.
Step 8: Cool & Glaze
Once it’s baked to perfection, let the zucchini bread cool in the pan for about 10-15 minutes. This allows it to set up properly. Then, carefully turn it out onto a wire rack to cool completely. Once it’s completely cool, you can whisk together your glaze ingredients and drizzle it over the top. Let the glaze set for a bit before slicing.
Step 9: Slice & Serve
Once the glaze is set (or if you’re skipping the glaze), slice it up with a serrated knife for clean cuts. This bread is delicious served at room temperature. The aroma as you slice into it is just heavenly!
What to Serve It With
This zucchini bread is so wonderfully versatile, it fits into any meal or snack time. For a leisurely Breakfast, I love it toasted with a smear of butter and a hot cup of coffee. It’s the perfect way to start the day without feeling heavy. For a more festive Brunch spread, I’ll slice it a bit thinner, arrange it nicely on a platter, maybe with a few fresh berries on the side, and pair it with a mimosa or some sparkling cider. It’s always a hit! As a satisfying Dessert, it’s fantastic on its own, or you could serve a slice warm with a scoop of vanilla ice cream or a dollop of whipped cream. Seriously decadent! And for those moments when you just need a comforting, Cozy Snack in the afternoon or evening (you know, that 10 pm craving for something sweet?), this zucchini bread is pure bliss. It’s hearty enough to curb the cravings but not so heavy that it makes you feel sluggish. My family also loves it as an after-school treat with a glass of cold milk. It’s just that good!
Top Tips for Perfecting Your Zucchini Bread
I’ve learned a few things over the years of making this zucchini bread, and I’m happy to share them to help you get the absolute best results. First, about the Zucchini Prep: squeezing out that moisture is key. I can’t stress this enough. It’s the difference between a moist, tender loaf and a dense, gummy one. Use a fine grater for the zucchini; it blends into the batter more seamlessly. For Mixing Advice, remember the golden rule: don’t overmix! Fold the wet into the dry until *just* combined. A few streaks of flour are better than overmixing. The batter should be thick but pourable. When it comes to Swirl Customization, get creative! You can use cream cheese mixed with a little sugar and cinnamon, or even a simple fruit jam. Just spoon dollops on top and gently swirl with a knife. Don’t go too deep, or you’ll disrupt the batter too much. For Ingredient Swaps, if you don’t have butter, a neutral vegetable oil like canola or even melted coconut oil works well. For the nuts, pecans add a lovely buttery flavor, while walnuts have a slightly more robust taste. If you want to add chocolate chips, semi-sweet or dark chocolate chips are my go-to; milk chocolate can sometimes be too sweet. When it comes to Baking Tips, make sure your oven rack is in the center position. This ensures even heat circulation. Always do the toothpick test to check for doneness, as oven temperatures can vary wildly. And finally, Glaze Variations: if you find the standard glaze a bit too sweet, you can add a tiny bit of lemon juice for a tangier finish, or a pinch of espresso powder for a subtle coffee note. You can also skip the glaze entirely and just dust it with powdered sugar once cooled, or serve it with a simple maple syrup drizzle.
Storing and Reheating Tips
This zucchini bread is so forgiving when it comes to storage, which is one of the reasons I love it so much. If you’re planning to eat it within a couple of days, you can simply leave it at Room Temperature. I usually wrap the cooled loaf tightly in plastic wrap, or place it in an airtight container. It stays wonderfully moist for about 2-3 days this way. If you want it to last longer, Refrigerator Storage is your best bet. Wrap it well in plastic wrap, then in foil, or keep it in a sturdy airtight container. It will keep well in the fridge for up to a week, though it might lose a tiny bit of its fresh-baked softness. When you want a slice, you can enjoy it cold or, my personal favorite, give it a quick warm-up. For Freezer Instructions, this bread freezes beautifully! Once completely cooled, wrap the loaf tightly in a double layer of plastic wrap, then a layer of aluminum foil. You can also slice it and wrap individual slices. It will keep in the freezer for up to 3 months. To thaw, unwrap it and let it come to room temperature, or if you like it warm, pop a slice in the toaster oven or microwave for a few seconds. For Glaze Timing Advice, if you plan to freeze the bread, it’s best to bake, cool completely, and then freeze *without* the glaze. Add the glaze after thawing and warming. If you’re storing it at room temperature or in the fridge and plan to glaze it later, make sure the bread is completely cool before applying the glaze.
Frequently Asked Questions
Final Thoughts
Honestly, this zucchini bread is more than just a recipe; it’s a little piece of my kitchen’s soul that I’m so happy to share with you. It’s that perfect balance of simple, delicious, and incredibly satisfying that makes it a true staple. It’s proof that sometimes, the most humble ingredients can create the most magical results. Whether you’re a seasoned baker or just starting out, I truly believe you’ll find joy in making and sharing this. It’s the kind of recipe that makes your home smell amazing and brings a smile to everyone’s face. If you love this, you might also enjoy my recipe for moist blueberry muffins or my famous banana bread. Give this zucchini bread a try, and let me know how it turns out in the comments below! I’d love to hear about any delicious variations you come up with, too. Happy baking!
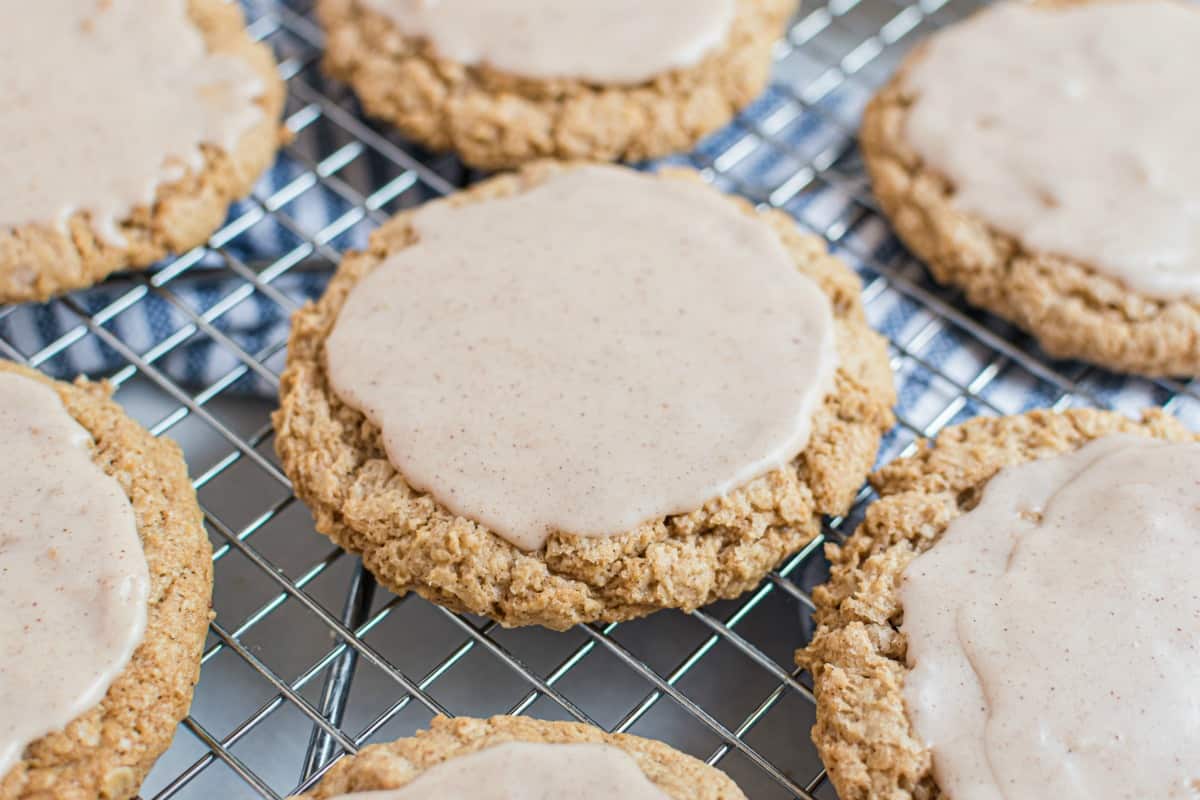
iced oatmeal cookies
Ingredients
Method
- In food processor, add oatmeal and pulse until partly ground. Don’t make into a fine powder, leave some chunks. I pulsed mine 6 times, at 1-2 seconds each. Set aside.
- In mixing bowl, blend together butter with sugars. Mix 1-2 minutes until combined. Add eggs, one at a time. Mix in remaining cookie ingredients and blend until thoroughly combined.
- Drop by several tablespoons onto a parchment paper lined cookie sheet. Bake in a 350 degree oven for 14-16 minutes. I like mine a little bit crunchier, so I went closer to 16 minutes. Remove and cool.
- To make glaze, whisk together powdered sugar with heavy cream and cinnamon until smooth. Frost each cookie and allow to harden. You can put them in refrigerator to speed up process (about 30 minutes). Enjoy!