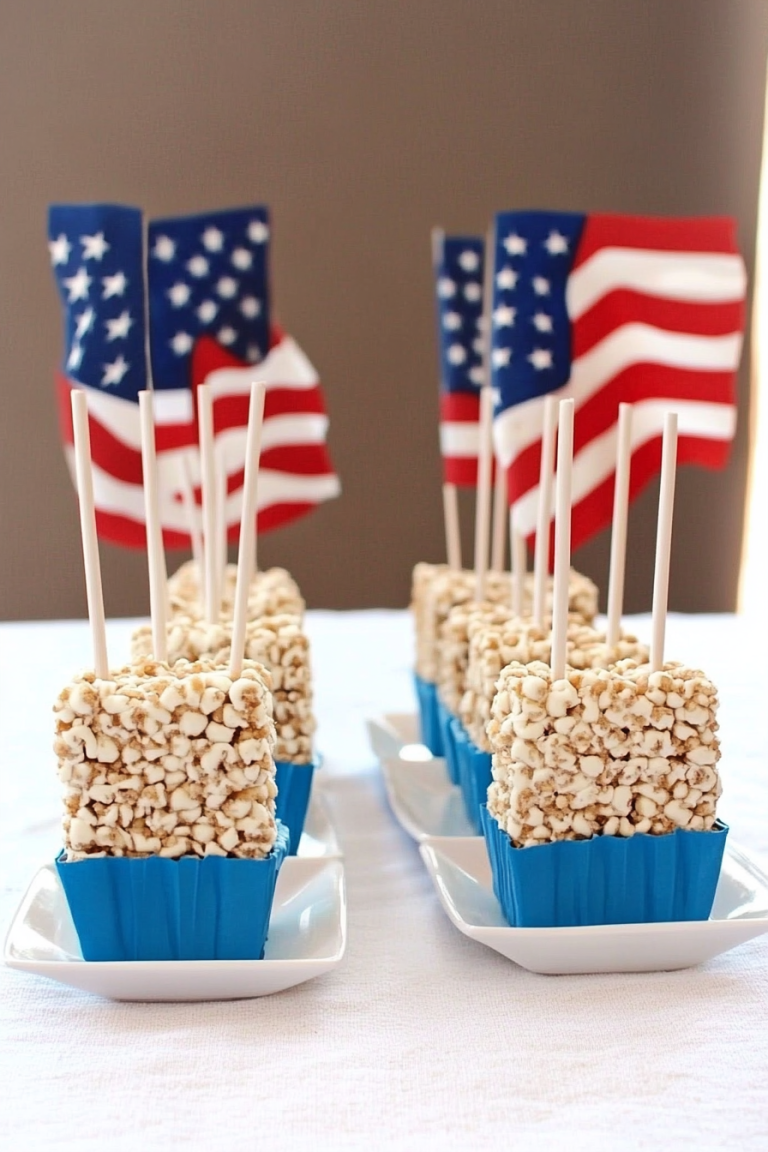
Grinch Cookies Simply Fun Holiday Baking
Okay, so you know those recipes that just… stick with you? The ones you find yourself making over and over, not just because they’re delicious, but because they bring a little bit of sunshine and comfort into your day? This Zucchini Bread is absolutely one of those for me. Honestly, I’ve tried so many variations over the years, trying to find that perfect balance of moistness, sweetness, and that little something extra. And I think I’ve finally cracked it. It’s not just any zucchini bread; it’s the kind that makes your whole house smell like pure happiness, the kind my kids beg for, and the kind that disappears from the counter in record time. If you’ve ever had a zucchini bread that’s too dry, or too bland, or just… meh, trust me, this one is different. It’s like a warm hug in loaf form, and I can’t wait to share it with you.
What is Zucchini bread?
At its heart, zucchini bread is a quick bread, meaning it uses baking soda or baking powder as a leavening agent rather than yeast, so you don’t have to wait for it to rise. Think of it as a muffin or a cake that’s baked in a loaf pan. The “zucchini” part might sound a little strange, right? Why put a vegetable in a sweet bread? Well, here’s the magic: zucchini, when grated, adds an incredible amount of moisture to baked goods without imparting a strong vegetable flavor. It’s like a secret weapon for achieving that perfectly tender, melt-in-your-mouth texture. The name itself is pretty straightforward – it’s a bread that prominently features zucchini. But this isn’t your grandma’s sometimes-a-bit-heavy zucchini bread. This one’s lighter, brighter, and bursting with flavor.
Why you’ll love this recipe?
I could go on and on about why this zucchini bread is my absolute favorite, but let me try to narrow it down. First, the flavor is just out of this world. It’s got that perfect sweetness, but it’s not cloying. The spices – cinnamon and a hint of nutmeg – are just right, making it incredibly comforting, especially on a cooler day. And the texture? Oh, the texture! It’s impossibly moist and tender, thanks to the secret ingredient: zucchini. You really can’t taste the zucchini itself; it just lends its amazing moisture to the crumb. And speaking of ease, this recipe is a lifesaver. It comes together so quickly. I can literally whip it up on a weeknight after the kids are in bed when I have a sudden craving for something sweet but don’t want to embark on a complicated cake project. Plus, it’s surprisingly budget-friendly! Zucchini is often quite affordable, and the other ingredients are pantry staples for most bakers. I’ve even tested this with almond milk instead of regular milk, and it made it even creamier, which is wild! It’s also incredibly versatile. It’s fantastic on its own, but I also love adding a handful of chocolate chips or chopped walnuts. It’s perfect for a quick breakfast on the go, a delightful afternoon snack with a cup of tea, or even a light dessert after dinner. Compared to a denser banana bread, this zucchini bread has a lighter, more delicate crumb that I just adore. It’s truly a crowd-pleaser, and I’ve never had anyone guess that zucchini was the star ingredient!
How do you make Zucchini bread?
Quick Overview
This zucchini bread recipe is all about simplicity and getting that perfect, moist crumb. We’ll start by prepping our zucchini, then whisking together the dry and wet ingredients separately. The key is not to overmix once they come together. After a quick swirl with some optional additions like chocolate chips or nuts, it bakes up into a golden-brown loaf of pure deliciousness. It’s designed to be foolproof, even for beginner bakers, and the results are consistently amazing.
Ingredients
For the Main Batter:
This is where the magic happens! We need all-purpose flour, of course, for structure. Make sure it’s fresh! I usually buy a big bag and keep it in an airtight container. For leavening, we’ve got baking soda and baking powder working together to give us that lovely lift. And the spices – cinnamon is a must, and a little pinch of nutmeg really rounds out the flavor. Don’t skimp on the good stuff here. For sweetness, granulated sugar is key, and a little brown sugar adds a lovely depth and keeps things extra moist. Eggs bind everything together, and melted butter or a neutral oil (like vegetable or canola) provides richness and moisture. And the star: grated zucchini! You’ll want about 2 cups, packed. Make sure to use fresh, firm zucchini; the older, mushier ones won’t give you the best results. And don’t peel it! The peel adds color and a little bit of extra fiber, and you won’t notice it in the final bread.
For the Filling (Optional Add-ins):
This is where you can really make it your own! My absolute favorite add-in is semi-sweet chocolate chips. They melt into gooey pockets of deliciousness. About a cup is usually perfect. If you’re a fan of nuts, chopped walnuts or pecans are fantastic too. Just make sure they’re roughly chopped, so you get nice little bursts of crunch. You could also do a mix of both chocolate chips and nuts if you’re feeling adventurous!
For the Glaze:
This is totally optional, but I think it elevates the whole experience. A simple powdered sugar glaze with a splash of milk or lemon juice is divine. I like it slightly tangy, so I usually use lemon juice for a bit of zing that cuts through the sweetness. You can adjust the liquid to get your desired consistency – a little thicker for a more opaque finish, or thinner for a delicate drizzle.
Step-by-Step Instructions
Step 1: Preheat & Prep Pan
First things first, let’s get our oven preheated to 350°F (175°C). It’s really important to get the oven to the right temperature before your batter goes in so it bakes evenly. While the oven is heating up, grab a standard 9×5 inch loaf pan. You’ll want to grease it really well, and then lightly flour it. I usually use butter or baking spray for greasing, and then dust it with a bit of flour, tapping out any excess. You can also line the bottom with parchment paper for extra insurance against sticking. Trust me, no one wants their beautiful loaf stuck to the pan!
Step 2: Mix Dry Ingredients
In a large bowl, whisk together your all-purpose flour, baking soda, baking powder, cinnamon, and nutmeg. Whisking them together thoroughly ensures that the leavening agents and spices are evenly distributed throughout the batter. This is super important for an even rise and consistent flavor. You don’t want any surprise pockets of baking soda! Give it a good whisk for about 30 seconds until everything looks well combined and there are no streaks of white flour.
Step 3: Mix Wet Ingredients
In a separate medium bowl, whisk together your granulated sugar and brown sugar. Then, add your eggs, melted butter (make sure it’s not too hot, or it’ll cook the eggs!), and the grated zucchini. Whisk everything until it’s well combined and smooth. The zucchini will look a bit stringy, and that’s perfectly fine. This mixture should be a nice, cohesive blend. If you’re using any liquid like milk or vanilla extract, you’d add it here too.
Step 4: Combine
Now comes the part where we bring the wet and dry ingredients together. Pour the wet ingredients into the bowl with the dry ingredients. Using a spatula or a wooden spoon, gently fold them together until *just* combined. It’s really crucial here not to overmix. You want to see just a few streaks of flour remaining. Overmixing develops the gluten in the flour too much, which can lead to a tough, dense bread. Stop as soon as you don’t see large pockets of dry flour. If you’re adding chocolate chips or nuts, this is also the point where you’d gently fold them in.
Step 5: Prepare Filling
This step is for if you’re choosing to add in extras like chocolate chips or nuts. If you’re going plain, you can skip ahead. If you’re adding them, just gently fold them into the batter with your spatula until they’re evenly distributed. I find that about a cup of chocolate chips or chopped nuts is the perfect amount for a 9×5 loaf pan. You want enough to be a nice surprise in every bite, but not so much that it weighs down the batter.
Step 6: Layer & Swirl
Pour about half of the batter into your prepared loaf pan and spread it evenly. If you’re adding a swirl of something like a cinnamon-sugar mixture or a different batter, now’s your chance! For a simple cinnamon swirl, mix a tablespoon of cinnamon with two tablespoons of sugar. Sprinkle about half of this mixture over the first layer of batter. Then, add the remaining batter on top and sprinkle the rest of the cinnamon-sugar mixture over that. You can then use a knife or a skewer to gently swirl it through the batter, creating beautiful patterns. Be careful not to over-swirl, or the colors will just blend together.
Step 7: Bake
Place the loaf pan in your preheated oven. Bake for about 55 to 70 minutes. The exact baking time will vary depending on your oven, so it’s important to do the doneness test. A wooden skewer or toothpick inserted into the center of the loaf should come out clean, with no wet batter clinging to it. If it comes out with a few moist crumbs, that’s usually okay, but if there’s wet batter, it needs more time. If the top starts to brown too quickly before the inside is cooked, you can loosely tent it with aluminum foil for the remainder of the baking time. I usually start checking around the 55-minute mark.
Step 8: Cool & Glaze
Once your zucchini bread is baked, take it out of the oven and let it cool in the pan for about 10-15 minutes. This helps it firm up a bit. Then, carefully invert the loaf onto a wire rack to cool completely. It’s really important that it cools completely before glazing, otherwise, the glaze will just melt off. For the glaze, whisk together powdered sugar with a little bit of milk or lemon juice until you reach a smooth, drizzly consistency. Once the bread is totally cool, drizzle the glaze over the top. Let the glaze set for about 15-30 minutes before slicing.
Step 9: Slice & Serve
Once the glaze is set (or if you skipped the glaze!), it’s time to slice! I like to use a serrated knife for the cleanest cuts. Slice it to your desired thickness – I usually go for about ½ inch thick slices. Serve it at room temperature for the best texture and flavor. It’s wonderful on its own, but a little smear of butter is also heavenly.
What to Serve It With
This zucchini bread is so wonderfully versatile, it fits in anywhere! For a simple, comforting **Breakfast**, I love it toasted with a generous smear of butter. It pairs perfectly with a steaming mug of coffee or a glass of cold milk. For a more elegant **Brunch**, I’ll slice it a bit thinner and arrange it on a platter with some fresh berries and perhaps a dollop of whipped cream or Greek yogurt. It’s a fantastic addition to a spread with quiches and other brunch favorites. As a sweet **Dessert**, it’s surprisingly satisfying. I often serve it slightly warm with a scoop of vanilla bean ice cream or a drizzle of warm caramel sauce – pure decadence! And for those **Cozy Snacks**, well, that’s its natural habitat. It’s perfect with a cup of herbal tea on a rainy afternoon, or just straight out of hand while you’re curled up with a good book. My family loves it after school, and it’s one of those treats that feels both special and completely unpretentious. Honestly, it’s so good, it doesn’t need much, but these pairings just take it to the next level.
Top Tips for Perfecting Your Zucchini Bread
I’ve learned a few things over the years of making this recipe, and I’m happy to share them with you! These little tricks can make all the difference between a good zucchini bread and a truly *great* one. First, regarding **Zucchini Prep**: Grating your zucchini is key. Use the medium holes on your grater. You don’t need to squeeze out all the moisture; the natural moisture is what makes the bread tender. However, if your zucchini is exceptionally watery (like if it’s been sitting around for a while), a quick pat with a paper towel can help. For **Mixing Advice**, I cannot stress enough the importance of not overmixing. Once the wet and dry ingredients meet, stir *just* until combined. A few streaks of flour are fine! Overmixing develops the gluten and makes your bread tough, which is the opposite of what we want. When it comes to **Swirl Customization**, if you’re adding a cinnamon-sugar swirl, don’t go crazy with it. A gentle swirl with a knife or skewer is enough to create pretty ribbons without making the bread gummy. For **Ingredient Swaps**, if you don’t have butter, a neutral oil like canola or vegetable oil works wonderfully and often makes the bread even moister. For the flour, I haven’t experimented extensively with gluten-free flours, but I’ll address that in the FAQ! If you want to reduce the sugar, you can try substituting up to half with applesauce or mashed banana, but be aware this might change the texture slightly. In terms of **Baking Tips**, always trust the skewer test over the timer. Ovens vary wildly! If the top is browning too quickly, tenting with foil is your best friend. And for **Glaze Variations**, if you’re not a fan of lemon, a splash of vanilla extract or even orange juice in the powdered sugar glaze works beautifully. You can also skip the glaze altogether and just dust with a little powdered sugar once cooled, or serve it plain – it’s still fantastic!
Storing and Reheating Tips
This zucchini bread is so good, you’ll likely want to enjoy it over several days, and luckily, it stores beautifully. For **Room Temperature Storage**, once the bread is completely cooled and the glaze (if used) is set, you can store it in an airtight container or wrapped tightly in plastic wrap at room temperature for up to 3 days. It maintains its moisture quite well this way. If you live in a very warm or humid climate, you might want to opt for refrigerator storage sooner rather than later. For **Refrigerator Storage**, wrap the cooled loaf tightly in plastic wrap, then in foil, or place it in an airtight container. It will stay fresh and delicious for up to a week in the fridge. The texture might become slightly firmer, but it’s easily remedied with a quick reheat. If you need to store it for longer, **Freezer Instructions** are your best bet. Wrap the cooled, un-glazed loaf very tightly in a double layer of plastic wrap, then in a layer of aluminum foil. You can also place the wrapped loaf in a freezer-safe bag or container. It will keep well in the freezer for up to 3 months. To thaw, simply remove it from the freezer and let it come to room temperature on the counter for a few hours. For **Glaze Timing Advice**, it’s best to add the glaze *after* the bread has completely cooled and just before serving or storing at room temperature. If you plan to freeze the bread, it’s usually best to freeze it *without* the glaze. You can then glaze it once it’s thawed and you’re ready to serve it.
Frequently Asked Questions
Final Thoughts
So there you have it – my go-to Zucchini Bread recipe that I truly believe is a keeper. It’s more than just a recipe; it’s a little bit of kitchen therapy, a way to use up those garden zucchinis, and a guaranteed way to bring smiles to the faces of whoever you share it with. The incredible moistness, the warm spice notes, and the sheer ease of making it are what make it so special to me. I hope you find as much joy in baking and eating this as I do. If you give this a try, please let me know how it turns out in the comments below! I’d love to hear about your favorite add-ins or any variations you come up with. Happy baking, and enjoy every delicious slice!

Grinch Cookies Recipe
Ingredients
Method
- In a large bowl, cream together softened butter, granulated sugar, and brown sugar until light and fluffy.
- Beat in the egg and vanilla extract until well combined.
- In a separate bowl, whisk together flour, baking soda, and salt.
- Gradually add the dry ingredients to the wet ingredients, mixing until just combined. Stir in the green food coloring until the dough is evenly colored.
- Preheat your oven to 350°F (175°C). Line baking sheets with parchment paper.
- Scoop rounded tablespoons of dough onto the prepared baking sheets, about 2 inches apart.
- Bake for 9-11 minutes, or until the edges are lightly golden and the centers are still soft.
- Let the cookies cool on the baking sheets for a few minutes before transferring them to a wire rack to cool completely.
- While the cookies are cooling, melt the white chocolate chips with vegetable oil in a microwave-safe bowl in 30-second intervals, stirring in between, until smooth.
- Dip the tops of the cooled cookies into the melted white chocolate and immediately sprinkle with red sanding sugar.
- Allow the chocolate to set completely before serving.