Flavorful Italian Chicken Sausage Pasta
If you’ve ever wandered into my kitchen early in the morning, you’ve probably caught a whiff of something warm and sweet baking away. One of my all-time favorites to whip up is this zucchini coffee cake with a luscious cream cheese swirl. It’s a recipe I’ve been making for years — my kids love it, my friends request it, and honestly, it’s become my secret weapon on busy mornings or lazy weekends. What I love most about this is how the zucchini keeps it moist without making it dense or heavy, and the swirl of cream cheese? Well, that’s just pure magic. Plus, it’s a sneaky way to get some veggies into your day! Trust me, this disappeared in minutes at my house, and I think you’ll love how it turns out too. Whether you’re sharing it with friends or just enjoying a slice with your coffee, this one’s a lifesaver on busy nights or relaxing weekends alike.
What is Zucchini Coffee Cake?
Think of this zucchini coffee cake as the love child of a classic crumb cake and a sweet quick bread. It’s essentially a tender, moist cake made with grated zucchini, which adds a subtle veggie freshness that pairs so well with the sweet crumb topping and creamy swirl of cheese. The name might sound fancy, but it’s super straightforward to make—think of it as the comfort food version of a bakery treat, baked right in your own kitchen. The idea originally comes from those fall-inspired coffee cakes, but I’ve tweaked it over the years to be perfect for anytime you crave something sweet and hearty. It’s a kind of dessert you can have for breakfast (hey, I’m not judging), brunch, or even an afternoon snack. The best part is that you don’t need fancy ingredients — just simple pantry staples and fresh zucchini, which makes this cake not only delicious but budget-friendly too.
Why you’ll love this recipe?
What I love most about this zucchini coffee cake with cream cheese swirl is how it manages to be both comforting and elegant at the same time. The flavor is warm and inviting, with a hint of vanilla and cinnamon that makes your house smell incredible while it bakes. Plus, the zucchini keeps the cake insanely moist — I’ve tested this with all sorts of variations, including almond milk instead of regular milk, and it actually made it even creamier! It’s honestly so easy to throw together that I always do this when I need a quick dessert or a cozy breakfast for the kids on a weekend. The cost is low because zucchini is typically cheap and plentiful, especially in summer, making it an accessible treat for everyone. The versatility is a huge plus — you can add nuts, use different spices, or even swap out the cream cheese for mascarpone if you’re feeling fancy. I promise, once you make this, it’ll become a regular in your baking rotation because it’s just that good!
How do you make Zucchini Coffee Cake with Cream Cheese Swirl?
Quick Overview
This cake comes together quickly with one bowl for the dry ingredients, another for the wet, and a simple layering process that makes it look pretty and taste even better. The key is to grate the zucchini finely, squeeze out excess moisture, and be gentle when combining everything. The filling and swirl are what make it special, and trust me, decorating it with a gentle swirl of cream cheese makes all the difference. Once baked, it’s a golden, aromatic loaf with a tender crumb that’s perfect for slicing and sharing. The best part? No complicated fussy steps — just the right balance of ingredients for a bakery-worthy treat right at home.
Ingredients
For the Main Batter:
– 2 cups held flour (all-purpose works perfectly)
– 1 cup sugar (white or a mix of brown and white for a richer flavor)
– 1 teaspoon baking powder
– ½ teaspoon baking soda
– ½ teaspoon salt
– 1 teaspoon ground cinnamon (or more if you love it!)
– ½ cup vegetable oil (or melted coconut oil for a tropical twist)
– 2 large eggs
– 1 teaspoon vanilla extract
– 1 cup grated zucchini (squeeze out excess moisture)
– ½ cup buttermilk (or milk with a splash of lemon juice for tang)
For the Filling:
– 8 oz cream cheese, softened
– ¼ cup sugar
– 1 teaspoon vanilla extract
For the Glaze (Optional, but highly recommended):
– ½ cup powdered sugar
– 1-2 teaspoons milk or lemon juice
– A tiny dash of vanilla (if you like extra flavor)
Step-by-Step Instructions
Step 1: Preheat & Prep Pan
Set your oven to 350°F (175°C) and line a 9-inch loaf pan or square baking dish with parchment paper or butter and flour it well. I always do this early — it saves you from any sticking mishaps and keeps your cake looking tidy.
Step 2: Mix Dry Ingredients
In a big bowl, whisk together flour, sugar, baking powder, baking soda, salt, and cinnamon. Mixing the dry ingredients first gives the batter a good foundation and prevents clumping later. I like to use a fork or whisk to make sure everything’s evenly combined.
Step 3: Mix Wet Ingredients
In a separate bowl, beat the eggs lightly, then add the oil, vanilla, and buttermilk. Whisk until smooth, then fold in grated zucchini — make sure you squeeze out as much moisture as possible before adding. I tested with a little extra zucchini this time, and it stayed moist but not heavy, which is exactly what you want.
Step 4: Combine
Pour the wet into the dry and gently fold just until combined. Do not overmix — a few lumps are totally fine. Overmixing can make the cake dense, and we want a tender crumb, not a brick! Trust me on this.
Step 5: Prepare Filling
Mix softened cream cheese with sugar and vanilla until smooth. You want it spreadable but not runny. If it’s too soft, pop it in the fridge for a few minutes, and it’ll be perfect for spreading.
Step 6: Layer & Swirl
Pour half the batter into your prepared pan. Drop dollops of the cream cheese mixture on top, then add the rest of the batter. Use a knife or skewer to swirl through the batter gently, creating a marbled effect. The key is to do this softly so the swirl looks pretty — not a messy mess!
Step 7: Bake
Pop it into the oven and bake for about 45-50 minutes, or until a toothpick inserted in the center comes out clean. If the edges brown too quickly, tent it with foil. Every oven is different, so start checking around 40 minutes if you want to be cautious.
Step 8: Cool & Glaze
Let the cake cool in the pan for at least 15 minutes before transferring to a wire rack. Once cooled, drizzle with a simple glaze made from powdered sugar and just enough milk or lemon juice to make it pourable. I like to add a splash of vanilla or lemon zest for extra zing.
Step 9: Slice & Serve
Use a sharp serrated knife to cut clean slices. This cake is best at room temperature, so give it a few minutes to settle after removing from the fridge. Serve it as-is or with a dollop of whipped cream — either way, it’ll disappear fast.
What to Serve It With
This zucchini coffee cake is so versatile that you can serve it pretty much anytime. For breakfast, pair it with good strong coffee and a drizzle of honey or a smear of butter. It’s equally charming on a brunch table, especially with fresh fruit or a side of yogurt. My family loves it after dinner too — warm with a cup of tea, it’s basically dessert disguised as breakfast. Occasionally, I’ll dust a little powdered sugar or even cocoa powder on top for a more grown-up feel. If you’re hosting a brunch, arrange slices on a pretty platter, add some sprigs of mint or edible flowers, and you’re good to go. This cake really shines when shared — I’ve sent extras home with friends, and they always call to ask for the recipe. It’s the kind of treat that makes ordinary moments special.
Top Tips for Perfecting Your Zucchini Coffee Cake
Trust me, over the years I’ve learned a few tricks that make this cake turn out just right every time. First, don’t skip the step of squeezing out excess moisture from the zucchini — wet zucchini can make the batter too loose, and the cake might fall apart. I usually grate it, then press it into a clean kitchen towel or paper towel to remove any extra water. When mixing, be gentle — overmixing is a sneaky culprit that can make your cake dense instead of tender. For the swirl, I like to add a few drops of almond extract or lemon zest to the cream cheese for a flavor boost. If you want to swap ingredients, whole wheat flour works well but can make it a little denser; adding an extra splash of milk keeps it moist. Baked it to the edge and checked with a toothpick — if it comes out clean, you’re golden. For toppings, a sprinkle of chopped nuts or a drizzle of caramel sauce can elevate it even more. I’ve tested different spice combinations too — cinnamon is classic, but I love a pinch of cardamom or nutmeg for a little extra warmth. Keep your oven centered, and remember that every batch can be a little different, so don’t be afraid to adapt as you go. The real secret? Patience and good ingredients — that’s all it takes for a cake that looks and tastes as lovely as this.
Storing and Reheating Tips
This cake stays fresh for several days if stored properly. I usually let it cool completely, then cover it tightly with plastic wrap or keep it in an airtight container. On the counter, it’s good for up to two days — any longer and the zucchini’s moisture can get a little funky. I prefer refrigerating it if I want to keep leftovers longer; just wrap it well, and it’ll hold for about 4-5 days. To reheat, pop a slice in the microwave for about 15-20 seconds — it’s just as soft and warm as when it was fresh. If you like, warm it up and add a little extra glaze or a dollop of whipped cream on top. Freezing is super easy: wrap individual slices tightly in plastic wrap and pop them in an airtight bag for up to three months. Thaw in the fridge overnight, then reheat gently. A little trick I swear by is to add the glaze right before serving if you’re planning to freeze — it keeps it shiny and fresh. The flavor actually improves as it sit — the spices mingle, and the zucchini stays irresistibly moist. Just remember, don’t overheat it — gentle warming is the way to go to keep that perfect moist crumb!
Frequently Asked Questions
Final Thoughts
If you’re looking for a cozy, comforting treat that rivals bakery-style coffee cakes but comes together in a flash, this zucchini coffee cake with cream cheese swirl is your new best friend. It’s moist, flavorful, and flexible enough to adapt to your taste or whatever ingredients you’ve got on hand. Over the years, I’ve baked this for family gatherings, quick breakfasts, and even last-minute brunch parties — it never disappoints. My kids ask for this all the time, and honestly, I love that they’re eating something secretly packed with zucchini! Each bite reminds me of lazy Sunday mornings or late-night conversations with friends. Trust me, once you’ve made this, it’ll become a favorite in your home too. Happy baking, and I can’t wait to hear how your slice turns out — don’t forget to snap a photo!
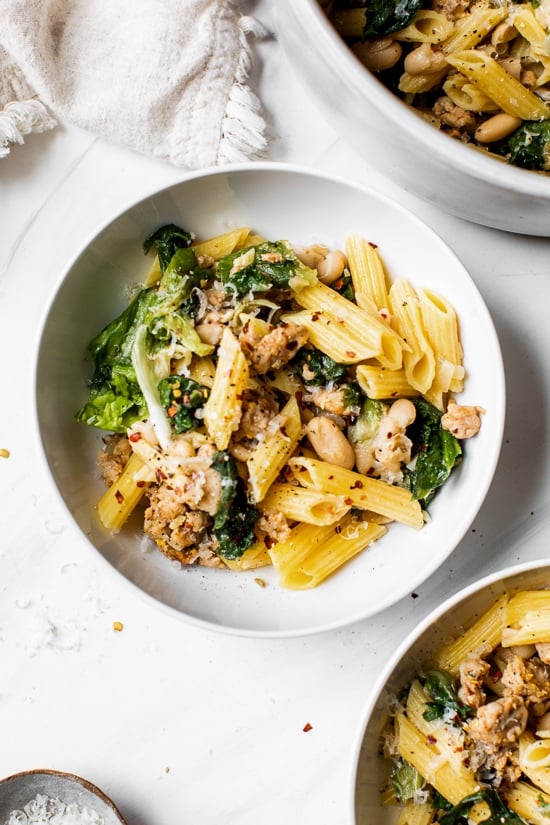
Italian Chicken Sausage Pasta with Escarole and Beans
Ingredients
Method
- Cook pasta according to package directions for al dente in a large pot of salted water. Reserve 1/2 cup water before draining.
- While pasta water boils, heat a large non-stick skillet on medium heat.
- Add olive oil; when hot add onions, garlic, salt and pepper until soft, about 4-5 minutes.
- Add sausage, breaking up with a wooden spoon and cook until golden, about 6 to 8 minutes. Set aside in a dish.
- Add chicken broth and beans to the skillet.
- Add the escarole; stir and cook about 4 minutes or until wilted.
- Gently stir in sausage, pasta, red pepper flakes, 1/2 cup of the reserved water or more if needed and grated Parmesan. Adjust salt and pepper if needed and toss well; transfer to a large serving bowl. Enjoy with some extra cheese on the side.