Easy Woven Top Crust for Pies
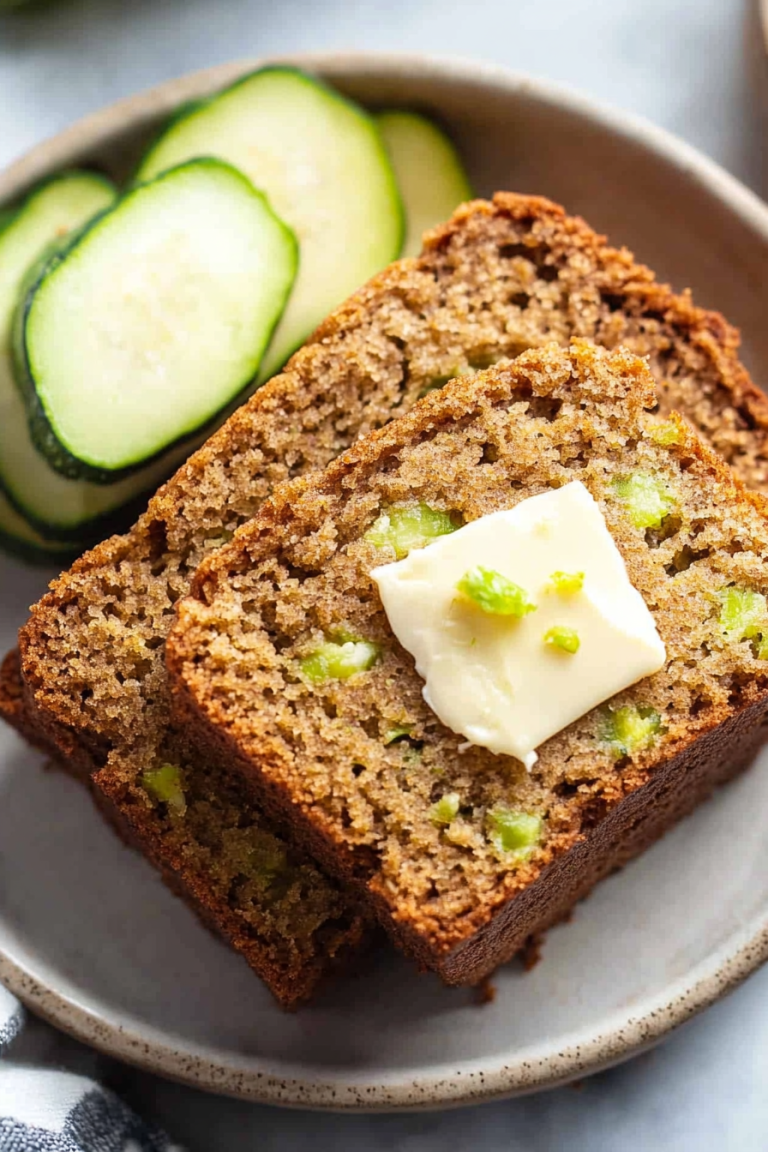
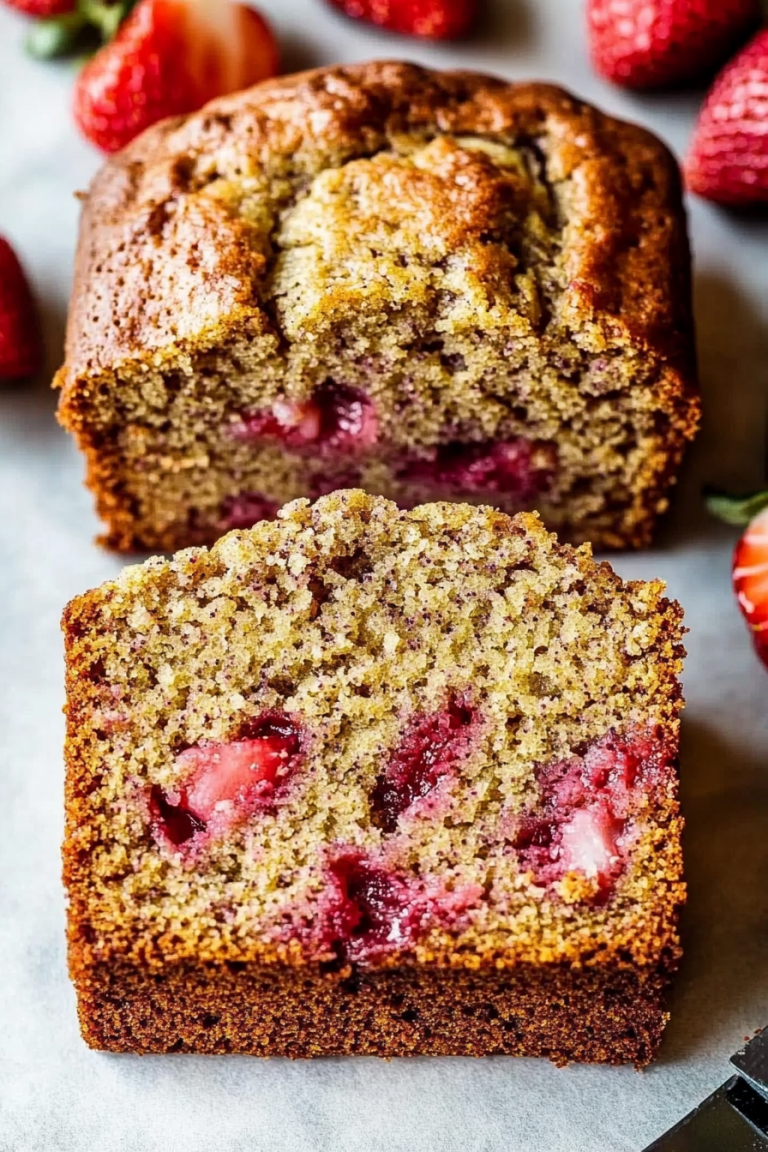
You know those recipes that just feel like a warm hug? The ones that fill your kitchen with the most incredible aroma and have your family practically begging for a slice before it’s even cooled? This chocolate zucchini bread is exactly that for me. It’s become my go-to, my absolute secret weapon, especially when I need something comforting, delicious, and surprisingly easy to whip up. I’ve lost count of how many times I’ve made it, but every single time, it’s a hit. It’s not just about the chocolate, or the surprise of the zucchini; it’s about that perfect balance of moist crumb and rich flavor that makes you want to close your eyes and savor every bite. Honestly, it’s miles better than those dry, crumbly quick breads you sometimes find, and way more satisfying than just a plain loaf. This is the kind of bake that makes you feel like a kitchen goddess, even on a Tuesday night.
What is chocolate Zucchini bread?
So, what exactly *is* this magical chocolate zucchini bread? At its heart, it’s a quick bread, meaning it doesn’t rely on yeast for leavening, which is why it’s so wonderfully simple and fast to make. Think of it as a really, really moist chocolate cake that just happens to be in loaf form and has a secret ingredient hiding inside – zucchini! Don’t let that green veggie fool you; it’s the key to its incredible moisture and tender crumb. When baked, the zucchini essentially melts into the batter, disappearing completely, leaving behind nothing but pure deliciousness. It’s not a dense bread, nor is it overly sweet, but it’s perfectly rich and satisfying, especially with that deep chocolate flavor woven all the way through. It’s the kind of treat that bridges the gap between a healthy-ish snack and a decadent dessert. It’s familiar, comforting, and always a welcome sight on the counter.
Why you’ll love this recipe?
There are so many reasons why this chocolate zucchini bread has earned a permanent spot in my recipe binder, and I’m sure it’ll earn one in yours too! First off, the flavor is just out of this world. The combination of rich cocoa powder and melted chocolate (yes, we use both!) creates a depth of chocolatey goodness that’s incredibly satisfying. It’s not just a hint of chocolate; it’s a full-on chocolate experience. Then there’s the texture. This is where the zucchini truly shines. It makes the bread unbelievably moist and tender. I’ve tried other zucchini bread recipes, and some can be a bit heavy, but this one is consistently light and fluffy, with a crumb that just melts in your mouth. And speaking of moist, I once accidentally used buttermilk instead of regular milk in a pinch, and it actually made it even creamier and richer – a happy little accident I now sometimes repeat!
Beyond the taste and texture, the simplicity is a major win. On those crazy weeknights when you need a last-minute dessert or a special treat for the next day, this recipe is a lifesaver. You probably have most of the ingredients in your pantry already. It’s also incredibly budget-friendly. Zucchini is often quite affordable, especially when it’s in season, and the other ingredients are pantry staples. Plus, it’s so versatile! While it’s fantastic on its own, it’s also perfect for a casual breakfast, a delightful brunch addition, or even a special dessert when paired with a scoop of ice cream. It’s honestly the best of all worlds. If you’re a fan of my classic banana bread, you’ll adore this – it’s similar in its comforting, easy-bake nature, but with that irresistible chocolate twist!
How do I make Zucchini bread?
Quick Overview
This chocolate zucchini bread is all about ease and incredible results. The process is straightforward: you’ll mix your dry ingredients, then your wet ingredients, combine them gently, fold in some chocolate chips (because why wouldn’t you?), and bake it in a loaf pan. The magic happens with the grated zucchini, which disappears during baking, ensuring an unbelievably moist and tender crumb. It’s a foolproof method that even beginner bakers can master, and it’s so quick you can have a warm loaf ready in about an hour from start to finish. The smell alone as it bakes is pure bliss!
Ingredients
For the Main Batter:
You’ll need about 2 cups of all-purpose flour. Make sure it’s fresh, not something that’s been sitting in your pantry for years! I always like to sift mine, even though it’s an extra step, it just ensures a lighter crumb. For the sugar, I use 1 ½ cups of granulated sugar. You can reduce it slightly if you prefer a less sweet loaf, but I find this amount perfect for balancing the cocoa. A good quality unsweetened cocoa powder is key here – about ¾ cup will give you that deep chocolate flavor. Don’t skimp on this! Baking soda and baking powder are our leaveners; we’ll use 1 teaspoon of each. And a good pinch of salt, about ½ teaspoon, to enhance all those lovely flavors.
For the Filling:
The star of the show! You’ll need about 1 ½ to 2 cups of grated zucchini. Make sure to use medium-sized zucchini, and I *always* recommend squeezing out as much moisture as you possibly can. It’s a step I learned the hard way after a few too many soggy loaves! Simply grate it, place it in a fine-mesh sieve over a bowl, and press down firmly with a spoon or your hands. You’ll also want about 1 cup of chocolate chips. I love using a mix of semi-sweet and dark chocolate chips for complexity, but use your favorite! Some people even add chopped nuts here, but I usually keep it just chocolate.
For the Glaze:
This is optional, but highly recommended for that extra touch of decadence! You’ll need about ½ cup of powdered sugar, 2 tablespoons of unsweetened cocoa powder, and a splash of milk or cream. You can also add a teaspoon of vanilla extract for extra flavor. The key here is to get the consistency just right – thick enough to coat but not so thick it’s unspreadable. We’ll aim for a drizzle consistency.
Step-by-Step Instructions
Step 1: Preheat & Prep Pan
First things first, get your oven preheated to 350 degrees Fahrenheit (175 degrees Celsius). While that’s warming up, grab a standard 9×5 inch loaf pan. Grease it really well with butter or cooking spray, and then flour it. I like to go a step further and line the bottom and long sides with parchment paper, leaving a little overhang. This makes it super easy to lift the bread right out once it’s baked, and it saves so much on clean-up. Trust me, this little step is a game-changer for baked goods!
Step 2: Mix Dry Ingredients
In a large bowl, whisk together your flour, granulated sugar, unsweetened cocoa powder, baking soda, baking powder, and salt. Make sure everything is thoroughly combined. You want to see an even distribution of all the dry ingredients. This ensures that your leaveners are spread throughout the batter, giving you a nice, even rise. Some people like to sift these together, and it’s a great way to guarantee no lumps, especially in the cocoa powder. I usually just give it a really good whisk, but if you’ve had issues with lumpy batters before, sifting is your friend!
Step 3: Mix Wet Ingredients
In a separate medium bowl, whisk together the eggs, melted butter (or oil – I’ve used both and it works beautifully!), and vanilla extract. If you’re using milk or buttermilk, add that in here too. Whisk it until it’s all well combined and slightly frothy. Make sure your melted butter isn’t too hot, or it could scramble the eggs. I usually let it cool for a minute or two after melting.
Step 4: Combine
Now, pour the wet ingredients into the bowl with the dry ingredients. Using a spatula or a wooden spoon, gently fold everything together until *just* combined. It’s really important not to overmix here. A few streaks of flour are okay; they’ll disappear as you add the zucchini and chocolate chips. Overmixing develops the gluten too much, which can lead to a tough bread, and we definitely don’t want that. We’re aiming for a lovely, tender crumb.
Step 5: Prepare Filling
This is the step where we get our zucchini ready! Make sure you’ve grated your zucchini (about 1 ½ to 2 cups) and have squeezed out as much excess liquid as possible. Seriously, get it as dry as you can. Then, gently fold the squeezed, grated zucchini and the chocolate chips into the batter. Again, fold just until they’re distributed. You’ll see the batter become even more substantial and rich with those chocolate chips studded throughout.
Step 6: Layer & Swirl
Spoon the batter evenly into your prepared loaf pan. You can smooth the top with your spatula. If you’re feeling fancy, you can add a few extra chocolate chips on top for decoration, or even a light swirl with a knife. This step isn’t crucial for flavor, but it adds a nice visual touch and ensures those chocolatey bites are visible.
Step 7: Bake
Pop the loaf pan into your preheated oven. Bake for about 50-65 minutes. The exact time will depend on your oven, so start checking around the 50-minute mark. You’ll know it’s done when a wooden skewer or toothpick inserted into the center comes out clean or with a few moist crumbs attached (not wet batter!). If the top starts browning too quickly before the inside is cooked, you can loosely tent it with aluminum foil.
Step 8: Cool & Glaze
Once it’s baked, let the bread cool in the pan on a wire rack for about 10-15 minutes. This allows it to set up a bit before you try to remove it. Then, carefully lift it out using the parchment paper overhangs or invert it onto the wire rack to cool completely. Patience is key here! Trying to glaze a warm loaf will just make a melty mess. Once it’s completely cool, you can prepare your glaze. Whisk together the powdered sugar, cocoa powder, and milk until smooth and pourable. Drizzle it over the top and let it set slightly before slicing. If you’re not glazing, you can just dust it with a little powdered sugar once cooled.
Step 9: Slice & Serve
Once the glaze has set (if you used it), it’s time to slice and enjoy! I usually use a serrated knife for clean slices. Serve it at room temperature for the best flavor and texture. This bread is fantastic on its own, but I’ll tell you, a warm slice with a smear of butter or even a dollop of whipped cream is pure heaven.
What to Serve It With
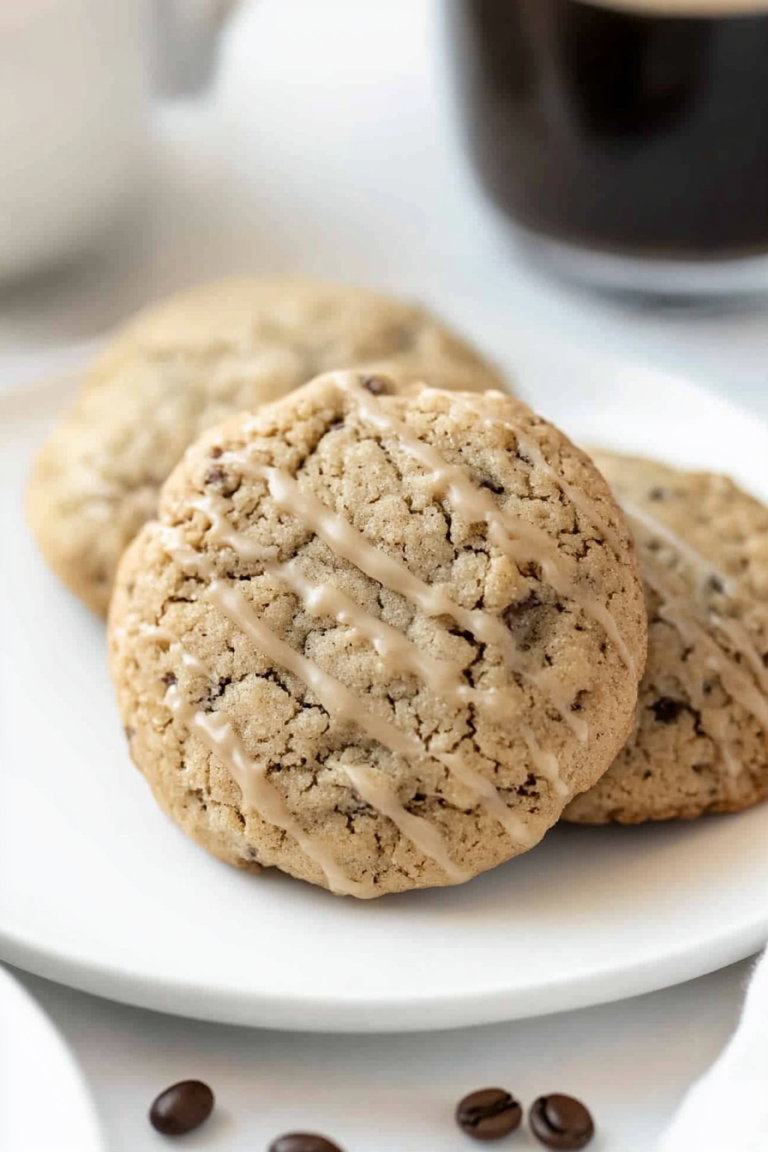
This chocolate zucchini bread is so incredibly versatile, it feels right at home at any time of day or any occasion! For a quick and satisfying breakfast, I love a slice toasted lightly and served with a good cup of black coffee. The slight crispness from toasting is divine. It’s also brilliant alongside a glass of cold milk for the kids (or me!).
When it comes to brunch, this loaf really shines. I like to serve it slightly warm, maybe with a dusting of powdered sugar or that lovely chocolate glaze. It pairs beautifully with fresh fruit like berries or a fruit salad. For beverages, think a nice mimosa or a good quality coffee. It adds a touch of indulgence to any brunch spread without being overly fussy.
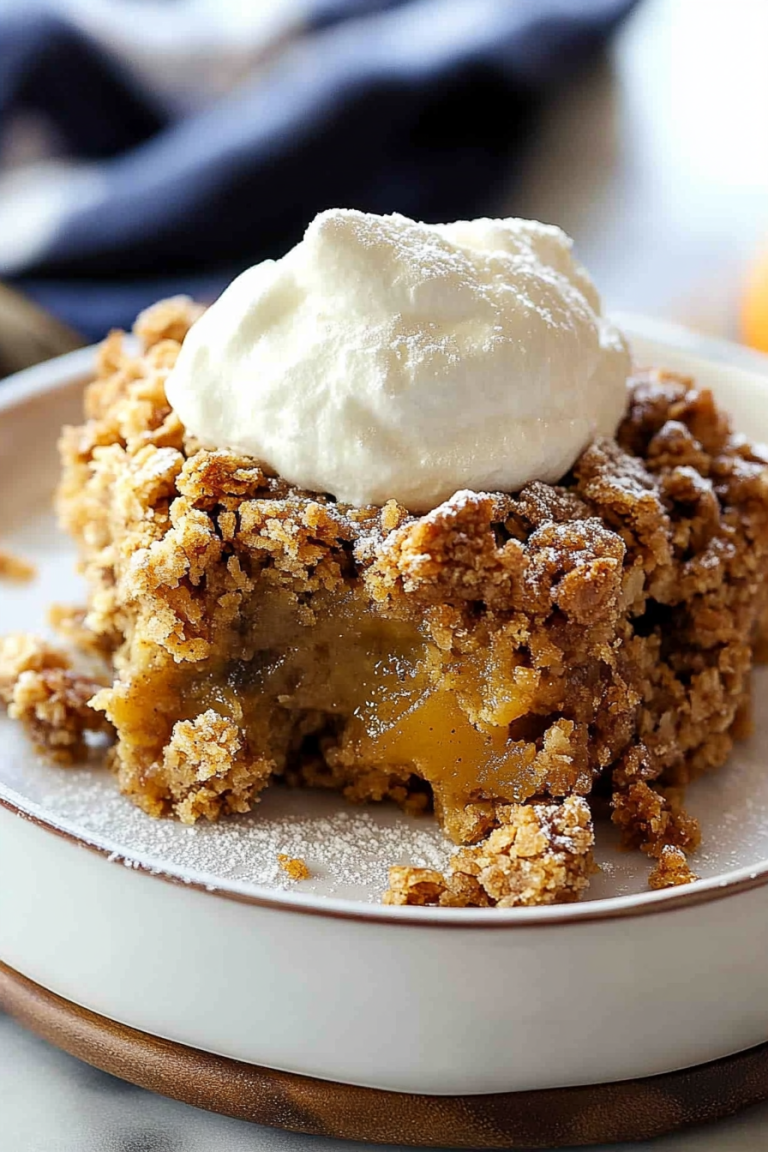
As a dessert, this is pure comfort. Serve a generous slice warmed up slightly, maybe with a scoop of vanilla bean ice cream or a dollop of freshly whipped cream. A drizzle of raspberry sauce can also add a lovely tart contrast to the rich chocolate. It’s a dessert that feels special but is so easy to prepare.
And for those cozy snack moments? This is where it truly excels. It’s perfect with a cup of tea on a rainy afternoon, or even late at night when you’re craving something sweet but don’t want to bake a whole cake. My family often grabs a slice just because, and it always hits the spot. It’s that reliable, comforting treat that makes ordinary moments feel a little bit special.
Top Tips for Perfecting Your Chocolate Zucchini Bread
I’ve made this bread more times than I can count, and over the years, I’ve picked up a few tricks that I think make a big difference. So, let’s talk about how to get yours absolutely perfect, every single time!
Zucchini Prep: This is hands down the most crucial step. Grate your zucchini using the medium holes on a box grater. Once grated, put it in a fine-mesh sieve over a bowl and press down hard with a spoon or your hands to remove as much liquid as possible. I can’t stress this enough – excess moisture is the enemy of a good quick bread! I’ve learned this after a few loaves that were just a bit too dense and heavy because I didn’t squeeze enough water out. Aim for dry, fluffy grated zucchini.
Mixing Advice: Remember what I said about not overmixing? It bears repeating! Once you combine the wet and dry ingredients, mix only until they’re *just* combined. A few streaks of flour are fine. Then, when you fold in the zucchini and chocolate chips, fold gently. The goal is to incorporate them without overworking the batter. Overmixing develops the gluten in the flour, leading to a tough, rubbery texture. You want a tender, melt-in-your-mouth crumb, and gentle mixing is the key to achieving that.
Swirl Customization: If you’re adding chocolate chips, I always recommend folding them in gently at the end. For an even more intense chocolate experience, you can reserve about a quarter cup of the batter and mix it with a tablespoon of cocoa powder until it’s a very deep chocolate. Then, dollop this rich batter into the loaf pan, followed by the rest of the batter, and use a knife or skewer to create a swirling effect. This gives you pockets of extra-rich chocolate flavor and looks really impressive!
Ingredient Swaps: Don’t have butter? You can substitute a neutral-flavored oil like vegetable or canola oil in a 1:1 ratio. I’ve tested it, and it works wonderfully for moisture. If you want to make it dairy-free, you can use plant-based milk (like almond or oat milk) and a dairy-free butter alternative or oil. For the chocolate chips, feel free to use milk chocolate, white chocolate, or even chopped dark chocolate. experiment! My kids love it with mini chocolate chips because they get a bit more chocolate in every bite.
Baking Tips: Ovens can be quirky, so always do the toothpick test. Insert it into the thickest part of the loaf. If it comes out clean or with a few moist crumbs clinging to it, it’s done. If there’s wet batter, it needs more time. If the top is browning too fast, loosely tent the pan with foil. I usually place my loaf pan in the center of the oven, but sometimes if I know my oven has hot spots, I’ll rotate it halfway through baking. It’s all about getting to know your own oven!
Glaze Variations: The chocolate glaze is delicious, but you can totally switch it up. A simple vanilla glaze made with powdered sugar and milk is classic. For a lemon twist, add a little lemon zest and juice to a vanilla glaze. Or, skip the glaze altogether and just dust the cooled loaf with a little powdered sugar for a lighter finish. If you like a really intense chocolate flavor, you can also mix a bit of espresso powder into the glaze to deepen the cocoa notes – it’s amazing!
Storing and Reheating Tips
One of the best things about this chocolate zucchini bread is how well it keeps. It’s fantastic on day one, but it somehow gets even better the next day as the flavors meld together. Here’s how I keep it fresh and delicious:
Room Temperature: Once the loaf is completely cool, I like to wrap it tightly in plastic wrap or store it in an airtight container on the counter. It stays wonderfully moist for about 2-3 days this way. If it’s a very humid day, I might pop it in the fridge after the first day just to be safe, but usually, room temperature is perfect. It’s always ready for a quick slice!
Refrigerator Storage: If you think you won’t finish it within 3 days, or if your kitchen is particularly warm, storing it in the refrigerator is a great option. Wrap it tightly in plastic wrap, then again in foil, or place it in an airtight container. It will keep well in the fridge for up to a week. Just a heads-up, the bread might firm up a bit in the fridge, so you’ll want to bring it back to room temperature or gently warm it before serving.
Freezer Instructions: This bread freezes like a dream, which is fantastic if you want to bake ahead for holidays or just have some on hand for when the craving strikes. Once the loaf is completely cool, wrap it very tightly in plastic wrap, then in a layer of aluminum foil, and finally place it in a freezer-safe bag or container. It can stay frozen for up to 3 months. To thaw, remove it from the freezer and let it thaw at room temperature, still wrapped, for a few hours. You can also slice it before freezing and just thaw individual slices as needed.
Glaze Timing Advice: If you’re planning on storing your bread for more than a day or two, I actually recommend glazing it right before you serve it. If you glaze a whole loaf and then wrap it, the glaze can sometimes get a bit sticky or smudged. So, I often store the un-glazed, cooled loaf, and then glaze individual slices or the whole loaf just before I plan to eat it. If you do glaze the whole loaf and want to freeze it, make sure the glaze is completely set before wrapping.
Frequently Asked Questions
Final Thoughts
There you have it – my cherished chocolate zucchini bread recipe! This isn’t just a recipe; it’s a little piece of my kitchen that I’m so happy to share with you. It’s the kind of bake that consistently brings smiles to faces, and it’s a testament to how simple ingredients can create something truly extraordinary. The way the chocolate and zucchini come together is pure magic, resulting in a loaf that’s unbelievably moist, rich, and satisfying. It’s forgiving, it’s easy, and it’s guaranteed to be a hit.
If you love this recipe, I think you might also enjoy my moist lemon blueberry muffins or my foolproof classic banana bread – they share that same comforting, easy-bake spirit. Give this chocolate zucchini bread a try, and I truly hope it becomes a beloved recipe in your home too. I can’t wait to hear how your loaf turns out and what your family thinks! Let me know in the comments below if you try it, and feel free to share any variations or tips you discover!
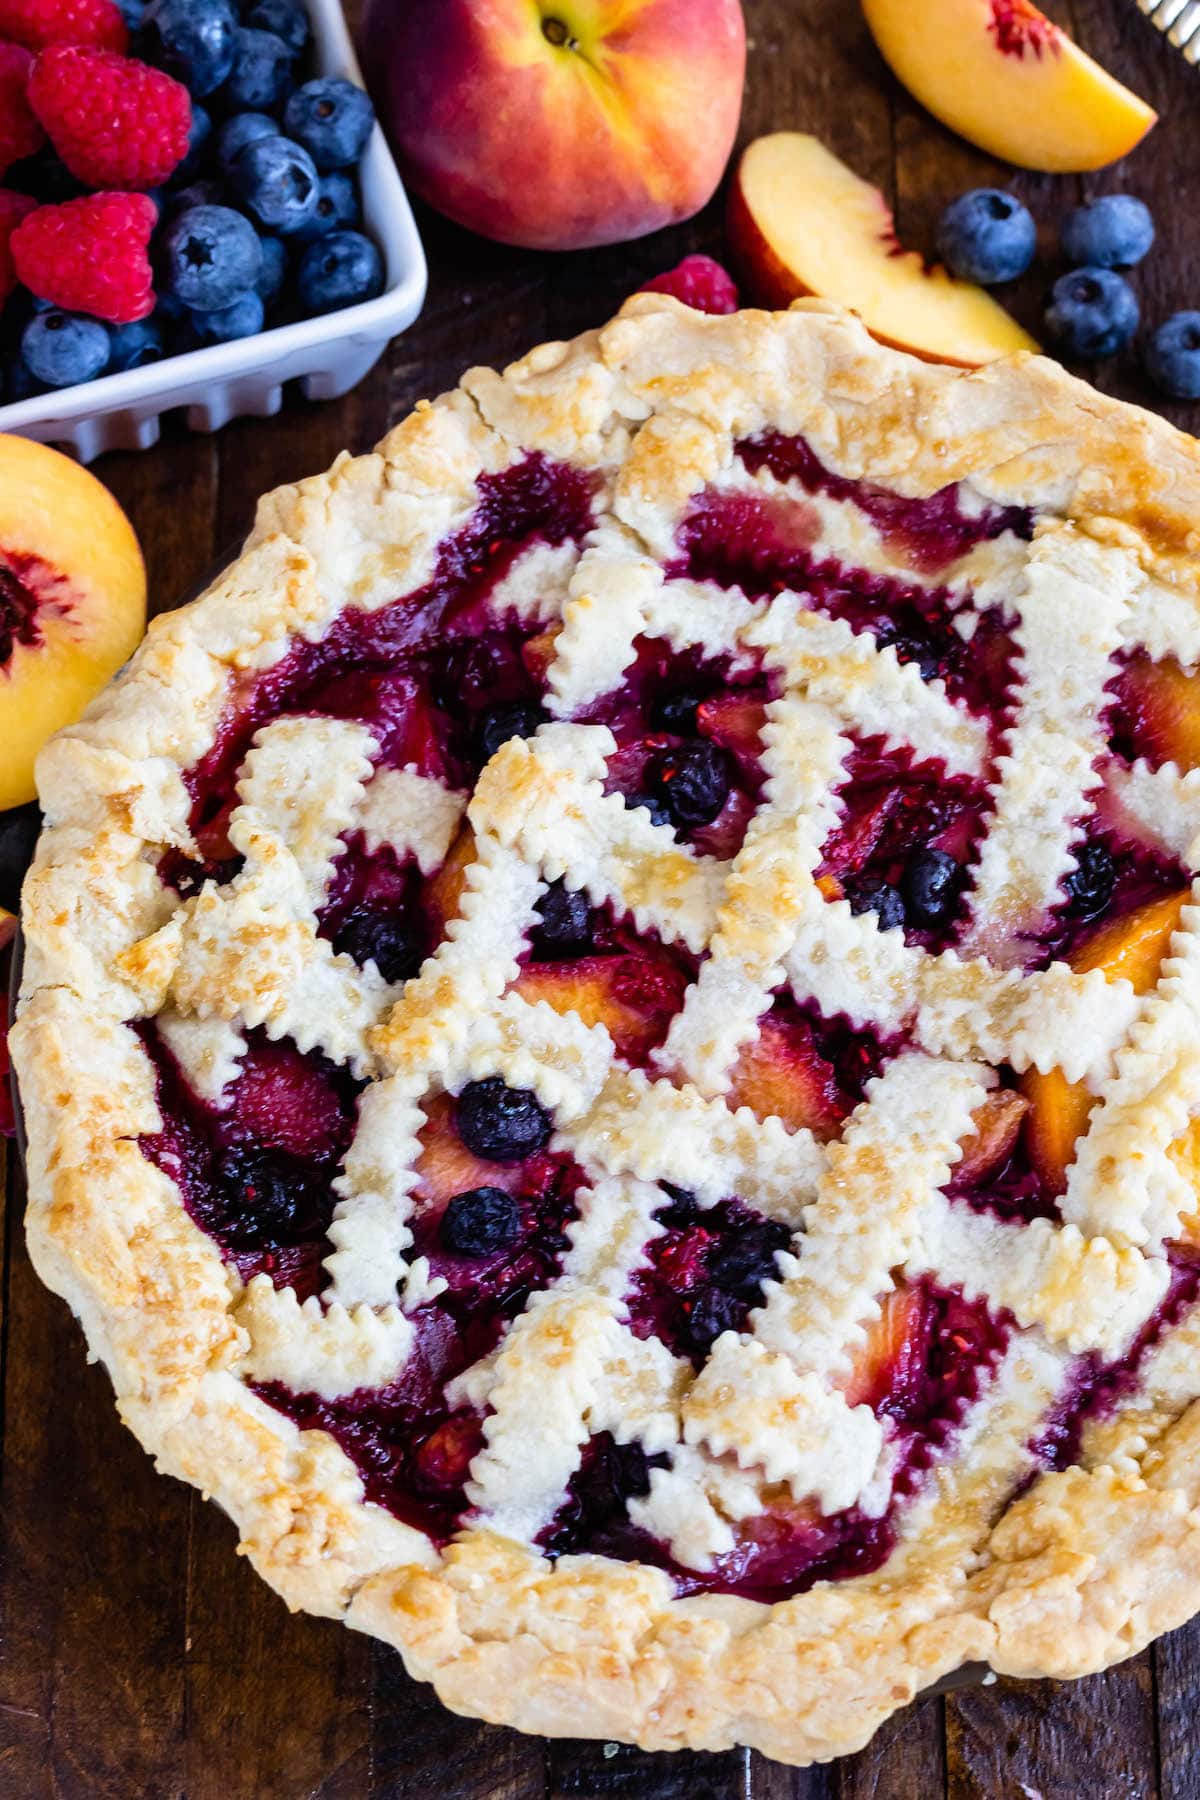
lattice pie crust
Ingredients
Method
- Roll one pie crust out to fit your pie plate. Place the crust in the pie, letting the edges overhang. Chill for 30 minutes.
- Roll the second pie crust a bit thicker than you would for a bottom crust, aiming for at least 0.25-inch thick or just slightly thicker. This ensures the strips are easy to handle and not too fragile.
- Fill your pie as desired using your chosen recipe.
- Remove the rolled-out second pie crust from the refrigerator. Using a knife, pizza cutter, or pastry wheel, cut strips in the pie crust that are 0.5-inch to 1-inch thick. Use a ruler to help keep them straight, if needed.
- Pick up strips of the pie crust and lay them over the pie, creating gaps between them that are the same width as the strips. Try to match the strip size to its location on the pie, using smaller strips near the sides and longer strips in the middle.
- Fold over alternating strips, then place a new strip perpendicular to the ones already on the pie. Unfold the previously folded strips, then repeat the process using the other alternating strips. Continue this basket weave pattern until the pie is fully covered with the lattice.
- In a small bowl, beat the large egg with a fork to create an egg wash. Lightly brush the lattice crust with the egg wash using a pastry brush or your fingers for browning. Sprinkle with coarse sugar, if desired.
- Trim the edges of the lattice and crimp as desired. Chill the pie for 20-30 minutes, then bake according to your specific pie recipe directions.