Easy Oatmeal Chocolate Chip Cookies
There’s just something about biting into a slice of warm coffee cake that instantly transports me to lazy Sunday mornings at my grandma’s house. The smell of cinnamon wafting through the air, the gentle crumble topping, and that tender, moist crumb that melts in your mouth—it’s pure comfort. I’ve made this zucchini coffee cake countless times, and honestly, it’s become my family’s go-to when we want something sweet but still cozy and homey. And the best part? It’s so simple! You know, I always do this trick where I toss the zucchini in a little salt before mixing it in—trust me, it helps keep it moist but prevents that watery texture that sometimes sneaks in. I’ve tested this with almond milk, whole milk, and even coconut oil, and honestly, it always turns out amazing. This one’s a lifesaver on busy nights when I want a quick dessert that tastes fancy but feels like a warm hug. Plus, I love how versatile it is—easy to make gluten-free or dairy-free if you need. It’s become a little tradition in my kitchen, and I can’t wait to tell you all about it!
What is Moist Zucchini Cinnamon Coffee Cake?
Think of this moist zucchini cinnamon coffee cake as a cozy, slightly indulgent treat that’s secretly good for you. Its name comes from the generous bits of shredded zucchini folded right into the batter—kind of like sneaking a veggie into a dessert, but honestly, nobody notices because it keeps the cake insanely moist and tender. It’s essentially a cross between a quick bread and a coffee cake, with a cinnamon-sugar swirl filling and a buttery crumble topping that crisps up perfectly in the oven. The beauty of this recipe is how approachable it is; you can whip it up on a weekend or have it ready in just about an hour. It’s the kind of thing you could serve for breakfast with your morning coffee, or slice up for an afternoon snack—anytime you need a little extra warmth, this cake delivers. And if you think “zucchini” sounds weird for a dessert—trust me, once you taste how perfectly balanced it is, you’ll see why I keep making this over and over!
Why you’ll love this recipe?
What I love most about this moist zucchini cinnamon coffee cake is how it strikes the perfect balance between indulgence and coziness. The cinnamon fills the air with that familiar, comforting scent—seriously, it’s hard to resist. The flavor is rich yet subtly fruity from the zucchini, and the sweetness is just right—you won’t feel like you’re eating dessert, but you’ll still get that satisfying, sweet hit. It’s also super easy to put together; I’ve learned that a quick mix of the batter, layering in the cinnamon swirl, and a sprinkle of crumble on top is all it takes. No fancy equipment needed, and the ingredients are inexpensive—nothing fancy, just pantry staples. This recipe is so versatile, too. I’ve swapped in coconut sugar for a less refined sweetness, or added chopped nuts for extra crunch. What I love most about this is how well it keeps, too—Storing slices in an airtight container, it stays moist for days, which is rare for baked goods. It’s perfect for when you want something homemade but don’t want the fuss of a complicated baking project. My kids ask for this all the time, and honestly, I’d happily eat it every morning if I could!
How do I make Zucchini Cinnamon Coffee Cake?
Quick Overview
This coffee cake is a walk in the park to make. You mix the dry ingredients and wet ingredients separately, then fold them together carefully so the batter stays light and fluffy. The shredded zucchini gets gently folded in to keep the cake moist and flavorful. Then, it’s all layered with a cinnamon-sugar swirl, topped with a buttery crumble, and baked until golden. The whole process from start to finish takes about an hour, and I promise, it’s worth every minute. The minimalist steps make it perfect for a beginner, but the flavor will make you feel like a pro. Once out of the oven, I like to let it cool just enough that the glaze or crumble doesn’t slide off, but it’s still warm enough to enjoy with a mug of coffee or tea. Trust me on this one: make a double batch—you’ll want leftovers!
Ingredients
For the Main Batter:
– 2 cups all-purpose flour (I always go for unbleached for a richer flavor)
– 1 cup granulated sugar (or coconut sugar for a deeper caramel tone)
– 1 teaspoon baking powder
– ½ teaspoon baking soda
– ½ teaspoon salt
– 1 teaspoon ground cinnamon
– ½ cup vegetable oil or melted coconut oil
– 1 cup milk (dairy or plant-based—I tested with almond milk, and it’s creamy perfection)
– 2 large eggs
– 1 cup shredded zucchini (remember to squeeze out excess moisture after grating)
For the Filling:
– 2 tablespoons brown sugar
– 1 teaspoon ground cinnamon
– ¼ cup chopped nuts (optional but adds great texture)
For the Glaze:
– ½ cup powdered sugar
– 1-2 teaspoons milk or lemon juice
– A dash of vanilla (if you want that extra flavor boost)
Step-by-Step Instructions
Step 1: Preheat & Prep Pan
Set your oven to 350°F (175°C). Grease a 9-inch square baking pan or line it with parchment paper. Trust me, this step saves a headache later! If you want more rustic edges, just use a baking spray or butter and dust with a bit of flour. Let your oven heat up fully, so your cake bakes evenly from the start.
Step 2: Mix Dry Ingredients
In a large bowl, whisk together the flour, sugar, baking powder, baking soda, salt, and cinnamon. I like to do this step thoroughly—it helps ensure your baking powder and soda are evenly distributed. The flour should be silky, with no lumps. I’ve learned that a good dry mix makes all the difference in a fluffy, tender cake.
Step 3: Mix Wet Ingredients
In another bowl, whisk the eggs, then stir in the oil, milk, and vanilla if you’re using. Warm milk is fine, but I always make sure it’s not too hot—you don’t want scrambled eggs! Mix until smooth and frothy. This is the part where you fill the kitchen with that lovely cinnamon scent, and it immediately lifts my mood.
Step 4: Combine
Make a well in the dry ingredients, then pour in the wet mixture. Gently fold everything together using a spatula—don’t overmix! You want the batter just combined, with no streaks of flour. Overmixing can lead to dense, tough cake, and nobody wants that. It’s okay if it’s a little lumpy; the zucchini bits will keep it extra moist.
Step 5: Prepare Filling
In a small bowl, mix the brown sugar and cinnamon. If you’re feeling nuts, toss them in here. This filling is what gives your cake that gorgeous swirl, so sprinkle it generously over the batter when you layer everything.
Step 6: Layer & Swirl
Pour half of the batter into your prepared pan, then sprinkle evenly with the cinnamon-sugar mixture. Add the remaining batter on top, and, using a butter knife or skewer, swirl gently through the batter to create those beautiful ribbons of cinnamon—trust me, it’s almost hypnotic to watch it come together. This swirling step is what elevates it from plain to “wow, this looks like a bakery treat.”
Step 7: Bake
Pop it into the oven for about 35-40 minutes, or until a toothpick inserted in the center comes out clean. I always set a timer for 30 minutes, then check. If it’s getting too dark on top but isn’t done inside, I tent it with foil. Every oven is a little different, so don’t be shy to adjust time or position—middle rack is usually best for even baking.
Step 8: Cool & Glaze
Let it cool in the pan for about 15 minutes, then transfer to a wire rack if you want a crispier edge. When it’s just warm, whisk together your glaze—powdered sugar with a splash of milk and vanilla. Drizzle it artfully over the top for that perfect finishing touch. I find that glazing while the cake’s still warm makes it absorb a bit more flavor and creates that glossy, irresistible look.
Step 9: Slice & Serve
Use a serrated knife to cut clean slices. Serve slightly warm or at room temperature—either way, it’s a hit. I love pairing it with a strong cup of coffee or a glass of cold milk. Oh, and leftovers? Just cover the cake tightly and keep it at room temp for a day or two, or refrigerate for longer. Honestly, I’ve been known to sneak a slice late at night—no shame!
What to Serve It With
This cake is a chameleon. On mornings when I want that little bit of extra comfort, I’ll serve it with a dollop of Greek yogurt or a splash of cream. My kids adore it with a drizzle of honey on top—sort of a deconstructed honey cinnamon roll. For brunch, I jazz it up with fresh berries and a dusting of powdered sugar; it makes everything look fancy without much effort. As an after-dinner treat, I like to heat up a slice and serve it with vanilla ice cream or a warm caramel drizzle—trust me, it’s divine. If I’m just craving a cozy snack, a simple cup of tea and a piece of this cake make everything feel calmer. It’s become part of our weekend ritual—coffee, cake, and good conversation. I’ve also made mini muffins using this batter—just reduce baking time to about 20 minutes, and they’re adorable and portable. I swear, no matter how you serve it, it’s a crowd-pleaser.
Top Tips for Perfecting Your Moist Zucchini Cinnamon Coffee Cake
Over the years, I’ve learned a few tricks to make this cake even better. First, when you grate the zucchini, squeeze out as much moisture as you can—use a clean kitchen towel or cheesecloth. Too much water will make the cake dense, and nobody wants a soggy bottom. I tested this with freshly grated zucchini and frozen—it works with frozen if you thaw it out and squeeze the water, but fresh is easiest. When mixing the batter, fold gently and avoid overmixing—that’s a rookie mistake I made early on. It’s tempting to stir vigorously, but patience pays off in a light, airy crumb. For the swirl, I like using a skewer or toothpick to make sure the cinnamon sugar forms beautiful ribbons—I’ve made the mistake of just dumping it all in, and it’s less pretty. If you want to swap ingredients, applesauce can replace oil for a lighter version, but keep the batter thick—too runny, and it won’t hold the swirl well. I’ve also experimented with maple syrup instead of sugar for a richer flavor, which pairs beautifully with the cinnamon. The key to perfect baking is oven calibration—every oven bakes differently, so start checking around the 35-minute mark. And don’t forget, a quick glaze while the cake’s still warm makes a huge difference—it sinks in a little, add a nice sheen, and makes it look bakery-fancy in no time. I’ve learned that storing it properly keeps it moist longer—wrap it tightly in plastic wrap if you’re not eating it right away, and it stays tender for days. A slice frozen with a layer of wax paper in between also works like a charm when you need a quick treat later.
Storing and Reheating Tips
This cake is surprisingly resilient, which makes it perfect for make-ahead treats. I usually let it cool completely, then store in an airtight container at room temperature for about 2-3 days. It’s best eaten fresh, but I’ve wrapped slices very tightly in plastic wrap and left them on the counter—still moist and flavorful. For longer storage, the fridge is your friend. Wrap the cake tightly or place it in a sealed container; it’ll stay good for up to a week, though I do recommend eating it sooner rather than later. If you want to keep it even longer, the freezer works beautifully—wrap with plastic wrap, then foil, and it can last up to 3 months. When you’re ready to eat another slice, just thaw it at room temp or warm it gently in the microwave for about 20 seconds. If your cake has a glaze, I recommend adding it after reheating, or it can get a bit sticky or melt off. Honestly, I find that fresh is best, but leftovers still taste divine the next day—just keep in mind that the crumble may soften a bit after storing.
Frequently Asked Questions
Final Thoughts
This moist zucchini cinnamon coffee cake has certainly earned a special place in my recipe box. It’s easy to make, deliciously comforting, and so adaptable—you can tweak the ingredients based on what you have on hand, and it still comes out amazing. I love how sneaky it is, with the zucchini adding moisture without a vegetable taste. Perfect for brunch, breakfast, or just a spontaneous sweet treat when craving something cozy. Once you get the hang of layering the cinnamon swirl and swirling it beautifully, you’ll see how pretty and inviting the final result looks. Honestly, this is my antidote to boring desserts. It’s not just a cake; it’s a memory in every slice—a little piece of comfort I want to keep sharing. So grab your zucchinis, your cinnamon, and your butter, and let’s get baking. I can’t wait to hear how yours turns out! If you give it a try, leave me a comment or tag me in your photos—sharing these recipes is the best part of this journey. Happy baking!
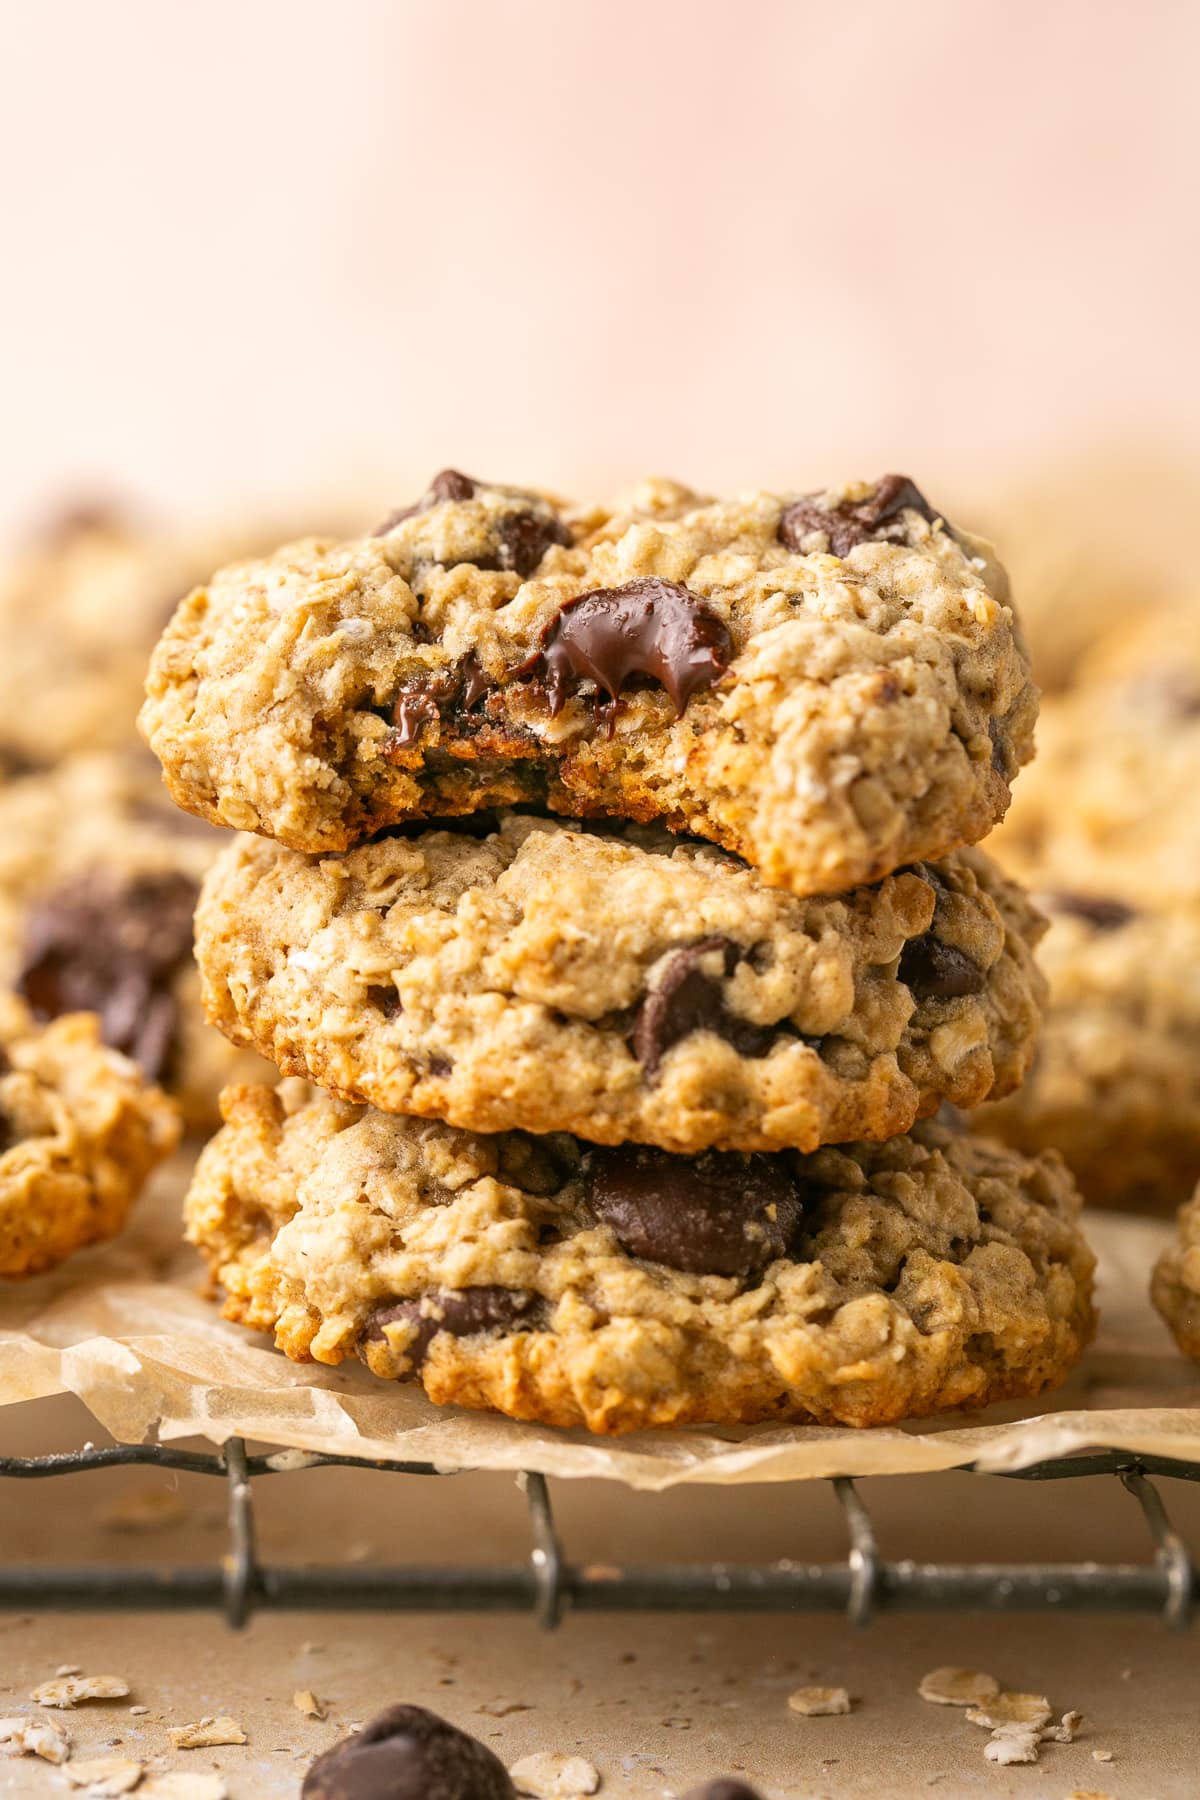
Oatmeal Chocolate Chip Cookies
Ingredients
Method
- Preheat oven to 350°F; line two baking sheets with parchment paper or use a silpat.
- In a medium bowl, whisk together flour, baking powder, baking soda, salt and cinnamon.
- In a large bowl, with a mixer, cream together the butter and the sugars on medium speed.
- Add the egg, followed by the applesauce and vanilla extract.
- Working by hand, stir in the flour mixture and the oats until just combined and no streaks of flour remain; stir in the chocolate chips.
- Drop heaping tablespoonfuls (approx 1 tbsp each) of the dough onto prepared baking sheets, flattening each cookie slightly.
- Bake for about 10-12 minutes, or until cookies become light brown at the edges.
- Let cool on baking sheet for 3 or 4 minutes, then transfer to a wire rack to cool completely.
- Store in an airtight container.