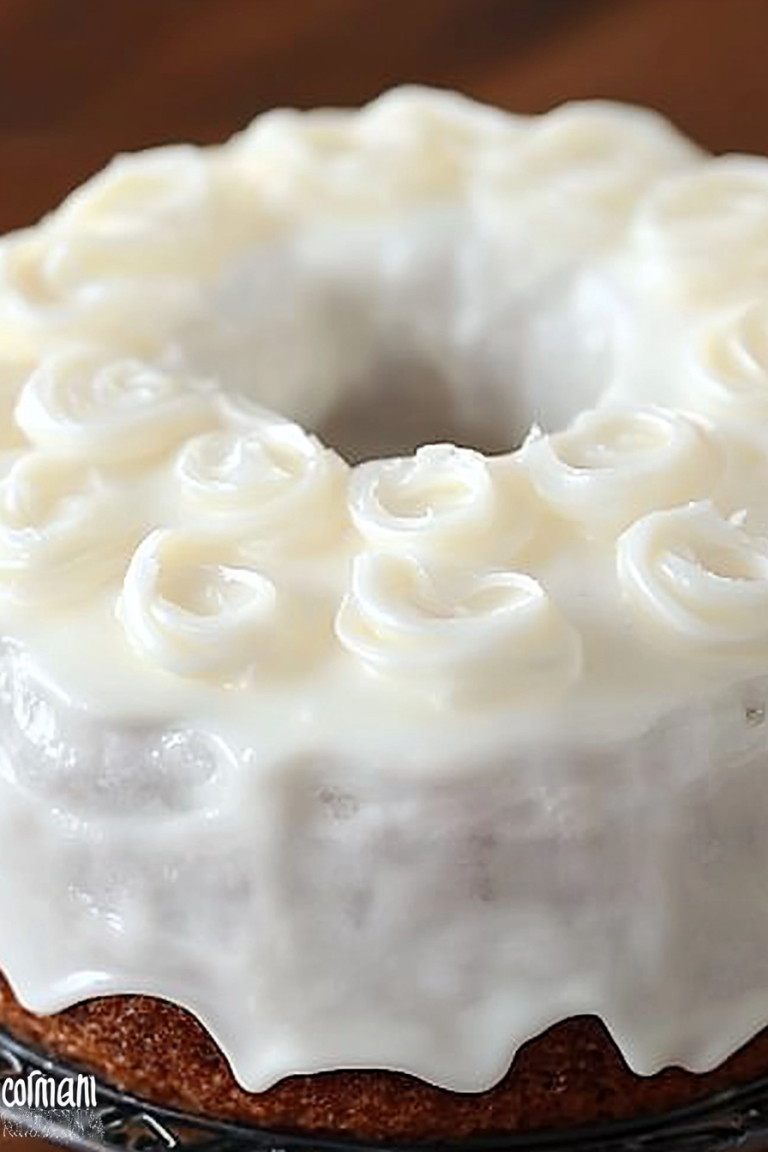
Easy Coconut Icebox Cake Delight
Okay, pull up a chair, grab a mug of something warm, and let me tell you about this zucchini bread. This isn’t just *any* zucchini bread; this is the stuff of my kitchen dreams, the recipe that rescued me from dry, crumbly baked goods for good. I remember the first time my mom made it for me after I complained about another failed loaf from a recipe I found online. She just winked, pulled out her worn recipe card, and said, “This one’s different, kiddo.” And oh, was she right! It’s that perfect balance of sweet and comforting, moist and tender, that makes you want to hide the whole pan for yourself. It’s so good, in fact, that my family devours it faster than I can bake it, and honestly, I’m not even mad. If you’ve ever been disappointed by a dense, tasteless zucchini bread, get ready to have your mind changed. This is the recipe that finally taught me what truly wonderful zucchini bread tastes like, and it’s a game-changer.
What is this “Magic” Zucchini Bread?
So, what exactly makes this zucchini bread so darn special? Well, think of it as your go-to comfort bake, elevated. It’s essentially a classic quick bread, but with a few secret weapons that ensure it stays incredibly moist and flavorful, no matter what. The “zucchini” part, of course, comes from finely grated zucchini, which might sound a little odd if you’re new to baking with it, but trust me, it’s the MVP here. It melts into the batter, lending a beautiful tenderness and, believe it or not, a subtle sweetness that just makes everything taste better. It’s not like you’re biting into a piece of vegetable; it’s more like the zucchini acts as a moisture-retaining superhero, working behind the scenes to make every bite pure bliss. It’s hearty enough for breakfast but decadent enough for dessert, and that’s part of its charm.
Why you’ll love this recipe?
Honestly, I could list a million reasons why this zucchini bread is my absolute favorite, but let me try to narrow it down for you. First and foremost, the flavor is just out of this world. It’s got that perfect hug-in-a-muffin-top kind of taste – warm spices, a hint of sweetness, and that amazing tender crumb. It’s not overly sweet, which I really appreciate, so you can enjoy a slice without feeling like you’ve just demolished a sugar bomb. And the moisture! This is where it truly shines. Unlike other recipes that can turn out dry or heavy, this one is consistently, unbelievably moist, thanks to the zucchini and a couple of other little tricks I’ll share. It’s also ridiculously easy to whip up. I’ve made this on a chaotic Tuesday evening with kids running around, and it still turned out perfectly. The ingredients are all pantry staples, so you probably have most of them on hand right now. Plus, it’s super versatile! Serve it warm with a smear of butter, slathered with cream cheese, or even as is. It’s also incredibly cost-effective, using up those extra zucchini from the garden or that sale you couldn’t resist. It just ticks all the boxes for me, and I have a feeling it will for you too.
How do I make Zucchini Bread?
Quick Overview
The beauty of this recipe is its straightforward nature. You’ll essentially be mixing your dry ingredients, then your wet ingredients, combining them gently, folding in the star – the zucchini – and then baking it until golden and fragrant. The whole process, from gathering ingredients to pulling it out of the oven, takes about an hour, and much of that is hands-off baking time. It’s the kind of recipe that makes your kitchen smell like pure comfort and happiness.
Ingredients
For the Main Batter:
2 cups all-purpose flour (I’ve also tried a blend of all-purpose and whole wheat, and it worked great!)
1 teaspoon baking soda
1/2 teaspoon baking powder
1/4 teaspoon salt
1/2 teaspoon ground cinnamon
1/4 teaspoon ground nutmeg (optional, but it adds such a lovely warmth)
1 and 3/4 cups granulated sugar (this might seem like a lot, but it’s what helps with the moisture! You can try reducing it slightly, but I wouldn’t go too low)
2 large eggs
3/4 cup vegetable oil (or any neutral oil like canola or grapeseed. Some people use melted butter, but oil guarantees moisture!)
1/4 cup milk (any kind will do, I’ve even used almond milk and it made it even creamier!)
1 teaspoon vanilla extract
2 cups finely grated zucchini (about 2-3 medium zucchini. Squeeze out some of the excess moisture, but don’t go crazy – we want that goodness!)
For the Swirl (Optional but Highly Recommended!):
1/2 cup packed brown sugar
1 tablespoon all-purpose flour
1 teaspoon ground cinnamon
2 tablespoons unsalted butter, softened
For the Glaze (Also Optional, but oh-so-good!):
1 cup powdered sugar
2-3 tablespoons milk (start with 2 and add more if needed for consistency)
1/2 teaspoon vanilla extract
Step-by-Step Instructions
Step 1: Preheat & Prep Pan
First things first, get your oven fired up to 350 degrees Fahrenheit (175 degrees Celsius). I always grease and flour a 9×5 inch loaf pan, or you can line it with parchment paper for super easy removal. If you’re using parchment, leave a little overhang on the sides – it’s a lifesaver when lifting the bread out!
Step 2: Mix Dry Ingredients
In a large bowl, whisk together the flour, baking soda, baking powder, salt, cinnamon, and nutmeg (if you’re using it). Give it a good whisk to make sure everything is evenly distributed. This ensures your leavening agents are spread out, which means a nice, even rise for your bread.
Step 3: Mix Wet Ingredients
In a separate medium bowl, whisk together the granulated sugar, eggs, vegetable oil, milk, and vanilla extract until everything is well combined and looks smooth. Don’t overbeat here, just get it mixed.
Step 4: Combine
Now, pour the wet ingredients into the dry ingredients. Use a spatula or a wooden spoon to mix until *just* combined. Seriously, stop as soon as you don’t see any big streaks of flour. Overmixing is the enemy of tender baked goods, so be gentle! Then, gently fold in the grated zucchini until it’s evenly distributed throughout the batter.
Step 5: Prepare Filling
If you’re making the cinnamon swirl, in a small bowl, mix together the brown sugar, 1 tablespoon of flour, and 1 teaspoon of cinnamon. Then, cut in the softened butter with a fork or your fingers until it forms coarse crumbs. This is your yummy swirl mixture!
Step 6: Layer & Swirl
Pour about half of the zucchini batter into your prepared loaf pan. Sprinkle half of the cinnamon sugar mixture evenly over the top. Then, pour the remaining batter over that, and sprinkle the rest of the cinnamon sugar mixture on top. If you want a more pronounced swirl, you can take a knife or a skewer and gently swirl it through the batter, creating little pockets of cinnamon goodness. Don’t over-swirl, or you’ll lose the distinct layers!
Step 7: Bake
Pop the pan into your preheated oven. Bake for 50-65 minutes, or until a wooden skewer or toothpick inserted into the center comes out clean (or with just a few moist crumbs attached, not wet batter). Ovens can be so different, so keep an eye on it. If the top starts browning too quickly, you can loosely tent it with foil.
Step 8: Cool & Glaze
Let the zucchini bread cool in the pan for about 10-15 minutes. This is important! It helps it set up and makes it easier to remove. Then, carefully invert it onto a wire rack to cool completely. If you’re adding a glaze, whisk together the powdered sugar, milk, and vanilla extract in a small bowl until smooth. You want a drizzle-able consistency, not too thick and not too thin. Once the bread is completely cool, drizzle the glaze over the top. If you add the glaze while it’s warm, it’ll just soak in and disappear!
Step 9: Slice & Serve
Once the glaze has set a bit, slice into generous pieces and enjoy! The best way to cut it is usually with a serrated knife for clean slices. I love it best when it’s just slightly warm or at room temperature.
What to Serve It With
This zucchini bread is practically a meal in itself, but it also plays nicely with so many things! For a casual breakfast, a thick slice with a dollop of butter or cream cheese is pure heaven. It pairs beautifully with a hot cup of coffee or a creamy latte. For a more elegant brunch spread, I love serving it alongside some fresh fruit salad and perhaps some crispy bacon or a light quiche. The sweetness of the bread is a lovely contrast. As a dessert, it’s fantastic on its own, but if you want to go all out, a scoop of vanilla bean ice cream alongside it is divine. And for those moments when you just need a little something sweet to perk you up? This is your answer. A slice with a glass of cold milk is my personal favorite for a cozy afternoon snack. My family loves it so much that sometimes I’ll cut it into smaller, muffin-sized pieces for them to have as little grab-and-go treats.
Top Tips for Perfecting Your Zucchini Bread
Over the years, I’ve learned a thing or two about making this zucchini bread absolutely perfect, and I want to share those little secrets with you!
Zucchini Prep: The key is to grate your zucchini finely. Use the small holes on your box grater or a food processor with the grating attachment. Once grated, gently squeeze out *some* of the excess liquid. I don’t mean wring it out like a sponge, but a gentle squeeze in your hands or by pressing it in a sieve is enough. Too much moisture can make the bread soggy, and too little can make it dry. Also, try to use fresh, firm zucchini; they have the best flavor and texture.
Mixing Advice: This is crucial! When you combine the wet and dry ingredients, mix only until *just* combined. I repeat, just combined! You’ll see a few little streaks of flour, and that’s okay. Overmixing develops the gluten too much, leading to a tough, chewy bread. We want tender, melt-in-your-mouth goodness. The same goes for folding in the zucchini – be gentle.
Swirl Customization: If you love a swirl, don’t be afraid to play with it! You can add a little cocoa powder to some of the cinnamon sugar mixture to create chocolate swirls, or even add a few mini chocolate chips to the swirl mixture before sprinkling. For a more dramatic swirl, use a butter knife or a skewer to create zig-zag patterns, but remember, a little goes a long way. You don’t want to overdo it and have it all blend together.
Ingredient Swaps: While this recipe is pretty spot-on as is, I’ve tinkered a bit. For a slightly healthier spin, you can swap out about half of the all-purpose flour for whole wheat flour. It will change the texture slightly, making it a bit denser, but it’s still delicious. I’ve also successfully used unsweetened applesauce in place of half the oil, but be aware it can make the bread a bit gummier. For the milk, any dairy or non-dairy milk works wonderfully.
Baking Tips: Always use the middle rack in your oven for even baking. If you notice the top is browning too quickly before the center is cooked, don’t panic! Just loosely tent the loaf pan with aluminum foil. This reflects the heat and prevents the crust from burning while the inside finishes baking. To check for doneness, a toothpick inserted into the thickest part of the bread should come out with a few moist crumbs, but no wet batter. If it’s still gooey, give it another 5-10 minutes and check again.
Glaze Variations: The glaze is optional, but it really does take it to the next level. For a thicker glaze, use less milk. For a thinner, more translucent glaze, add a touch more milk. You can also add a little lemon zest to the glaze for a nice citrusy zing, or a tiny bit of almond extract instead of vanilla for a different flavor profile.
Storing and Reheating Tips
One of the best things about this zucchini bread is how well it keeps! It’s genuinely better the next day, in my opinion. At room temperature, I store it in an airtight container or wrapped tightly in plastic wrap for up to 3 days. It stays wonderfully moist. If you need it to last longer, you can absolutely refrigerate it. Wrap it well in plastic wrap, then in foil, or place it in an airtight container. It should stay fresh in the fridge for about a week, though honestly, it rarely lasts that long in my house! If you want to freeze it, I highly recommend doing it before glazing. Wrap the cooled bread tightly in plastic wrap, then in a layer of aluminum foil, and pop it into a freezer-safe bag. It will keep beautifully in the freezer for up to 3 months. To thaw, just let it sit at room temperature for a few hours. If you decide to add the glaze *after* freezing, let it cool completely, then glaze away!
Frequently Asked Questions
Final Thoughts
There you have it – my absolute favorite, incredibly moist zucchini bread recipe. I hope you love it as much as my family and I do. It’s the kind of recipe that makes you feel like a baking wizard, even if you’re just starting out. It’s so forgiving and always turns out beautifully, filling your home with the most wonderful aroma. It’s that perfect balance of comforting, sweet, and surprisingly healthy (thanks, zucchini!) that makes it a staple in my kitchen year-round. If you adore this recipe, you might also enjoy my (Link to another relevant recipe, e.g., “Best Ever Banana Bread”) or my (Link to another relevant recipe, e.g., “Easy Blueberry Muffins”). They share that same cozy, homemade goodness. Give this zucchini bread a try, and let me know how it turns out! I can’t wait to hear your thoughts and see your creations in the comments below. Happy baking, my friends!
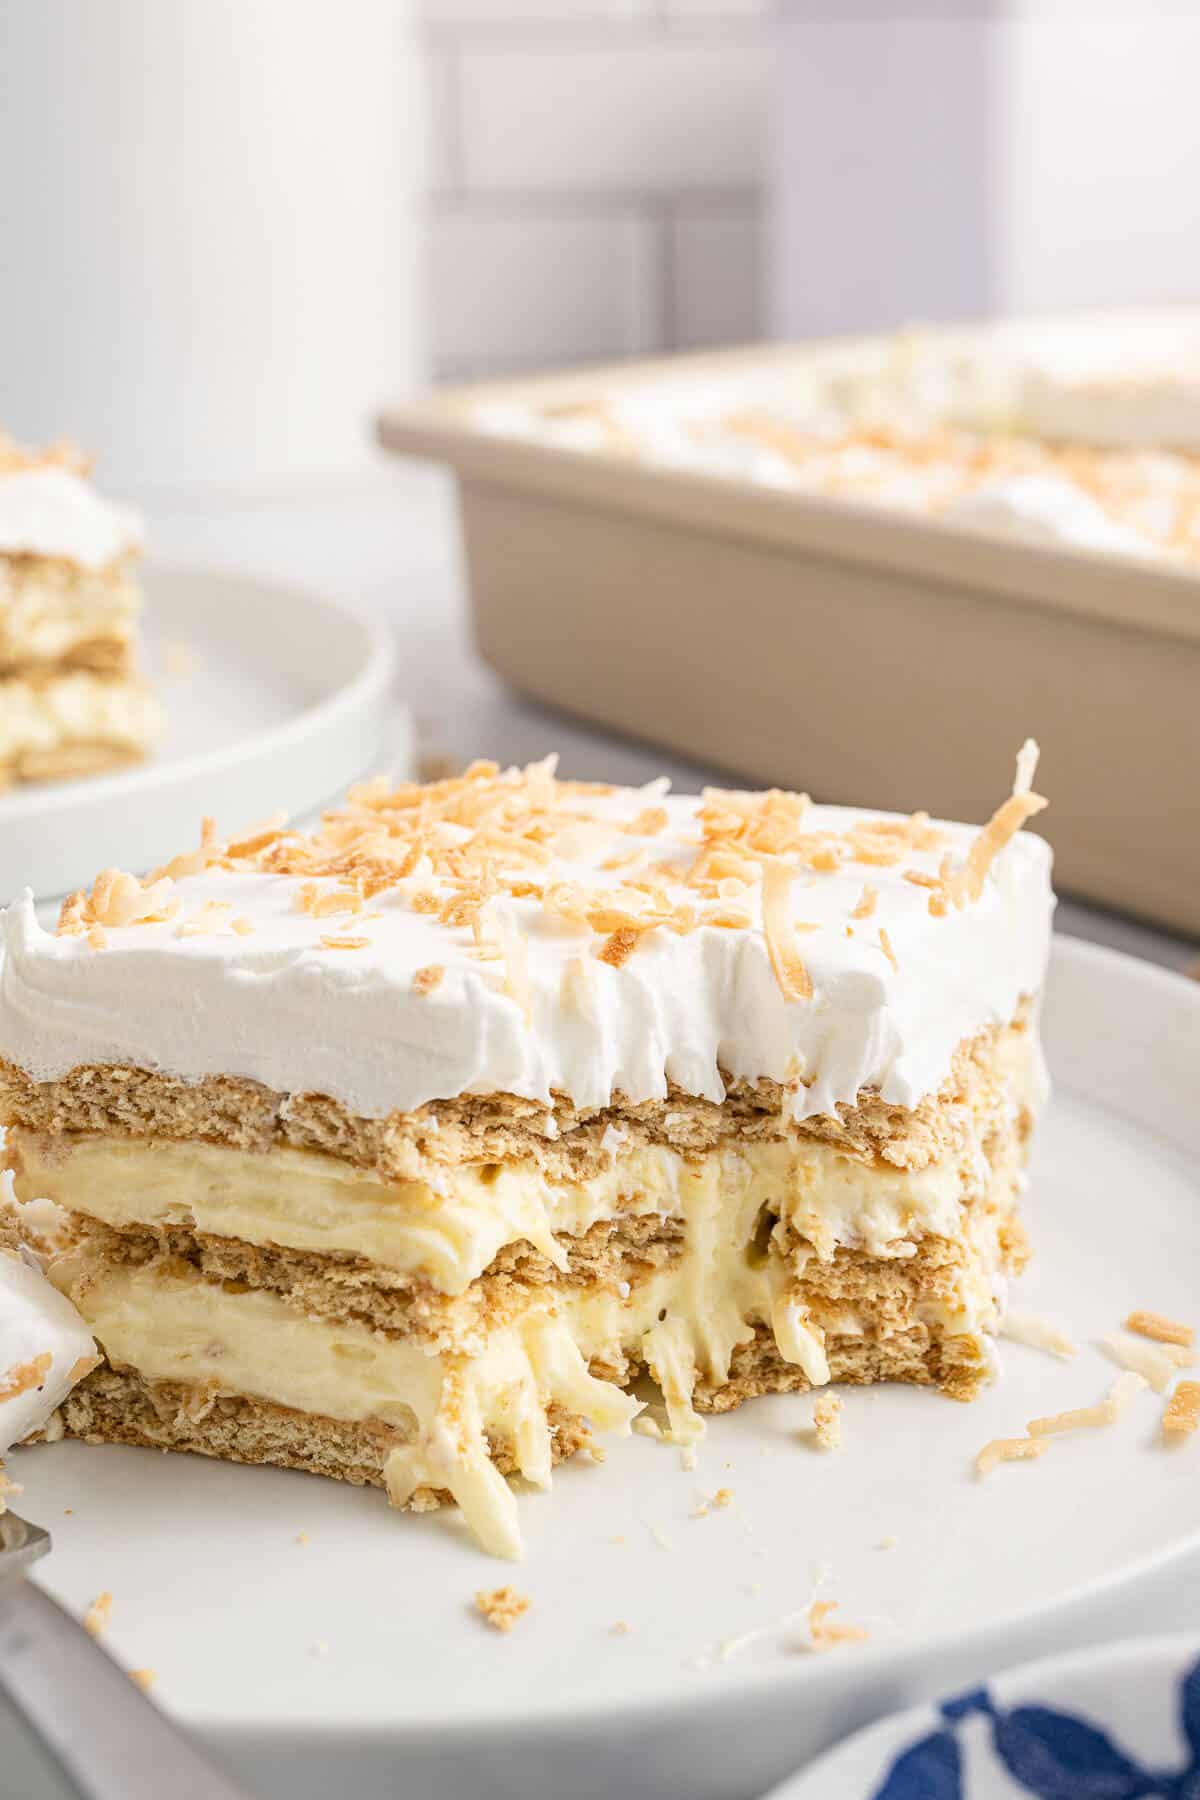
coconut icebox cake
Ingredients
Method
- In a large bowl, whisk together the vanilla pudding mix, milk, and coconut extract for about 1 to 2 minutes until the pudding mix is dissolved and the mix has thickened.
- Add the coconut flakes and stir.
- Fold in one 8 oz container of thawed whipped topping until well-mixed.
- Line the bottom of a 9x13-inch baking dish or pan with 8 to 9 graham crackers. You can break the graham crackers apart to make sure the whole bottom is covered.
- Spoon about half the pudding mixture over the graham crackers and smooth it out with a spoon or spatula.
- Layer another 8 to 9 graham crackers over the pudding mix, then cover those with the other half of the pudding mixture.
- Do one more layer of graham crackers then spread the second 8 oz container of thawed whipped topping over the top.
- Refrigerate for at least 4 hours, but chilling overnight is best.
- Sprinkle the toasted coconut on top, and serve chilled.