Easy Chocolate Fudge That Melts In Your Mouth
You know those recipes that just feel like a warm hug? The ones that instantly transport you back to childhood, or make your kitchen smell like pure magic? Well, this zucchini bread is one of *those* recipes for me. I’ve been making it for years, and honestly, it’s become my go-to for everything from a quick breakfast on a chaotic school morning to a comforting dessert after a long day. It’s not just any zucchini bread, though. The secret weapon here is a luscious cream cheese swirl that takes it from delicious to absolutely divine. If you’ve ever thought zucchini bread was boring, trust me, this will change your mind completely. It’s like the comfort of a classic chocolate chip cookie met the wholesome goodness of a baked treat, all rolled into one perfect loaf. This recipe has saved me more times than I can count when unexpected guests pop over or when that sweet craving hits hard at 10 PM, and I just don’t have the energy to tackle a full cake. It’s my little shortcut to happy sighs and satisfied smiles.
What is Zucchini bread with cream cheese swirl?
So, what exactly *is* this magical creation? Think of it as your beloved, moist, and tender zucchini bread, but with a delightful twist. The cream cheese swirl is essentially a slightly sweetened, tangy cream cheese mixture that gets swirled into the batter before baking. It bakes up into these decadent, cheesecake-like pockets throughout the bread, adding an incredible richness and a subtle tang that perfectly balances the sweetness of the bread. It’s not overly complicated, just a simple addition that elevates the whole experience. The name itself, “Zucchini Bread with Cream Cheese Swirl,” pretty much tells the whole story, but it doesn’t quite capture the sheer joy it brings. It’s comforting, it’s a little bit fancy without being fussy, and it always, always hits the spot.
Why you’ll love this recipe?
Honestly, where do I even begin with why this recipe is my absolute favorite? Let’s break it down. First off, the flavor is just out of this world. The zucchini keeps the bread incredibly moist and tender, almost melt-in-your-mouth tender, and you get that subtle, earthy sweetness from it. But then you hit one of those swirls of cream cheese, and it’s like a little burst of cheesecake heaven. It’s creamy, it’s tangy, and it’s just… perfect. I also really appreciate how surprisingly simple it is to whip up. Even on those crazy busy weeknights when I’m juggling dinner and trying to wrangle the kids, I can still get this mixed up and in the oven. The ingredients are all pretty budget-friendly, too. You probably already have most of them in your pantry, and zucchini is usually super affordable, especially when it’s in season. What I love most about this is its versatility. You can have it for breakfast, a mid-afternoon snack, or even a light dessert. It pairs beautifully with a cup of coffee in the morning, or a scoop of vanilla ice cream in the evening. If you’ve enjoyed my classic Chocolate Zucchini Bread or my incredibly popular Banana Bread, you are going to adore this. It takes all the comfort of those familiar favorites and adds a sophisticated touch that makes it feel really special, without any extra effort.
How do you make Zucchini bread with cream cheese swirl?
Quick Overview
This recipe is all about creating a moist, flavorful zucchini bread batter and then swirling in a simple, delicious cream cheese mixture before baking. You’ll mix your dry ingredients, then your wet, combine them gently, prepare your cream cheese swirl, layer it all into your pan, and bake until golden and fragrant. The beauty of this method is its straightforwardness, and the swirl comes together in mere minutes. It’s designed to be fuss-free, so even a beginner baker can achieve fantastic results. The aroma that fills your kitchen as it bakes is just a preview of the deliciousness to come!
Ingredients
For the Main Batter:
2 cups all-purpose flour (I like to use unbleached for a better texture)
1 teaspoon baking soda
1/2 teaspoon baking powder
1/2 teaspoon salt
1/2 teaspoon ground cinnamon
1/4 teaspoon ground nutmeg (optional, but it adds such warmth!)
1 1/2 cups granulated sugar (you can reduce this slightly if you prefer, but it helps with moisture)
For the Wet Ingredients:
2 large eggs, at room temperature (this helps them incorporate better)
3/4 cup vegetable oil or melted unsalted butter (I’ve tried both, and oil makes it extra moist, butter adds a nice flavor)
1 teaspoon vanilla extract (use good quality for the best flavor!)
2 cups finely grated zucchini (about 2 medium zucchinis, I don’t bother peeling them)
For the Cream Cheese Swirl:
8 ounces cream cheese, softened to room temperature (this is crucial for a smooth swirl!)
1/4 cup granulated sugar
1 large egg yolk (just the yolk for richness and a smooth texture)
1/2 teaspoon vanilla extract
Step-by-Step Instructions
Step 1: Preheat & Prep Pan
First things first, preheat your oven to 350°F (175°C). Grab a standard 9×5 inch loaf pan and grease it really well. I like to use a combination of butter and flour, or even better, a baking spray that has flour in it. Make sure to get into all the corners! You can also line it with parchment paper, leaving an overhang on the sides – this makes lifting the baked loaf out a breeze. This prep step might seem small, but it makes sure your beautiful zucchini bread doesn’t stick.
Step 2: Mix Dry Ingredients
In a large bowl, whisk together the flour, baking soda, baking powder, salt, cinnamon, and nutmeg (if you’re using it). Give it a good whisk for about 30 seconds. This aerates the flour and ensures all the leavening agents and spices are evenly distributed. You don’t want any pockets of baking soda in your bread, trust me! Once everything looks well combined, set this bowl aside.
Step 3: Mix Wet Ingredients
In a separate medium bowl, whisk together the granulated sugar, eggs, vegetable oil (or melted butter), and vanilla extract. Whisk until everything is well combined and looks smooth. Then, fold in the grated zucchini. Don’t overmix here, just get it incorporated. The zucchini will seem like a lot, but it’s what makes this bread wonderfully moist!
Step 4: Combine
Now, pour the wet ingredients into the bowl with the dry ingredients. Using a spatula or wooden spoon, mix *just* until combined. It’s really important not to overmix the batter. A few streaks of flour are okay; they’ll disappear as you continue. Overmixing develops the gluten in the flour, which can lead to a tough, dense bread. We want tender and moist, so gentle is key!
Step 5: Prepare Filling
While the batter is resting, let’s make that dreamy cream cheese swirl. In a small bowl, beat the softened cream cheese with the sugar until it’s completely smooth and creamy. There should be no lumps. Then, beat in the egg yolk and vanilla extract until just combined. Don’t overbeat; we just want it smooth and homogenous. This filling is so good, you might be tempted to eat it with a spoon!
Step 6: Layer & Swirl
Pour about half of the zucchini bread batter into your prepared loaf pan and spread it out evenly. Dollop about half of the cream cheese mixture over the batter. Then, pour the remaining zucchini bread batter on top, followed by the rest of the cream cheese mixture. Now for the fun part: grab a butter knife or a skewer and gently swirl the cream cheese into the batter. Don’t go crazy; just a few twists and turns will create beautiful marbling. You want distinct ribbons, not a fully mixed batter.
Step 7: Bake
Place the loaf pan in the preheated oven. Bake for 50-65 minutes, or until a wooden skewer or toothpick inserted into the center comes out clean (or with just a few moist crumbs, but no wet batter). The top should be golden brown and the edges should be pulling away slightly from the sides of the pan. Ovens vary, so keep an eye on it. If the top starts browning too quickly, you can loosely tent it with aluminum foil for the last 15-20 minutes of baking.
Step 8: Cool & Glaze
Once baked, let the zucchini bread cool in the pan for about 10-15 minutes. This allows it to set up properly. Then, carefully remove it from the pan and transfer it to a wire rack to cool completely. Resist the urge to slice into it while it’s hot! It needs to cool down to firm up. If you’re feeling fancy, you can whip up a simple glaze (powdered sugar mixed with a little milk or lemon juice) and drizzle it over once it’s completely cool. I love a simple vanilla glaze or even a lemon glaze for a little zing.
Step 9: Slice & Serve
Once completely cooled, slice your beautiful zucchini bread with a serrated knife for clean cuts. The texture should be incredibly moist with those lovely pockets of cream cheese. Serve a slice (or two!) with a cup of your favorite beverage. It’s wonderful on its own, but a little dollop of whipped cream or a scoop of ice cream on the side for dessert is never a bad idea. Enjoy the fruits of your labor – this loaf is pure comfort!
What to Serve It With
This zucchini bread is so versatile, it’s practically a meal in itself! For breakfast, I love serving a thick slice with a strong cup of black coffee or a creamy latte. The richness of the bread is the perfect complement to a hot morning drink. Sometimes, I’ll even toast a slice lightly and spread it with a little butter or cream cheese – sounds decadent, I know, but it’s SO good. For a more relaxed brunch, it’s a fantastic addition to a spread. Imagine it alongside some fresh fruit salad, scrambled eggs, and maybe even some crispy bacon. It adds that touch of homemade sweetness that makes a brunch feel extra special. As a dessert, this is where it really shines for me. A warm slice with a scoop of good quality vanilla bean ice cream? Absolutely heavenly. You could also serve it with a dollop of whipped cream and a sprinkle of chopped nuts. And for those cozy snack times, it’s perfect. I’ll often just grab a slice (or a corner!) while I’m catching up on a good book or movie. It’s incredibly satisfying and feels like a treat without being too heavy. My kids also love it as an after-school snack with a glass of milk – it’s a “treat” that I don’t feel guilty about them having!
Top Tips for Perfecting Your Zucchini Bread with Cream Cheese Swirl
Over the years, I’ve learned a few tricks that make this zucchini bread absolutely perfect every single time. Let’s talk zucchini prep: make sure you grate it finely. I don’t peel it because the skin adds fiber and color, but if you prefer a super-smooth texture, you can peel it. The most important thing is to squeeze out as much excess moisture as you can. I usually place the grated zucchini in a fine-mesh sieve and press down with a spoon, or even wrap it in a clean kitchen towel or cheesecloth and wring it out. This step prevents your bread from becoming soggy. When it comes to mixing, remember my earlier advice: *do not overmix*. Seriously, it’s the biggest culprit for tough baked goods. Just mix until you no longer see dry flour. For that beautiful swirl, don’t go too deep when you’re swirling. You want distinct ribbons of cream cheese, not a muddy mess. Gentle swirls are best. If you want to experiment with ingredient swaps, I’ve found that using half whole wheat flour and half all-purpose flour works pretty well, though it might make the bread a bit denser. For a dairy-free option, you can try a plant-based cream cheese alternative for the swirl, but results can vary. I haven’t personally tested this, but I’ve heard good things. When it comes to baking, always trust your oven’s cues. My oven runs a little hot, so I sometimes need to reduce the temperature by 10-15 degrees. The skewer test is your best friend – if it comes out clean, it’s done! Don’t be afraid of variations either. You can add chocolate chips (about 1/2 cup) to the batter for a chocolatey twist, or some chopped walnuts or pecans for a nutty crunch. For the glaze, if it’s too thick, add a tiny bit more liquid (milk or lemon juice); if it’s too thin, add a bit more powdered sugar. The goal is a glaze that drizzles nicely but isn’t watery.
Storing and Reheating Tips
One of the best things about this zucchini bread is how well it keeps. If I’m planning to eat it within a couple of days, I’ll just leave it on the counter at room temperature, loosely tented with foil or in an airtight container. It stays wonderfully moist for about 2-3 days this way. If I know it’s going to be longer, or if the weather is particularly warm, I’ll pop it into the refrigerator. Stored in an airtight container in the fridge, it should last for a good week, though the texture might be a little firmer. To reheat, I love to gently warm a slice in a toaster oven or a regular oven at around 300°F (150°C) for about 5-10 minutes. This brings back that wonderful moistness and aroma. You can also microwave it for about 15-20 seconds, but be careful not to overheat it, or it can become a bit rubbery. For freezing, this bread is a champ! Let it cool completely, then wrap it tightly in plastic wrap, followed by a layer of aluminum foil or a freezer-safe bag. It can be frozen for up to 3 months. When you’re ready to enjoy it, you can thaw it overnight in the refrigerator and then gently reheat as described above, or try thawing it on the counter for a few hours. If you’ve added a glaze, it’s usually best to add that *after* reheating to prevent it from becoming sticky or melted.
Frequently Asked Questions
Final Thoughts
So there you have it, my absolute favorite zucchini bread with a dreamy cream cheese swirl. It’s more than just a recipe to me; it’s a source of comfort, a crowd-pleaser, and a testament to how simple ingredients can create something truly special. The moistness from the zucchini, combined with those sweet, tangy pockets of cream cheese, just sings. It’s the kind of bake that makes you feel good, both while you’re making it and while you’re enjoying every single bite. If you’re looking for a new go-to baked treat that’s reliably delicious and surprisingly easy, give this one a try. I promise you won’t be disappointed! For those of you who love a good quick bread, you might also enjoy my Spiced Apple Bread or my classic Lemon Poppy Seed Loaf. They all share that same spirit of simple, home-baked goodness. I can’t wait to hear what you think of this zucchini bread! Please leave a comment below and let me know how yours turns out, or if you’ve tried any fun variations. Happy baking!
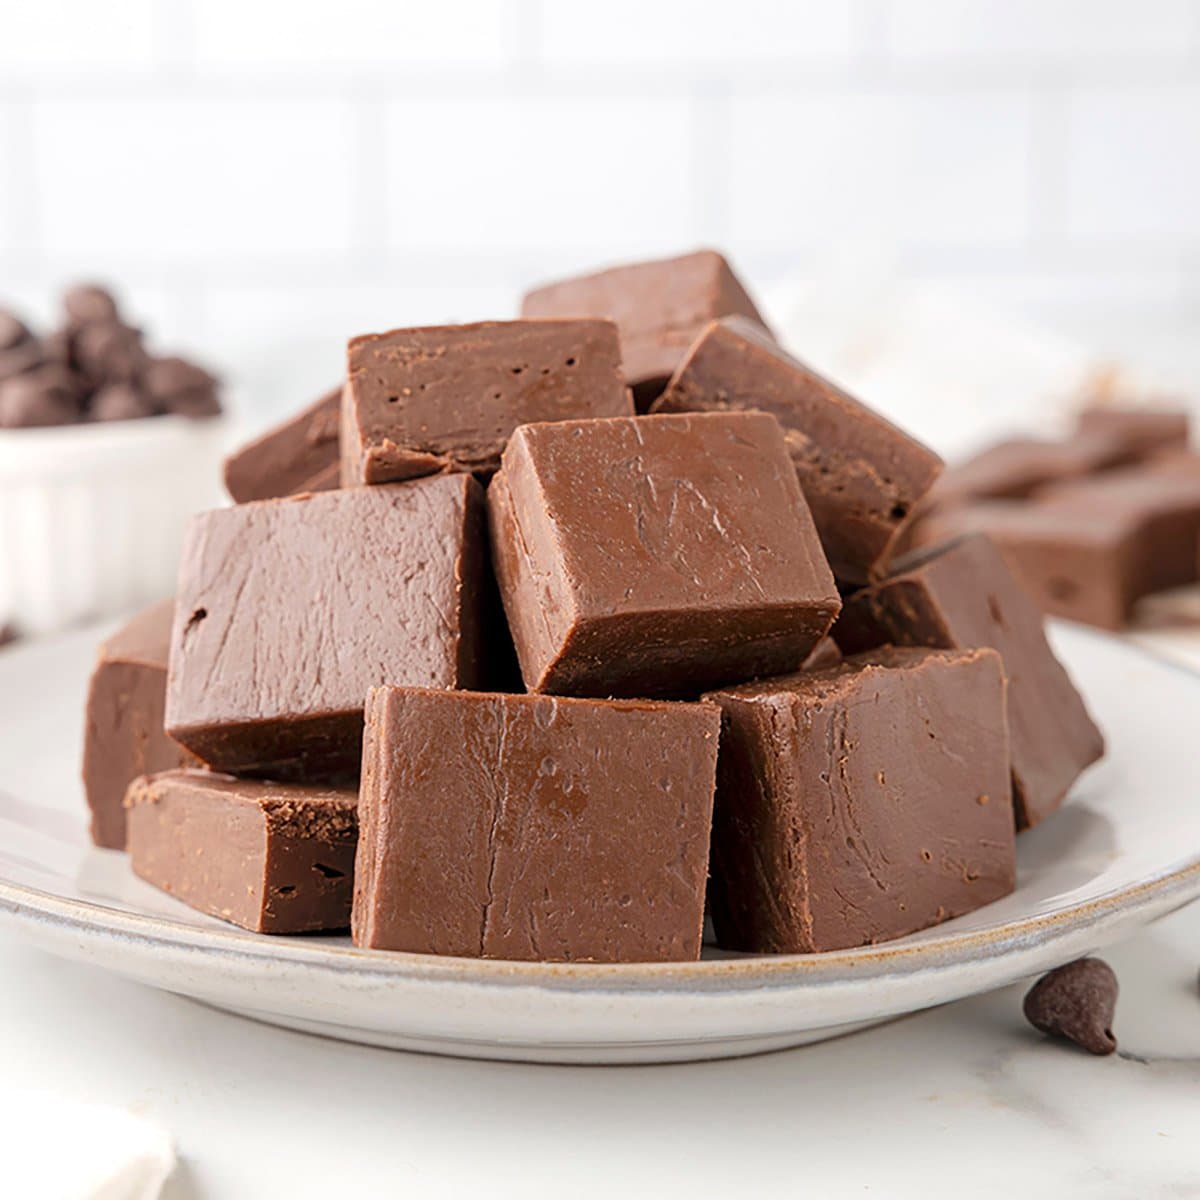
Easy Microwave Chocolate Fudge
Ingredients
Method
- Prepare an 8x8 inch (20x20 cm) square pan by spraying it lightly with nonstick cooking spray. Line the pan with a sheet of parchment paper, leaving an overhang on the sides for easy removal of the fudge later.
- In a large, microwave-safe bowl, combine the chocolate chips and the sweetened condensed milk.
- Place the bowl in the microwave and heat in 30-second increments. After each 30-second interval, remove the bowl and stir the mixture thoroughly. Continue microwaving and stirring until the chocolate chips are completely melted and the mixture is smooth and well combined (this typically takes about 3-4 minutes total).
- Pour the hot chocolate mixture into the prepared pan. Use a rubber spatula to spread the fudge evenly into all corners of the pan, smoothing the top surface.
- Place the pan in the refrigerator for 2-3 hours, or until the fudge is completely set and firm to the touch.
- Once set, use the parchment paper overhang to lift the fudge out of the pan. Place it on a cutting board and cut it into small squares or desired shapes.