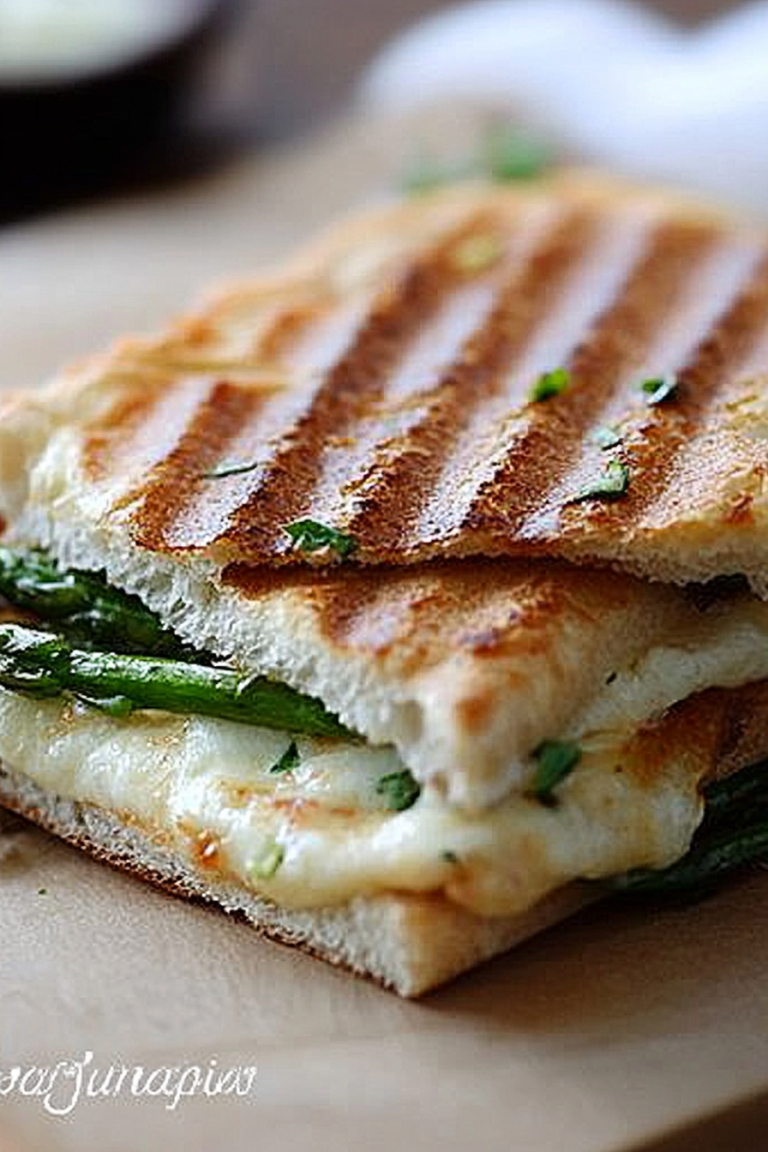
Easy Chicken Provolone Panini with Greens
Okay, so confession time. I used to be one of those people who’d turn up their nose at zucchini bread. I just pictured some bland, mushy loaf that was pretending to be cake. But oh, was I wrong! This recipe, my friends, is a game-changer. It’s the kind of thing that makes your whole kitchen smell like pure comfort, and it disappears from the cooling rack faster than you can say “extra slice, please.” My kids, who are usually pretty picky, actually ask for this all the time. It’s moist, packed with flavor, and has this perfect tender crumb that’s just… divine. If you’ve ever thought zucchini bread was boring, you HAVE to try this. It’s honestly more satisfying than a lot of actual cakes I’ve baked!
What
At its heart, zucchini bread is just that – a quick bread where grated zucchini is the star ingredient. But don’t let that fool you into thinking it’s just a health-food disguise! The zucchini is totally undetectable in terms of flavor; its magic lies in its moisture, which keeps the bread incredibly tender and moist. Think of it as a really forgiving, incredibly delicious loaf that happens to have a secret ingredient helping it out. It’s not a cake, not a muffin, but something wonderfully in between – a perfect cozy treat for any time of day. It’s the kind of recipe that makes you feel like a baking superhero, even if you’re just starting out.
Why you’ll love this recipe?
What are some good reasons to make zucchini bread?flavor. It’s not just sweet; it’s got this warm, spiced complexity from the cinnamon and nutmeg that just feels like a hug. You get hints of warm vanilla and, if you add nuts, a lovely crunch. Then there’s the simplicity. Honestly, this is a lifesaver on busy nights or when I suddenly have unexpected guestscost-effective. Zucchini is often readily available and quite affordable, and the other ingredients are pantry staples for most bakers. What I love most, though, is its versatility. You can enjoy a slice with your morning coffee, serve it as a sweet treat after dinner, or pack it for a satisfying snack. It’s honestly a bit like my Easy Banana Bread recipe in terms of how universally loved it is, but with its own unique charm. It’s just good, honest baking that happens to taste incredible.
How to Make Zucchini Bread
Quick Overview
The process is super straightforward and surprisingly quick. You’ll grate your zucchini, mix up a simple wet batter, whisk together your dry ingredients, combine them gently, and then bake until golden and fragrant. The real “magic” happens during baking, where the zucchini releases its moisture and creates this incredibly tender crumb that you just can’t achieve with other quick breads. It’s really just about combining the right ingredients at the right time, and the oven does the rest!
Ingredients
For the Main Batter:
You’ll need about 2 cups of grated zucchini. I always try to use medium-sized zucchinis – they have the best balance of moisture and seeds. Don’t bother peeling them; the skin is totally fine and adds a nice fleck of color. Make sure to squeeze out as much excess liquid as you can after grating – this is a key step for a perfectly textured bread! You’ll also need all-purpose flour (about 2 cups), baking soda and baking powder for lift, a pinch of salt to balance the sweetness, and of course, cinnamon and nutmeg for that warm, cozy spice. I usually use about 1.5 teaspoons of cinnamon and 1/2 teaspoon of nutmeg, but feel free to adjust to your liking! A little bit of brown sugar (about 3/4 cup) gives it a lovely depth of flavor and moisture, alongside 1/4 cup of granulated sugar. And for richness and that tender crumb, we’ll use 1/2 cup of melted butter or vegetable oil. If you’re feeling decadent, I’ve even tested this with melted coconut oil and it was amazing! Two large eggs, lightly beaten, help bind everything together, and a teaspoon of vanilla extract just rounds out all those beautiful flavors.
For the Filling:
This is where you can really customize! My personal favorite is a simple swirl of extra cinnamon and brown sugar, maybe with some chopped walnuts or pecans (about 1/2 cup). Sometimes I’ll even add a few chocolate chips because, well, why not? You just mix these ingredients together in a small bowl until you have a crumbly, delicious mixture. If you’re going for a chocolate chip version, I usually add about 1 cup of chocolate chips to the main batter instead of a separate filling. It’s really up to you and what you’re craving!
For the Glaze:
This is totally optional, but it takes the bread to another level. A simple powdered sugar glaze made with about 1 cup of powdered sugar, a tablespoon or two of milk (or even a bit of orange juice for a citrusy twist!), and a tiny splash of vanilla extract. You want it thick enough to drizzle but not so thick it’s like paste. If it’s too thick, add milk a teaspoon at a time; if it’s too thin, add more powdered sugar.
Step-by-Step Instructions
Step 1: Preheat & Prep Pan
First things first, let’s get our oven preheated to 350 degrees Fahrenheit (175 degrees Celsius). While that’s warming up, grab a standard 9×5 inch loaf pan. I like to grease it really well with butter or cooking spray, and then dust it with a little flour. This extra step ensures your beautiful loaf won’t stick, which is so frustrating when you’ve put in all that effort! You can also line it with parchment paper for even easier removal – that’s my secret weapon for perfect loaves every time.
Step 2: Mix Dry Ingredients
In a large bowl, whisk together your flour, baking soda, baking powder, salt, cinnamon, and nutmeg. Whisking them together thoroughly helps distribute the leavening agents evenly, which means you get a consistent rise and texture throughout your bread. It also gets rid of any little lumps in the flour. I always do this step first; it just feels organized!
Step 3: Mix Wet Ingredients
In a separate, medium-sized bowl, combine your grated zucchini (remember to squeeze out that extra water!), granulated sugar, brown sugar, melted butter or oil, eggs, and vanilla extract. Give it a good stir until everything is well combined. The mixture will look moist and inviting – that’s the zucchini working its magic even before it hits the oven!
Step 4: Combine
Now, pour your wet ingredients into the bowl with the dry ingredients. This is where you need to be gentle! Use a spatula or a wooden spoon to mix until *just* combined. A few streaks of flour are okay; you don’t want to overmix, or your bread can end up tough. Overmixing develops the gluten in the flour too much, and we’re going for tender here! It’s better to be slightly under-mixed than over-mixed, trust me on this one.
Step 5: Prepare Filling
If you’re adding a swirl, now’s the time to prepare that mixture. In a small bowl, combine your extra brown sugar, cinnamon, and chopped nuts (if using). This quick little mix will be layered into the batter for extra pockets of flavor and texture. If you’re just adding chocolate chips, you’d fold them in right after combining the wet and dry ingredients.
Step 6: Layer & Swirl
Pour about half of the batter into your prepared loaf pan. Sprinkle about half of your cinnamon-sugar mixture (or chocolate chips) over the top. Then, pour the remaining batter over that. Sprinkle the rest of your filling mixture on top. If you want a visible swirl, you can take a knife or a skewer and gently swirl it through the batter a few times. Don’t over-swirl, or you’ll lose the definition of the layers!
Step 7: Bake
Pop that loaf pan into your preheated oven. Bake for about 50-65 minutes. The exact time can vary depending on your oven, so keep an eye on it after 50 minutes. You’ll know it’s done when a toothpick inserted into the center comes out clean, or with just a few moist crumbs attached (but no wet batter!). If the top starts browning too quickly, you can always loosely tent it with foil.
Step 8: Cool & Glaze
Once it’s out of the oven, let the bread cool in the pan for about 10-15 minutes. This is important because it allows the loaf to set up properly. Then, carefully invert it onto a wire rack to cool completely. If you’re adding a glaze, wait until the bread is completely cool before drizzling it over the top. Adding glaze to warm bread will just make it melt and disappear!
Step 9: Slice & Serve
Once it’s cooled and glazed (or just plain, which is also delicious!), use a serrated knife to slice it. A gentle sawing motion works best for a clean cut. Serve it at room temperature for the best flavor and texture. Enjoy every single bite!
What to Serve It With
This zucchini bread is so wonderfully versatile, it fits into almost any meal or occasion! For a simple, cozy breakfast, I love a thick slice with a hot cup of black coffee or a creamy latte. The warm spices in the bread pair perfectly with the robust coffee. It’s also fantastic alongside a bowl of fresh fruit. For a more elegant brunch spread, I’ll often slice it thinly and arrange it on a platter with other pastries or fruit salads. It adds a lovely homemade touch that guests always appreciate. Beverage-wise, a mimosa or a sparkling cider would be delightful. As a dessert, it’s surprisingly satisfying. I sometimes serve a warm slice with a scoop of vanilla bean ice cream or a dollop of freshly whipped cream. The contrast of warm bread and cold ice cream is just heavenly! For those moments when you need a cozy snack, a slice with a glass of cold milk is pure comfort. My family loves it as an after-school treat. Honestly, it’s good with pretty much anything, or even just on its own!
Top Tips for Perfecting Your Zucchini Bread
Over the years, I’ve learned a few tricks that really make this zucchini bread sing. Here are my absolute must-know tips:
Zucchini Prep: This is probably the most critical step. Always grate your zucchini and then give it a good squeeze using your hands, a cheesecloth, or even a clean kitchen towel. You want to get out as much moisture as possible. Too much liquid will make your bread dense and gummy, and nobody wants that! I’ve learned this the hard way after a few dense loaves in my early baking days. Also, make sure you’re using fresh, firm zucchini. Mushy zucchini won’t grate as well and will add too much water.
Mixing Advice: Remember what I said about not overmixing? Seriously, this is key. Mix the wet and dry ingredients until *just* combined. A few little flour pockets are perfectly fine; they’ll disappear as it bakes. Overmixing develops the gluten too much, leading to a tough, rubbery texture. Your goal is a tender, moist crumb, so gentle folding is your friend here.
Swirl Customization: If you love a good swirl, don’t go crazy with it! A few gentle passes with a knife or skewer are all you need to create beautiful patterns without blending everything into a uniform color. You can also experiment with adding cocoa powder to half of the cinnamon-sugar mixture for a chocolate-cinnamon swirl, or even some finely chopped dried fruit like cranberries or cherries.
Ingredient Swaps: While this recipe is fantastic as is, I’ve experimented a bit. For a richer flavor, I’ve sometimes used a mix of butter and oil (like 1/4 cup butter and 1/4 cup oil). For a slightly healthier twist, you can try substituting half the flour with whole wheat flour, but be aware it might make the bread a bit denser. I’ve also tested it with almond milk instead of regular milk in the glaze, and it actually made it even creamier! For nut allergies, simply omit the nuts or replace them with sunflower seeds or extra chocolate chips.
Baking Tips: Ovens can be tricky! If your oven tends to run hot, start checking for doneness a bit earlier. If you notice the top is browning too quickly, loosely tent the loaf pan with aluminum foil. Ensure your loaf pan is centered in the oven for even cooking. And always, always do the toothpick test. It’s the most reliable way to know your bread is perfectly baked through.
Glaze Variations: While powdered sugar is classic, you can change it up! A squeeze of fresh lemon or orange juice in place of some of the milk adds a bright citrus note. You could also add a pinch of cardamom or even a tiny bit of espresso powder for a mocha glaze. If you prefer something lighter, a simple dusting of powdered sugar through a sieve is also lovely and keeps it from being overly sweet.
Storing and Reheating Tips
This zucchini bread is fantastic for making ahead of time, which is why I love it so much. If you’ve got some leftover (which is rare in my house!), here’s how to keep it fresh:
Room Temperature: Once completely cooled, wrap the loaf tightly in plastic wrap or place it in an airtight container. It will stay delicious at room temperature for about 2-3 days. I’ve found that keeping it wrapped tightly is the best way to maintain its moisture.
Refrigerator Storage: For longer storage, up to a week, you can keep it in the refrigerator. Wrap it very well in plastic wrap, and then place it in an airtight container. Just be aware that refrigeration can sometimes dry out baked goods a bit, so reheating might be a good idea. Make sure it’s fully cooled before refrigerating.
Freezer Instructions: This bread freezes beautifully, making it perfect for stashing away for future cravings. Once completely cooled, wrap the loaf tightly in a layer of plastic wrap, followed by a layer of aluminum foil, or place it in a heavy-duty freezer bag. It should keep well in the freezer for up to 3 months. To thaw, unwrap it and let it come to room temperature on the counter for a few hours, or gently reheat it.
Glaze Timing Advice: If you plan to store your bread at room temperature or in the refrigerator, it’s best to add the glaze *after* it has cooled and just before serving. If you freeze the bread, it’s even better to leave it unglazed. You can add the glaze after thawing and bringing it back to room temperature, or even just dust it with powdered sugar. This prevents the glaze from getting sticky or weird in storage.
Frequently Asked Questions
Final Thoughts
So there you have it – my absolute favorite zucchini bread recipe. It’s more than just a recipe; it’s a bowl full of comfort and happy memories for my family. I truly believe this is the recipe that will convert even the most skeptical zucchini bread hater! It’s simple enough for a weeknight bake, impressive enough for company, and delicious enough to satisfy any sweet craving. If you love this recipe, you might also enjoy my other quick bread recipes, like my Classic Blueberry Muffins or my incredibly moist Chocolate Chip Banana Bread. They’re all tried-and-true favorites in my kitchen. I really hope you give this zucchini bread a try. I can’t wait to hear how yours turns out and what variations you come up with! Happy baking, everyone!
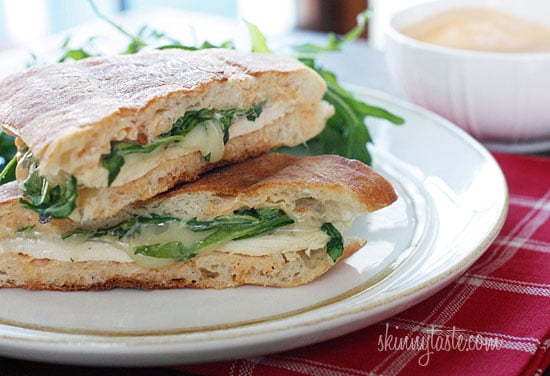
chicken provolone panini
Ingredients
Method
- Combine mayonnaise and chipotle pepper sauce in a small bowl.
- Spread the spicy mayonnaise inside the ciabatta.
- Lay the provolone cheese, grilled chicken and arugula in the bread; close and lightly spray the top with cooking spray.
- Place on a panini press and close until the cheese melts and the bread is toasted.
- Cut in half and eat immediately.