Easy Baked Blueberry Muffin Delights
Oh, hello there! Come on in, have a seat. I was just about to whip up my absolute favorite batch of zucchini bread, and I couldn’t think of anyone better to share the process with than you. You know those recipes that just feel like a warm hug? This is it for me. It’s not just any zucchini bread, though. It’s the kind that smells absolutely divine filling the house, the kind that has just the right amount of sweetness, and, my secret weapon, a ribbon of tangy cream cheese swirled all through it. Seriously, if you’ve ever thought zucchini bread was boring, this recipe is going to change your mind entirely. It’s like the fancier, more sophisticated cousin to the basic loaf, but somehow even easier to make. It’s my go-to when I’ve got a little too much zucchini from the garden (or the grocery store sale rack!), and it disappears in about ten minutes every single time. It’s that good.
What is Zucchini bread with a cream cheese swirl?
So, what exactly *is* this magical thing? At its heart, it’s a moist, tender quick bread packed with shredded zucchini. But here’s where it gets interesting: we’re jazzing it up with a luscious cream cheese swirl. Think of it as a slightly sweet, slightly tangy cream cheese frosting baked right into the bread itself. It’s not like a layer of frosting on top, but more like ribbons of creamy goodness woven through every slice. The zucchini, bless its heart, doesn’t really have a strong flavor once it’s baked, but it does wonders for keeping the bread incredibly moist and tender. It’s a brilliant way to use up that garden bounty, and honestly, it makes even the simplest breakfast feel a little bit special. It’s less about the “zucchini” and more about the incredibly satisfying, subtly sweet, comforting loaf it becomes.
Why you’ll love this recipe?
There are so many reasons I keep coming back to this recipe, and I just know you’re going to fall in love with it too. First off, let’s talk about the flavor and texture. That cream cheese swirl? It adds this wonderful tang that cuts through the sweetness perfectly, and it makes the bread unbelievably moist and almost decadent. It’s not just sweet; it’s got a lovely balance. Then there’s the simplicity of it all. Honestly, this comes together so quickly, especially on a busy weeknight when you’re craving something homemade but don’t have hours to spare. You can literally have it mixed and in the oven in about 15 minutes. And the cost-efficiency! Most of the ingredients are pantry staples, and zucchini is usually pretty affordable, especially when it’s in season. What I love most, though, is its versatility. It’s fantastic for breakfast with a cup of coffee, a delightful treat for an afternoon snack, or even a simple dessert after dinner. It’s way more satisfying than a store-bought pastry, and you know exactly what’s in it. It’s truly one of those recipes that feels both comforting and a little bit fancy, all at once.
How do you make Zucchini bread with a cream cheese swirl?
Quick Overview
This recipe is a dream for home bakers! We’ll start by whisking together our dry and wet ingredients separately, then combining them until just mixed. While that rests, we’ll whip up a simple, tangy cream cheese mixture. The magic happens when we layer the batter and cream cheese mixture into the loaf pan and swirl them together before baking. The result is a stunning, unbelievably moist bread with delightful pockets of cream cheese in every bite. It’s straightforward, forgiving, and always a crowd-pleaser.
Ingredients
For the Main Batter:
You’ll need about 2 cups of shredded zucchini, and here’s a little tip: squeeze out as much excess moisture as you can. It might seem like a lot of work, but trust me, it makes a huge difference in the final texture, preventing a soggy loaf. I usually grate mine using the large holes of a box grater. Also, don’t worry about peeling the zucchini; the skin adds nutrients and doesn’t affect the texture once it’s baked. You’ll also need all-purpose flour, granulated sugar, a bit of brown sugar for that extra depth of flavor, baking soda, baking powder, salt, and warm spices like cinnamon and nutmeg – they really bring out the cozy factor. For the wet ingredients, we’re looking at eggs, vegetable oil (or another neutral oil like canola), vanilla extract, and maybe a touch of milk or buttermilk if you have it on hand; it makes it even more tender. I’ve even experimented with almond milk, and it was surprisingly creamy!
For the Filling:
This is where the magic happens! You’ll need one block of cream cheese, softened to room temperature. This is important – if it’s too cold, it won’t mix smoothly. A little granulated sugar and an egg yolk go in here too. The egg yolk helps the cream cheese mixture become richer and bind nicely with the batter. Sometimes, I’ll add a tiny pinch of cinnamon or even a little lemon zest if I’m feeling adventurous, but honestly, the classic cream cheese flavor is perfection.
For the Glaze:
This is optional, but highly recommended! It’s a simple powdered sugar glaze. You just need powdered sugar and a liquid. Milk, cream, or even lemon juice works beautifully. I like to start with a few tablespoons of milk and add more gradually until I get the consistency I like – a nice, thick but pourable drizzle. If you want it a little tangier, a splash of lemon juice is fantastic.
Step-by-Step Instructions
Step 1: Preheat & Prep Pan
First things first, let’s get our oven fired up to 350°F (175°C). You want it nice and hot so the bread bakes evenly. Then, grab a standard 9×5 inch loaf pan. Grease it really well with butter or cooking spray, and then dust it with a little flour. I like to tap out any excess flour. This extra step ensures your beautiful loaf slides right out without sticking, which is always a win. If you have parchment paper, you can also line the bottom and sides of the pan with it, leaving a little overhang to easily lift the bread out later.
Step 2: Mix Dry Ingredients
In a large bowl, whisk together your all-purpose flour, granulated sugar, brown sugar, baking soda, baking powder, salt, cinnamon, and nutmeg. Whisking them all together really helps to distribute the leavening agents evenly, so you don’t get weird dense spots. It also just ensures all those lovely spices are well incorporated. You want it to look like a uniform, pale tan powder.
Step 3: Mix Wet Ingredients
In a separate medium bowl, whisk together your eggs, vegetable oil, and vanilla extract. If you’re using milk or buttermilk, whisk that in now too. I like to give it a good whisk until everything is thoroughly combined and slightly emulsified. This wet mixture is what’s going to bring all those dry ingredients to life.
Step 4: Combine
Now, pour the wet ingredients into the bowl with the dry ingredients. Using a spatula or wooden spoon, gently fold them together until *just* combined. It’s really, really important not to overmix here. You’ll still see a few streaks of flour, and that’s perfectly okay! Overmixing develops the gluten too much, which can lead to a tough, rubbery bread. Once combined, gently fold in your squeezed and drained shredded zucchini. The batter will be thick.
Step 5: Prepare Filling
In a small bowl, beat the softened cream cheese with a hand mixer or a sturdy whisk until it’s smooth and creamy. Add the granulated sugar and the egg yolk and beat again until everything is well incorporated and smooth. It should be a thick, luxurious mixture. If it seems too stiff, you can add a tiny splash of milk or cream to loosen it up slightly, but you want it to hold its shape a bit.
Step 6: Layer & Swirl
Spoon about half of the zucchini batter into your prepared loaf pan and spread it out evenly. Dollop about half of the cream cheese mixture over the top of the batter. Then, add the remaining zucchini batter on top of the cream cheese layer, and finish by dotting the rest of the cream cheese mixture over this final batter layer. Now for the fun part! Grab a butter knife or a skewer and gently swirl the cream cheese into the batter. Don’t over-swirl; you want distinct ribbons, not a uniform muddy mess. Just a few gentle passes up and down and side to side usually does the trick.
Step 7: Bake
Place the loaf pan in the preheated oven. Bake for about 50-65 minutes. The time can vary depending on your oven, so keep an eye on it. You’ll know it’s done when a wooden skewer or toothpick inserted into the center comes out clean, or with just a few moist crumbs attached (but no wet batter). The top should be golden brown and look set.
Step 8: Cool & Glaze
Once it’s baked, let the bread cool in the pan for about 10-15 minutes. This allows it to set up properly before you try to remove it. Then, carefully invert the pan onto a wire rack to release the loaf. Let it cool completely on the wire rack. This is crucial! If you try to glaze it while it’s warm, the glaze will just melt into a puddle. Once it’s completely cool, whisk together your powdered sugar and liquid for the glaze until smooth. Drizzle it generously over the top of the bread. If you like a thicker glaze, use less liquid; if you want it thinner, add more. You can also just dust it with powdered sugar for a simpler finish.
Step 9: Slice & Serve
Once the glaze has set a bit, slice your beautiful zucchini bread with a serrated knife for the cleanest cuts. Serve it at room temperature, and prepare for compliments! This is best enjoyed the day it’s made, but it’s still wonderful the next day.
What to Serve It With
This zucchini bread is so versatile, it works for almost any meal or snack occasion! For a simple, comforting breakfast, a warm slice with a steaming mug of coffee or a nice cup of black tea is pure bliss. The slight sweetness and tang pair beautifully with the bitterness of coffee. If you’re planning a lovely weekend brunch, this bread is a fantastic addition to a spread. Serve it alongside fresh fruit salad, some crispy bacon, or maybe even some smoked salmon for a more elegant touch. A mimosa or a glass of freshly squeezed orange juice would be perfect beverages. As a dessert, it’s surprisingly satisfying. A dollop of whipped cream or a scoop of vanilla bean ice cream alongside a slice is pure indulgence! It’s also just divine on its own when you need a little something sweet to tide you over. For those cozy afternoon snacks, it’s perfect with a glass of milk, and the kids absolutely adore it. Honestly, I’ve even packed it for picnics, and it’s always a hit. My family loves it with a smear of butter, too, but I often find it so moist it doesn’t even need it.
Top Tips for Perfecting Your Zucchini Bread
I’ve made this bread more times than I can count, and over the years, I’ve picked up a few tricks that make it even better. First, about the zucchini prep: make sure you really squeeze out that water! I use a clean kitchen towel or cheesecloth, and I literally wring it out like I’m trying to get every last drop of juice out. This prevents a dense, heavy loaf. For mixing the batter, remember my earlier warning: do *not* overmix. A few flour streaks are your friend. Just fold until they disappear. When it comes to the swirl, less is more. You want visible ribbons, not a marbled mess. A few gentle passes with a knife is all it takes. If your cream cheese mixture seems too firm to swirl, you can gently warm it for about 10 seconds in the microwave, but be careful not to melt it. For ingredient swaps, if you don’t have brown sugar, you can use all granulated sugar, but you’ll lose a little bit of that deep caramel note. I’ve tested this with different oils; canola and vegetable are neutral and work best. Olive oil will impart too much flavor. Baking is an art, and ovens can be tricky. If your loaf is browning too quickly on top, loosely tent it with aluminum foil for the last 20-30 minutes of baking. And always, always test for doneness in the thickest part of the loaf. For glaze variations, if you’re not a fan of overly sweet glazes, a simple dusting of powdered sugar or even a sprinkle of chopped nuts like walnuts or pecans on top while the glaze is wet adds a lovely texture and flavor contrast. Sometimes, I’ll even add a bit of almond extract to the batter for a nutty undertone.
Storing and Reheating Tips
This zucchini bread is wonderful at room temperature for a few days. I like to store it in an airtight container or wrap it tightly in plastic wrap, and it stays fresh for about 2-3 days. If it’s particularly humid where you are, the refrigerator might be a better bet to prevent it from getting stale too quickly. Wrapped well in plastic wrap and then in foil, or kept in an airtight container, it can last up to a week in the fridge. The flavor actually gets even better the next day, in my opinion! Now, for freezing, this bread freezes beautifully. I usually let it cool completely, then wrap the entire loaf tightly in a double layer of plastic wrap, followed by a layer of aluminum foil. You can also slice it and wrap individual slices if you prefer. It will keep in the freezer for up to 3 months. To thaw, just unwrap it and let it come to room temperature on the counter. If you want to reheat it slightly, you can pop a slice into a warm oven for a few minutes or even microwave it for about 10-15 seconds, but be careful not to overheat it, or it can become dry. I usually recommend adding the glaze *after* it’s been cooled, especially if you plan to store it for more than a day or two. If you freeze it, you might want to glaze it after thawing and reheating, as the glaze can sometimes get a bit sticky when frozen and thawed.
Frequently Asked Questions
Final Thoughts
This zucchini bread with a cream cheese swirl has truly earned its spot as my favorite go-to recipe. It’s the perfect balance of comfort and a little bit of something special, proving that simple ingredients can create something truly magical. It’s a testament to how the humble zucchini can transform into a moist, flavorful treat that brings joy to my kitchen and everyone who tastes it. If you love this recipe, you might also enjoy my Fluffy Blueberry Muffins or my Classic Banana Bread. Both have that same heartwarming quality and are perfect for cozy days. I really hope you give this zucchini bread a try. It’s such a lifesaver on busy mornings and a wonderful way to use up that garden bounty. I can’t wait to hear what you think, and I’d absolutely love to see your creations! Let me know in the comments how yours turns out, or if you have any special twists you’ve added.
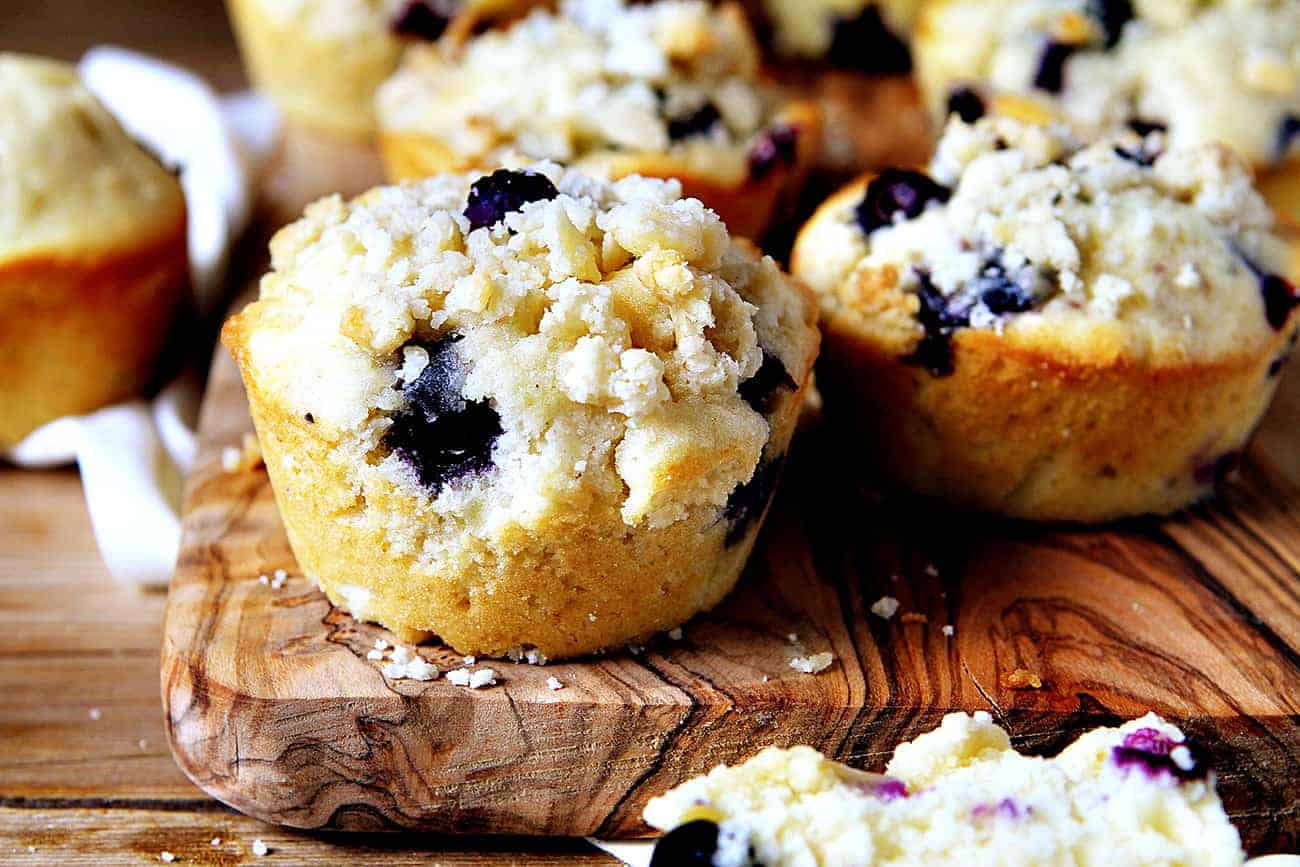
blueberry muffins
Ingredients
Method
- Preheat oven to 350°F. Spray or butter a cast iron skillet.
- Combine the flour, sugar, and salt in the bowl of a stand mixer fitted with the paddle attachment and paddle on low speed until well mixed. Add the butter and water and paddle on low speed until the mixture starts to come together in small clusters.
- Spread the clusters in skillet. Bake for 10 minutes. When done the crumbs should still be a little moist to the touch; they will dry and harden as they cool.
- Let the crumbs cool at least five minutes before adding to muffins.
- Prepare two muffin tins with non-stick cooking spray.
- Whisk flour, baking powder, and salt together in large bowl.
- Mix sugar and eggs together in a stand mixer until combined, about 45 seconds.
- Add in butter, buttermilk and vanilla and mix until just combined.
- Remove bowl from mixer and fold in the flour mixture. Once mostly combined, gently add the blueberries into batter.
- Use ice cream scoop or large spoon to divide batter equally among prepared muffin cups (approximately 0.25 heaping cup batter).
- Sprinkle top of muffins with pie crust crumble, about a teaspoon per muffin.
- Bake at 350°F for 17-19 minutes, or until muffin tops are golden and just firm.
- Cool muffins in muffin tin for 5 minutes, then transfer to wire rack.