Cheesecake Blueberry Bars Easy Recipe
There are some recipes that just feel like home, you know? The kind that instantly transport you back to your childhood kitchen, with the warm scent of baking filling the air. For me, that’s this zucchini bread. It’s not just any zucchini bread, though. My Grandma Elsie’s recipe is legendary in our family. It’s unbelievably moist, perfectly spiced, and has this subtle sweetness that just makes you happy. Honestly, I’ve tried a gazillion zucchini bread recipes over the years, looking for something to rival hers, but nothing ever comes close. It’s the one thing my kids request constantly, even when they know there are a million other treats in the house. This recipe is the real deal, and I’m so excited to finally share it with you. It’s surprisingly simple, which is a lifesaver on those busy weeknights when you need a little something sweet but don’t have hours to bake.
What is Grandma Elsie’s Zucchini Bread?
So, what makes this zucchini bread so special? Think of it as the ultimate comfort food baked into a loaf. It’s essentially a quick bread, meaning it doesn’t rely on yeast and comes together pretty fast. The “zucchini” part might sound a little odd if you’re not used to it, but trust me, you don’t taste the zucchini itself. What it does is add an incredible amount of moisture, making the bread incredibly tender and almost fudgy. Grandma Elsie always said the secret was to use “good, firm zucchini,” and boy, was she right! It’s got a lovely, warm spice blend that’s not overpowering, just enough to make it feel cozy and inviting. It’s the kind of treat that’s perfect with a hot cup of coffee in the morning or as an afternoon pick-me-up. It’s not overly sweet, which I think is another reason why it’s so universally loved.
Why you’ll love this recipe?
Okay, let’s talk about why this zucchini bread is about to become your new go-to. First off, the flavor is just out of this world. It’s got this perfect balance of sweet and spiced, with the moistness of the zucchini making every bite melt in your mouth. You’d never guess it was packed with vegetables! And simplicity? Oh my goodness, it’s ridiculously easy. You can literally have this mixed up and in the oven in about 15 minutes. It’s the perfect recipe for beginners, or for when you’re short on time but still want to bake something from scratch. Budget-friendly is another huge win here. Zucchini is usually pretty affordable, and the other ingredients are pantry staples for most bakers. Plus, think about how much you spend buying a decent loaf of quick bread from a bakery – this homemade version is a fraction of the cost and tastes a million times better. The versatility is another thing I adore. You can enjoy it plain, but I’ll get into some delicious serving ideas later. It’s also a fantastic way to use up that excess zucchini from your garden or the farmer’s market before it goes bad. I’ve made this so many times for potlucks and bake sales, and it’s always the first thing to disappear. It truly stands out because it’s not dry or crumbly like so many other quick breads can be. It’s just… perfect.
How do I make Grandma Elsie’s Zucchini Bread?
Quick Overview
The process is straightforward: whisk together your dry ingredients, then your wet ingredients, combine them gently, fold in the star of the show (zucchini!), and bake until golden and fragrant. The magic really happens in how the zucchini breaks down and infuses the batter with moisture, creating that signature tender crumb. It’s a one-bowl wonder for the wet ingredients, making cleanup a breeze, which is always a win in my book. You’ll end up with a gorgeous, golden-brown loaf that smells like pure happiness.
Ingredients
For the Main Batter:
Here’s what you’ll need to get started. I always try to use room-temperature eggs and butter if I can – it just helps everything emulsify better. For the flour, all-purpose works perfectly, but I’ve even experimented with a blend of half all-purpose and half whole wheat for a slightly nuttier flavor, and it was lovely! Make sure your baking soda and baking powder are fresh; it really makes a difference in the rise.
- 2 cups all-purpose flour
- 1 teaspoon baking soda
- 1/2 teaspoon baking powder
- 1/2 teaspoon salt
- 1 teaspoon ground cinnamon
- 1/4 teaspoon ground nutmeg
- 1/4 teaspoon ground cloves (optional, but I love the warmth it adds!)
- 1 cup granulated sugar (you can reduce this to 3/4 cup if you prefer it less sweet)
- 1/2 cup packed light brown sugar
- 2 large eggs, at room temperature
- 1 cup vegetable oil (or another neutral oil like canola or melted coconut oil)
- 1 teaspoon vanilla extract
- 2 cups grated zucchini (from about 2 medium zucchini), squeezed dry
For the Filling (Optional, but highly recommended!):
This is where you can really personalize it. My Grandma Elsie often added a simple cinnamon-sugar swirl, but I like to mix it up sometimes. A few chopped walnuts or pecans are always a winner, or you could even throw in some chocolate chips. My kids *live* for the chocolate chip version!
- 1/4 cup packed light brown sugar
- 1 teaspoon ground cinnamon
- 1/2 cup chopped walnuts or pecans (optional)
- 1/2 cup chocolate chips (optional)
For the Glaze (Optional, but so good!):
This is more of a drizzle than a thick frosting, and it adds a lovely little extra something. The key is to get the consistency right so it drizzles nicely without being too runny.
- 1 cup powdered sugar
- 2-3 tablespoons milk (or almond milk, which makes it extra creamy!)
- 1/2 teaspoon vanilla extract
Step-by-Step Instructions
Step 1: Preheat & Prep Pan
First things first, get your oven preheated to 350°F (175°C). Now, grab a standard 9×5 inch loaf pan. I like to grease it really well with butter or cooking spray and then dust it lightly with flour. This ensures your beautiful loaf comes out without sticking. You can also line it with parchment paper, leaving a little overhang on the sides – this makes lifting the loaf out super easy.
Step 2: Mix Dry Ingredients
In a large bowl, whisk together the all-purpose flour, baking soda, baking powder, salt, cinnamon, nutmeg, and cloves (if you’re using them). Give it a good whisk until everything is evenly distributed. This helps to make sure you don’t get any pockets of leavening agents or spices in your finished bread. You’re looking for a uniform, pale mixture.
Step 3: Mix Wet Ingredients
In a separate medium bowl (or a large measuring cup), whisk together the granulated sugar, packed light brown sugar, eggs, vegetable oil, and vanilla extract. Beat until it’s well combined and slightly lighter in color. Don’t overbeat; just get it nicely incorporated.
Step 4: Combine
Now, pour the wet ingredients into the bowl with the dry ingredients. Use a spatula or a wooden spoon to mix everything together. Be careful here! You want to mix just until there are no dry streaks of flour left. A few small lumps are okay – overmixing is the enemy of tender quick bread! We’re aiming for a thick, somewhat lumpy batter.
Step 5: Prepare Filling
If you’re adding a swirl or mix-ins, prepare them now. For a simple cinnamon-sugar swirl, just mix the brown sugar and cinnamon in a small bowl. If you’re adding nuts or chocolate chips, have them ready.
Step 6: Layer & Swirl
Gently fold in the grated, squeezed zucchini into the batter. Be gentle! Once the zucchini is mostly incorporated, add your optional mix-ins (nuts, chocolate chips). Now, pour about half of the batter into your prepared loaf pan. Sprinkle about half of your cinnamon-sugar mixture (if using) over the batter. Dollop the remaining batter on top, then sprinkle the rest of the cinnamon-sugar over that. If you’re just adding nuts or chocolate chips, you can fold them into the batter in Step 5 and pour the whole thing into the pan. For a swirl effect, you can gently run a knife or skewer through the batter a few times, but don’t overdo it. You just want streaks.
Step 7: Bake
Pop that beautifully filled loaf pan into your preheated oven. Bake for 50-65 minutes. The exact time will depend on your oven, so keep an eye on it! You’ll know it’s done when a wooden skewer or toothpick inserted into the center comes out clean, or with just a few moist crumbs attached (not wet batter). The top should be a lovely golden brown, and it might even start to pull away slightly from the sides of the pan.
Step 8: Cool & Glaze
Once it’s baked, carefully remove the loaf pan from the oven. Let it cool in the pan for about 10-15 minutes. This allows it to set up a bit before you try to remove it. Then, carefully invert the loaf onto a wire rack to cool completely. If you’re adding the glaze, wait until the bread is *completely* cool. Whisk together the powdered sugar, 2 tablespoons of milk, and vanilla extract. Add more milk, a teaspoon at a time, until you reach a drizzle-able consistency. Drizzle it over the cooled loaf. Let the glaze set for about 15-20 minutes before slicing.
Step 9: Slice & Serve
Once the glaze has set (or if you skipped it!), you’re ready to slice and enjoy! I find a sharp serrated knife works best for getting clean slices. Serve it warm or at room temperature. It’s absolutely delicious on its own, but wait till you see my serving suggestions!
What to Serve It With
This zucchini bread is honestly a champion all on its own, but I love playing around with how I serve it. For a simple, cozy breakfast, a slice of this toasted and slathered with a little butter or cream cheese is pure heaven with a steaming mug of my favorite dark roast coffee. For a more elegant brunch spread, I’ll often serve it alongside fresh fruit salad and maybe some mini quiches. It adds a lovely sweet element that balances out the savory dishes. As a dessert, it’s fantastic served slightly warm with a dollop of whipped cream or a scoop of vanilla bean ice cream – seriously, try it with ice cream, you won’t regret it! For those late-night cravings or just a comforting afternoon snack, a thick slice with a glass of cold milk is a classic for a reason. My family has a tradition of having this with hot chocolate on rainy days. It’s just so comforting and always hits the spot. It’s amazing how a simple loaf of bread can fit into so many different dining moments!
Top Tips for Perfecting Your Zucchini Bread
After making this countless times, I’ve picked up a few tricks that I think really make a difference. For the zucchini prep, it’s crucial to grate it and then squeeze out as much liquid as possible. I usually use a clean kitchen towel or cheesecloth for this. This is the biggest secret to avoiding a soggy loaf! If you skip this step, your bread will be dense and gummy. When it comes to mixing the batter, remember: do NOT overmix. Seriously, just combine until the flour disappears. A few lumps are fine, overmixing develops the gluten too much and leads to a tough bread. For the swirl, don’t go crazy with it. A few gentle passes with a knife are all you need to create those pretty ribbons of flavor. If you’re adding nuts or chocolate chips, I’ve found that tossing them with a little bit of the dry flour mixture before adding them to the batter helps prevent them from sinking to the bottom. For ingredient swaps, if you don’t have vegetable oil, melted butter works, but it might change the texture slightly, making it a bit less moist. I tested this once with almond milk in the glaze, and it actually made it even creamier and smoother, so don’t be afraid to experiment with dairy-free options! When it comes to baking, always trust the skewer test. Ovens can be finicky, so visual cues are great, but the skewer is your ultimate guide to doneness. If the top is browning too quickly, you can always loosely tent it with foil for the last 15-20 minutes of baking.
Storing and Reheating Tips
Keeping this zucchini bread fresh is pretty easy, but there are a few things that help maintain its amazing moistness. At room temperature, it’s best stored in an airtight container or wrapped tightly in plastic wrap. It should stay fresh for about 2-3 days. If you’ve glazed it, I usually wait for the glaze to set fully before wrapping. If you live in a warmer climate or won’t eat it within a couple of days, the refrigerator is your friend. Wrap it well to prevent it from drying out, and it should last for up to a week. I’ve even frozen this bread, and it thaws out beautifully! Wrap the cooled, unglazed loaf tightly in a couple of layers of plastic wrap, then a layer of aluminum foil, or place it in a freezer-safe bag. It’ll keep for up to 3 months. To reheat, I like to let it thaw at room temperature, or gently warm individual slices in the oven or microwave. If you’re reheating a whole loaf that was frozen, I’d recommend thawing it in the fridge overnight first, then warming it in a 300°F (150°C) oven for about 10-15 minutes. If you’re reheating slices, just a few seconds in the microwave or a quick toast is usually enough.
Frequently Asked Questions
Final Thoughts
There you have it – my Grandma Elsie’s famous zucchini bread! I truly hope you give this recipe a try. It’s more than just a treat; it’s a little piece of my family history, and every time I bake it, I feel a connection to her. It’s incredibly moist, wonderfully spiced, and just all-around comforting. It’s the perfect example of how simple ingredients can create something truly spectacular. If you love this recipe, you might also enjoy my spiced apple cake or my chewy ginger molasses cookies. They’ve got that same cozy, homemade feel. I can’t wait to hear how your zucchini bread turns out! Please leave a comment below and let me know your favorite variations or any family traditions you have around baking. Happy baking, everyone!
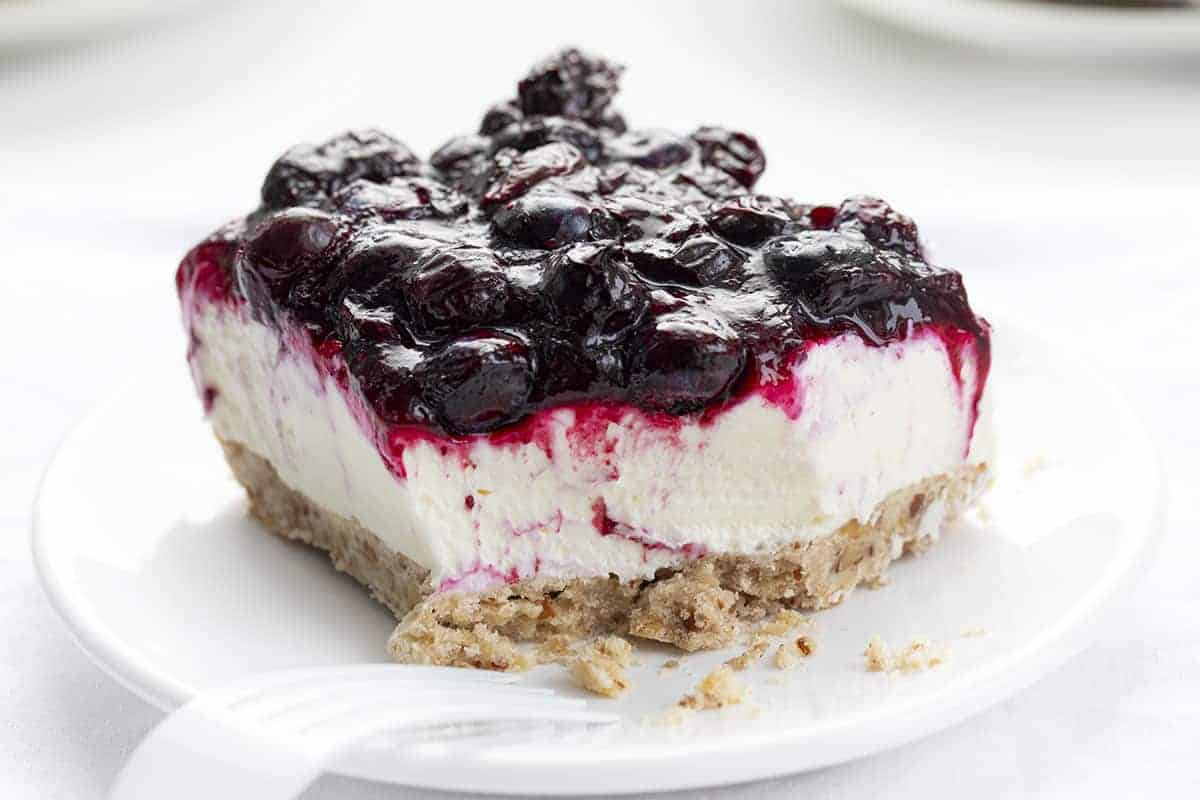
blueberry cheesecake bars
Ingredients
Method
- Preheat oven to 325°F (160°C) and line a 9x13-inch baking dish with parchment paper. Set aside.
- In a large saucepan over medium-high heat, add 2 cups of blueberries, granulated sugar, and brown sugar. Mix until sugar is dissolved. Blueberries will start to pop as they heat, this is normal.
- In a small bowl, whisk together the cornstarch and water until the cornstarch is dissolved.
- Pour the cornstarch mixture into the blueberries and stir until thickened.
- Add the lemon zest. Stir to combine.
- Remove from heat and fold in the remaining 1.5 cups of blueberries.
- Pour the blueberry mixture into a separate bowl. Allow it to cool a few minutes before transferring the bowl to the refrigerator to chill as you make the crust and filling.
- To toast the pecans, add them to a medium skillet over medium heat. Toast until browned and fragrant, stirring frequently (3-5 minutes). Remove from heat and let cool.
- When ready, in a medium bowl, combine melted butter, flour, and toasted pecans.
- Press into the bottom of the prepared 9x13-inch baking dish.
- Bake for 15 minutes. Remove from the oven and let cool to room temperature.
- Add heavy cream to a mixing bowl. Start mixing at the lowest speed, and then gradually increase speed to medium until the cream starts to get thicker.
- When the cream starts to thicken, stop the mixer. Slowly add in the confectioners' sugar and then resume mixing again, starting with low speed and increasing to medium speed, and eventually moving to a high speed. The cream will thicken and start to peak.
- In a separate large bowl, add cream cheese and beat until creamy.
- Gently fold the whipped cream mixture into the cream cheese. Pour the mixture over the cooled crust.
- Top with cooled blueberry mixture.
- Chill in the refrigerator for 1 hour before serving.