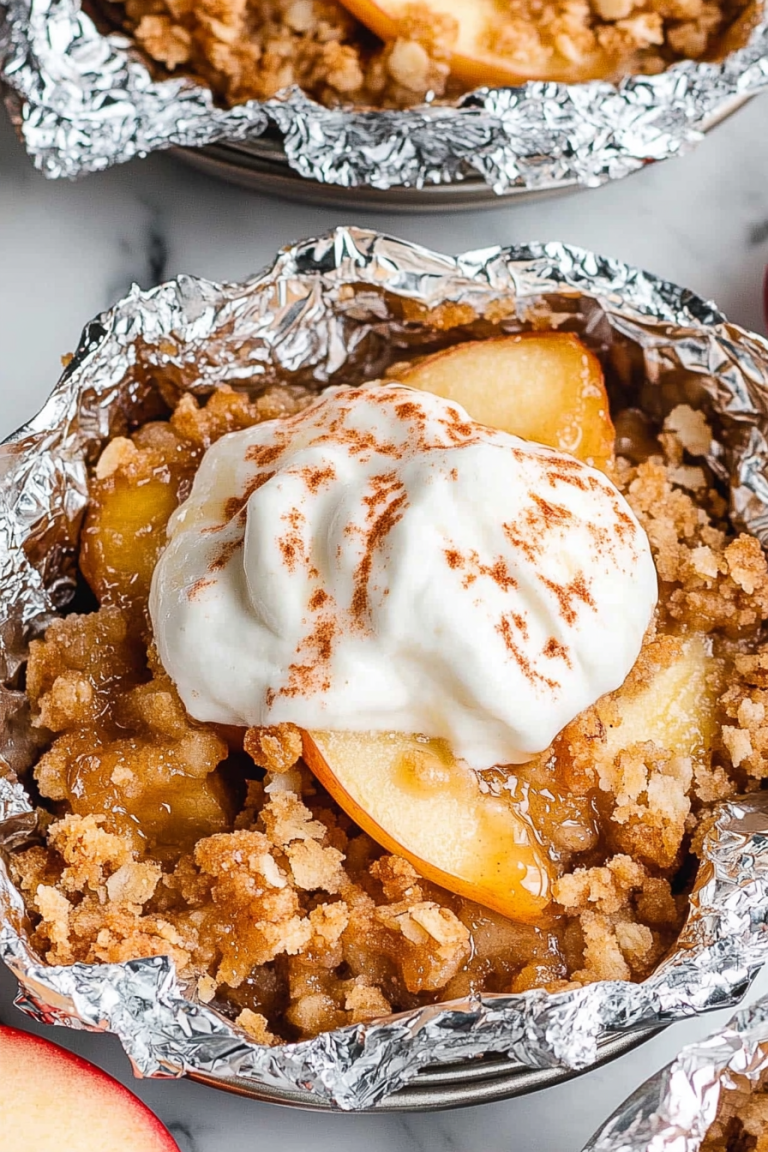
Amazing Cinnamon Swirls A Better Treat
There’s something so nostalgic about a moist, flavorful cake that’s just the right balance of sweet and tender, especially when it’s filled with plenty of fresh zucchini. Honestly, I’ve lost count of how many times I’ve come home after a busy day, craving something comforting, and this zucchini swirl cake has been my saving grace. It’s almost like a secret little treat I whip up on a whim—nothing fancy, just honest, home-style goodness that my family always asks for. I remember my grandma making a version of this back in the day, and I’ve sort of put my own twist on it, adding that luscious glaze that makes it impossible to resist. If you’re looking for a recipe that’s surprisingly easy, endlessly versatile, and makes use of those summer zucchinis hiding in your fridge, you’ve just found your new favorite. Trust me on this one—this cake disappears in minutes at my house!
What is Zucchini Swirl Cake?
Think of zucchini swirl cake as a juicy, tender dessert that’s almost like a cross between a loaf and a coffee cake—soft, moist, with beautiful marbled swirls. It’s essentially a delightful way to sneak in those summer zucchinis that might otherwise go untouched, but with a sweetness that makes you forget all about the healthy stuff. The name “swirl” comes from the way you gently layer or swirl the sweet filling into the batter before baking, creating these gorgeous marbled streaks. It’s a cake that’s not overly rich, but fully satisfying—perfect for breakfast, brunch, or a cozy afternoon snack. I love how it’s equally beautiful on the table and easy enough for a weeknight treat. Plus, the ingredients are simple pantry staples, which makes it budget-friendly, too. Think of it as a charming, homey dessert with a little twist of veggie goodness—think of it as a sneaky way to get the kids to eat more greens, hehe!
Why you’ll love this recipe?
What I love most about this zucchini swirl cake is how irresistibly moist and flavorful it turns out—a real testament to how a simple ingredient like zucchini can transform a humble cake into something special. The spices and vanilla in the batter give it that warm, comforting aroma that really fills the kitchen, making everyone come running. And let me tell you, this one’s a lifesaver on busy nights—no fancy equipment needed, and you probably already have everything in your pantry. The batter is straightforward, and the swirl filling adds this lovely visual interest that makes it feel fancy but is actually foolproof to make. It’s incredibly cost-effective too because zucchinis are cheap and plentiful during summer, and I always do this when I want to make something quick but impressive for friends or family. My kids ask for this all the time, especially when I add a simple drizzle of glaze—trust me, it elevates the whole thing! It’s versatile, too: you can swap spices, add nuts, or even mix in a handful of chocolate chips if you’re feeling rebellious. Honestly, it’s a recipe I’ve made countless times, and it never fails to please everyone’s taste buds.
How do I make Zucchini Swirl Cake?
Quick Overview
This cake is a breeze to whip up. You start by preparing your batter—the perfect mix of flour, sugar, butter, eggs, and warm spices. Then, you make your flavorful zucchini filling, which is just shredded zucchini mixed with a little sugar and cinnamon. Next, you pour the batter into your prepared pan, dollop the zucchini filling on top, and swirl it all together with a butter knife or skewer to create those gorgeous marbled patterns. Pop it into the oven, bake until golden, and while it’s cooling, whip up a simple glaze. That’s it! You get a tender, moist cake with a beautiful swirl, fragrant with cinnamon and vanilla—guaranteed to make everyone smile.
Ingredients
For the Main Batter:
– 1 1/2 cups all-purpose flour (I like unbleached for flavor)
– 1 cup granulated sugar
– 1/2 cup unsalted butter, softened (butter makes it wonderfully rich)
– 3 large eggs
– 1 teaspoon vanilla extract
– 1 teaspoon ground cinnamon
– 1/2 teaspoon baking powder
– Pinch of salt
> Tip: I tested this with almond milk once—made it even creamier, but dairy milk works perfectly too.
For the Zucchini Filling:
– 1 cup shredded zucchini (squeeze out excess moisture so it doesn’t make the batter runny)
– 2 tablespoons brown sugar or regular sugar
– 1 teaspoon cinnamon
– 1 teaspoon lemon zest (optional but adds brightness)
For the Glaze:
– 1 cup powdered sugar
– 2-3 teaspoons milk or lemon juice (add liquid slowly until you reach the right drizzle consistency)
– A splash of vanilla (for extra flavor)
Step-by-Step Instructions
Step 1: Preheat & Prep Pan
Set your oven to 350°F (175°C). Grease your 8×8 or loaf pan generously with butter or line it with parchment paper—you want no sticking! A little patience here pays off when you’re slicing the cake later. Also, when grating zucchini, I always do this just before I start mixing so it doesn’t get all mushy or oxidized.
Step 2: Mix Dry Ingredients
In a bowl, whisk together the flour, cinnamon, baking powder, and salt. This step ensures everything’s evenly distributed and avoids clumps—trust me, it makes the batter smoother.
Step 3: Mix Wet Ingredients
In another large bowl, beat the softened butter and sugar until fluffy—this is when the magic starts to happen, and the batter becomes light and airy. Then, add eggs one at a time, mixing well after each. Vanilla goes in here, too. The smell alone will start to make your kitchen warm and inviting!
Step 4: Combine
Gradually add the dry mixture into the wet, mixing on low just until combined—no overmixing! Overmixing can make the cake dense, and nobody wants that. It should be thick but pourable.
Step 5: Prepare Filling
In a small bowl, toss shredded zucchini with sugar, cinnamon, and lemon zest if using. Set aside for 5 minutes—that allows the zucchini to soften and release some moisture, making the swirl more flavorful and less watery.
Step 6: Layer & Swirl
Pour half the batter into your prepared pan, then dollop spoonfuls of zucchini filling on top. Pour the remaining batter over that, then gently swirl with a skewer or butter knife. Think of it as gentle marbling—don’t overmix or you’ll lose the beautiful pattern. My trick is to go around in circles or zig-zags to get a pretty marble effect.
Step 7: Bake
Pop into the oven for about 40-45 minutes. Check with a toothpick—if it comes out clean, you’re good! Every oven is different—my friend’s oven runs hot, so I start checking around 38 minutes. If it looks too brown on top before it’s baked through, tent it with foil to protect the crust from burning.
Step 8: Cool & Glaze
Let the cake cool in the pan for at least 15 minutes—patience pays off! Once slightly cooled but still warm, drizzle your glaze over the top—this melts into all those nooks and makes every bite even more irresistible.
Step 9: Slice & Serve
Use a sharp serrated knife for neat slices—this cake is tender, so a gentle sawing motion is best. I love serving it warm with a cup of coffee or tea, but it’s just as good room temperature. A dollop of whipped cream or a sprinkle of powdered sugar makes it look pretty for guests, too.
What to Serve It With
This zucchini swirl cake is versatile enough to shine in so many settings. For breakfast, I love pairing it with a strong cup of coffee—especially on slow mornings when I have time to savor each bite. It’s also fantastic as a brunch dessert, garnished with fresh berries or a dollop of whipped cream—all those flavors complement each other perfectly. When serving as a dessert, I often add a drizzle of extra glaze or even some chopped nuts for crunch. If I want a cozy snack, I slice it thick, butter it lightly, and enjoy with a glass of milk or a warm cup of tea. Plus, I sometimes sneak in a handful of chocolate chips or chopped walnuts into the batter—trust me, it’s a game changer! This cake has become my go-to recipe whenever I want a comfort food that’s both simple and special. It’s just one of those recipes that feels like a warm hug, and the best part? It kinda feels like a little secret—most people don’t even realize there’s zucchini inside until they take a bite!
Top Tips for Perfecting Your Zucchini Swirl Cake
From my years of baking this, I’ve picked up a few tricks that make all the difference. First, when grating zucchini, I always squeeze out as much moisture as possible—this helps keep the batter from getting too wet and ensures your cake is nice and fluffy. Using fresh zucchini makes a big difference; older zucchinis tend to be watery and dull in flavor. If you’re feeling adventurous, add a pinch of nutmeg or a splash of orange zest for a different flavor profile—that’s how I add my personal touch! When swirling the filling, don’t over-mix; just go around gently so the pattern stays distinct. For the batter, I’ve tried swapping half the flour for almond flour, and it added a lovely nutty flavor while keeping the cake moist. Remember not to open the oven door too early—wait until at least 35 minutes in, so the structure sets properly. If you like a shiny glaze, I recommend adding a splash of lemon juice—you’ll get a lovely tang that balances out the sweetness. This recipe is forgiving, so don’t be afraid to experiment a little; each tweak makes it uniquely yours. After baking dozens of times, I’ve learned that patience really pays off, especially with cooling and glazing. The result is always flaky, tender, and packed with cozy, cinnamon-spiced goodness—not to mention it smells divine!
Storing and Reheating Tips
This cake is just as delicious the next day—if it lasts that long! If you have leftovers, I recommend storing it in an airtight container at room temperature for up to two days. Keep it covered to prevent it from drying out—that’s I learned the hard way! For longer storage, pop it in the fridge—up to 4 days—though I suggest bringing it back to room temp before slicing to keep it tender. Want to save it for later? Wrap slices tightly with plastic wrap and freeze for up to a month. Thaw at room temperature or microwave briefly for a quick treat. When reheating, I prefer a gentle warm-up in the oven at 300°F (150°C) for about 10 minutes—this keeps it moist and fresh. If you bake it ahead and add the glaze later, the cake stays moist and the glaze stays shiny. Just remember, moisture is key to keeping this cake delightful—so avoid over-storing or refrigerating directly without covering. And if you want that luscious glaze to stick in the best way possible, do it just after cooling so it seeps into all those tempting nooks and crannies. It’s a simple process, but these little tips make all the difference in keeping your cake tasting just as good as day one.
Frequently Asked Questions
Final Thoughts
This zucchini swirl cake has become a bit of a family favorite—so much so, I’ve lost count of how many times I’ve made it during summer zucchini season. It’s one of those recipes that’s humble but impressive, cozy yet elegant, all in one. The best part? It’s forgiving enough for beginners but refined enough to serve at a brunch or after-dinner gathering. Every time I cut into it, I get that warm, vanilla-cinnamon fragrance that instantly makes everyone smile. I love knowing I’m sneaking a healthy veggie into a treat, and honestly, nobody ever guesses it’s packed with zucchini! If you’re craving something sweet but don’t want to overcomplicate, this is your answer. It’s straightforward, adaptable, and, above all, comforting. I really hope you give this a try and customize it to your liking—maybe toss in some chopped nuts or swap the glaze for cream cheese frosting. Whatever you do, I promise it’ll bring a little extra joy into your home. Happy baking! And I’d love to hear how yours turns out—leave me a comment, share your tweaks, or just drop a photo. Let’s make dessert memories together!
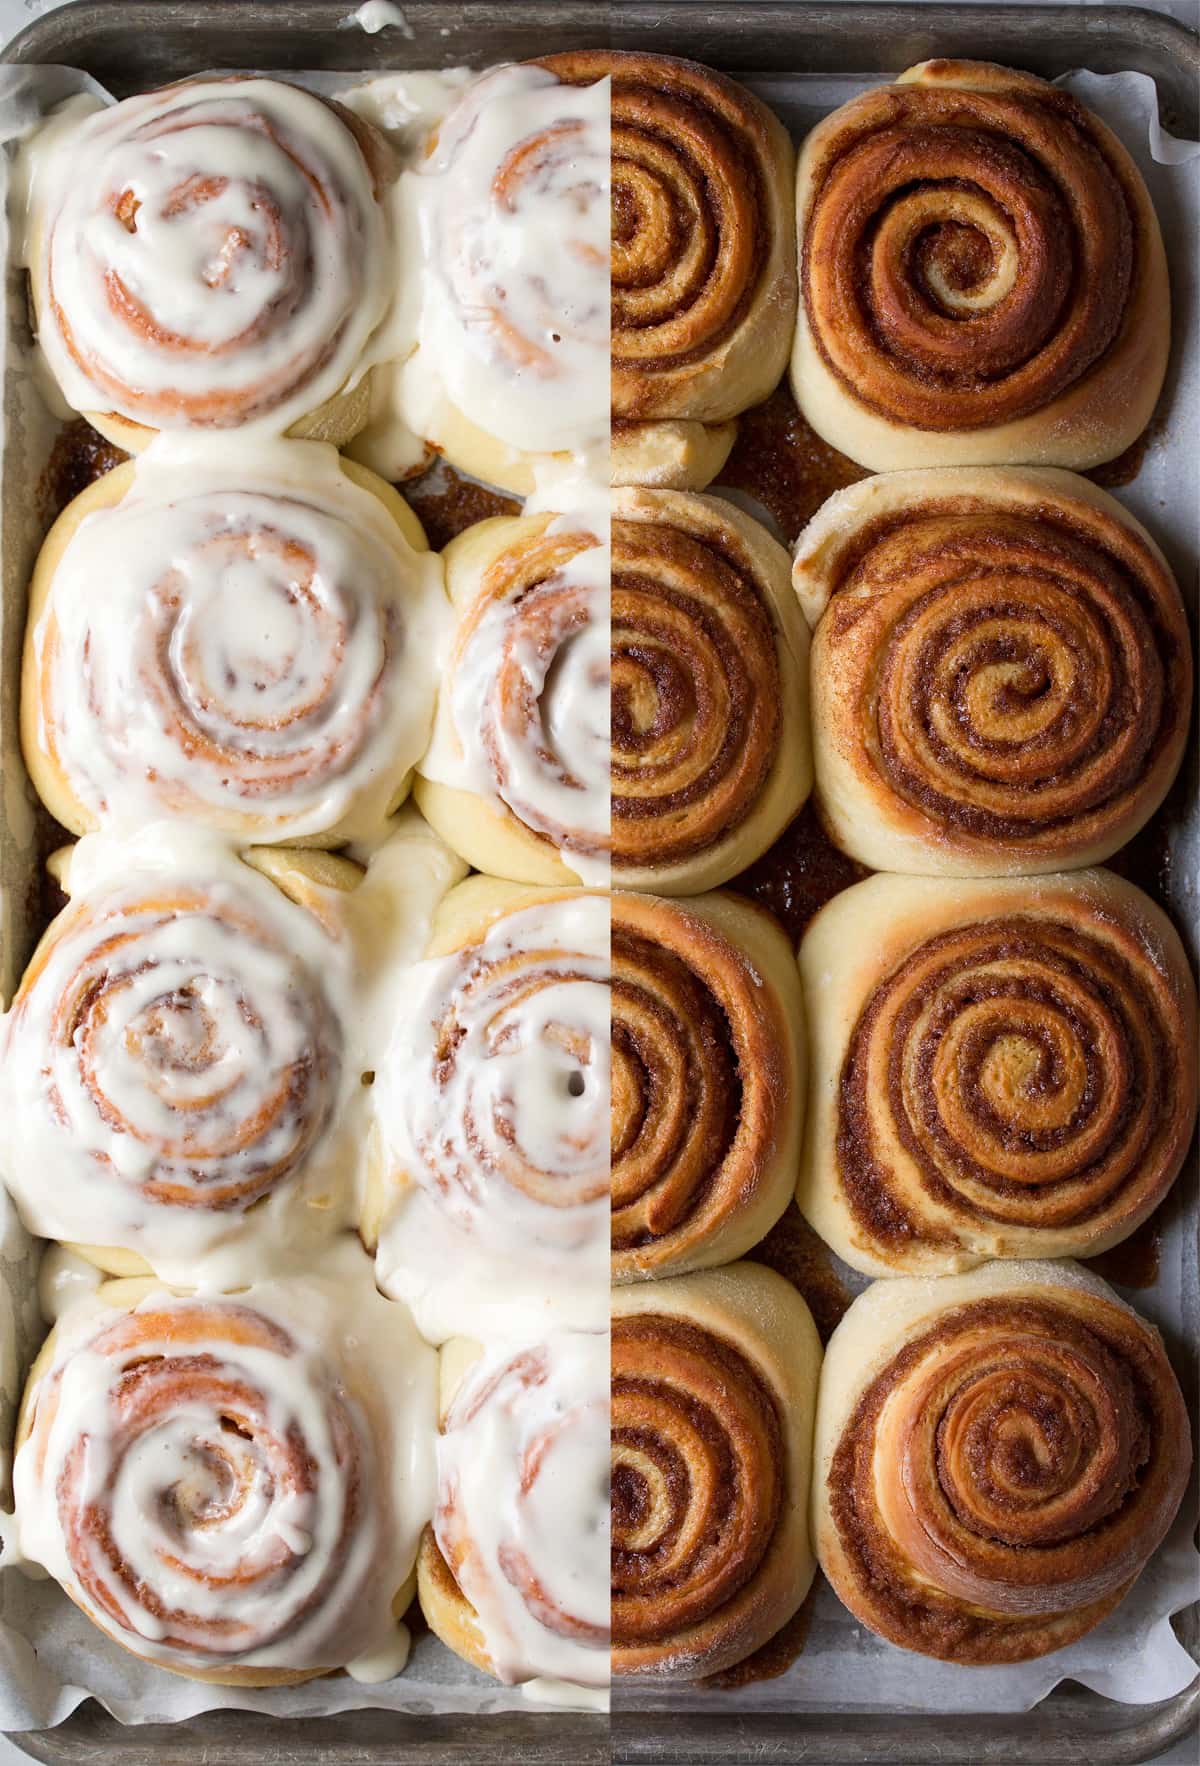
Cinnamon Rolls
Ingredients
Method
- In the bowl of an electric stand mixer, combine warm water, yeast, and 0.5 teaspoon of granulated sugar. Whisk well and let rest for 5-10 minutes to proof. If it doesn't puff up, the water was too hot or the yeast is bad.
- Add buttermilk, eggs, the remaining 0.5 cup granulated sugar, salt, vanilla extract, and 6 tablespoons of melted butter to the mixer bowl. Fit the mixer with a whisk attachment and blend until combined.
- Pour in 2.5 cups of the bread flour and mix until well combined. Switch to a dough hook attachment and add another 1 cup of flour. Knead the mixture until combined.
- Continue to knead on moderately low speed for about 5-6 minutes, adding more flour as needed to reach a soft and moist dough. The dough shouldn't stick to the sides of the bowl but can stick to the bottom. You may need around 3.75 cups (approximately 18.75 oz) of flour.
- Transfer the dough to an oiled bowl, cover with plastic wrap, and let rise in a warm place until doubled in volume, about 1.5 hours.
- Butter a rimmed 15 by 10-inch jelly roll pan and line it with parchment paper. Butter the parchment paper and set aside.
- Punch down the dough. Lightly dust a working surface with flour and turn the dough out. Sprinkle the top of the dough with a little flour and roll it out into a 20 by 18-inch rectangle.
- Spread the 6 tablespoons of softened butter evenly over the entire surface of the dough. In a small bowl, whisk together the brown sugar and cinnamon. Sprinkle and spread the brown sugar mixture evenly over the butter, leaving about a 0.5-inch border uncovered along all edges.
- Starting on an 18-inch side, tightly roll the dough into a cylinder. Pinch the seam to seal.
- Cut the roll into 12 equal portions (each should be about 1.5 inches wide). Arrange the rolls, spacing them evenly apart, on the prepared baking sheet.
- Cover the rolls loosely with plastic wrap (ensure it fully encloses to keep air out) and let them rise in a warm place until doubled in volume, about 1.5 hours. Near the last 20 minutes of rising, preheat your oven to 375 degrees Fahrenheit.
- Bake the rolls in the preheated oven until the centers are no longer doughy, about 18-22 minutes. The center should reach 185 degrees Fahrenheit on an instant-read thermometer. If needed, tent with foil during the last 5 minutes of baking to prevent excess browning.
- While the rolls are baking, prepare the icing. In a medium mixing bowl, use an electric hand mixer to whip together the softened butter and cream cheese until smooth and fluffy. Add the vanilla extract and powdered sugar and whip until light and fluffy.
- Spread the cream cheese icing over the hot-from-the-oven cinnamon rolls. Serve warm. If you have leftovers, store them in an airtight container once cool and rewarm individually in the microwave for about 15 seconds.