Easy Strawberry Cobbler Bursting with Fresh Flavor
You know those recipes that just feel like a warm hug on a plate? The ones that smell like childhood and make your kitchen feel instantly cozier? Well, this zucchini bread is absolutely one of those for me. I’ve been making it for what feels like forever, and it’s one of those reliably delicious treats that always hits the spot. It’s not overly complicated, but it’s got this amazing depth of flavor and the most perfect, moist crumb. Honestly, it’s my go-to when I’m craving something sweet but don’t want to spend hours in the kitchen. It’s like a simpler, more forgiving cousin to a really good pound cake, but with that little extra something from the zucchini that just makes it sing. If you’ve ever been intimidated by baking with vegetables, trust me, this recipe will change your mind completely.
What is Zucchini bread?
So, what exactly *is* zucchini bread? At its heart, it’s a quick bread, meaning it uses chemical leaveners like baking soda and baking powder instead of yeast, so you don’t have to wait for dough to rise. Think of it as a very moist, slightly dense cake that just happens to have shredded zucchini baked right into the batter. The zucchini is the magic ingredient here; it’s pretty neutral in flavor when cooked, but it adds an incredible amount of moisture, making the bread super tender and keeping it from drying out for days. It’s also a fantastic way to sneak in a veggie, especially for picky eaters! The name itself is pretty straightforward – it’s a bread made with zucchini. But the *experience* of it is so much more than the sum of its parts. It’s that perfect balance of sweet and comforting, with just a hint of spice that makes it utterly irresistible.
Why you’ll love this recipe?
Oh, where do I even begin with why this zucchini bread is a superstar? First off, the flavor is just out of this world. It’s sweet, yes, but not cloyingly so. There’s a lovely warmth from the cinnamon and nutmeg, and if you add in chocolate chips (which I *always* do, because life’s too short not to), you get these little pockets of gooey deliciousness. Beyond the taste, it’s unbelievably easy to make. Seriously, you can whip up the batter in about 15 minutes, and the rest is just waiting for that amazing aroma to fill your house. This is a true lifesaver on busy weeknights when the sweet craving hits, or for those weekend mornings when you want something special without a ton of fuss. It’s also surprisingly budget-friendly! Zucchini is usually pretty affordable, and the other ingredients are pantry staples. I’ve also found it to be incredibly versatile. While I adore it plain or with chocolate chips, it’s also fantastic with walnuts, pecans, or even a swirl of cream cheese. Compared to a fancier cake that might require creaming butter and sugar for ages or intricate frosting, this is a revelation in terms of simplicity and yield. What I love most about this recipe is that it’s so forgiving. Even if you’re a beginner baker, you’re going to nail this. It’s the kind of recipe that makes you feel like a baking pro without actually having to be one!
How do you make Zucchini bread?
Quick Overview
This recipe is all about combining wet and dry ingredients separately, then gently bringing them together before folding in your favorite mix-ins. The key to its amazing texture lies in not overmixing, which keeps the bread wonderfully tender. You’ll shred your zucchini, whisk together your dry ingredients, then whisk your wet ingredients, combine them all, stir in those delicious additions, and bake until golden and fragrant. It’s honestly that simple! The resulting loaf is moist, flavorful, and utterly satisfying.
Ingredients
For the Main Batter:
Here’s what you’ll need for the base of our delicious bread. Don’t be tempted to skip the ingredients – they all play a crucial role! I always try to use fresh, vibrant zucchini. You don’t need anything fancy; just a couple of medium-sized ones will do. For the flour, all-purpose is perfect, but I’ve experimented with a 1:1 gluten-free blend and it worked beautifully! The sugars – both granulated and brown – work together to give it sweetness and that lovely tender crumb. Don’t skimp on the eggs; they bind everything and add richness. The oil is key for moisture; vegetable or canola works great, but I’ve also used melted coconut oil in a pinch. And for that classic flavor, don’t forget the vanilla extract!
For the Filling:
This is where you get to personalize your loaf! My absolute favorite is chocolate chips – semi-sweet or dark are divine. But honestly, chopped walnuts or pecans add a wonderful crunch. Sometimes, for a real treat, I’ll do a mix of both chocolate chips and nuts. If you’re feeling adventurous, a little bit of cinnamon or nutmeg mixed in with the chocolate chips is also heavenly.
For the Glaze:
This is totally optional, but it elevates the whole experience! A simple powdered sugar glaze is perfection. Just powdered sugar, a splash of milk or even orange juice for a different zing, and a tiny bit of vanilla extract. You want it thick enough to coat but still pourable. It adds that extra touch of sweetness and a pretty finish.
Step-by-Step Instructions
Step 1: Preheat & Prep Pan
First things first, let’s get our oven preheated to 350 degrees Fahrenheit (175 degrees Celsius). While the oven is warming up, grab a standard loaf pan – the 9×5 inch kind is perfect. You’ll want to grease it really well, and then I like to flour it too, or even better, line it with parchment paper. This ensures your beautiful loaf pops out cleanly every single time, without any sticking drama. I usually cut a piece of parchment that fits the bottom and then leave some overhang on the sides to act as handles for lifting it out. Trust me, it’s a game-changer!
Step 2: Mix Dry Ingredients
In a large bowl, we’re going to whisk together our dry ingredients. This includes your all-purpose flour, baking soda, baking powder, salt, cinnamon, and nutmeg. Give it a good whisk until everything is thoroughly combined and there are no little lumps of baking soda or powder. This step is super important because it helps ensure your leavening agents are evenly distributed throughout the batter, leading to a nice, consistent rise. You want to see a uniform color throughout the dry mixture – that’s how you know you’re on the right track!
Step 3: Mix Wet Ingredients
Now, in a separate, medium-sized bowl, let’s combine the wet ingredients. This is where we’ll add the eggs, granulated sugar, brown sugar, oil (or melted butter), and that lovely vanilla extract. Whisk these together until they’re well combined and the sugar has started to dissolve. It might look a little glossy. Make sure your eggs are at room temperature if you can – they incorporate better that way. I’ve found that using a mix of granulated and brown sugar really gives this bread a fantastic texture and depth of flavor that you just can’t get with one or the other alone.
Step 4: Combine
Here’s the crucial part: gently combine the wet and dry ingredients. Pour the wet mixture into the bowl with the dry ingredients. Now, using a spatula or a wooden spoon, fold them together *just until combined*. I’m talking a few gentle strokes, making sure there are no big streaks of dry flour left. It’s really important not to overmix here. Overmixing develops the gluten too much, which can lead to a tough, dense bread. A few little lumps are totally okay, actually preferred! We want that tender crumb, remember?
Step 5: Prepare Filling
If you’re adding in chocolate chips, nuts, or anything else fun, now’s the time! Gently fold them into the batter. Again, don’t go crazy with the mixing. Just a few folds to distribute them evenly throughout. This is where you can really make it your own. I always add chocolate chips, and sometimes I’ll even toss them with a tablespoon of the flour mixture before adding them to the batter. This little trick helps prevent them from sinking to the bottom during baking. It’s a small thing, but it makes a difference!
Step 6: Layer & Swirl
Pour the batter into your prepared loaf pan. Smooth the top a little with your spatula. If you’re feeling fancy and want to add a “swirl” effect, you can prepare a simple cinnamon-sugar mixture or even a bit of jam and dollop it on top, then use a knife or skewer to swirl it through the batter. For this particular recipe, I usually just let the chocolate chips (or nuts) do their thing and create their own lovely textures within the loaf. Just ensure the batter is evenly distributed in the pan.
Step 7: Bake
Pop that pan into your preheated oven and bake for about 50-65 minutes. The exact time will vary depending on your oven, so keep an eye on it. You’ll know it’s done when a wooden skewer or toothpick inserted into the center comes out clean, or with just a few moist crumbs attached (not wet batter!). The top should be a beautiful golden brown, and it will smell absolutely divine. If the top starts browning too quickly, you can loosely tent it with foil for the last 15-20 minutes of baking.
Step 8: Cool & Glaze
Once it’s baked, take the loaf pan out of the oven and let it cool in the pan for about 10-15 minutes. This allows the bread to set up properly. Then, carefully invert the pan to remove the loaf and place it on a wire rack to cool completely. If you’re adding glaze, this is the time to do it! Whisk together your powdered sugar, liquid (milk, juice, or water), and vanilla until you reach your desired consistency. Drizzle it over the cooled loaf. It’s so satisfying to watch it drip down the sides!
Step 9: Slice & Serve
Once the glaze has set a bit (or if you skipped the glaze), it’s time to slice and enjoy! I usually wait until it’s mostly cooled, as it’s easier to slice then, and the texture is just perfect. Use a good serrated knife for clean cuts. This bread is wonderful served on its own, but it’s also heavenly with a smear of butter or cream cheese. My family usually devours it warm, but it’s also great at room temperature.
What to Serve It With
This zucchini bread is so versatile, it truly fits into any meal or occasion! For a simple, comforting breakfast, I love serving a thick slice with a steaming mug of coffee. It’s just the perfect way to start the day – not too heavy, but satisfying and sweet. The coffee really cuts through the sweetness beautifully. For a more relaxed weekend brunch, I’ll often pair it with some fresh fruit salad and maybe a side of scrambled eggs or a light yogurt parfait. It adds that touch of homemade charm that everyone appreciates. As a dessert, it’s an absolute winner. I’ll sometimes serve it with a dollop of whipped cream or a scoop of vanilla bean ice cream – pure indulgence! The warm spices in the bread pair wonderfully with the cool creaminess. And for those cozy snack times, it’s simply perfect. Whether it’s an afternoon pick-me-up with a glass of milk or a late-night treat after the kids are in bed, it always feels like a little moment of joy. My family has a tradition of having this with hot chocolate on rainy days; it’s become our ultimate comfort food pairing!
Top Tips for Perfecting Your Zucchini Bread
Over the years, I’ve picked up a few tricks and learned a thing or two from the occasional baking mishap. Let’s talk about zucchini prep first. You absolutely *must* squeeze out the excess moisture. I usually grate my zucchini using the large holes of a box grater, then put it in a fine-mesh sieve and press down firmly with a spoon, or even better, wrap it in a clean kitchen towel or cheesecloth and squeeze it until no more water comes out. This is non-negotiable for a good texture! If you skip this, your bread will be gummy and too wet. For mixing, remember my advice about not overmixing. You want to see just a few small lumps in the batter. Overmixing is the quickest way to a tough loaf, and nobody wants that. When it comes to swirl customization, if you decide to do a cinnamon-sugar swirl, mix about 1/4 cup granulated sugar with 1-2 teaspoons of cinnamon and swirl that through the batter just before baking. It adds a lovely texture and flavor. For ingredient swaps, I’ve had success using whole wheat flour mixed with all-purpose flour (about a 50/50 ratio) for a slightly heartier loaf. You can also try different oils like avocado oil. For baking, always do the toothpick test! Ovens can be so finicky, so relying solely on time isn’t always best. A little adjustment here or there can make all the difference. If your loaf browns too fast, a simple piece of foil will save it. For glaze variations, if you don’t have powdered sugar, you can whisk some melted butter with honey and a splash of milk for a different kind of topping, or just dust it with a little extra cinnamon and sugar before serving. These little things, learned through trial and error, really help ensure a perfect loaf every time!
Storing and Reheating Tips
This zucchini bread is pretty forgiving when it comes to storage, which is a huge plus! At room temperature, it’s best kept in an airtight container or well-wrapped in plastic wrap. It will stay deliciously moist for about 2-3 days. Beyond that, the edges might start to get a little dry. If you’ve glazed it, I’d recommend waiting until the glaze is fully set before wrapping it up. If you’ve got a whole loaf that you know won’t be finished within a few days, the refrigerator is your friend. Wrapped tightly, it can last for about a week in the fridge. When you’re ready to enjoy a slice, you can eat it cold, or pop it in the toaster for a minute or two to bring back that fresh-baked warmth and softness. My personal favorite is to gently warm a slice in a low oven or toaster oven for about 5-10 minutes. For longer storage, freezing is a fantastic option. You can freeze the entire loaf, or slices wrapped individually. Wrap it tightly in a layer of plastic wrap, then a layer of aluminum foil, or place it in a freezer-safe bag. It will keep well in the freezer for up to 3 months. To thaw, simply unwrap it and let it come to room temperature on the counter, or gently reheat slices as you would from the refrigerator. Reheating usually brings back that wonderful fresh-baked texture beautifully.
Frequently Asked Questions
Final Thoughts
So there you have it – my absolute favorite, no-fail zucchini bread recipe. It’s more than just a recipe; it’s a little piece of comfort and joy that I love sharing. It’s proof that you don’t need fancy techniques or exotic ingredients to make something truly special. The simple addition of zucchini transforms a basic bread into something incredibly moist, tender, and flavorful. If you’re a fan of quick breads, I think you’ll also adore my recipe for my famous banana bread – it’s another family favorite that’s always a hit! Give this zucchini bread a try, and I promise you’ll be hooked. It’s the perfect treat for any time of day, and it’s guaranteed to bring smiles to your kitchen. I can’t wait to hear what you think and how yours turns out! Don’t be shy about sharing your own little twists in the comments below – I always love hearing them. Happy baking, my friends!
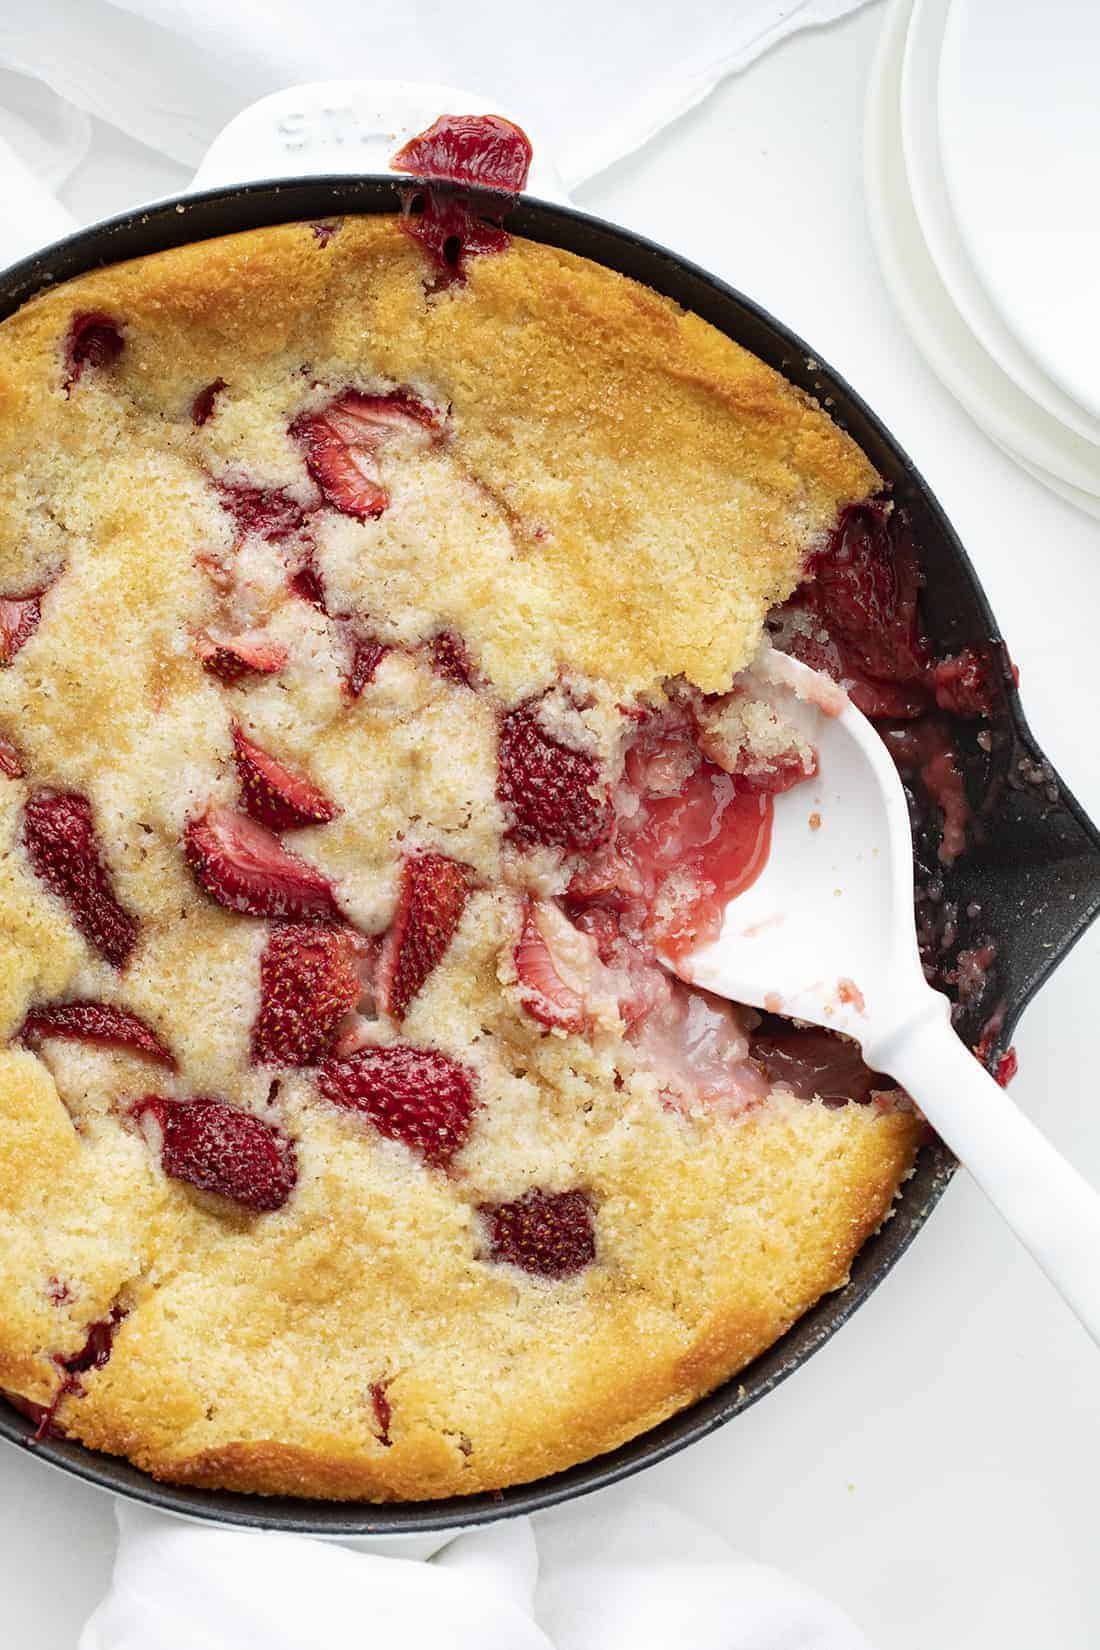
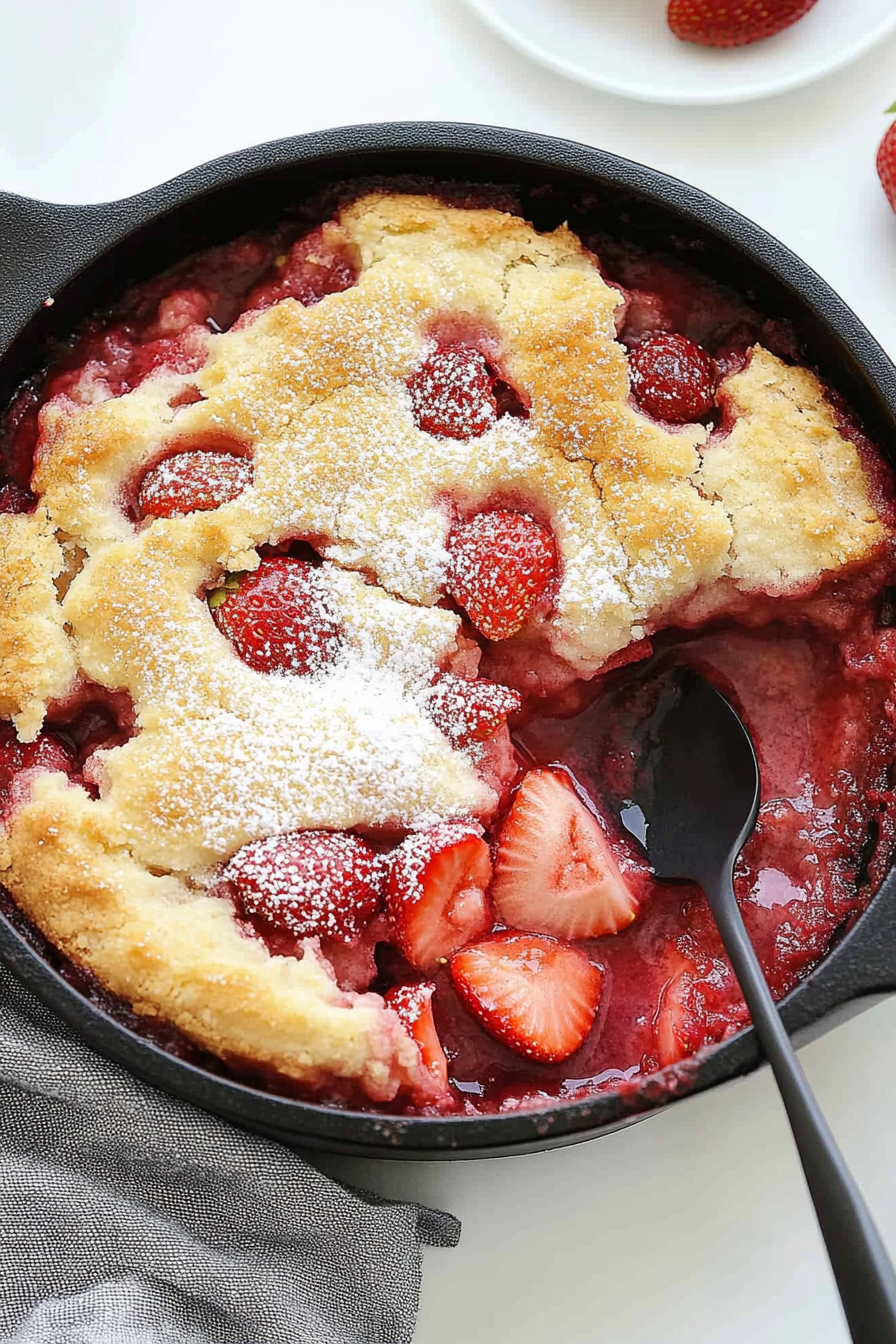
strawberry cobbler recipe
Ingredients
Method
- Preheat the oven to 350°F and spray a 10-inch cast-iron skillet with nonstick cooking spray. (You could also use a 9x13-inch baking dish.)
- In a medium bowl, combine sugar, flour, baking powder, salt, and milk. Slowly whisk in the melted butter. Pour the batter into the skillet.
- In a medium bowl, toss the strawberries with sugar, cornstarch, and lemon juice. Add the strawberry mixture evenly over the top of the batter.
- Bake for 45 minutes. (Line a baking sheet with aluminum foil and place it on the bottom rack of the oven to catch any drips.)
- After 45 minutes, sprinkle the turbinado sugar over the top and return to oven; bake an additional 10-15 minutes, or until golden brown.
- Serve topped with ice cream or whipped topping.