Caramel Apple Cheesecake A Dreamy Dessert
I’m so excited to finally share this with you! You know how sometimes you find a recipe that just *works*? It’s the one you come back to again and again, the one that makes your kitchen smell like pure happiness, and the one that always, *always* gets rave reviews? Yep, this is that recipe for me. It’s my go-to Zucchini Bread, but honestly, it’s so much more than just a quick bread. Think of it as a warm hug in edible form, perfect for those days when you just need something comforting and delicious without a fuss. It’s like a hug from your grandma, but you get to eat it! I’ve been making this for years, and it’s become a staple, especially when I’ve got a bumper crop of zucchini from the garden. It’s funny, sometimes I’ll even grab zucchini from the store just so I can make a batch. It’s that good. If you’ve ever had a less-than-stellar zucchini bread experience (I know, I’ve been there!), prepare to be amazed. This one’s a total game-changer, and I truly believe it’s the best zucchini bread out there.
What is Zucchini bread?
So, what exactly *is* this magical Zucchini Bread I’m raving about? At its heart, it’s a quick bread, meaning it uses chemical leaveners like baking soda and baking powder instead of yeast, so you don’t have to wait around for dough to rise. This makes it super accessible, even if you’re not a seasoned baker. The star ingredient, of course, is zucchini. Now, don’t let that scare you! When baked, zucchini becomes incredibly tender and moist, adding a beautiful softness to the bread without imparting any strong vegetable flavor. It’s like a secret ingredient that makes everything better. The name itself, “Zucchini Bread,” is pretty straightforward, but I like to think of it as more of a “moist and delicious spiced cake that happens to have zucchini in it.” It’s typically flavored with warm spices like cinnamon and nutmeg, often with nuts or chocolate chips folded in for extra texture and flavor. It’s that perfect balance of sweet and spiced, incredibly moist thanks to the zucchini, and just generally delightful. It’s essentially the ultimate crowd-pleaser that feels a little bit indulgent but is secretly packed with goodness!
Why you’ll love this recipe?
There are so many reasons why this Zucchini Bread has become my absolute favorite, and I just know you’re going to feel the same way. First off, let’s talk about the flavor. Oh. My. Goodness. It’s perfectly spiced with cinnamon and a hint of nutmeg, which just sings when it’s warm. The sweetness is just right – not too overpowering, allowing the other flavors to shine. It’s got this incredibly moist and tender crumb that just melts in your mouth. Seriously, it’s heavenly.
And the simplicity? It’s a lifesaver on busy weeknights or lazy weekend mornings. You can whip this up in about 15 minutes of active prep time, and then it bakes away while you’re catching up on emails or playing with the kids. It’s so forgiving! Even if you’re a beginner baker, you’ll nail this. The ingredients are all pantry staples, making it super budget-friendly too. I love that I can use up zucchini that’s about to go bad and turn it into something everyone devours.
What really sets this apart for me, though, is its versatility. It’s perfect as is, but I love adding chopped walnuts or pecans for a bit of crunch, or a generous handful of chocolate chips (because, well, chocolate!). Sometimes I’ll even swirl in some cream cheese or a bit of fruit jam before baking for an extra special touch. It’s fantastic for breakfast, a midday snack, or even a simple dessert. If you’re a fan of banana bread or pumpkin bread, you are going to absolutely adore this. It has that same cozy, comforting vibe but with its own unique charm. What I love most about this is that it never fails. It’s my go-to when I need a guaranteed win, and the smell that fills my house while it’s baking? Pure magic.
How do you make Zucchini bread?
Quick Overview
Making this zucchini bread is a breeze! You’ll simply whisk together your dry ingredients, mix your wet ingredients separately, then combine them gently. Fold in your optional add-ins, pour the batter into a prepared loaf pan, and bake until golden and a tester comes out clean. Top with a simple glaze, and you’ve got pure deliciousness. It’s a one-bowl wonder in spirit, really, just with a little dish for the wet stuff. The beauty is in its speed and ease, proving you don’t need hours to create something truly wonderful.
Ingredients
For the Main Batter:
3 cups all-purpose flour (I sometimes use half whole wheat for extra nuttiness, but all-purpose is classic)
1 teaspoon baking soda
1/2 teaspoon baking powder
1 teaspoon ground cinnamon (don’t skimp here!)
1/4 teaspoon ground nutmeg (just a whisper, but it makes a difference)
1/2 teaspoon salt
1 1/2 cups granulated sugar (you can reduce this slightly if you’re using very sweet add-ins)
3 large eggs, at room temperature (this helps them incorporate better)
1 cup vegetable oil or melted unsalted butter (oil makes it super moist, butter adds a richer flavor – I often do half and half!)
1/4 cup milk (any kind works, I’ve even used almond milk and it made it incredibly creamy!)
1 teaspoon vanilla extract
2 cups grated zucchini, well-drained (about two medium zucchinis)
For the Filling (Optional, but HIGHLY recommended!):
1/2 cup chopped walnuts or pecans
1/2 cup chocolate chips (semi-sweet are my favorite, but milk or dark work too!)
*Or*
1/2 cup cream cheese, softened and mixed with 2 tbsp sugar and a pinch of cinnamon (for a cream cheese swirl)
For the Glaze:
1 cup powdered sugar
2-3 tablespoons milk or lemon juice (lemon juice adds a lovely tang!)
1/2 teaspoon vanilla extract
Step-by-Step Instructions
Step 1: Preheat & Prep Pan
First things first, get that oven preheating to 350 degrees Fahrenheit (175 degrees Celsius). This is a pretty standard temperature for quick breads, and it ensures even baking. While the oven is heating up, grab a 9×5 inch loaf pan. You’ll want to grease it really well and then flour it. I usually use butter or cooking spray for the grease, and then a tablespoon or two of flour, tapping out any excess. This step is crucial to prevent your beautiful bread from sticking. Trust me, you don’t want to spend ages trying to pry your bread out of the pan!
Step 2: Mix Dry Ingredients
In a large bowl, whisk together the flour, baking soda, baking powder, cinnamon, nutmeg, and salt. Give it a good whisk until everything is evenly distributed. This is important because it ensures that your leavening agents and spices are spread throughout the batter, so you don’t get pockets of one flavor or uneven rising. If you’re adding nuts or chocolate chips directly into the batter (not for a swirl), you can toss them in here too. Tossing them in the dry ingredients first helps them not sink to the bottom during baking. I’ve learned that trick the hard way!
Step 3: Mix Wet Ingredients
In a separate medium bowl, whisk together the granulated sugar, eggs, vegetable oil (or melted butter, or your combo!), milk, and vanilla extract. Whisk until everything is well combined and the mixture is smooth. Make sure your eggs aren’t straight from the fridge; room temperature eggs mix in much more easily and contribute to a better texture. This is where the moistness really starts to build.
Step 4: Combine
Now, pour the wet ingredients into the bowl with the dry ingredients. Using a spatula or a wooden spoon, gently fold them together until *just* combined. It’s really important not to overmix here. A few streaks of flour are perfectly fine. Overmixing develops the gluten too much, which can lead to a tough, dense bread. We want tender and moist, remember?
Step 5: Prepare Filling
If you’re adding chocolate chips or nuts directly into the batter, you’d have already added them in Step 2. If you’re doing a swirl, now’s the time to prepare that. For the cream cheese swirl, just mix the softened cream cheese with the sugar and cinnamon until smooth. It doesn’t need to be perfectly uniform, a little texture is nice!
Step 6: Layer & Swirl
Spoon about half of the batter into your prepared loaf pan and spread it out evenly. If you’re doing the cream cheese swirl, dollop spoonfuls of the cream cheese mixture over this layer of batter. Then, spoon the remaining batter over the top and gently spread to cover. If you want more pronounced swirls, you can run a knife or skewer through the batter in a zig-zag motion. Don’t overdo it; you just want to marble the flavors and colors. If you’re adding chocolate chips or nuts as a separate layer, add them now, then cover with the rest of the batter.
Step 7: Bake
Place the loaf pan in the preheated oven and bake for 50-65 minutes. Baking times can vary depending on your oven, so start checking around the 50-minute mark. The best way to tell if it’s done is to insert a toothpick or a thin knife into the center of the loaf. If it comes out clean (or with just a few moist crumbs attached), it’s ready. If it comes out with wet batter, give it another 5-10 minutes and check again. If the top starts to brown too quickly, you can loosely tent it with foil.
Step 8: Cool & Glaze
Once baked, let the zucchini bread cool in the loaf pan for about 10-15 minutes. This allows it to set up a bit and makes it easier to remove. Then, carefully invert the pan onto a wire rack to release the loaf. Let it cool completely on the wire rack before glazing. For the glaze, whisk together the powdered sugar, 2 tablespoons of milk (or lemon juice) and vanilla extract. Add more liquid, a teaspoon at a time, until you reach your desired drizzling consistency. Drizzle it over the cooled loaf. It’s so satisfying to see that glaze drip down the sides!
Step 9: Slice & Serve
Once the glaze has set a little, slice the zucchini bread with a serrated knife for clean cuts. Serve and enjoy! It’s absolutely delicious when it’s still slightly warm, but also fantastic at room temperature. This is the moment of truth – digging into that moist, flavorful bread. Pure bliss!
What to Serve It With
This zucchini bread is a true chameleon, fitting in perfectly no matter the meal or occasion. For a cozy breakfast, I love a thick slice toasted and topped with a smear of butter. It’s surprisingly satisfying and pairs beautifully with a hot cup of coffee or a steaming mug of tea. The subtle sweetness and spice are just the right wake-up call.
When we’re doing a weekend brunch, it’s a star on the table. I’ll slice it neatly and arrange it on a pretty platter, maybe with some fresh berries on the side. It adds a touch of homemade charm that guests always appreciate. A nice glass of orange juice or a mimosa is the perfect accompaniment.
As a dessert, especially when you’ve added chocolate chips, it’s just delightful. I sometimes serve a warm slice with a small scoop of vanilla bean ice cream or a dollop of whipped cream. It’s a bit like having a warm chocolate chip cookie and a comforting cake all in one. For those late-night cravings when you want something sweet but don’t want to bake a whole cake, a slice of this is pure perfection.
And for those purely “just because” moments, when you need a little pick-me-up, this bread is your best friend. It’s wonderful on its own, maybe with a glass of cold milk. It’s the kind of thing that just makes a regular afternoon feel special. My family loves it as an after-school snack too – it’s always gone in minutes!
Top Tips for Perfecting Your Zucchini Bread
Over the years, I’ve picked up a few tricks that I think really elevate this zucchini bread from good to absolutely unforgettable. The biggest game-changer is definitely how you handle the zucchini. Grating it is key, and draining it is *non-negotiable*. I usually grate my zucchini, then place it in a fine-mesh sieve over the sink or a bowl. I gently press down on it with a spoon or even my hands to squeeze out as much liquid as possible. The more moisture you remove, the less likely your bread will be gummy or dense. I’ve found that using the small holes on the box grater gives you a finer texture, which I prefer, but the larger holes work too if you don’t mind slightly chunkier bits.
When it comes to mixing, remember my earlier advice: don’t overmix! It’s worth repeating. Just mix until the wet and dry ingredients are *barely* combined. A few flour streaks are okay. This is probably the most common mistake people make with quick breads, and it’s the easiest way to get a tough texture. Fold gently, and you’ll be rewarded with a tender crumb.
For the swirl lovers out there (you know who you are!), I’ve found that the key to a beautiful swirl is not to over-swirl. Just a few gentle passes with a knife are enough to create those lovely patterns. Too much swirling can make the colors muddy and can also overmix the batter. Don’t be afraid to experiment with different patterns – a simple zig-zag or a figure-eight can look stunning!
If you’re looking for ingredient swaps, I’ve got you covered. For a dairy-free version, you can easily swap the milk for almond, soy, or oat milk, and use a neutral oil like canola or sunflower instead of butter. If you’re out of vegetable oil, melted coconut oil works too, though it might impart a slight coconut flavor. I’ve also tested this with brown sugar instead of granulated sugar, and it gives it a richer, caramel-like flavor – delicious! For the spice, if you’re not a fan of nutmeg, you can omit it or add a pinch of allspice instead.
Baking can be a bit of an art form, and ovens definitely have their own personalities. My oven tends to run a little hot, so I often set my timer for the lower end of the baking range and keep a close eye on it. If you notice the top is getting too brown before the inside is cooked, don’t hesitate to loosely tent the loaf pan with aluminum foil. This reflects the heat and prevents the crust from burning while the center finishes baking. A wooden skewer or thin metal skewer is your best friend for testing doneness – it should come out clean or with just a few moist crumbs!
And finally, the glaze! If you prefer a thinner glaze, just add a little more liquid. If you want it thicker, add a bit more powdered sugar. For a tangier flavor, lemon juice is absolutely divine. You can also add a drop of food coloring for a fun twist, or even mix in some cocoa powder for a chocolate glaze. The possibilities are endless, and it’s a fun way to customize your bread.
Storing and Reheating Tips
One of the best things about this zucchini bread is how well it keeps. It’s one of those baked goods that actually gets better over time, as the flavors meld and the moisture evens out. For storing at room temperature, I usually wrap the cooled loaf tightly in plastic wrap or aluminum foil, or place it in an airtight container. It stays wonderfully moist for about 3-4 days this way. I’ve found that it’s best to wait to glaze it until just before serving if you plan to store it for more than a day, as the glaze can sometimes get a bit sticky or melt if left on for too long at room temperature.
If you think you won’t get through the whole loaf in a few days, or if your kitchen tends to be warm, refrigerator storage is a great option. Wrap it well in plastic wrap, then in foil, or place it in an airtight container. It should stay fresh and delicious in the fridge for up to a week. When you’re ready to eat a slice, you can enjoy it cold, or gently warm it up. I usually pop a slice in the toaster oven for a few minutes until it’s just warmed through – it brings back that fresh-baked aroma and texture!
For longer storage, freezing is your best bet. You can freeze the entire loaf or individual slices. Wrap the cooled loaf (without glaze, if possible, or add it after thawing) tightly in a layer of plastic wrap, then a layer of aluminum foil, or pop it into a freezer-safe bag. It will keep well in the freezer for up to 3 months. When you’re ready to thaw, you can either let it come to room temperature on the counter for a few hours, or microwave individual slices on a lower power setting until thawed and warmed. Honestly, even frozen, the moisture content is so good that it thaws beautifully!
My advice for the glaze when storing or freezing is to keep it separate until you’re ready to serve. If you’re freezing the loaf, let it thaw completely, then make the glaze fresh and drizzle it on. If you’re refrigerating, I usually wait to glaze until I’m about to eat a slice, just to keep it looking its best. This way, your glaze stays pristine and your bread stays perfectly moist.
Frequently Asked Questions
Final Thoughts
So there you have it – my absolute favorite Zucchini Bread recipe. It’s more than just a recipe for me; it’s a little piece of kitchen comfort, a reliable friend when I need something delicious and easy. It’s that perfect balance of moist, spiced goodness that makes everyone’s eyes light up. I truly believe that if you give this recipe a try, it’ll become a staple in your kitchen too. It’s so wonderfully forgiving, uses up that garden bounty, and tastes like pure homemade love.
If you love this recipe, you might also enjoy my [link to another popular quick bread recipe, e.g., “Moist Banana Bread with a Secret Ingredient”] or my [link to a complementary sweet treat, e.g., “Easy Chocolate Chip Cookie Bars”]. They share that same spirit of simple, delicious home baking that brings joy to any occasion.
I really hope you get a chance to make this. I can’t wait to hear what you think! If you try it, please leave a comment below and let me know how it turned out, what add-ins you used, or any fun variations you discovered. Your feedback means the world to me! Happy baking, and enjoy every delicious bite!
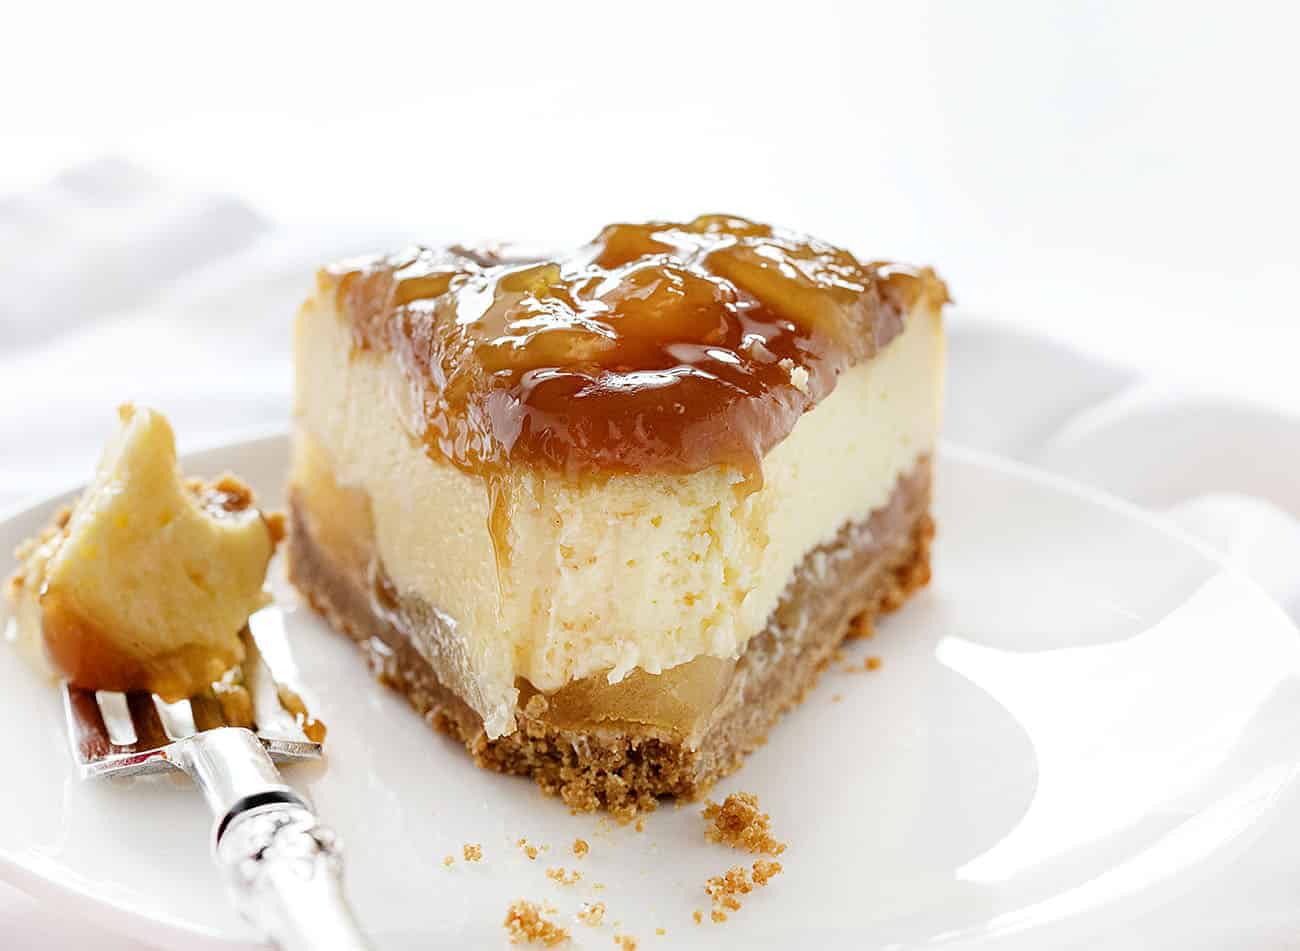
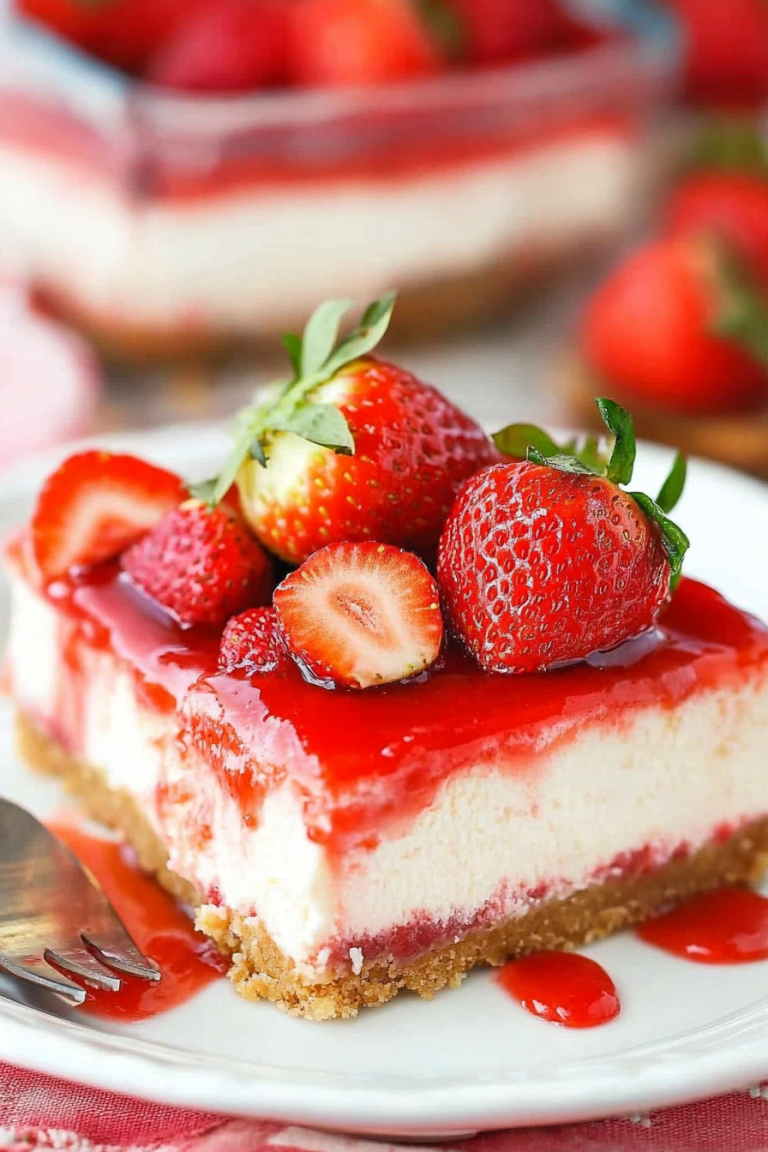
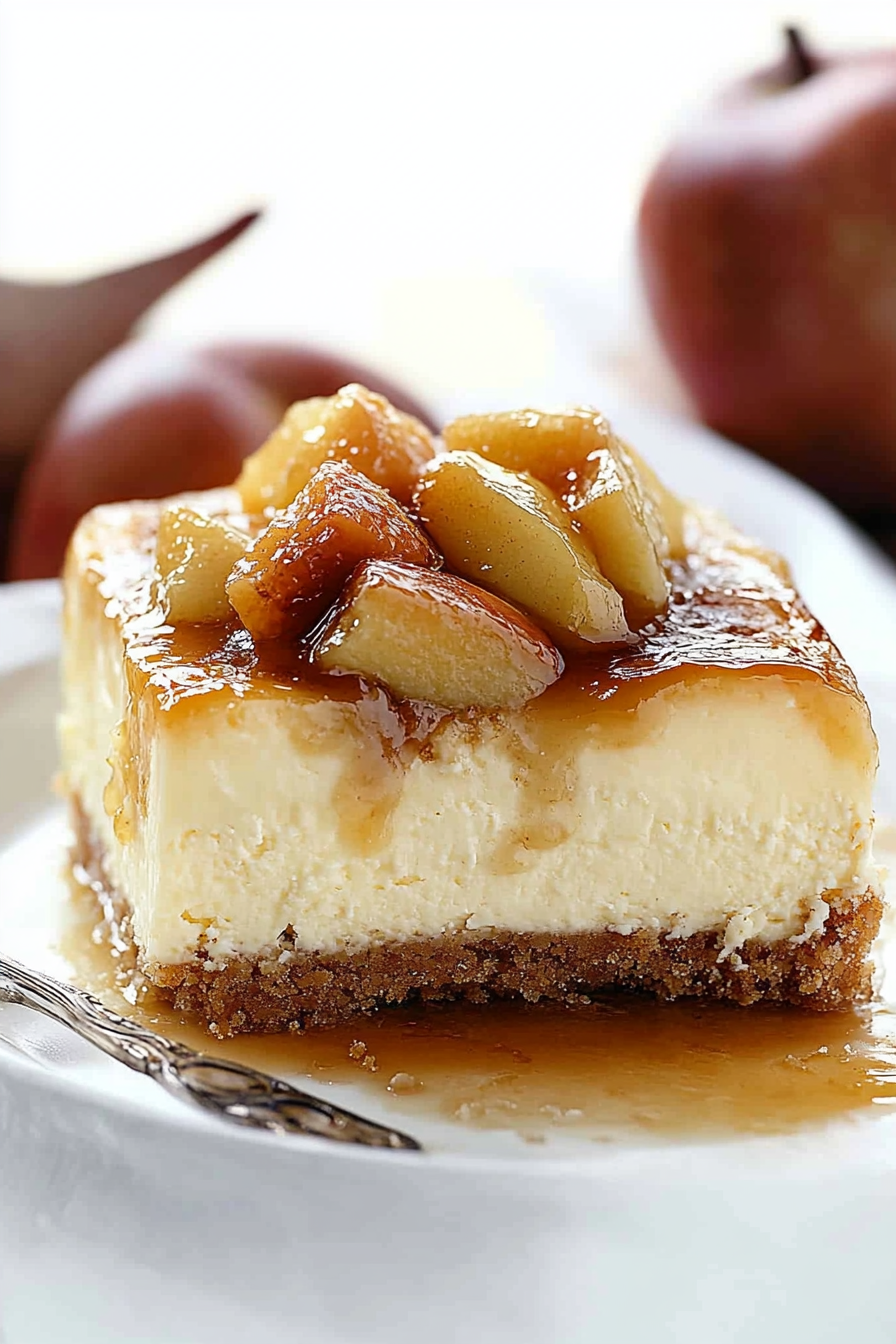
caramel apple cheesecake
Ingredients
Method
- Preheat the oven to 350°F (175°C).
- In a medium bowl, mix together crushed graham crackers and melted butter until all of the crackers are fully coated.
- Press the cracker mixture firmly into a prepared 7-inch springform pan, covering the bottom.
- Spoon 1.5 cups of apple pie filling evenly into the prepared crust and carefully spread it out.
- In a large bowl, whip the cream cheese with an electric mixer until fluffy. Add the granulated sugar, vanilla extract, and eggs, beating until just smooth, only a few seconds. Do not overmix.
- Pour the cheesecake mixture over the apple pie filling in the springform pan.
- Bake in the preheated oven for 50-55 minutes, or until the edges are set and the center of the cake is slightly jiggly.
- Remove from the oven and cool to room temperature on a wire rack.
- In a small saucepan over medium-low heat, combine the caramel topping and 0.5 cup of apple pie filling. Heat gently for about 1 minute, stirring until warmed through.
- Spoon the warm apple-caramel mixture over the top of the cooled cheesecake and spread evenly.
- Refrigerate the cheesecake for at least 4 hours, or preferably overnight, until thoroughly chilled and set before serving.