Cinnamon Swirl Baked Apples Muffins
Okay, so confession time. I used to think zucchini bread was just… fine. You know, a decent way to use up that garden overflow or the impulse buy from the farmer’s market. But then, my Aunt Carol shared her recipe with me, and everything changed. This isn’t just any zucchini bread; it’s moist, it’s packed with flavor, and it has this incredible, tender crumb that just melts in your mouth. I remember the first time I made it; the whole house smelled like pure comfort, and my little ones, who usually eye anything “healthy” with suspicion, devoured it. This recipe is my absolute go-to, especially when I need a little bit of magic without a whole lot of fuss. It’s like a warm hug in loaf form, and honestly, once you try it, you’ll get why I’m so obsessed.
What is Zucchini bread?
So, what exactly *is* this magical zucchini bread? At its heart, it’s a quick bread, meaning it doesn’t involve any yeast or lengthy proofing times, which is a lifesaver on busy weeknights. The star ingredient, of course, is zucchini, finely grated and hidden within a spiced batter. Don’t worry, you won’t taste the zucchini in a “green” way at all! What it does is lend an incredible amount of moisture, making the bread unbelievably tender and almost decadent. Think of it as nature’s secret weapon for perfect baked goods. It’s not quite a cake, and it’s not quite a muffin, but it sits perfectly in that cozy, comforting middle ground. It’s the kind of thing that makes even a Tuesday afternoon feel a little bit special.
Why you’ll love this recipe?
Honestly, there are so many reasons why this zucchini bread has become a staple in my kitchen, and I just know you’re going to love it too. First off, the flavor. It’s perfectly spiced with cinnamon and a hint of nutmeg, just enough to make it feel festive without being overwhelming. The moisture from the zucchini means it stays incredibly tender for days, which is fantastic because I can never eat a whole loaf at once (though I’ve definitely tried!). Speaking of staying fresh, this recipe is a total budget-friendly champion. Zucchini is usually pretty affordable, and the other ingredients are pantry staples. You get so much deliciousness for such a small investment. And the versatility! You can add nuts, chocolate chips, or even a simple cream cheese glaze on top. It’s perfect for breakfast with a cup of coffee, a sweet afternoon snack, or even a light dessert after dinner. What I love most about this recipe, though, is how forgiving it is. Even if you’re not an experienced baker, you can whip this up and it will turn out beautifully. It’s the kind of recipe that builds confidence in the kitchen, and that’s pretty special, right?
How do you make Zucchini bread?
Quick Overview
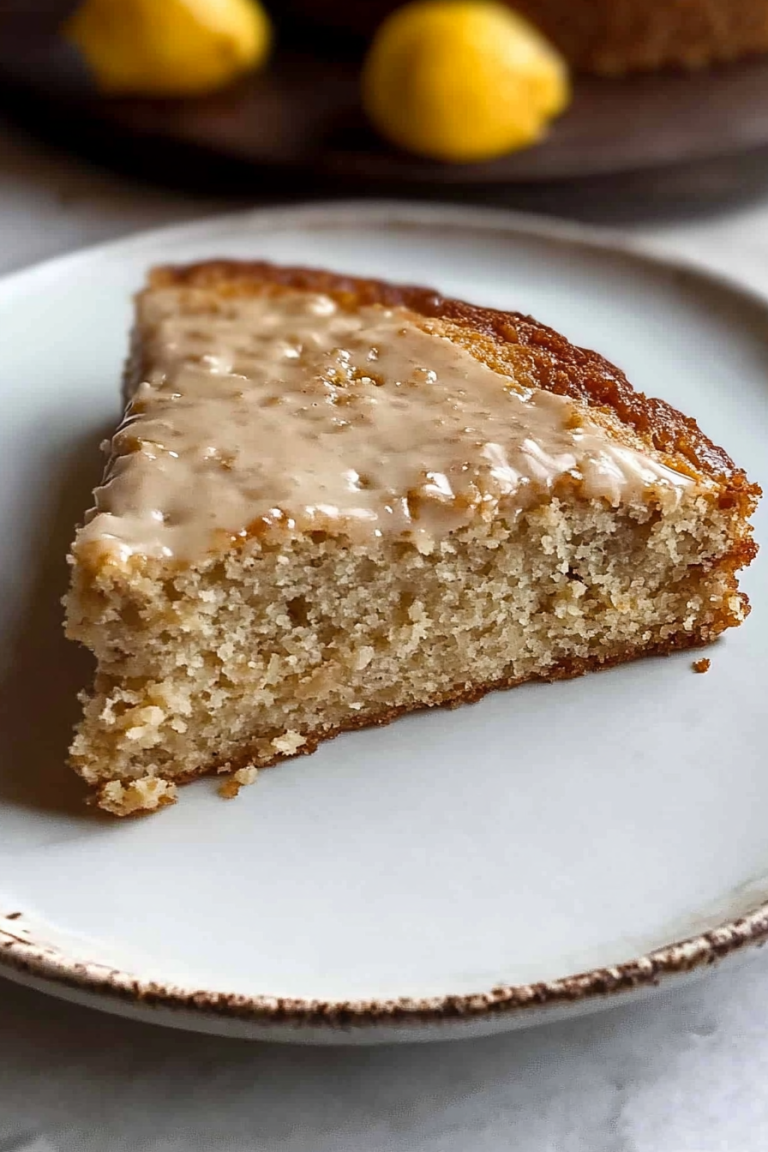
The beauty of this zucchini bread is its straightforward approach. You’ll simply whisk together your dry ingredients, mix your wet ingredients separately, then gently combine them. While that’s happening, you’ll prepare a quick, luscious filling that gets swirled right into the batter before baking. The result? A perfectly moist, flavorful loaf with ribbons of goodness throughout. It really is as simple as mixing and baking, making it an ideal recipe for beginners and seasoned bakers alike.
Ingredients
For the Main Batter:
2 cups all-purpose flour (I always use unbleached; it makes a difference in texture!)
1 teaspoon baking soda
1/2 teaspoon baking powder
1/2 teaspoon salt
1 teaspoon ground cinnamon
1/4 teaspoon ground nutmeg (freshly grated is best if you have it!)
1 cup granulated sugar (you can get away with 3/4 cup if you prefer it less sweet, but I love the classic sweetness)
1/2 cup unsalted butter, softened (or you can use melted butter if you’re in a rush, but softened gives a slightly better crumb)
2 large eggs, at room temperature
1 teaspoon vanilla extract
1 1/2 cups finely grated zucchini (about 2 medium zucchinis; make sure to squeeze out as much liquid as possible!)
For the Filling:
1/2 cup packed light brown sugar
2 tablespoons all-purpose flour
1 teaspoon ground cinnamon
1/2 cup chopped walnuts or pecans (optional, but highly recommended for crunch!)
For the Glaze (Optional, but SO good):
1 cup powdered sugar
2-3 tablespoons milk (or almond milk for a creamier texture!)
1/2 teaspoon vanilla extract
Step-by-Step Instructions
Step 1: Preheat & Prep Pan
First things first, get your oven preheating to 350 degrees Fahrenheit (175 degrees Celsius). This is crucial for even baking. Then, grab a 9×5 inch loaf pan. I like to grease it really well with butter or baking spray, and then dust it lightly with flour. This ensures your beautiful loaf slides right out without sticking. Trust me, wrestling a stuck loaf is NOT fun!
Step 2: Mix Dry Ingredients
In a medium bowl, whisk together the flour, baking soda, baking powder, salt, cinnamon, and nutmeg. Give it a good whisk until everything is evenly distributed. This helps make sure your leavening agents and spices are spread throughout the batter, so you don’t end up with pockets of flavor or dense spots. I always do this step first to get it out of the way!
Step 3: Mix Wet Ingredients
In a larger bowl, cream together the softened butter and granulated sugar until it’s light and fluffy. This usually takes a few minutes with an electric mixer, or a bit longer by hand if you’re feeling ambitious! Then, beat in the eggs one at a time, mixing well after each addition. Stir in the vanilla extract. Your mixture should look smooth and creamy.
Step 4: Combine
Now, it’s time to bring it all together. Gradually add the dry ingredients to the wet ingredients, mixing on low speed (or gently by hand) until just combined. Don’t overmix here! Overmixing can develop the gluten too much, leading to a tough bread. Then, fold in the grated zucchini until it’s evenly distributed. The batter will be thick, but don’t worry, that’s exactly what you want.
Step 5: Prepare Filling
In a small bowl, combine the brown sugar, flour, and cinnamon for the filling. If you’re using nuts, toss them in now too. This mixture will create those wonderful sweet, spiced pockets throughout your bread. It smells amazing even at this stage!
Step 6: Layer & Swirl
Pour about half of the batter into your prepared loaf pan. Sprinkle half of the filling mixture evenly over the batter. Then, pour the remaining batter on top, followed by the rest of the filling mixture. Now, grab a butter knife or a skewer and gently swirl the filling into the batter. Don’t overdo it; just a few gentle swirls will create beautiful ribbons without disturbing the batter too much. You want to see those distinct layers!
Step 7: Bake
Pop that pan into your preheated oven. Bake for 50-65 minutes. The exact time will vary depending on your oven, so start checking around the 50-minute mark. The bread is done when a wooden skewer or toothpick inserted into the center comes out clean. If the top starts to brown too quickly before the inside is cooked, you can loosely tent it with foil.
Step 8: Cool & Glaze
Once baked, let the zucchini bread cool in the pan for about 10-15 minutes. This is important because it helps the bread set. Then, carefully invert it onto a wire rack to cool completely. If you’re adding the glaze, wait until the bread is completely cool. Whisk together the powdered sugar, milk, and vanilla until smooth and pourable. Drizzle it over the top of the cooled loaf, letting it drip down the sides. It’s pure perfection!
Step 9: Slice & Serve
Once the glaze is set (if you used it), slice your gorgeous zucchini bread. I love a good, thick slice. Serve it at room temperature. The aroma alone is enough to make you swoon, and the taste? Absolutely divine. Enjoy every single bite!
What to Serve It With
This zucchini bread is so wonderfully versatile, you can serve it up pretty much any time of day! For breakfast, it’s heavenly alongside a strong cup of coffee or a creamy latte. I sometimes toast a slice lightly and spread a little butter on it – simple, but divine. If you’re planning a weekend brunch, it’s an absolute crowd-pleaser. I love arranging slices on a pretty platter, maybe with some fresh berries on the side for a pop of color and freshness. For dessert, it’s fantastic on its own, but I’ve also served it warm with a scoop of vanilla bean ice cream or a dollop of whipped cream, and that’s just pure indulgence. And for those cozy, quiet evenings when you just need a little something sweet? A slice of this bread, perhaps with a glass of milk or a cup of herbal tea, is the ultimate comfort food. My family also loves it as a snack after school; it’s substantial enough to keep them going until dinner.
Top Tips for Perfecting Your Zucchini Bread
I’ve made this zucchini bread more times than I can count, and over the years, I’ve picked up a few tricks that I think really make a difference. First, about that zucchini prep: you absolutely MUST squeeze out as much liquid as you can. I usually grate my zucchini, then wrap it in a clean kitchen towel or a few layers of paper towels and wring it out with all my might. This step is non-negotiable for preventing a gummy, overly wet bread. I learned this the hard way after one particularly moist batch! When it comes to mixing, remember the mantra: “just combined.” Overmixing is the enemy of tender quick breads. A few streaks of flour are perfectly fine; they’ll incorporate as it bakes. For the swirl, don’t go crazy. You want distinct ribbons of flavor, not a muddy mess. Gentle swirls are best. I’ve experimented with ingredient swaps too! If you’re out of regular milk for the glaze, a bit of yogurt or even some orange juice can add a subtle citrusy note. I once tried adding shredded carrot along with the zucchini, and it added a lovely depth of flavor and even more moisture. For baking, I always recommend using the middle rack of your oven for the most even heat. And don’t be afraid to give it a little tap on the top; if it springs back lightly, it’s usually done. Finally, the glaze: if you prefer a thinner glaze, just add a tiny bit more milk, a teaspoon at a time, until you get the consistency you like. A thicker glaze is delicious too; it creates more of a frosting effect!
Storing and Reheating Tips
This zucchini bread is fantastic because it stays moist and delicious for several days, which is always a win in my book. At room temperature, I’ll keep it wrapped tightly in plastic wrap or in an airtight container for up to 3 days. It’s important to make sure it’s completely cool before wrapping, otherwise, you risk condensation forming, which can make it soggy. If you think you’ll need it for longer than that, or if your kitchen is particularly warm, I’d recommend storing it in the refrigerator. Wrapped well in plastic wrap and then placed in an airtight container, it can last up to a week in the fridge. The texture is still lovely, though I personally prefer it at room temperature or slightly warmed. If you want to freeze it, I always recommend slicing it first. Wrap each slice individually in plastic wrap, then place them all in a freezer-safe bag or container. It’ll keep well in the freezer for up to 3 months. To reheat, you can just let a slice thaw at room temperature, or pop it in the microwave for about 10-15 seconds, or toast it gently in a toaster oven. If you glazed your bread, I find it best to add the glaze *after* it’s been thawed or reheated if it was frozen, just to keep the glaze looking its best. For bread stored at room temperature or in the fridge, the glaze usually holds up well.
Frequently Asked Questions
Final Thoughts
So there you have it, my absolute favorite zucchini bread recipe! It’s the kind of bake that brings so much joy, both in the making and the eating. It’s proof that simple ingredients can create something truly magical, and that there’s always room for a little bit of comfort in our lives. I really hope you give this a try and that it becomes a favorite in your home too. If you love this recipe, you might also enjoy my Classic Banana Bread or my Lemon Poppy Seed Muffins – they’re all about that same cozy, homemade goodness. Please, please let me know in the comments below how yours turns out, or if you have any special additions you like to include! I can’t wait to hear all about your baking adventures. Happy baking, everyone!
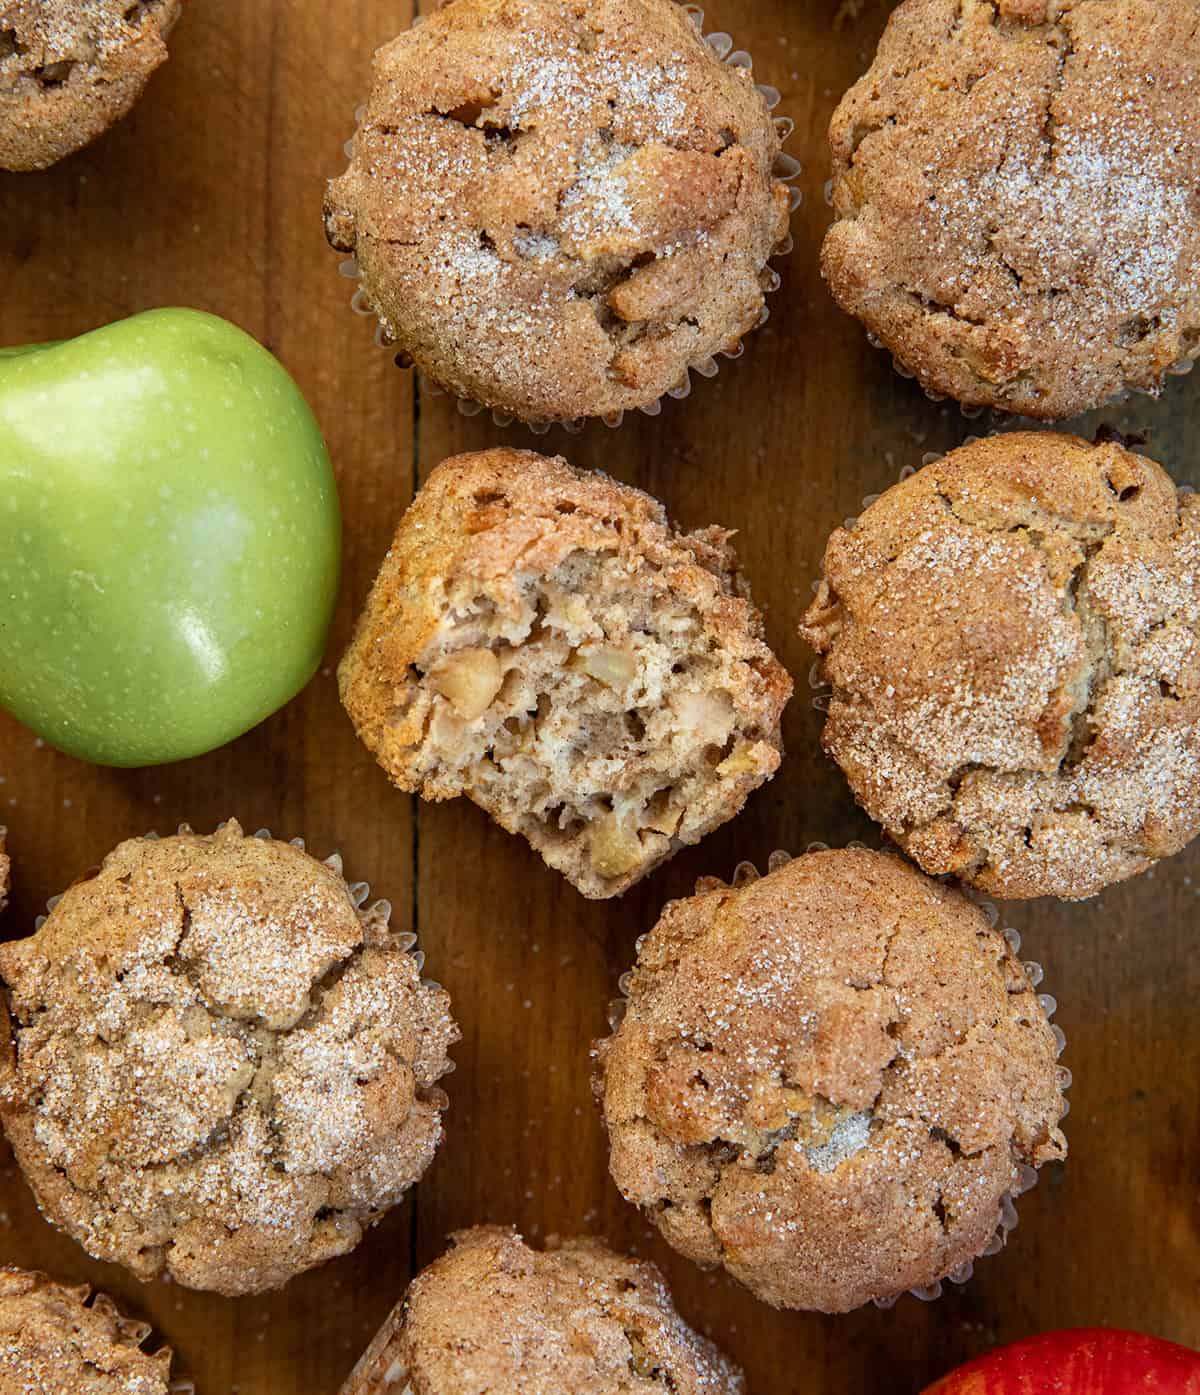
apple snickerdoodle muffins
Ingredients
Method
- Preheat the oven to 425°F. Line muffin tins with paper liners and set aside.
- In a medium bowl, combine the flour, baking powder, baking soda, apple pie spice, and salt. Whisk together to combine.
- In a large bowl, use a hand mixer to beat together the butter, oil, granulated sugar, and brown sugar until smooth and slightly fluffy.
- Add the eggs and vanilla, mixing until fully incorporated.
- Pour in the buttermilk and mix until just combined. The batter may look slightly curdled at this point; this is normal.
- Add the flour mixture to the wet ingredients and mix until just combined. Do not overmix. Set aside.
- In a small bowl, toss the finely diced apples, granulated sugar, and apple pie spice. Stir until the apples are well coated.
- Gently fold the apple mixture into the muffin batter using a spatula, being careful not to overmix.
- Divide the batter evenly among the muffin cups, filling each one to the top.
- In a small bowl, mix together the granulated sugar and ground cinnamon for the topping.
- Brush the tops of each unbaked muffin generously with melted butter, then sprinkle the cinnamon-sugar mixture evenly over the tops.
- Bake the muffins for 18–20 minutes, or until a toothpick inserted in the center comes out with a few moist crumbs but no wet batter.
- Let the muffins cool in the pan for 5–10 minutes, then transfer them to a wire rack to cool completely.