Easy Cheesy Chicken Enchilada Bake
Okay, so you know how sometimes you just need a baking project that feels like a warm hug? That’s exactly what this zucchini bread is for me. It’s not just any zucchini bread; it’s *the* zucchini bread. The one that uses up that surplus zucchini from your garden (or the farmer’s market haul that you couldn’t resist). The one that smells absolutely divine baking in the oven and makes your whole house feel cozy. Honestly, it’s worlds away from those dry, crumbly versions you might have encountered. This recipe is all about that incredibly tender, moist crumb with just the right amount of sweetness and spice. It’s the kind of thing that disappears in minutes at my house, and my kids ask for it all the time, especially after school. It’s seriously a lifesaver on busy nights when everyone needs a little pick-me-up, and you don’t have hours to whip up a whole cake. If you’re a fan of quick breads, like my famous banana bread, you’re going to adore this one.
What is Zucchini bread?
So, what exactly *is* zucchini bread? At its heart, it’s a quick bread, meaning it uses chemical leaveners like baking soda and baking powder instead of yeast, so you don’t have to wait for dough to rise. The star ingredient, zucchini, might sound a little unusual for a sweet treat, but trust me, it’s pure magic. When grated and mixed into the batter, it adds incredible moisture without imparting any strong flavor. It’s a brilliant way to sneak in some veggies, too! Think of it as a super-moist, spiced cake that just happens to have zucchini in it. It’s essentially a fantastic vehicle for delicious flavors like cinnamon, nutmeg, and sometimes even chocolate chips or nuts. The name “zucchini bread” itself is pretty straightforward – it’s a bread that features zucchini as a key component. It’s become a classic for good reason, especially during late summer and fall when zucchini is abundant.
Why you’ll love this recipe?
Honestly, there are so many reasons why I keep coming back to this recipe, and I’m betting you’ll fall in love with it too. First off, the flavor is just out of this world. It’s perfectly spiced with cinnamon and a hint of nutmeg that makes it taste like pure comfort. The sweetness is spot on – not too much, not too little – thanks to the combination of sugar and the natural sweetness from the zucchini itself. And the texture? Oh my goodness. It’s unbelievably moist and tender. The secret, I’ve found, is in how the zucchini breaks down and adds that essential hydration. This isn’t a dry cake that crumbles; it’s a slice of pure, moist delight. Beyond the taste, the simplicity of this recipe is a huge win. You can whip up the batter in about 15 minutes, and then it’s hands-off time while it bakes. It’s perfect for when you’re craving something sweet but don’t want to spend hours in the kitchen. Plus, it’s incredibly cost-effective. Zucchini is often quite affordable, especially when in season, and the other ingredients are pantry staples. I’ve also found it to be super versatile. While I love it plain, adding chocolate chips or walnuts takes it to a whole new level. If you enjoyed my Easy Apple Crumble or my classic Muffin Recipe, this zucchini bread offers a similar level of comforting deliciousness but with its own unique charm.
How do you make Zucchini bread?
Quick Overview
Making this incredible zucchini bread is surprisingly simple. You’ll essentially mix your dry ingredients, whisk together your wet ingredients, then gently combine them. The grated zucchini gets folded in, and then you’re ready to bake. What makes this method special is how we manage the moisture from the zucchini and ensure everything is perfectly balanced for that ultimate moist texture. It’s a straightforward process that yields professional-level results, even for beginner bakers. You’ll be amazed at how easy it is to create something this delicious.
Ingredients
For the Main Batter:
You’ll need about 2 cups of grated zucchini. Make sure to use fresh zucchini; it makes a difference! I like to grate mine using the medium holes on a box grater. You don’t need to peel it – the skin adds extra nutrients and a lovely subtle texture. For the flour, all-purpose is perfect here. I always use around 2 cups. And for the sweeteners, a mix of granulated sugar and brown sugar gives it a lovely depth of flavor and extra moisture. About 1 cup total sugar is usually right, but you can adjust slightly to your preference. For leavening, we’ll use 1 teaspoon of baking soda and 1 teaspoon of baking powder to ensure a good rise. Don’t forget your warm spices: 1 teaspoon of cinnamon and about a half teaspoon of nutmeg. A pinch of salt always balances out the sweetness. Finally, you’ll need eggs (2 large ones are perfect for binding and richness) and about a half cup of oil. I usually use a neutral oil like vegetable or canola, but melted coconut oil works beautifully too, adding a subtle tropical hint.
For the Filling (Optional but Highly Recommended!):
This is where you can really personalize your bread. My absolute favorite add-in is chocolate chips! About 1 cup of semi-sweet or dark chocolate chips is divine. If you’re more of a nut person, about a cup of chopped walnuts or pecans adds a wonderful crunch. Some people even like to add a swirl of cinnamon sugar butter right into the batter before baking for an extra layer of flavor. For that, you’ll just need a couple of tablespoons of softened butter, a tablespoon of sugar, and another half teaspoon of cinnamon, all mashed together.
For the Glaze (Optional, but so good!):
If you want that extra touch of sweetness and elegance, a simple glaze is the way to go. I usually make mine with about 1 cup of powdered sugar, a tablespoon or two of milk (or even a bit of orange juice for a citrusy kick!), and a tiny splash of vanilla extract. You want it thick enough to coat the back of a spoon but still pourable. I’ll sometimes add a little more liquid if it gets too thick, or more powdered sugar if it’s too thin. Testing the consistency is key here!
Step-by-Step Instructions
Step 1: Preheat & Prep Pan
First things first, get your oven preheating to 350 degrees Fahrenheit (175 degrees Celsius). This is super important for even baking. While the oven is heating up, grease and flour a standard 9×5 inch loaf pan. You can use butter or cooking spray for greasing, then dust it lightly with flour, tapping out any excess. This prevents your beautiful bread from sticking. I’ve made the mistake of not prepping the pan well enough before, and let me tell you, trying to salvage a stuck loaf is not fun!
Step 2: Mix Dry Ingredients
In a large mixing bowl, whisk together your flour, baking soda, baking powder, cinnamon, nutmeg, and salt. Whisking well ensures that all those dry ingredients are evenly distributed. This means you won’t get pockets of baking soda or salt in your finished bread, and it helps everything rise beautifully. It’s a small step, but it really does make a difference!
Step 3: Mix Wet Ingredients
In a separate medium bowl, whisk together the eggs and your sugars until well combined. Then, slowly drizzle in the oil while whisking continuously. You want this mixture to be smooth and slightly lighter in color. If you’re using vanilla extract, now’s the time to stir it in. Getting this right ensures a good base for your batter.
Step 4: Combine
Now, pour the wet ingredients into the bowl with the dry ingredients. Stir gently with a spatula or wooden spoon until *just* combined. It’s really important not to overmix here! A few streaks of flour are okay; they’ll disappear as you fold in the zucchini. Overmixing develops the gluten too much, which can lead to a tough, dense bread. We want tender and fluffy, remember?
Step 5: Prepare Filling
If you’re adding chocolate chips or nuts, now’s the time to gently fold them into the batter. If you’re making that cinnamon sugar swirl, mix the softened butter, sugar, and cinnamon in a small bowl until it forms a paste. You’ll add this in the next step.
Step 6: Layer & Swirl
Add the grated zucchini to the batter and fold it in until evenly distributed. If you’re doing the cinnamon swirl, spoon about half of the batter into your prepared loaf pan. Dollop half of the cinnamon sugar mixture over the batter, then add the remaining batter. Dollop the rest of the cinnamon sugar mixture on top. Now, take a knife or a skewer and gently swirl the mixture through the batter. Don’t over-swirl; you want distinct ribbons of flavor. If you’re just adding chocolate chips or nuts, simply fold them into the batter until evenly dispersed after adding the zucchini.
Step 7: Bake
Pop the loaf pan into your preheated oven. Bake for about 50-65 minutes. The exact time will depend on your oven, of course. You’ll know it’s done when a toothpick inserted into the center comes out clean, or with just a few moist crumbs attached. If the top starts to brown too quickly, you can loosely tent it with aluminum foil for the last 15-20 minutes of baking. I’ve learned this trick after burning the tops a few times!
Step 8: Cool & Glaze
Once baked, let the bread cool in the pan on a wire rack for about 10-15 minutes. This helps it firm up before you remove it. Then, carefully invert the pan to turn the loaf out onto the wire rack to cool completely. This is crucial! If you try to glaze a warm loaf, the glaze will just melt right off. Once it’s fully cooled, whisk together your glaze ingredients until smooth. Drizzle it over the top of the cooled loaf, letting it drip down the sides. You can add more milk or powdered sugar to get your desired consistency.
Step 9: Slice & Serve
Once the glaze has set a bit (or if you skipped the glaze), use a serrated knife to slice the bread. A sharp serrated knife glides through beautifully without crushing the loaf. Serve it at room temperature for the best texture and flavor. It’s also delicious slightly warm if you can resist!
What to Serve It With
This zucchini bread is such a versatile treat, you can enjoy it in so many ways! For breakfast, a thick slice with a smear of butter or cream cheese is pure heaven. It pairs wonderfully with a hot cup of coffee or a refreshing glass of iced tea. Imagine: you wake up, the house is quiet, and you have a warm slice of this goodness. Perfect start! For a more elaborate brunch spread, I love serving it alongside fresh fruit salad, maybe some scrambled eggs and a side of crispy bacon. It adds a touch of homemade sweetness that complements savory dishes beautifully. And for dessert? Oh, it’s fantastic. A warm slice with a scoop of vanilla bean ice cream is absolutely decadent. Or, serve it as is after a lovely dinner. It’s also my go-to for cozy afternoon snacks. When that 3 pm craving hits, this is the perfect thing to have on hand. My family loves it with a glass of cold milk. It’s just one of those comforting things that makes everyday moments feel a little bit special. I’ve even been known to pack a slice in my kids’ lunchboxes as a special treat.
Top Tips for Perfecting Your Zucchini Bread
I’ve made this zucchini bread more times than I can count, and over the years, I’ve picked up a few tricks that make it consistently amazing. Here are my top tips:
Zucchini Prep: While you don’t need to peel the zucchini, it’s really important to grate it and then give it a gentle squeeze to remove excess moisture. You don’t want to wring it out completely, but just press out some of the water. This is a game-changer for preventing a soggy loaf and ensures a tender crumb. Using fresh, firm zucchini is also key. Avoid zucchini that feels mushy or has soft spots.
Mixing Advice: As I mentioned, the biggest pitfall is overmixing. Once you combine the wet and dry ingredients, stir only until *just* combined. A few small lumps of flour are perfectly fine. The same goes for folding in the zucchini and any add-ins; mix just enough to distribute them evenly. You’re not trying to beat it into submission!
Swirl Customization: If you’re doing the cinnamon sugar swirl, don’t go crazy with the swirling. A few passes with a knife or skewer are enough to create beautiful ribbons of flavor without making the whole batter muddy. You want distinct layers, not a uniform color.
Ingredient Swaps: This recipe is quite forgiving. If you don’t have brown sugar, you can use all granulated sugar, but you might lose a touch of that deep flavor and moisture. For a dairy-free version, you can easily swap the milk in the glaze for almond milk or even orange juice, and for the batter, I’ve tested this with melted coconut oil and it actually made it even creamier! Using a neutral oil like vegetable or canola is always a safe bet.
Baking Tips: Always preheat your oven thoroughly. If your oven tends to run hot, consider reducing the temperature by about 10-15 degrees Fahrenheit and increasing the baking time slightly. Placing the loaf pan on the center rack is usually best for even heat distribution. A good doneness test is a toothpick or a thin knife inserted into the center – it should come out clean with no wet batter attached.
Glaze Variations: The glaze is optional, but it really elevates the bread. For a thinner glaze, add milk a teaspoon at a time. For a thicker glaze, whisk in more powdered sugar. You can also add a touch of lemon zest or orange zest to the glaze for a brighter flavor, or even a spoonful of cocoa powder for a chocolate glaze!
Storing and Reheating Tips
One of the best things about this zucchini bread is how well it stores. It actually gets even more moist and flavorful after a day or two! For storage, I usually let the bread cool completely before doing anything else. If you’re planning to eat it within a day or two, you can simply wrap it tightly in plastic wrap or place it in an airtight container at room temperature. It should stay fresh and delicious for about 3-4 days that way.
If you have more bread than you can eat in a few days (which is unlikely at my house!), refrigerating it is a great option. Wrap the loaf well in plastic wrap, then place it in an airtight container or a heavy-duty freezer bag. It will keep well in the refrigerator for about a week. The texture might firm up a bit in the fridge, but it’s easily remedied.
For longer storage, freezing is your best friend. Wrap the cooled loaf very tightly in plastic wrap, then again in aluminum foil, or place it in a freezer-safe bag. It can be frozen for up to 3 months. To thaw, simply remove it from the freezer, keep it wrapped, and let it come to room temperature on the counter for a few hours. If you refrigerated it and want to reheat it, you can gently warm a slice in the microwave for about 10-15 seconds, or for a slightly crisper edge, pop it in a toaster oven at a low temperature for a few minutes.
Regarding the glaze: I always add the glaze *after* the bread has completely cooled and right before serving or storing at room temperature. If you refrigerate or freeze a glazed loaf, the glaze can sometimes become a bit sticky or lose its shine. If you do freeze a glazed loaf, it’s best to glaze it again after thawing for the best appearance.
Frequently Asked Questions
Final Thoughts
So, there you have it – my absolute go-to recipe for the most incredibly moist and flavorful zucchini bread. It’s the kind of recipe that makes you feel like a kitchen rockstar, even if you’re just starting out. The way the zucchini transforms into this tender, moist crumb is nothing short of magical, and the warm spices make it utterly irresistible. It’s proof that you can create something truly special with simple, everyday ingredients. I really hope you give this recipe a try. It’s perfect for using up that garden bounty, a delightful treat for a cozy afternoon, or a welcome addition to any brunch table. If you love this, you might also enjoy my recipe for my famously moist Chocolate Chip Banana Bread – it has a similar comforting vibe! Let me know in the comments below how yours turns out, what add-ins you chose, or any variations you tried. I absolutely love hearing from you! Happy baking, and enjoy every delicious bite!
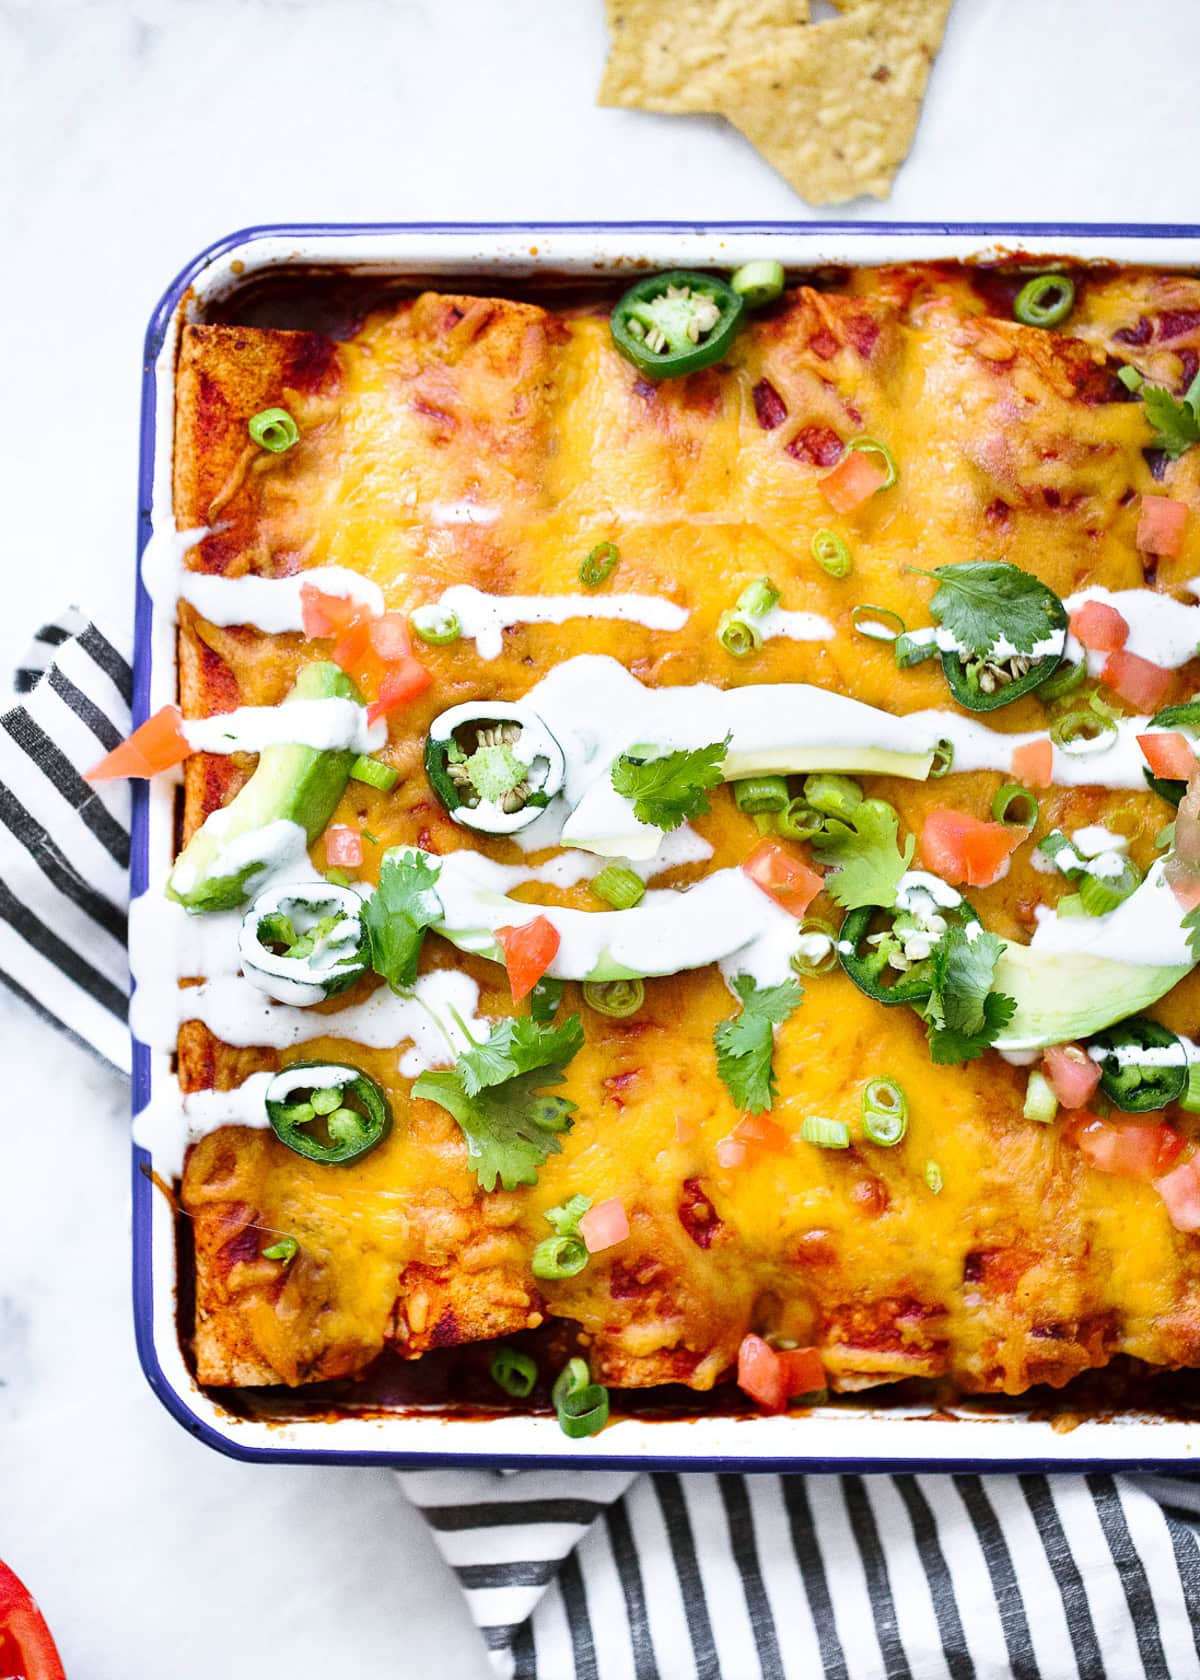
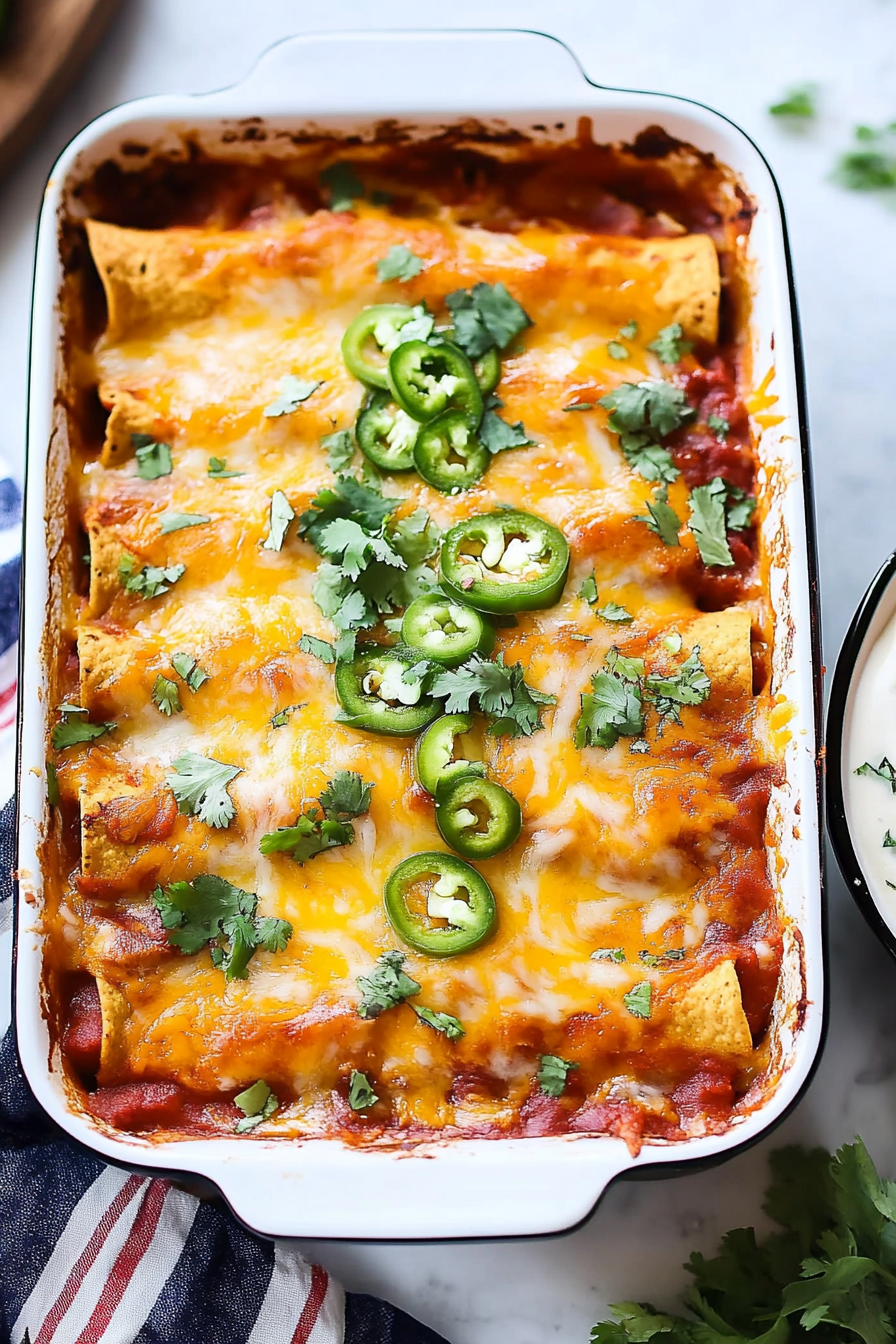
chicken enchilada bake
Ingredients
Method
- Preheat oven to 400°F (200°C).
- Spray a medium pot with olive oil spray and add minced garlic, sauté for 30 seconds. Add chipotle chiles, chipotle chili powder, ground cumin, chicken broth, tomato sauce, kosher salt, and black pepper. Bring to a boil, then reduce heat to low and simmer for 5-10 minutes to allow the flavors to meld. Set aside.
- Heat 1 teaspoon extra virgin olive oil in a medium skillet over medium-high heat. Sauté diced onions and minced garlic until soft, about 2 minutes. Add shredded chicken, kosher salt, chopped cilantro, ground cumin, dried oregano, chipotle chili powder, tomato sauce, and chicken broth. Cook for 4 to 5 minutes, then remove from heat.
- Spray a 13 by 9-inch glass or ceramic baking dish with olive oil. Spoon approximately 0.33 cup of the chicken mixture into each tortilla, then roll it up.
- Place the rolled tortillas seam-side down in the prepared baking dish. Top evenly with the reserved enchilada sauce, then sprinkle with shredded Mexican cheese blend.
- Cover the baking dish with foil and bake in the preheated oven on the middle rack for 20-25 minutes, or until heated through and the cheese is melted and bubbly. Garnish with chopped scallions or cilantro before serving. Add optional toppings like sour cream, avocado, Greek yogurt, or jalapeños if desired. Makes 8 enchiladas.
Notes
- Rotisserie Chicken: You can easily use store-bought rotisserie chicken, just shred it and mix with the filling ingredients.
- Freezing: Assemble the enchiladas in a freezer-safe dish, but do not bake. Cover tightly with foil and freeze for up to 3 months. Bake from frozen at 375°F (190°C) until heated through.
- Tortillas: Both corn and flour tortillas work well. If using corn, warm them first to prevent cracking. Whole wheat or gluten-free flour tortillas are also great options.
- Gluten-Free: To make this recipe gluten-free, use gluten-free tortillas and ensure your chicken broth and chipotle peppers are gluten-free.