Deviled Egg Pasta Salad Your New Favorite
There are some recipes that just have a permanent spot in your heart, you know? The ones you pull out when you need a little comfort, or when you want to impress without breaking a sweat. For me, that recipe is this absolutely, positively, can’t-live-without-it Zucchini Bread. I remember my grandma making this when I was a kid, the smell of cinnamon and toasted walnuts wafting through her tiny kitchen. It was always moist, never too sweet, and just… perfect. It’s not quite a cake, not quite a loaf, it’s that magical in-between that makes it so incredibly versatile. If you’ve ever thought zucchini bread was just “okay,” prepare to have your mind changed. This one’s a game-changer, folks, and it’s surprisingly simple to whip up, even on a weeknight.
What is Zucchini bread?
So, what exactly *is* zucchini bread? At its core, it’s a quick bread – meaning no yeast needed, which is always a win in my book! – where grated zucchini is the star ingredient. Don’t let that scare you! The zucchini doesn’t add a pronounced vegetable flavor; instead, it works its magic by lending an incredible, unbelievable moisture to the finished product. It’s essentially a sweet, spiced loaf that just happens to have a secret weapon for ultimate tenderness. Think of it as a delightful hug in loaf form, infused with warm spices and often studded with nuts or chocolate chips. It’s the kind of treat that’s humble in origin but delivers a truly gourmet experience. My grandma always said the zucchini was her little secret for making it so incredibly moist, and she wasn’t wrong!
Why you’ll love this recipe?
What is your go-to recipe for a grilled chicken?flavor. It’s this perfect balance of warm cinnamon and nutmeg, with a hint of sweetness that never, ever overpowers. When it bakes, your whole house smells like pure cozy bliss – it’s better than any candle, I promise! Then there’s the simplicity. I’ve made this countless times when I’m running on fumes, and it genuinely takes less than 20 minutes to get everything mixed and into the oven. It’s a lifesaver on busy nights when you need a little pick-me-up or something sweet to share. And let’s talk Cost-efficiency: What is the best way to measure cost-efficiency?. Zucchini is usually super affordable, especially when it’s in season, and the other pantry staples are things you probably already have on hand. You get a gorgeous, impressive-looking loaf for pennies on the dollar compared to buying a fancy bakery treat. Plus, its versatility is unmatched! I love it plain, but you can easily add chocolate chips, walnuts, or even a swirl of cream cheese. It’s perfect for breakfast, a midday snack, or even a simple dessert. What I love most about this is that it truly tastes like it came from a gourmet bakery, but it’s made with so much love and effortlessness right in your own kitchen. It’s a classic for a reason, and this rendition just hits all the right notes.
How to Make Zucchini Bread
Quick Overview
The process for this amazing zucchini bread is wonderfully straightforward. We’ll start by getting our oven nice and toasty and our loaf pan ready. Then, it’s a simple matter of whisking together the dry ingredients in one bowl and the wet ingredients in another. A quick, gentle combine of the two, fold in the star ingredient – our grated zucchini! – and then a luscious filling gets swirled in to create beautiful patterns. Pop it in the oven, and soon you’ll be greeted with the most incredible aroma. It’s truly that easy, and the result is a loaf that’s impossibly moist and packed with flavor. No fancy equipment, no complicated steps, just pure baking joy.
Ingredients
For the Main Batter:
2 cups all-purpose flour (you can absolutely use a good quality gluten-free blend too, just make sure it has xanthan gum in it)
1 teaspoon baking soda
1/2 teaspoon baking powder
1 teaspoon ground cinnamon
1/4 teaspoon ground nutmeg
1/2 teaspoon salt
1 cup granulated sugar (I’ve played around with reducing this a bit, but this is the sweet spot for me!)
2 large eggs, at room temperature (this makes a big difference in how they incorporate)
1/2 cup vegetable oil or melted coconut oil (I actually tested this with almond milk and it actually made it even creamier! So feel free to experiment)
1/4 cup unsweetened applesauce (this is my little secret for extra moisture!)
1 teaspoon vanilla extract
2 cups grated zucchini, squeezed dry (about 2 medium zucchinis – don’t skip squeezing the water out, trust me!)
For the Filling:
1/2 cup packed light brown sugar
1 tablespoon all-purpose flour
1 teaspoon ground cinnamon
1/2 cup chopped walnuts or pecans (optional, but highly recommended for that classic crunch! You can also do chocolate chips if you prefer)
For the Glaze:
1 cup powdered sugar
2-3 tablespoons milk (any kind works – dairy, almond, oat!)
1/2 teaspoon vanilla extract
Step-by-Step Instructions
Step 1: Preheat & Prep Pan
First things first, let’s get our oven humming. Preheat it to 350 degrees Fahrenheit (175 degrees Celsius). Now, grab a standard 9×5 inch loaf pan. I like to grease it really well with butter or cooking spray, and then dust it lightly with a bit of flour. This ensures our beautiful loaf slides out with zero fuss. You can also line it with parchment paper, leaving a little overhang on the sides, which makes lifting it out a breeze.
Step 2: Mix Dry Ingredients
In a large mixing bowl, whisk together the flour, baking soda, baking powder, cinnamon, nutmeg, and salt. Give it a good whisk to make sure all those leavening agents and spices are evenly distributed. This is super important so you don’t end up with pockets of baking soda or cinnamon in your finished bread. You want every bite to be perfectly spiced and rise beautifully.
Step 3: Mix Wet Ingredients
In a separate medium bowl, whisk together the granulated sugar, eggs, oil (or coconut oil), applesauce, and vanilla extract until they’re well combined and the mixture looks smooth. I always make sure my eggs are at room temperature for this; they incorporate so much better and create a more tender crumb. It’s a small step that really makes a difference!
Step 4: Combine
Now, pour the wet ingredients into the bowl with the dry ingredients. Using a spatula or a wooden spoon, mix until just combined. Be careful not to overmix! Seriously, this is the biggest tip for tender quick breads. A few streaks of flour are okay; they’ll disappear when you add the zucchini. Overmixing develops the gluten too much, which can make your bread tough, and we definitely don’t want that.
Step 5: Prepare Filling
While your batter is resting for a moment, quickly whip up the filling. In a small bowl, combine the brown sugar, flour, and cinnamon. If you’re adding nuts or chocolate chips, stir them in here too. This mixture is what will give you those lovely pockets of spiced sweetness throughout the loaf.
Step 6: Layer & Swirl
Gently fold the squeezed, grated zucchini into the batter. It might seem like a lot, but it will incorporate! Now, spoon about half of the batter into your prepared loaf pan. Sprinkle about half of the filling mixture over the top. Dollop the remaining batter over the filling, and then sprinkle the rest of the filling over the top of that. Now, grab a knife or a skewer and gently swirl the filling into the batter. Don’t go crazy; just a few gentle passes to create pretty patterns. This is where the magic happens visually!
Step 7: Bake
Place the loaf pan in your preheated oven. Bake for 50-65 minutes, or until a wooden skewer or toothpick inserted into the center comes out clean. Oven temperatures can vary, so start checking around the 50-minute mark. If the top starts to brown too quickly, you can loosely tent it with aluminum foil for the remainder of the baking time. The smell that fills your kitchen during this stage is just heavenly!
Step 8: Cool & Glaze
Once it’s baked, let the zucchini bread cool in the pan on a wire rack for about 10-15 minutes. This allows it to firm up slightly before you try to remove it. Then, carefully invert the pan to release the loaf onto the wire rack to cool completely. While it’s cooling, whisk together the powdered sugar, milk, and vanilla extract for the glaze until smooth. If it’s too thick, add a tiny bit more milk; if it’s too thin, add a bit more powdered sugar. Once the loaf is completely cool, drizzle the glaze over the top. I like to do this when it’s completely cool so the glaze stays lovely and thick.
Step 9: Slice & Serve
Once the glaze has set, it’s time to slice into this masterpiece! Use a serrated knife for the cleanest cuts. Serve at room temperature for the best texture and flavor. Enjoy every single moist, delicious bite!
What to Serve It With
This zucchini bread is honestly a superstar on its own, but it also plays well with others! For Breakfast, I love it toasted lightly and served with a dollop of Greek yogurt and a drizzle of honey, or simply with a strong cup of coffee. The warmth of the spices is just the perfect wake-up call. For Brunch, it elevates any spread beautifully. Serve it sliced alongside fresh fruit salad, some fluffy scrambled eggs, or maybe even some crispy bacon. A mimosa or a sparkling cider pairs wonderfully. If you’re serving it as Dessert, it’s divine with a scoop of vanilla bean ice cream or a dollop of freshly whipped cream. A small glass of dessert wine like a late-harvest Riesling can also be a lovely pairing. And for those Cozy Snacks moments, when you just need something comforting? It’s perfect on its own with a glass of milk, or alongside a warm cup of tea. My kids ask for this all the time when they get home from school, and I always feel good about giving them something so wholesome and delicious. My family tradition is to always have a slice with our afternoon tea on rainy days – it’s pure comfort!
Top Tips for Perfecting Your Zucchini Bread
I’ve made this so many times that I’ve picked up a few tricks along the way, and I want to share them with you so yours turns out just as amazing! For Zucchini Prep, the key is grating it and then squeezing out as much moisture as possible. I usually use the large holes on a box grater and then wrap the grated zucchini in a clean kitchen towel or cheesecloth and wring it out over the sink. This prevents your bread from becoming too wet and dense. Trust me, this step is non-negotiable for perfect texture! When it comes to Mixing Advice, remember my earlier warning: don’t overmix! Once the wet and dry ingredients are *just* combined, stop. A few tiny flour streaks are fine; they’ll disappear. Overmixing is the enemy of tender quick breads. For Swirl Customization, get creative! You don’t need to be an artist. Just dolloping the filling and then gently dragging a knife through it in zigzags or figure-eights creates a beautiful marbled effect. Don’t over-swirl, or the filling will get too mixed into the batter. For Ingredient Swaps, if you don’t have applesauce, you can substitute with an equal amount of extra oil or yogurt, though it might change the moisture slightly. For the nuts, feel free to omit them entirely if you have allergies or simply don’t like them, or swap them out for chocolate chips or even dried cranberries for a different flavor profile. When it comes to Baking Tips, always use the center rack of your oven for even heat distribution. If your oven tends to run hot, consider lowering the temperature by about 10-15 degrees Fahrenheit and baking for a few minutes longer. A wooden skewer test is your best friend for doneness – it should come out clean with no wet batter clinging to it. Lastly, Glaze Variations are endless! For a thinner glaze, add a touch more milk; for a thicker one, add more powdered sugar. You can also add a pinch of espresso powder for a mocha-flavored glaze, or a little lemon zest for a brighter, citrusy note. Some people even skip the glaze entirely and just dust with powdered sugar once cooled, which is equally lovely!
Storing and Reheating Tips
This zucchini bread is so good, you’ll want to savor it for as long as possible! For Room Temperature storage, keep the cooled, unglazed loaf tightly wrapped in plastic wrap or in an airtight container. It should stay wonderfully moist for up to 3 days. If you’ve already glazed it, it’s best to eat it within the first 2 days. For Refrigerator Storage, if you live in a particularly warm or humid climate, or just want it to last a bit longer, you can store it in an airtight container in the fridge for up to a week. The texture might become a little firmer, but it’s easily remedied. For Freezer Instructions, this bread freezes beautifully! Once completely cooled and unglazed, wrap the loaf tightly in plastic wrap, then in a layer of aluminum foil, or place it in a freezer-safe bag. It will keep well for up to 3 months. To thaw, unwrap it and let it come to room temperature on the counter for a few hours. You can also slice it before freezing and thaw individual slices as needed. For Glaze Timing Advice, I always recommend glazing the bread *after* it has completely cooled and is ready to be stored or served. If you glaze it while warm, the glaze will melt and likely drip off. If freezing, it’s best to freeze it unglazed and then glaze it once it’s thawed and ready to enjoy. This ensures a beautiful, intact glaze!
Frequently Asked Questions
Final Thoughts
So there you have it! My absolute favorite Zucchini Bread recipe. It’s more than just a recipe to me; it’s a little piece of home, a reminder of cozy afternoons, and proof that simple ingredients can create something truly spectacular. It’s incredibly forgiving, tastes amazing, and the smell while it bakes is just unbeatable. If you love a good quick bread that’s moist, flavorful, and always a crowd-pleaser, you’ve got to give this one a try. It’s perfect when you’re craving something sweet at 10pm but don’t want to bake a whole cake. I’m always so excited to hear from you when you try my recipes, so please let me know in the comments how yours turns out! I’d also love to hear about any fun variations you come up with. Happy baking, and enjoy every single crumb!
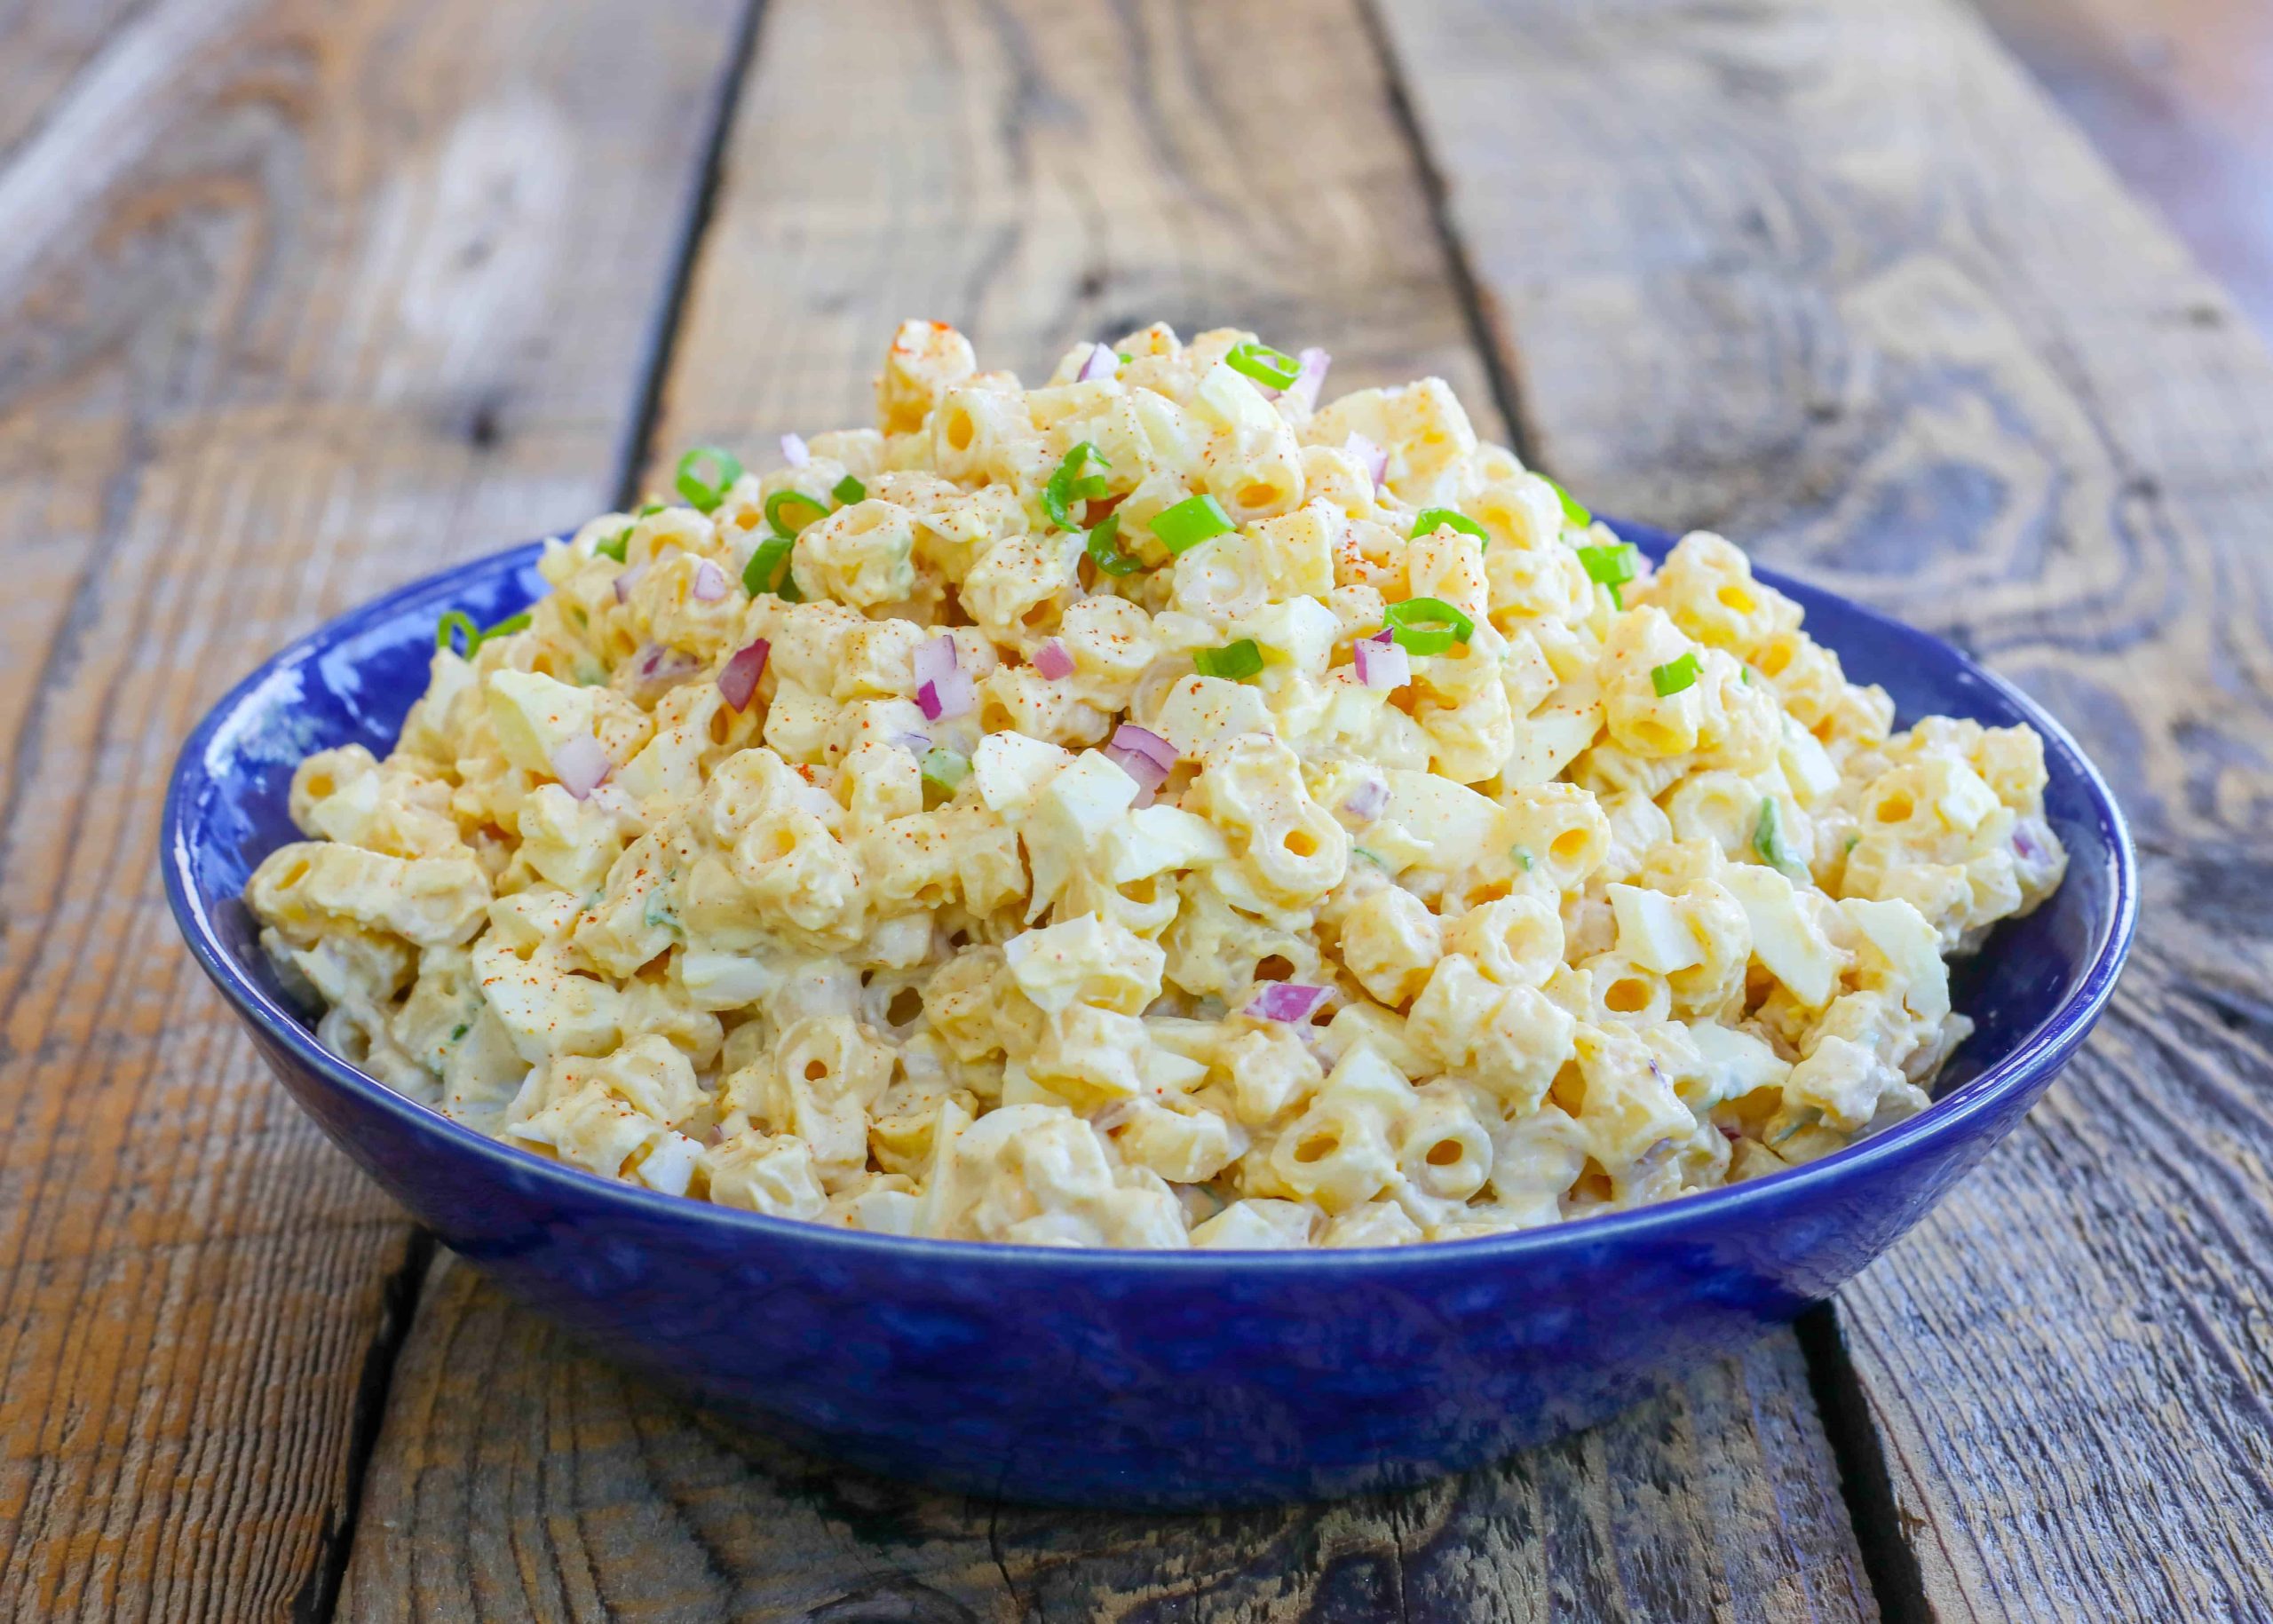
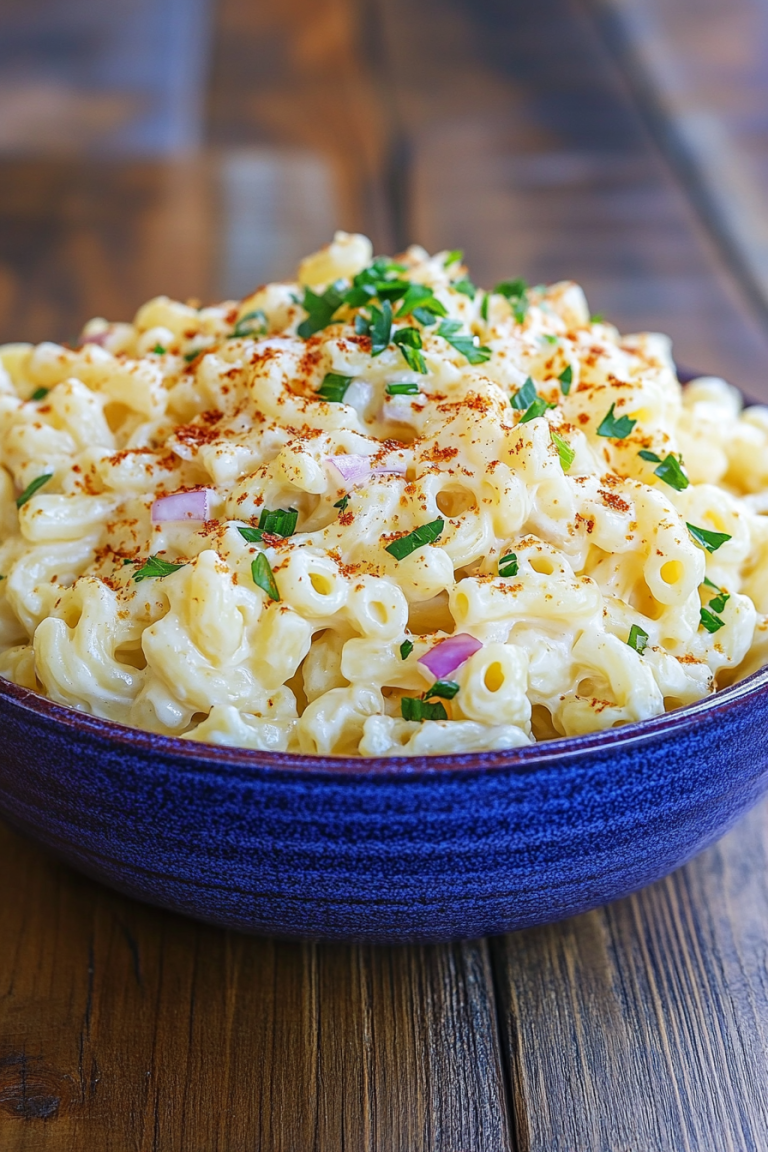
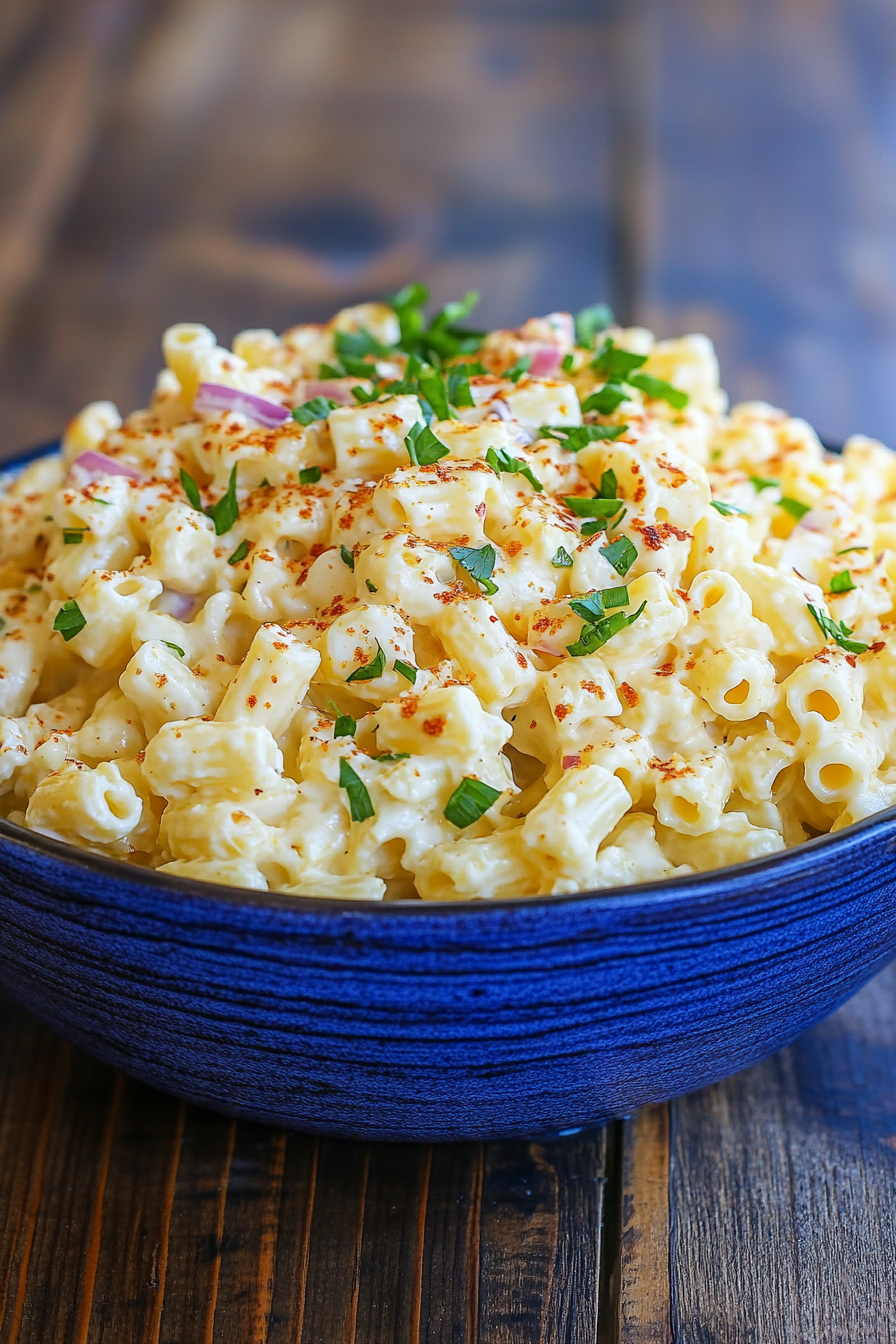
deviled egg pasta salad
Ingredients
Method
- Cook the pasta according to the directions on the package, adding a generous tablespoon or so of kosher salt to the water as it cooks. Drain in a colander and rinse until the pasta is cool. As the pasta is cooking, peel the eggs and separate the yolks from the whites.
- Chop the egg whites and set aside. Crush the yolks into a fine powder or use a wooden spoon to press them through a fine metal strainer into a large mixing bowl. Add the mayonnaise, mustard, vinegar, garlic, salt, paprika, and pepper to the bowl with the egg yolks. Whisk to combine.
- Add the cool pasta to the dressing in the bowl and stir to coat the pasta. Add the red onion, green onions, and egg whites. Stir to combine. Garnish with additional green onions and paprika, if desired. Serve immediately or cover and refrigerate until ready to serve. Enjoy!