Simple Peanut Banana Dip Your New Fave
You know those recipes that just feel like a warm hug? The ones you automatically reach for when you need a little comfort, or when you have a sudden urge to bake something that smells absolutely incredible? Well, this zucchini bread is *that* recipe for me. It’s the one I’ve made countless times, the one my kids ask for literally all the time, and the one that always disappears way too quickly. It’s got this perfect balance of moistness, warm spice, and just a hint of sweetness that makes it totally irresistible. Honestly, it’s so good, you’d never guess it started with a few humble zucchinis! If you’ve ever tried a dense, dry, or bland zucchini bread before, forget all about it. This one is a game-changer, and I’m so excited to share my secrets with you.
What is Zucchini bread?
So, what exactly *is* zucchini bread? At its heart, it’s a quick bread, meaning it uses chemical leaveners like baking soda and baking powder instead of yeast. Think of it like a muffin in loaf form, but way more sophisticated. The star ingredient, of course, is zucchini. Don’t worry, you won’t taste it directly! The zucchini adds incredible moisture and a tender crumb, making the bread super soft and decadent. It’s got this lovely earthy undertone that pairs perfectly with spices like cinnamon and nutmeg. The name itself just conjures up images of cozy kitchens and comforting aromas, and that’s exactly what this recipe delivers. It’s not overly fussy, it’s forgiving, and it’s just pure baked goodness.
Why you’ll love this recipe?
There are so many reasons why this zucchini bread has become a staple in my kitchen, and I just know you’re going to fall in love with it too. First off, the flavor is just out of this world. It’s perfectly spiced – not too much, not too little – with a beautiful aroma that fills the entire house the moment it starts baking. The texture is like a dream: incredibly moist, tender, and it stays that way for days. I’ve tested this with a touch of almond milk instead of regular milk, and it actually made it even creamier, if you can believe it! And talk about simple! This is a lifesaver on busy weeknights when I need a quick treat, or on a lazy Sunday morning. You basically just mix everything in two bowls and bake. No fancy equipment, no complicated techniques. Plus, it’s surprisingly budget-friendly, especially when zucchini is in season and you’re probably swimming in it anyway. What I truly adore about this recipe is its versatility. It’s fantastic on its own, but it’s also a perfect canvas for add-ins like chocolate chips, walnuts, or even a swirl of cream cheese. It’s that kind of dessert/snack that works for any occasion, from a simple afternoon pick-me-up to a nice dessert after dinner. It’s seriously the best of all worlds.
How do you make Zucchini bread?
Quick Overview
This recipe is wonderfully straightforward. You’ll mostly be combining dry ingredients in one bowl, wet ingredients in another, and then bringing them all together before folding in the star ingredient: finely grated zucchini. We’ll then bake it until golden and fragrant. The glaze is optional but highly recommended for that extra touch of sweetness and visual appeal. It truly comes together in a flash, making it perfect for those times you need a delicious homemade treat without a lot of fuss.
Ingredients
For the Main Batter:
This is where we build our flavor foundation. I always try to use good quality all-purpose flour here; nothing fancy needed, just a reliable brand. Make sure your baking soda and baking powder are fresh – that’s key for a good rise! For the sugar, I typically use a mix of granulated and brown sugar. The brown sugar adds this lovely depth and a bit of chewiness that you just don’t get with plain white sugar. And of course, the spices – cinnamon and nutmeg are my go-tos, but a pinch of cloves or allspice can be wonderful too if you like a warmer spice profile. I usually grab these spices from my local bulk bin so they’re always super fresh.
For the Filling:
Okay, this is where we can get a little playful! The zucchini is obviously the main “filling” ingredient, but I love adding things to it. Finely grated zucchini is non-negotiable – it needs to be fine so it disappears into the batter and imparts moisture without leaving chunky bits. Squeezing out excess moisture is crucial, and I’ll tell you why in a bit! I often add a handful of chopped walnuts or pecans for a lovely crunch, and for pure indulgence, I’ll toss in a cup of good quality chocolate chips. Mini chocolate chips tend to distribute more evenly, but any kind works!
For the Glaze:
This is the crowning glory, and it’s super simple. It’s just powdered sugar, a splash of milk (or even lemon juice for a bit of tang!), and a tiny bit of vanilla extract. The trick here is getting the consistency just right. You want it pourable but not too thin that it just runs off. It should be thick enough to coat the bread beautifully. I usually start with just a tablespoon of milk and add more, a teaspoon at a time, until it’s perfect.
Step-by-Step Instructions
Step 1: Preheat & Prep Pan
First things first, get that oven preheating to 350 degrees Fahrenheit (175 degrees Celsius). This is pretty standard for most quick breads, and it ensures even baking. While that’s warming up, grab a standard loaf pan – usually a 9×5 inch one works perfectly. Grease it really well with butter or baking spray, and then give it a light dusting of flour, tapping out any excess. This is an old-school trick my grandma taught me, and it guarantees your beautiful loaf won’t stick. You can also use parchment paper to line the pan for extra insurance, especially if you’re nervous about sticking.
Step 2: Mix Dry Ingredients
In a large mixing bowl, whisk together your all-purpose flour, granulated sugar, brown sugar, baking soda, baking powder, salt, cinnamon, and nutmeg. Give it a good whisk – this isn’t just about combining; it’s about distributing the leaveners and spices evenly throughout the flour. You don’t want to bite into a pocket of pure cinnamon, right? Make sure everything is nicely incorporated. It should look like a uniform, pale sandy mixture.
Step 3: Mix Wet Ingredients
In a separate, medium-sized bowl, whisk together your eggs, melted butter (make sure it’s cooled slightly so it doesn’t scramble the eggs!), milk, and vanilla extract. Whisk until everything is nicely emulsified and the color is pretty uniform. It should look smooth and slightly glossy. If you’re using oil instead of butter, this step is even simpler – just whisk it all together!
Step 4: Combine
Now, pour the wet ingredients into the bowl with the dry ingredients. Using a spatula or a wooden spoon, gently fold them together until *just* combined. This is a super important step. You do *not* want to overmix. A few streaks of flour are okay at this stage. Overmixing develops the gluten in the flour too much, which can lead to a tough, dense bread. We want tender! So, easy does it here.
Step 5: Prepare Filling
This is where our star, the zucchini, comes in. Grate your zucchini using the fine side of a box grater or a food processor with the grating attachment. You’ll need about 2 cups, packed. Now, here’s the crucial part: place the grated zucchini in a clean kitchen towel or cheesecloth and squeeze out as much liquid as you possibly can. Seriously, wring it out like you mean it! Excess water will make your bread gummy. Once squeezed, gently fold the grated zucchini into your batter. If you’re adding nuts or chocolate chips, fold them in now too, along with the zucchini.
Step 6: Layer & Swirl
Pour the batter into your prepared loaf pan. Smooth the top slightly with your spatula. Now, if you’re feeling fancy, you can add a swirl. Some people like to add a bit of extra cinnamon and sugar, or even a dollop of cream cheese mixed with a little sweetener, on top of the batter and then swirl it in with a knife. I usually just keep it simple, but a swirl adds a beautiful visual element and an extra burst of flavor. Just drag a knife or skewer through the batter a few times to create a marbled effect.
Step 7: Bake
Pop that pan into your preheated oven. Bake for about 50-65 minutes. The exact time will depend on your oven, so keep an eye on it. You’ll know it’s done when a wooden skewer or toothpick inserted into the center comes out clean, or with just a few moist crumbs attached. The top should be a beautiful golden brown, and it should smell absolutely divine. If the top is browning too quickly, you can loosely tent it with aluminum foil for the last 15-20 minutes of baking.
Step 8: Cool & Glaze
Once baked, let the bread cool in the pan on a wire rack for about 10-15 minutes. This allows it to set up properly. Then, carefully invert the loaf onto the wire rack to cool completely. Don’t try to glaze it while it’s hot, or the glaze will just melt and disappear! Wait until it’s mostly or completely cooled. Then, whisk together your powdered sugar, vanilla, and a tiny bit of milk until you reach your desired pourable consistency. Drizzle it over the top, letting it drip down the sides. It’s so satisfying to watch!
Step 9: Slice & Serve
Once the glaze has set slightly (or fully, if you prefer it less gooey), it’s time to slice into this masterpiece! Use a serrated knife for the cleanest cuts. I usually slice it about 3/4 inch thick. It’s delicious served at room temperature, but honestly, a slightly warm slice is pure bliss. I love to serve it with a dollop of butter, or just as is. Enjoy every single bite!
What to Serve It With
This zucchini bread is wonderfully versatile and can fit into almost any meal or occasion. For a quick and satisfying breakfast, I love a slice toasted with a little butter and a steaming mug of coffee. It’s hearty enough to keep you going, and that hint of sweetness is just the perfect way to start the day. It also makes an elegant addition to a brunch spread. Serve it on a pretty platter, perhaps with some fresh berries on the side for color. A mimosa or a nice cup of tea pairs beautifully. When it comes to dessert, it’s fantastic on its own, but a drizzle of extra glaze or a scoop of vanilla bean ice cream takes it to a whole new level. It’s perfect for satisfying a sweet craving after dinner without having to bake a whole cake. And for those cozy snacks, it’s unbeatable. Grab a slice (or two!) with a glass of milk while you’re curled up with a good book. My family also loves it as an after-school treat, often with a smear of cream cheese. It’s just one of those universally loved treats that brings a smile to everyone’s face.
Top Tips for Perfecting Your Zucchini Bread
I’ve made this bread more times than I can count, and through all those bakes, I’ve picked up a few tricks that I think make all the difference. Here are my top tips to ensure your zucchini bread turns out perfectly every single time.
Zucchini Prep: This is non-negotiable. Grate your zucchini on the fine side of a box grater. Then, and this is crucial, SQUEEZE out ALL the excess moisture. Use a clean kitchen towel or cheesecloth and wring it out like you’re trying to get every last drop of water. I learned this the hard way after one particularly gummy loaf! The less water, the more tender and less dense your bread will be. Also, no need to peel the zucchini; the skin adds nutrients and color and breaks down beautifully.
Mixing Advice: Remember what I said about overmixing? It’s the cardinal sin of quick breads. Mix the wet and dry ingredients until *just* combined. A few flour streaks are perfectly fine. The batter should look slightly lumpy. Overmixing develops the gluten, resulting in a tough texture. Embrace the lumps!
Swirl Customization: While the plain loaf is delicious, a swirl adds such visual appeal. For a simple cinnamon swirl, mix about 1/4 cup of brown sugar with 1 teaspoon of cinnamon. After pouring the batter into the pan, sprinkle this mixture over the top, then swirl it through gently with a knife. For a cream cheese swirl, beat 4 oz of cream cheese with 2 tablespoons of sugar and 1/4 teaspoon of vanilla until smooth. Dollop this over the batter and swirl. Don’t over-swirl, or the colors will blend too much.
Ingredient Swaps: I’ve experimented with quite a bit here! For a richer batter, you can swap out half of the milk for buttermilk or sour cream. For a dairy-free version, almond milk or oat milk works beautifully, and you can use melted coconut oil or a neutral vegetable oil instead of butter. If you don’t have both granulated and brown sugar, you can use all of one or the other, but the mix gives the best texture and flavor balance. I’ve even tested this with a blend of whole wheat flour and all-purpose flour (about 50/50) for a heartier loaf, but it can result in a slightly denser crumb.
Baking Tips: Always use the middle rack of your oven for even heat distribution. If you find your loaves are browning too quickly on top before the inside is cooked, loosely tent the pan with aluminum foil for the last 20-30 minutes of baking. A toothpick test is your best friend here – insert it into the thickest part of the bread; it should come out with just a few moist crumbs attached, not wet batter.
Glaze Variations: The basic powdered sugar glaze is classic, but you can change it up! For a lemony zing, substitute some of the milk with fresh lemon juice. A little orange zest can also add a lovely brightness. If you prefer a cream cheese frosting, simply double the cream cheese swirl recipe and frost the cooled loaf. For a simpler finish, a light dusting of powdered sugar is always elegant.
Storing and Reheating Tips
One of the best things about this zucchini bread is how well it keeps! It stays wonderfully moist for several days, which is why it’s perfect for making ahead. For storing at room temperature, I usually let it cool completely, then wrap it tightly in plastic wrap or place it in an airtight container. It should stay fresh and delicious for about 3-4 days. Just make sure your kitchen isn’t excessively warm or humid. If you live in a warmer climate or plan to keep it longer than a few days, I’d opt for refrigerator storage. Wrap it well, and it will keep beautifully for up to a week. The texture might firm up slightly in the fridge, but it’s easily remedied by a quick warm-up. If you want to store it for even longer, this bread freezes like a dream. Wrap it tightly in a couple of layers of plastic wrap, then in aluminum foil or a freezer bag. It can last in the freezer for up to 3 months. To thaw, simply unwrap it and let it come to room temperature, or pop it in a low oven for a few minutes. For the glaze timing, I generally add the glaze just before serving if I’m going to eat it within a day or two. If I’m freezing or storing it for longer, I’ll often glaze individual slices as I serve them, or I’ll store the glaze separately and apply it fresh. This prevents the glaze from getting sticky or weird during longer storage.
Frequently Asked Questions
Final Thoughts
Seriously, this zucchini bread is just one of those recipes that makes you feel like a baking rockstar without breaking a sweat. It’s the perfect blend of wholesome goodness and decadent indulgence, and the fact that it’s so forgiving makes it ideal for bakers of all levels. It’s the kind of treat that makes your home feel cozy and welcoming, filling it with the most wonderful aroma. I truly hope you give this recipe a try. It’s become a beloved classic in my house, and I have a feeling it might just become one in yours too. If you’re a fan of moist, spiced baked goods, you might also want to check out my Spiced Apple Crumble Muffins – they’re another family favorite!
I can’t wait to hear how yours turns out! Let me know in the comments below if you try it, and what your favorite add-ins or variations are. Happy baking!
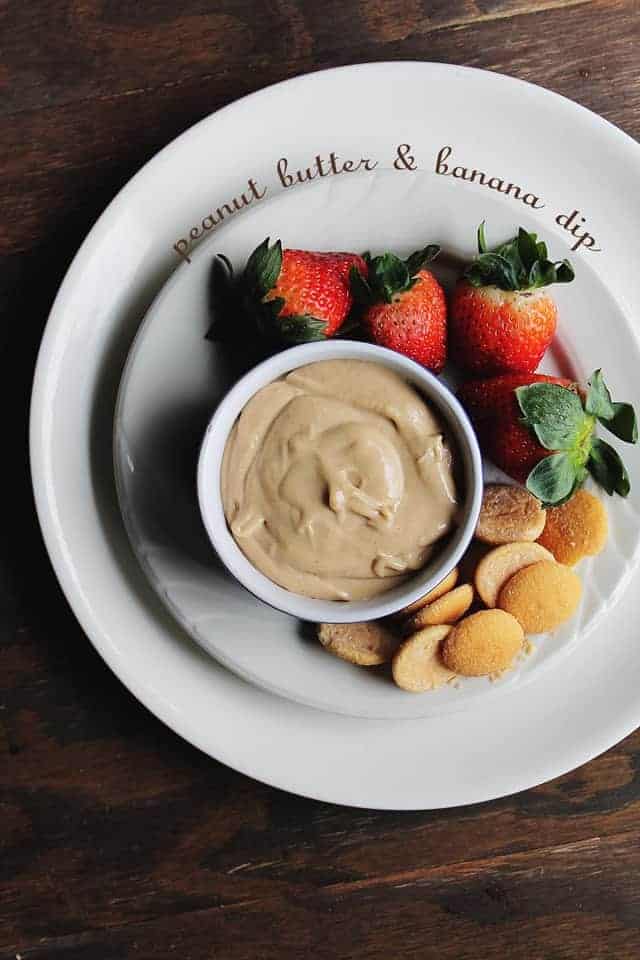
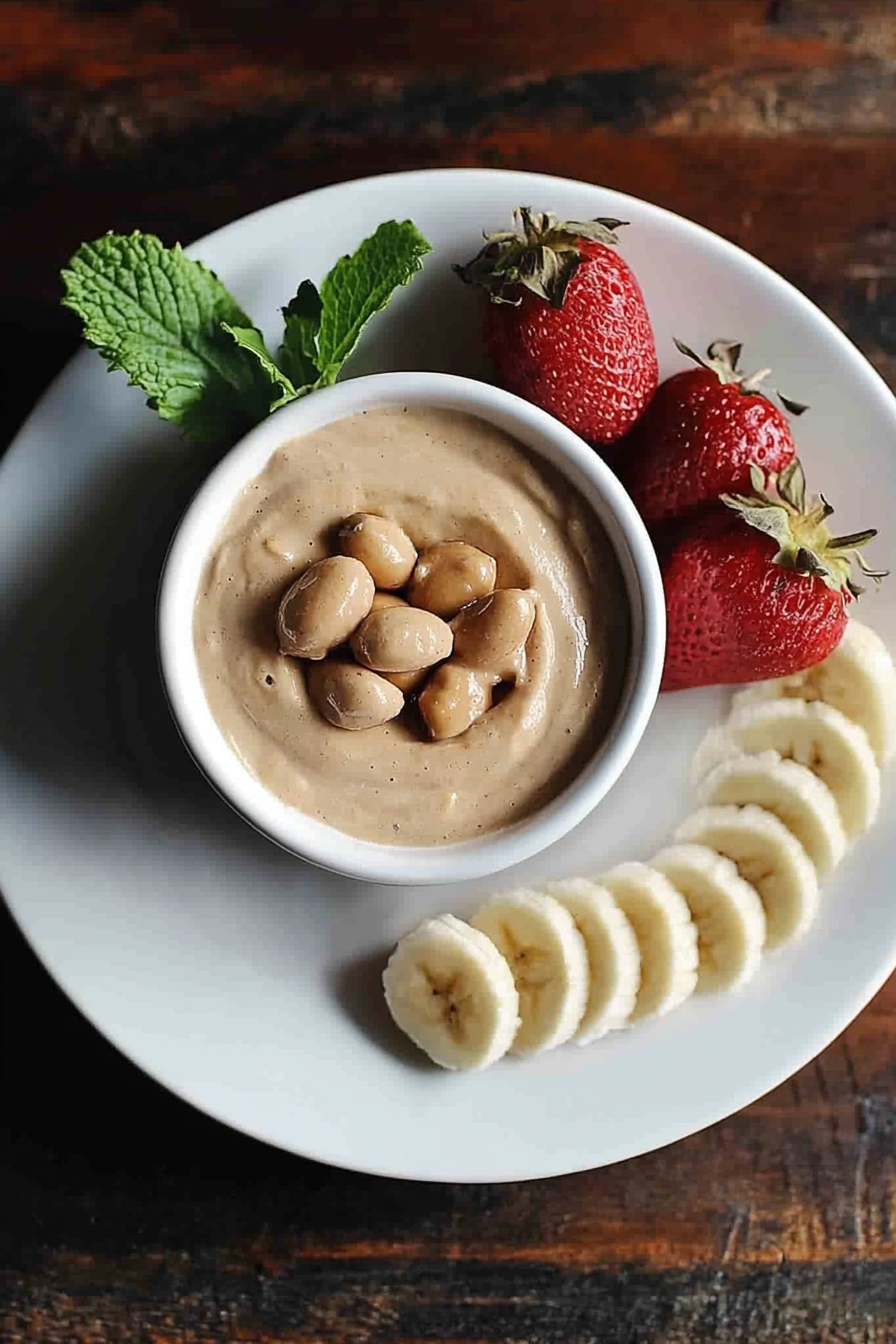
peanut banana dip
Ingredients
Method
- Combine all ingredients, excluding dipping food, into a blender and pulse a few times until thoroughly combined.
- Stir before serving.
- Serve with fruit, cookies, chips, pretzels, etc...