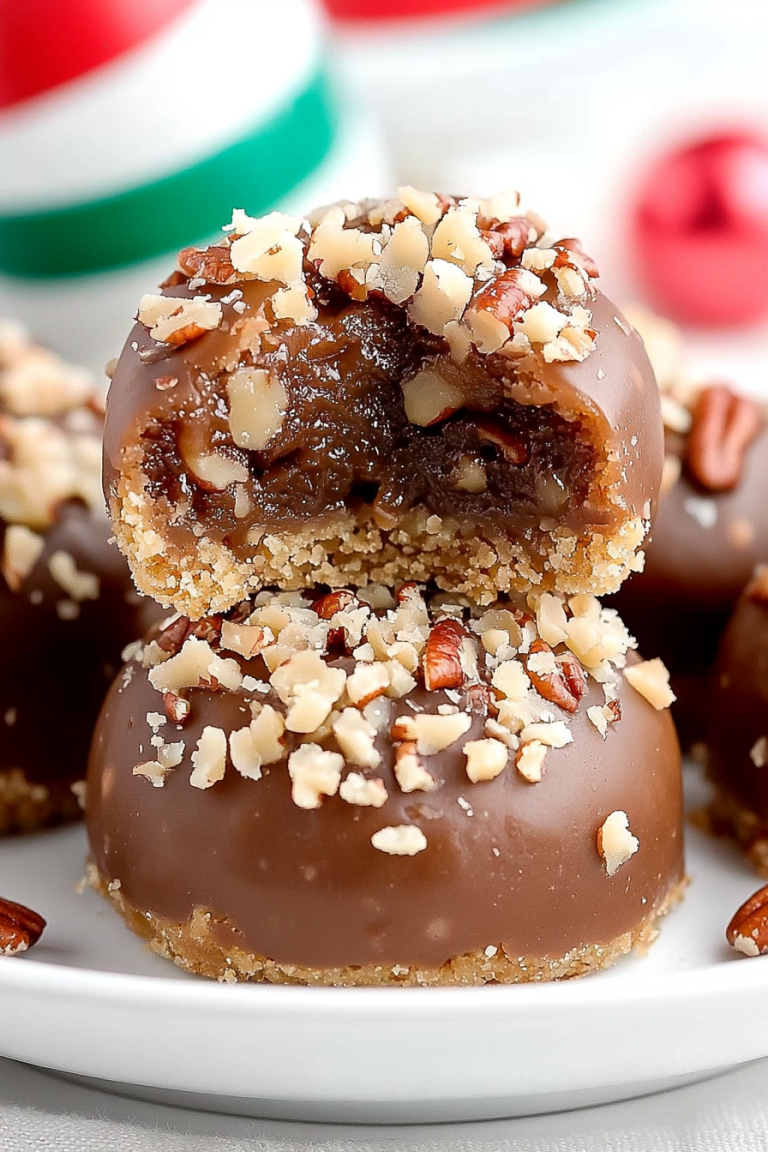
Easy Christmas Pretzel Delight Recipe
Oh my gosh, friends, I am SO excited to share this recipe with you today. This isn’t just any zucchini bread; this is *the* zucchini bread. The one that makes my house smell like heaven, the one my kids beg for, and the one I instinctively reach for when that 10pm sweet craving hits but I don’t want to commit to a whole cake. It’s moist, it’s perfectly spiced, and it has this incredible depth of flavor that you just don’t find in every loaf. If you’ve ever had a sad, dry, bland zucchini bread before, forget about it. This one is a game-changer. It’s like the cozy hug your tastebuds have been waiting for, and honestly, it’s even better than my grandma’s famous banana bread, and that’s saying something!
What is Zucchini bread?
So, what exactly *is* zucchini bread? At its heart, it’s a quick bread, which means no yeast and no complicated rising times. It’s basically a delicious way to use up all that extra zucchini that seems to magically appear in gardens (or at the grocery store!). The zucchini, when grated, almost disappears into the batter, but it works magic. It adds an unbelievable amount of moisture, making the bread incredibly tender and rich. Think of it as a really moist, flavorful cake that happens to be perfect for breakfast, brunch, or a snack. It’s the kind of recipe that’s so forgiving, even if you’re new to baking, you’ll nail it. It’s essentially a spiced cake batter with the secret ingredient that makes it a marvel.
Why you’ll love this recipe?
Honestly, there are so many reasons why I keep coming back to this zucchini bread recipe, and I have a feeling you will too. First off, the flavor. It’s not just “sweet”; it’s warm, comforting, and perfectly balanced. The cinnamon and nutmeg sing, and if you’re feeling adventurous, a pinch of cloves or allspice really takes it to the next level. The texture is just divine – super moist, tender, and never, ever dry. I’ve tried it with different types of zucchini, from the garden giants to the smaller, sweeter ones, and it always comes out amazing. It’s also ridiculously easy to make, which is a lifesaver on busy weeknights when you need a quick treat. You basically just mix wet ingredients, mix dry ingredients, and combine. No stand mixer needed! And let’s talk about budget-friendliness – zucchini is usually pretty affordable, and the other pantry staples are things most of us already have on hand. Plus, it’s so versatile! You can add nuts, chocolate chips, or even a swirl of cream cheese, and it’s still fantastic. What I love most about this recipe, though, is how happy it makes people. It’s a crowd-pleaser, plain and simple. It’s also a great alternative to something like my classic chocolate chip cookie recipe when you want something a bit more substantial but still wonderfully sweet.
How do you make Zucchini bread?
Quick Overview
This recipe is all about simplicity and amazing results. You’ll start by preparing your zucchini (we’ll get to that!), then whisking together your wet and dry ingredients separately before bringing them all together. The magic really happens when it bakes, filling your kitchen with the most incredible aroma. It’s a straightforward process that guarantees a perfectly moist and flavorful loaf every single time. Honestly, it’s so easy, I often get the kids involved in measuring the dry ingredients!
Ingredients
For the Main Batter:
You’ll need about 2 cups of grated zucchini. Make sure to squeeze out as much excess moisture as you can – this is KEY to avoiding a soggy loaf! I like to use the large holes on my box grater. About 2-3 medium zucchinis usually yield this amount. And while you *can* use zucchini straight from the garden, make sure they’re not too watery. I always feel like a good quality all-purpose flour makes a difference, so grab your favorite. You’ll also need granulated sugar and packed brown sugar for that perfect sweet and slightly caramel note. For richness, unsalted butter, softened to room temperature (this is important for creaming!), and a couple of large eggs. And don’t forget the leavening agents: baking soda and baking powder, plus a good pinch of salt to balance everything out. Vanilla extract is a must for that comforting flavor base.
For the Filling:
This is where we amp up the flavor! A generous amount of ground cinnamon is essential, along with a whisper of nutmeg. If you have ground cloves, just a tiny pinch adds an extra layer of warmth. I also love adding chopped walnuts or pecans for a little crunch, but they’re totally optional. Some people even throw in chocolate chips here, which is also divine!
For the Glaze:
This is totally optional, but oh-so-worth-it! A simple powdered sugar glaze made with a little milk or cream and a splash of vanilla. You can also add a touch of lemon zest for brightness or a bit more cinnamon if you’re a cinnamon lover like me! Getting the consistency right is important – you want it thick enough to coat but not so thick it won’t drizzle.
Step-by-Step Instructions
Step 1: Preheat & Prep Pan
First things first, let’s get your oven preheated to 350°F (175°C). While that’s warming up, grease and flour a 9×5 inch loaf pan. You can also line it with parchment paper, leaving some overhang on the sides so you can easily lift the loaf out later. This step ensures your beautiful bread doesn’t stick!
Step 2: Mix Dry Ingredients
In a large bowl, whisk together your all-purpose flour, granulated sugar, brown sugar, baking soda, baking powder, salt, cinnamon, nutmeg, and any other spices you’re using. Whisking them thoroughly ensures the leavening agents are evenly distributed, which means a perfectly even rise. You want to see no streaks of flour or spice.
Step 3: Mix Wet Ingredients
In a separate medium bowl, cream together your softened butter and both sugars until light and fluffy. This is where the magic starts for that tender crumb. Beat in the eggs one at a time, making sure each is fully incorporated before adding the next. Stir in the vanilla extract and your squeezed, grated zucchini. Don’t worry if it looks a little messy; it’s all going to come together!
Step 4: Combine
Now, here’s a crucial step: gently add the dry ingredients to the wet ingredients. Mix them together *just* until they are combined. Overmixing develops the gluten too much, which can lead to a tough loaf. A few streaks of flour are okay; they’ll disappear during baking. This is the golden rule for quick breads!
Step 5: Prepare Filling
If you’re adding nuts or chocolate chips, gently fold them into the batter now. If you’re doing a swirl, you’ll prepare that separately. For a simple swirl, you can mix a little extra cinnamon and a tablespoon or two of sugar together, then sprinkle it over the batter before swirling.
Step 6: Layer & Swirl
Pour about half of the batter into your prepared loaf pan. If you’re doing a swirl, sprinkle half of your cinnamon-sugar mixture over the top. Then, pour the remaining batter on top and sprinkle the rest of the cinnamon-sugar mixture. Now, take a knife or a skewer and gently swirl it through the batter a few times. Don’t overdo it; you want distinct swirls, not a muddy mess!
Step 7: Bake
Bake in your preheated oven for 50-65 minutes. The baking time can vary depending on your oven, so start checking around the 50-minute mark. The bread is done when a wooden skewer or toothpick inserted into the center comes out clean, or with just a few moist crumbs attached. If the top is browning too quickly, you can loosely tent it with foil.
Step 8: Cool & Glaze
Once baked, let the loaf cool in the pan for about 10-15 minutes. This allows it to set up nicely. Then, carefully invert it onto a wire rack to cool completely. If you’re adding the glaze, wait until the bread is completely cool. In a small bowl, whisk together powdered sugar, milk/cream, and vanilla until smooth and pourable. Drizzle it over the top of the cooled loaf, letting it drip down the sides. It’s pure bliss!
Step 9: Slice & Serve
Once the glaze has set a bit, slice your masterpiece and enjoy! I find it’s best served at room temperature. The smell alone will make everyone gather around!
What to Serve It With
This zucchini bread is so versatile, it truly shines in so many settings. For a simple, cozy breakfast, I love it toasted with a smear of butter and a hot cup of coffee. It’s just the perfect way to start the day without feeling heavy. For a more elegant brunch spread, I’ll slice it thinly and arrange it on a platter with fresh berries and maybe a dollop of whipped cream or a side of yogurt. It pairs beautifully with mimosas or a nice cup of tea. As a dessert, it’s a winner all on its own, but you can certainly elevate it. A scoop of vanilla bean ice cream on the side, or a drizzle of chocolate ganache, makes it feel extra special. It’s also fantastic with a warm caramel sauce. For those cozy, low-key evenings when you just need a little something sweet, it’s perfect with a glass of milk. My kids absolutely devour it this way after school, and it’s so much better for them than a sugary granola bar. It’s one of those treats that just fits every moment.
Top Tips for Perfecting Your Zucchini Bread
Over the years, I’ve learned a few things that really make this zucchini bread sing. First, about the zucchini prep: squeezing out as much moisture as possible is non-negotiable. I usually grate my zucchini, then put it in a fine-mesh sieve over the sink and press down on it with a spoon or my hands. You’ll be amazed at how much water comes out! If you skip this, your bread can turn out gummy and heavy. For mixing, remember the “just combined” rule. Seriously, don’t go crazy with the mixing. A few lumps are fine; they’ll bake out. Overmixing is the arch-nemesis of tender quick breads. When it comes to the swirl, I find that a light hand works best. You want to see distinct ribbons of cinnamon and sugar, not a uniformly brown batter. A gentle pull of a knife through the batter is all you need. If you’re looking for ingredient swaps, I’ve experimented a lot! For a dairy-free version, I’ve had great success using almond milk in the glaze and a good quality plant-based butter in the batter. I even tested this with almond milk for the batter itself and it actually made it even creamier! For a little extra richness, you can swap out some of the all-purpose flour for whole wheat, but don’t do more than 50% or it might get too dense. And for baking, always trust your nose and the skewer test. Ovens can be so finicky, so getting to know yours is key. If the top is getting too dark before the inside is cooked, just loosely tent a piece of foil over the top for the remaining baking time. For glaze variations, if you don’t have powdered sugar, a simple dusting of powdered sugar through a sieve after cooling is lovely. Or, you can whisk in a little melted chocolate for a chocolate glaze. The possibilities are endless!
Storing and Reheating Tips
This zucchini bread is so good, you’ll want to savor it, and thankfully, it stores beautifully. At room temperature, if it’s completely cooled, it will stay fresh for about 2-3 days. Just wrap it tightly in plastic wrap or place it in an airtight container. The moisture from the zucchini helps it stay tender. If you need it to last longer, the refrigerator is your friend. Wrap it well and it can last up to a week. Honestly, I often find it’s even better on the second day! For longer storage, freezing is your best bet. I like to slice the cooled bread first, then wrap each slice individually in plastic wrap, and then place them all in a freezer-safe bag or container. This way, you can just grab a slice or two whenever the craving strikes. It will keep in the freezer for up to 3 months. To reheat, you can pop a slice in the toaster oven for a few minutes until warmed through, or gently microwave it for about 15-20 seconds. If you’ve glazed your bread, it’s best to add the glaze *after* it’s been reheated and cooled slightly, especially if you’re freezing it, as the glaze can get a bit sticky in the freezer. Or, you can skip the glaze altogether if you plan to freeze it and add it just before serving.
Frequently Asked Questions
Final Thoughts
So there you have it, my absolute favorite zucchini bread recipe! I truly hope you give this one a try. It’s more than just a recipe for me; it’s a taste of home, a reliable treat, and a delicious way to use up those garden veggies. It’s the kind of baking that feels good, smells amazing, and tastes even better. If you end up making it, please, please come back and tell me how it turned out! I’d love to hear your variations, your family’s reactions, or any little tweaks you made. You can leave a comment below or even tag me on social media – I’m always looking for more inspiration! If you enjoyed this, you might also love my recipe for moist blueberry muffins or my easy apple crumble. Happy baking, my friends!
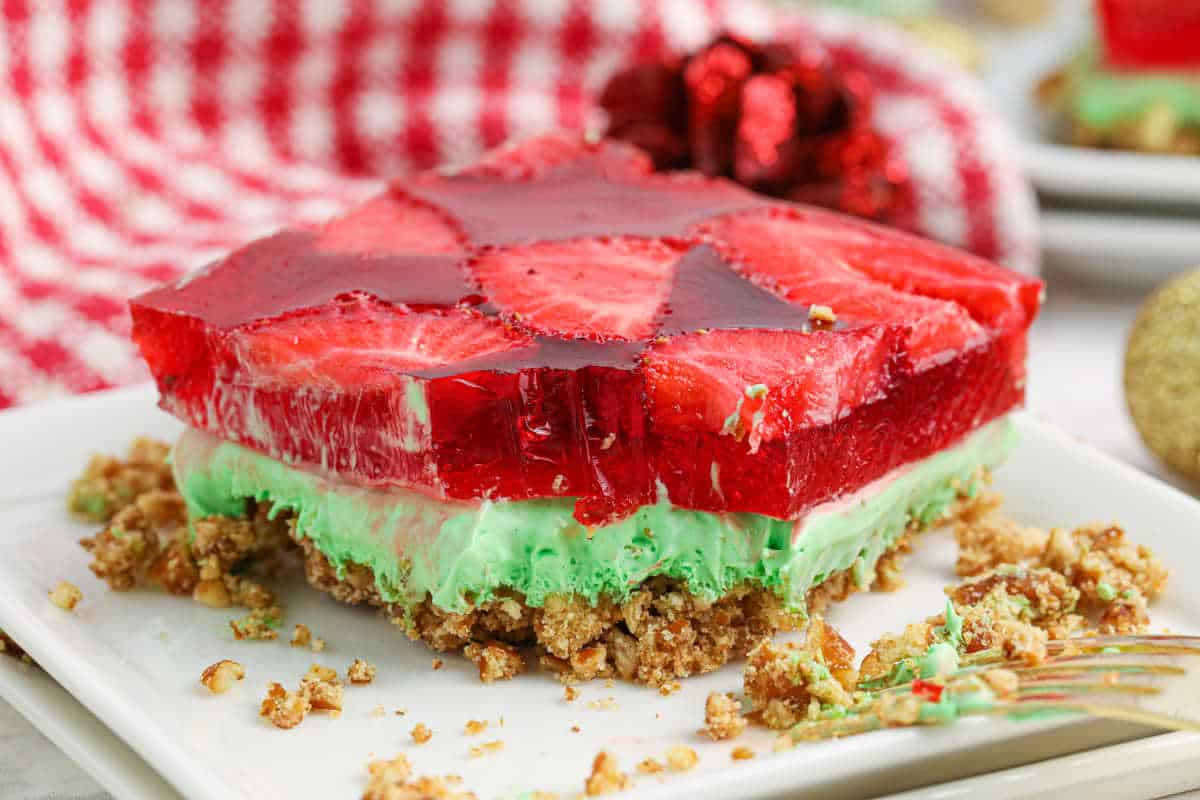
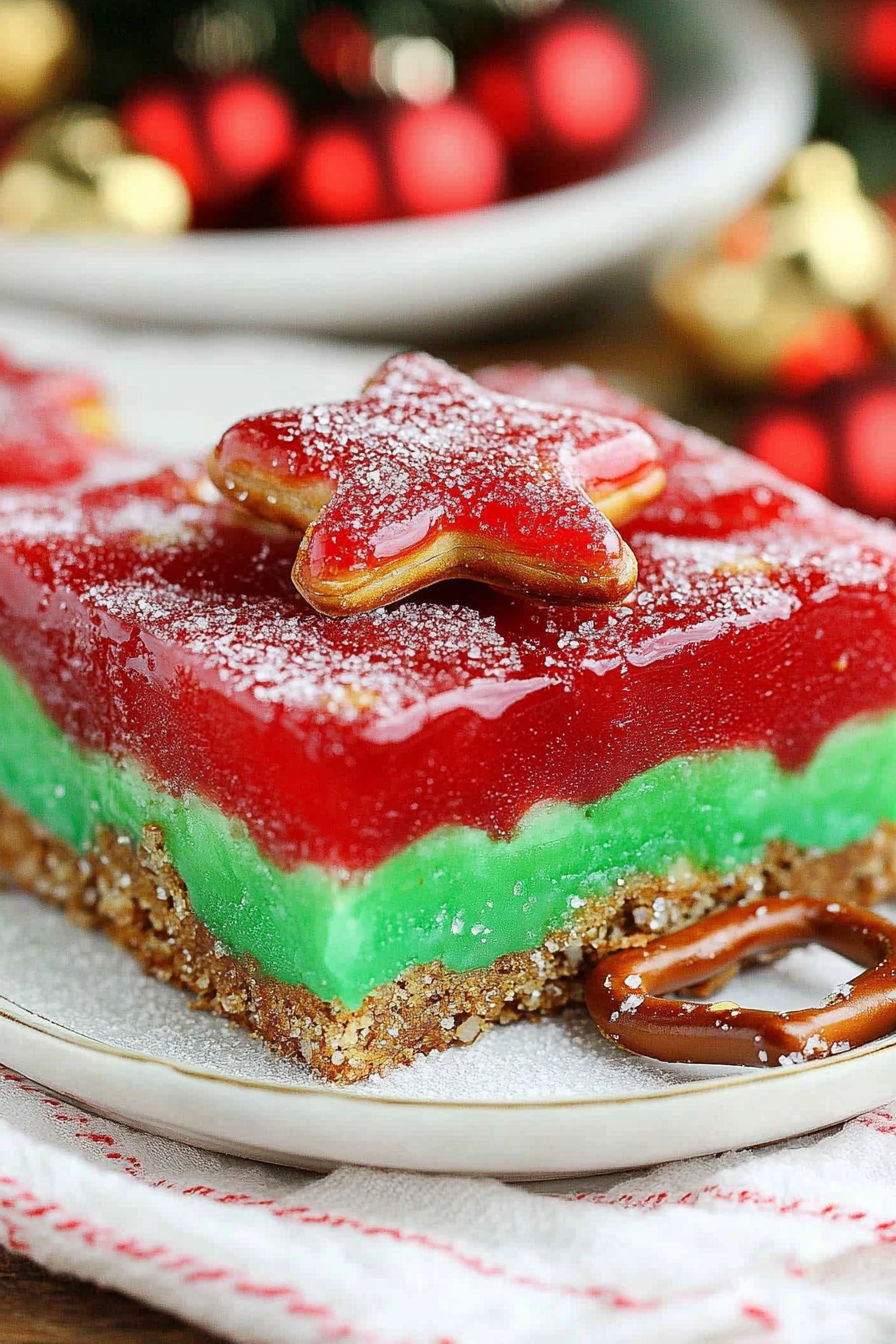
Christmas pretzel delight
Ingredients
Method
- Preheat the oven to 400°F (200°C) and grease the bottom of a 9x13 inch baking dish.
- Mix together crushed pretzels, melted butter, and 3 tablespoons of sugar in a mixing bowl until well combined.
- Press the pretzel mixture evenly into the bottom of the prepared baking dish. Bake in the preheated oven for 8 minutes. Remove from the oven and allow to cool completely.
- In a large mixing bowl, blend the softened cream cheese and 1 cup of sugar with a hand mixer on medium-high speed until smooth and creamy.
- Gently fold in the thawed whipped topping until just combined.
- Stir in several drops of green gel food coloring until you reach your desired shade of festive green.
- Carefully spread the green cream cheese mixture over the cooled pretzel crust. Place the baking dish in the refrigerator for 1 hour to chill and set.
- Once the cream cheese mixture has set, prepare the jello topping.
- In a bowl, mix together the boiling water with the strawberry Jello until it is fully dissolved. Allow the Jello mixture to cool down significantly and slightly set (it should still be pourable but not hot).
- Stir the sliced strawberries into the cooled Jello mixture. Gently pour and spread this strawberry-Jello topping over the set green cream cheese layer.
- Return the baking dish to the refrigerator and chill for 4 to 6 hours, or preferably overnight, until the Jello layer is fully set and firm. Slice and serve cold.