Easy Lighter Baked Macaroni Cheese
You know those recipes that just *feel* like home? The ones that have been passed down, tweaked a little here and there, and always, *always* turn out perfectly? This chocolate zucchini bread is exactly that for me. It’s the kind of thing I whip up when the weather turns a bit chilly, or when the kids have friends over and I need a quick, crowd-pleasing treat. Honestly, it’s the best way I know to sneak a little extra goodness into something everyone devours without question. Forget those dry, crumbly versions you might have tried; this one is unbelievably moist, deeply chocolatey, and you’d never guess the secret ingredient! It’s like a hug in loaf form, and my family begs for it constantly. If you’ve ever been disappointed by zucchini bread before, trust me, this recipe will change your mind forever. It’s hands-down my favorite way to use up those summer zucchinis that seem to multiply overnight!
What is chocolate Zucchini bread?
So, what exactly *is* this magical chocolate zucchini bread I keep raving about? Think of it as your classic, comforting quick bread, but with a decadent chocolatey twist and the not-so-secret ingredient that makes it unbelievably moist: zucchini! I know, I know, zucchini in a sweet treat might sound a little… well, green. But trust me on this one. When grated and baked into a batter, zucchini practically disappears, lending its moisture and a subtle, almost undetectable earthiness that just makes everything taste better. The “chocolate” part is where things get really fun. We’re not just talking a hint of cocoa; this loaf is rich, deeply chocolatey, with tender crumbs that melt in your mouth. It’s essentially a moist chocolate cake disguised as a healthy-ish bread, making it the ultimate guilt-free indulgence. The name says it all, really – it’s chocolate, it’s zucchini, and it’s the best darn bread you’ll ever bake.
Why you’ll love this recipe?
Let me count the ways! First off, the *flavor*. Oh, the flavor! It’s intensely chocolatey, but not overly sweet, which I really appreciate. The zucchini adds this incredible, almost creamy texture that’s unlike any other chocolate bread I’ve tried. It’s just so tender and rich. Then there’s the *simplicity*. Seriously, this is a one-bowl wonder for the most part, and it comes together in less time than it takes to preheat your oven. It’s a lifesaver on busy weeknights when you need something sweet but don’t have a lot of time or energy. Plus, it’s surprisingly *cost-efficient*. Zucchini is often super affordable, especially when it’s in season, and the rest of the ingredients are pantry staples. What I love most about this is its *versatility*. It’s perfect with a cup of coffee in the morning, as a mid-afternoon pick-me-up, or even a light dessert after dinner. It’s also a fantastic way to use up those garden zucchinis that are practically begging to be baked into something delicious. If you enjoy my famous blueberry muffins or my easy banana bread, you’re going to adore this chocolate zucchini bread. It’s got that same comforting, homemade goodness, just with an extra layer of chocolatey magic.
How do I make Zucchini bread?
Quick Overview
This recipe is wonderfully straightforward. You’ll basically whisk together your dry ingredients, then your wet ingredients, combine them gently, fold in the grated zucchini, and bake. That’s it! The key is not to overmix, and the zucchini does all the heavy lifting in terms of moisture. The result is a loaf that’s unbelievably tender and bursting with chocolate flavor. It’s truly one of the easiest and most rewarding bakes I know, perfect even for beginner bakers.
Ingredients
For the Main Batter:
You’ll need 2 cups of all-purpose flour. I always use unbleached for a slightly better texture, but any AP flour works. Make sure it’s spooned and leveled, not scooped directly from the bag, or you might end up with a dense loaf! Then, we have 3/4 cup of unsweetened cocoa powder. I prefer Dutch-processed cocoa for a richer, darker color and a smoother flavor, but regular unsweetened is fine too. Next is 1 1/2 teaspoons of baking soda – this is crucial for that lovely lift and tender crumb. A pinch of salt, about 1/2 teaspoon, to balance all that sweetness and chocolate. And last, 1 1/2 cups of granulated sugar. Don’t be tempted to cut back too much here; it helps with tenderness and moisture too!
For the Wet Ingredients & Zucchini:
You’ll need 2 large eggs, at room temperature. This helps them emulsify better. Then, 1/2 cup of melted butter, unsalted is best so you can control the saltiness. You could also use a neutral oil like vegetable or canola oil if you prefer. About 1/2 cup of milk or buttermilk – buttermilk adds a lovely tang and extra tenderness, but regular milk works perfectly fine. I’ve even tested this with almond milk and it actually made it even creamier! Then comes our star: 2 cups of grated zucchini. Make sure it’s packed lightly. Don’t peel it! The peel adds fiber and a lovely fleck of color. And for that extra kick of flavor, 1 teaspoon of vanilla extract. And of course, for the ultimate chocolate experience, 1 cup of chocolate chips. I love a mix of semi-sweet and dark chocolate chips for the best flavor profile, but use your favorite!
For the Optional Glaze:
This is totally optional, but it takes it over the top! You’ll need 1 cup of powdered sugar, sifted to avoid lumps. Then, 2-3 tablespoons of milk or cream for consistency. A dash of vanilla extract, about 1/2 teaspoon, and a tablespoon or two of cocoa powder if you want a chocolate glaze. You can adjust the milk to get your desired drizzle thickness.
Step-by-Step Instructions
Step 1: Preheat & Prep Pan
First things first, get your oven preheated to 350 degrees Fahrenheit (175 degrees Celsius). This ensures even baking right from the start. Then, grab a standard 9×5 inch loaf pan. I like to grease it really well with butter or cooking spray, and then dust it lightly with cocoa powder instead of flour. This gives the crust a lovely dark finish and prevents sticking. Alternatively, you can line it with parchment paper, leaving some overhang on the sides so it’s easy to lift out later. That’s my secret for a perfectly released loaf every single time!
Step 2: Mix Dry Ingredients
Grab a large mixing bowl. This is where most of the magic happens! Add your 2 cups of all-purpose flour, 3/4 cup of unsweetened cocoa powder, 1 1/2 teaspoons of baking soda, and 1/2 teaspoon of salt. Give them a good whisk together until everything is evenly distributed. You want to make sure the leavening agents and salt are thoroughly mixed into the flour, so you don’t get any pockets of bitterness or uneven rise. This step ensures a uniform texture throughout your loaf.
Step 3: Mix Wet Ingredients
In a separate medium bowl (or a large liquid measuring cup), whisk together your 2 large eggs, 1/2 cup of melted butter (or oil), 1/2 cup of milk or buttermilk, and 1 teaspoon of vanilla extract. Just a quick whisk until everything is combined. Don’t overthink this; we’re not trying to whip air into it, just bring everything together smoothly. The room temperature eggs really do make a difference here!
Step 4: Combine
Now, pour the wet ingredients into the bowl with the dry ingredients. Using a spatula or a wooden spoon, mix just until *barely* combined. You’ll still see some streaks of flour, and that’s perfectly okay! This is the most important part to prevent a tough loaf. Overmixing develops the gluten too much, making it chewy. So, gentle is the name of the game here. Trust me, I’ve learned this the hard way!
Step 5: Prepare Filling (Zucchini & Chocolate Chips)
Here’s where we add our stars! Gently fold in your 2 cups of grated zucchini and 1 cup of chocolate chips. Use your spatula to fold them in until they’re just distributed throughout the batter. Again, don’t overmix! You want to see those lovely chocolate chips peeking through. The zucchini will look like a lot, but it bakes down beautifully and adds all that moisture.
Step 6: Layer & Swirl (Not applicable for this recipe)**
**This step is more for marbled cakes. For our chocolate zucchini bread, you’ll simply pour the batter evenly into your prepared loaf pan. Make sure the top is relatively smooth.
Step 7: Bake
Pour your batter into the prepared loaf pan and spread it evenly. Pop it into your preheated oven. Now, bake for about 50-65 minutes. The exact time will vary depending on your oven. You’ll know it’s done when a wooden skewer or toothpick inserted into the center comes out clean, or with a few moist crumbs attached (but no wet batter). If the top starts browning too quickly before the center is cooked, you can loosely tent it with aluminum foil for the last 10-15 minutes. Resist the urge to open the oven door too early!
Step 8: Cool & Glaze
Once it’s baked, carefully remove the loaf pan from the oven. Let it cool in the pan for about 10-15 minutes. This allows it to set up a bit. Then, invert the loaf onto a wire rack to cool completely. If you used parchment paper, you can lift it out easily. Waiting for it to cool completely before slicing is agony, I know, but it’s worth it! Once it’s fully cool, you can whip up the optional glaze. Whisk together the powdered sugar, cocoa powder (if using), vanilla, and milk until smooth and drizzly. Drizzle it generously over the top. Let the glaze set for a few minutes before slicing.
Step 9: Slice & Serve
Once it’s cooled and glazed (or not!), slice your chocolate zucchini bread into thick, generous slices. The best way to get clean slices is to use a serrated knife. Serve it at room temperature, or even slightly warmed for an extra decadent treat. It’s perfect on its own, but a dollop of whipped cream or a scoop of vanilla ice cream doesn’t hurt either!
What to Serve It With
This chocolate zucchini bread is so versatile, it fits in almost anywhere! For a lovely *breakfast* treat, I love serving it with a hot mug of coffee or a steaming cup of Earl Grey tea. The richness of the bread is balanced perfectly by a good brew. If you’re serving it for *brunch*, it’s a delightful addition to a spread alongside some fresh fruit salad, maybe some scrambled eggs, and a mimosa. I like to slice it a little thinner for brunch and arrange it nicely on a platter. As a *dessert*, it’s surprisingly satisfying. Imagine a slice warmed up with a scoop of vanilla bean ice cream melting into the warm chocolate, or a drizzle of caramel sauce. For *cozy snacks*, it’s the ultimate comfort food. Serve a thick slice with a glass of cold milk, or just enjoy it plain while curled up with a good book. My family tradition is to have this on a lazy Sunday morning, straight out of the oven (once it’s cooled a bit, of course!). It just makes the whole house smell amazing and sets a relaxed, happy tone for the day.
Top Tips for Perfecting Your Chocolate Zucchini Bread
I’ve made this bread more times than I can count, and I’ve picked up a few tricks along the way that I think you’ll find super helpful. For *zucchini prep*, make sure you grate it using the medium holes of a box grater. Don’t wring out the moisture! Just the natural moisture is what makes this bread so good. If you grate it super fine, it can almost turn to mush, so medium is the sweet spot. For *mixing advice*, I can’t stress enough: do NOT overmix. Once the wet and dry meet, stir just until combined. Lumps are your friend here! Overmixing leads to a tough, chewy loaf, and nobody wants that. When it comes to *swirl customization*, well, that’s more for cakes, but with the chocolate chips, just give them a gentle fold so they’re distributed evenly. For *ingredient swaps*, I’ve successfully used almond flour mixed with a little coconut flour for a gluten-free version (about a 1:1 ratio, though you might need an extra egg). For the oil, a light olive oil or grapeseed oil works beautifully if you’re out of butter. And if you don’t have buttermilk, a tablespoon of lemon juice or vinegar mixed into regular milk and left to sit for 5 minutes does the trick! For *baking tips*, always trust the skewer test. Ovens can be so different! If your loaf looks done on the outside but is still gooey inside, cover it loosely with foil and give it a bit more time. For *glaze variations*, if you want a thinner glaze, add milk a teaspoon at a time. If you want it thicker, add more powdered sugar. You can also add a little espresso powder to the glaze for a mocha kick, or a touch of orange zest for a brighter flavor.
Storing and Reheating Tips
This chocolate zucchini bread is quite forgiving when it comes to storage. If you’re keeping it at *room temperature*, an airtight container or a well-wrapped loaf will stay fresh for about 3-4 days. Make sure it’s completely cool before wrapping, otherwise, you’ll create condensation and a soggy bottom! For *refrigerator storage*, it can last up to a week, though the texture might become a little denser. Again, wrap it tightly to prevent it from drying out. To *reheat*, you can pop a slice in the microwave for about 10-15 seconds for a warm, fudgy treat, or warm it gently in a toaster oven. If you’re planning to freeze portions, wrap individual slices tightly in plastic wrap, then in foil or a freezer bag. It freezes beautifully for up to 3 months. Thaw overnight at room temperature or gently reheat from frozen. For *glaze timing advice*, if you plan to freeze the loaf, it’s best to add the glaze *after* thawing. Otherwise, the glaze can become sticky or crack in the freezer. If you’re storing it at room temp or in the fridge, you can glaze it as soon as it’s completely cool.
Frequently Asked Questions
Final Thoughts
So there you have it – my absolute favorite chocolate zucchini bread recipe! It’s more than just a recipe to me; it’s a little bit of comfort, a guaranteed win when I need to bake something impressive with minimal fuss, and a fantastic way to use up that abundant summer zucchini. The combination of rich chocolate and incredibly moist crumb is just irresistible. I truly believe this recipe will become a staple in your kitchen, just like it has in mine. If you’re looking for more easy and delicious baked goods, you might want to check out my simple chocolate chip cookies or my rustic apple crumble. They’re made with the same love and simple ingredients! I can’t wait to hear what you think. Please, let me know in the comments below how your chocolate zucchini bread turns out, and if you have any special twists you’ve added! Happy baking!
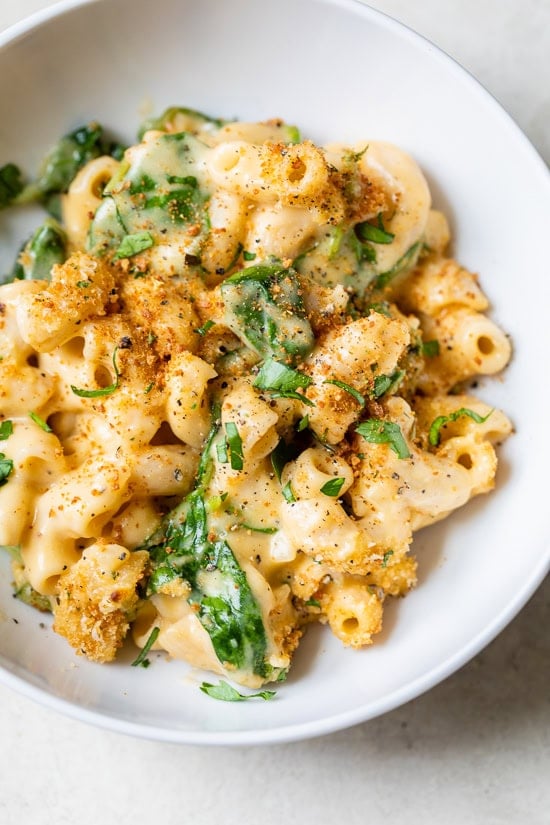
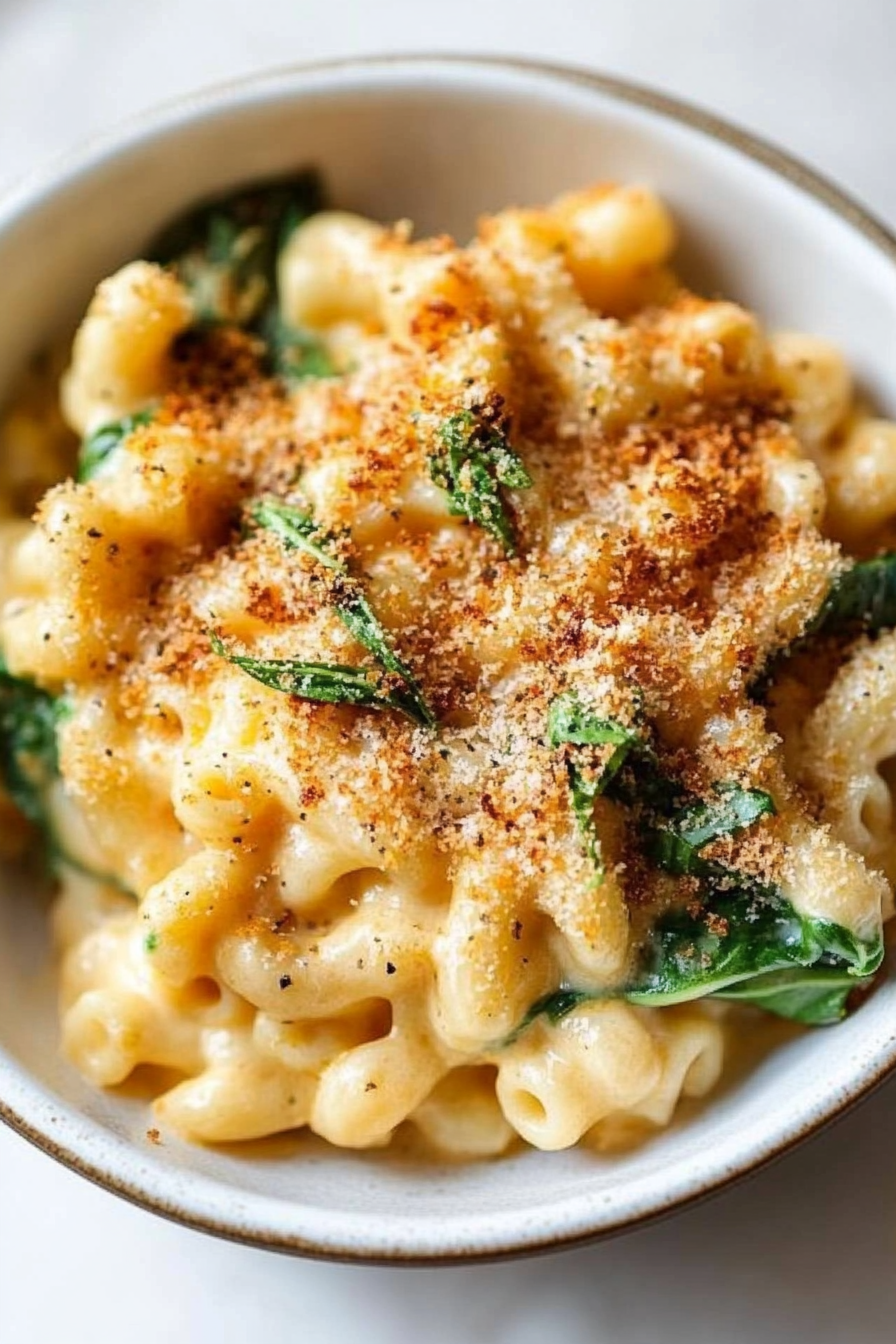
Healthy Baked Macaroni and Cheese
Ingredients
Method
- Cook pasta in salted water according to package directions. Spray a baking dish with oil.
- Preheat oven to 375°F.
- In a large, heavy skillet, melt butter. Add flour and cook over low heat stirring with a whisk.
- Add onion and cook another 2 minutes. Add milk and chicken broth and continue whisking, raising heat to medium-high until it comes to a boil and becomes smooth and thick. Season with salt and pepper.
- Once it becomes thick, remove from heat, add cheese 0.25 cup at a time and mix well until cheese is melted. Adjust salt and pepper to taste, add cooked macaroni and baby spinach.
- Pour into baking dish. Top with grated cheese and breadcrumbs. Spray a little more oil on top.
- Bake for 15-20 minutes, then broil for a few minutes to get the breadcrumbs golden.