Easy Marsala Chicken Bake Comfort Food
Okay, so confession time. I’ve tried a gazillion zucchini bread recipes over the years. You know, the kind where you have way too much zucchini from the garden and you just need to use it up? Well, this one, this is the one. It’s not just *any* zucchini bread; it’s the one I always come back to, the one my family devours in minutes, and the one I get asked for constantly. It’s got that perfect balance of moistness, sweetness, and that little hint of spice that just makes everything feel cozy. Honestly, it’s better than any store-bought muffin or loaf I’ve ever tried, and that’s saying something! It’s that magical recipe that feels like a warm hug on a chilly day, or a sweet little reward after a long week. If you’re looking for a truly amazing zucchini bread that’s surprisingly easy and just… well, *right*, you’ve found it.
What is Zucchini bread?
So, what exactly *is* zucchini bread, beyond just, you know, bread with zucchini in it? Think of it as a super moist, tender quick bread that uses grated zucchini as its secret weapon. It’s not like a cake, though it’s sweet enough to be a treat, and it’s not quite as dense as a traditional loaf bread. The zucchini itself is pretty mild in flavor once it’s baked, but oh boy, does it work wonders for texture! It adds this incredible moisture and tenderness that you just can’t achieve with other ingredients. It’s a classic for a reason, really – a brilliant way to use up those garden abundance veggies and turn them into something utterly delicious. It’s often spiced with cinnamon and sometimes nutmeg, giving it that comforting, homemade aroma that fills the whole house. It’s one of those baked goods that feels both wholesome and indulgent, all at once!
Why you’ll love this recipe?
There are so many reasons I’ve made this recipe my absolute favorite, and I just know you’re going to feel the same way. First off, the flavor is just out of this world. It’s perfectly sweet without being cloying, and the hint of cinnamon is just *chef’s kiss*. It tastes like pure comfort. Then there’s the texture – oh my gosh, the texture! It’s incredibly moist and tender, thanks to the zucchini, and it stays that way for days (if it even lasts that long!). Seriously, I’ve made this with almond milk once when I ran out of regular milk, and it actually made it even creamier, which I never thought was possible. It’s also surprisingly simple to whip up, which is a lifesaver on busy weeknights when you need a quick treat. You don’t need any fancy equipment, just a bowl, a whisk, and a baking pan. And the ingredients? All super budget-friendly and readily available. Plus, it’s so versatile! You can easily add nuts, chocolate chips, or even a dollop of cream cheese frosting if you’re feeling fancy. What I love most about this particular zucchini bread is that it doesn’t have that “healthy” taste some quick breads can have. It’s just pure deliciousness that happens to be packed with a secret veggie.
How do I make Zucchini bread?
Quick Overview
This recipe is a breeze, honestly. You’ll start by preheating your oven and prepping your pan. Then, you’ll mix up your dry ingredients, followed by your wet ingredients, and combine them gently. The zucchini gets mixed in, and then we’ll prepare a simple, sweet filling to swirl through. Layering it all in the pan and baking until golden brown is the final step before a delicious glaze makes it truly irresistible. It’s really that straightforward, and the result is always spectacular!
Ingredients
For the Main Batter:
You’ll need about 2 cups of grated zucchini. Make sure to squeeze out as much excess moisture as you can – this is a crucial step! I usually use a fine grater for the best texture. You’ll also need 2 cups of all-purpose flour, 1 teaspoon of baking soda, ½ teaspoon of baking powder, ½ teaspoon of salt, and 1 ½ teaspoons of ground cinnamon. For sweetness, we’ll use 1 cup of granulated sugar and ½ cup of packed light brown sugar. Then, we have 2 large eggs, beaten, ½ cup of unsalted butter, melted and slightly cooled (I sometimes use unsalted butter sticks that have been left out to soften and then melt them, it’s just easier!), ½ cup of milk (whole milk or buttermilk is best for richness, but any milk will do in a pinch!), and 1 teaspoon of vanilla extract.
For the Filling:
This is where the magic happens! You’ll need ¼ cup of granulated sugar, 1 tablespoon of ground cinnamon, and 2 tablespoons of melted butter. Sometimes I’ll add a pinch of nutmeg here too, but that’s optional. It’s just a simple, sweet, spiced layer that makes each bite extra special.
For the Glaze:
Once it’s cooled a bit, a drizzle of glaze takes it over the top. For this, you’ll need 1 cup of powdered sugar, 2-3 tablespoons of milk (start with 2 and add more if needed), and ½ teaspoon of vanilla extract. You want it pourable but not too thin!
Step-by-Step Instructions
Step 1: Preheat & Prep Pan
First things first, get your oven preheated to 350 degrees Fahrenheit (175 degrees Celsius). For the pan, I love using a 9×13 inch baking pan, but a loaf pan works too if you prefer. Grease and flour it really well, or line it with parchment paper, leaving some overhang on the sides. This makes lifting it out so much easier, trust me!
Step 2: Mix Dry Ingredients
In a large bowl, whisk together the flour, baking soda, baking powder, salt, and cinnamon. Give it a good mix so everything is evenly distributed. This ensures your bread rises evenly and has consistent flavor throughout.
Step 3: Mix Wet Ingredients
In a separate medium bowl, whisk together the granulated sugar, brown sugar, beaten eggs, melted butter, milk, and vanilla extract until everything is well combined and smooth.
Step 4: Combine
Pour the wet ingredients into the dry ingredients. Now, this is important: mix *just* until combined. A few little lumps are perfectly fine! Overmixing can make your bread tough, and nobody wants that. Gently fold in the grated and squeezed zucchini until it’s just evenly distributed.
Step 5: Prepare Filling
In a small bowl, stir together the ¼ cup sugar, 1 tablespoon cinnamon, and 2 tablespoons melted butter until it forms a slightly crumbly paste. This is your delicious filling!
Step 6: Layer & Swirl
Pour about half of the batter into your prepared pan. Sprinkle about half of the filling mixture evenly over the batter. Then, pour the remaining batter on top, and sprinkle the rest of the filling mixture over that. Now, for the swirl! Take a knife or a skewer and gently swirl the filling into the batter. Don’t overdo it; you want distinct swirls, not a completely blended mess. This is what gives it that beautiful marbled look!
Step 7: Bake
Bake for about 35-45 minutes for a 9×13 pan, or 50-60 minutes for a loaf pan. You’ll know it’s done when a toothpick inserted into the center comes out clean or with a few moist crumbs attached. Ovens can be so different, so start checking around the 30-minute mark for the larger pan.
Step 8: Cool & Glaze
Let the bread cool in the pan for about 10-15 minutes before carefully transferring it to a wire rack to cool completely. Once it’s mostly cooled, whisk together the powdered sugar, 2 tablespoons of milk, and vanilla extract for the glaze. Add more milk, a tiny bit at a time, until you reach your desired drizzling consistency. Drizzle it all over the top of the cooled bread. Let the glaze set for a bit before slicing.
Step 9: Slice & Serve
Once the glaze has set, slice it up and enjoy! It’s best served at room temperature. The aroma alone is enough to make you happy, and the first bite is pure heaven. This is perfect for a midnight snack or a delightful breakfast treat.
What to Serve It With
This zucchini bread is so wonderfully versatile, you can enjoy it in so many ways! For a quick and easy breakfast, I love to just grab a slice with a hot cup of coffee. It’s filling enough to start your day and tastes so comforting. If you’re having a lazy brunch, it’s divine served alongside some fresh fruit salad and maybe some scrambled eggs or bacon. It adds a lovely sweet counterpoint to savory dishes. As a dessert, it’s perfect! Serve a warm slice with a scoop of vanilla bean ice cream or a dollop of whipped cream. It’s also amazing with a caramel sauce drizzled over it. And for those cozy snack attacks? Just a slice on its own, maybe with a glass of cold milk, is pure bliss. My kids absolutely love it warmed up with a smear of butter. It truly is a crowd-pleaser, no matter the occasion!
Top Tips for Perfecting Your Zucchini Bread
I’ve learned a few things over the years of making this, so let me share some secrets! First, Zucchini Prep is key. Really, really squeeze out that moisture. You can use a cheesecloth, a clean kitchen towel, or even just your hands. The drier the zucchini, the more tender your bread will be, and it won’t get soggy. Grating it on the fine side of a box grater is my preference; it distributes better than large chunks. When it comes to Mixing Advice, remember: don’t overmix! Once the wet and dry ingredients meet, stir just until they come together. A few streaks of flour are fine. The zucchini will release more moisture as it bakes, so you don’t want to overdevelop the gluten. For Swirl Customization, have fun with it! You can add a pinch of cocoa powder to half of the filling mixture for a chocolate swirl, or even a few drops of food coloring for a fun pop. Just be gentle when swirling to keep the distinct layers. For Ingredient Swaps, I’ve successfully subbed out half the all-purpose flour for whole wheat flour, which gives it a slightly nuttier flavor and added fiber. It does make it a tad denser, but still delicious. If you don’t have butter, a neutral oil like canola or vegetable oil can work in a pinch, but melted butter really adds that richness. And when it comes to Baking Tips, always trust your oven. Use the toothpick test to confirm doneness, as baking times can vary. If the top is browning too quickly, you can loosely tent it with foil. For Glaze Variations, if you want a thicker glaze, just use less milk. For a thinner one, add a touch more. You can also add a bit of lemon zest to the glaze for a bright, zesty kick, or even a touch of almond extract instead of vanilla for a different flavor profile.
Storing and Reheating Tips
One of the best things about this zucchini bread is how well it stores! At Room Temperature, it’s best kept in an airtight container or well-wrapped in plastic wrap. It stays wonderfully moist and delicious for about 2-3 days. If your kitchen is on the warmer side, I’d err on the side of refrigerating it sooner. For Refrigerator Storage, it can last up to a week! Keep it in an airtight container or tightly wrapped. The moisture from the zucchini helps preserve it. When you’re ready to enjoy a slice from the fridge, you can eat it cold, or I highly recommend warming it up slightly. For Freezer Instructions, this bread freezes beautifully. I like to wrap individual slices tightly in plastic wrap, then place them in a freezer-safe bag or container. It can stay frozen for up to 3 months. To thaw, just unwrap a slice and let it come to room temperature for about 30 minutes, or pop it in the microwave for a few seconds. For the Glaze Timing Advice, it’s best to add the glaze only when the bread has completely cooled, especially if you plan to store it for more than a day or freeze it. If you glaze it right before freezing, the glaze can sometimes become a bit sticky. For refrigerator or room temperature storage, glazing after it’s fully cooled but before serving is ideal.
Frequently Asked Questions
Final Thoughts
So there you have it, my absolute favorite, tried-and-true zucchini bread recipe. It’s the one that never fails to impress, the one that brings smiles to faces, and the one that makes my kitchen smell like pure happiness. It’s more than just a recipe; it’s a little piece of comfort I love sharing. It truly highlights how humble ingredients like zucchini can transform into something utterly magical. If you’re looking for that perfect balance of moistness, flavor, and ease, I really hope you’ll give this one a try. You might find it becomes your go-to, just like it has for me! I’m already excited to hear how yours turns out – please, please share your thoughts and any fun variations you try in the comments below! Happy baking, everyone!
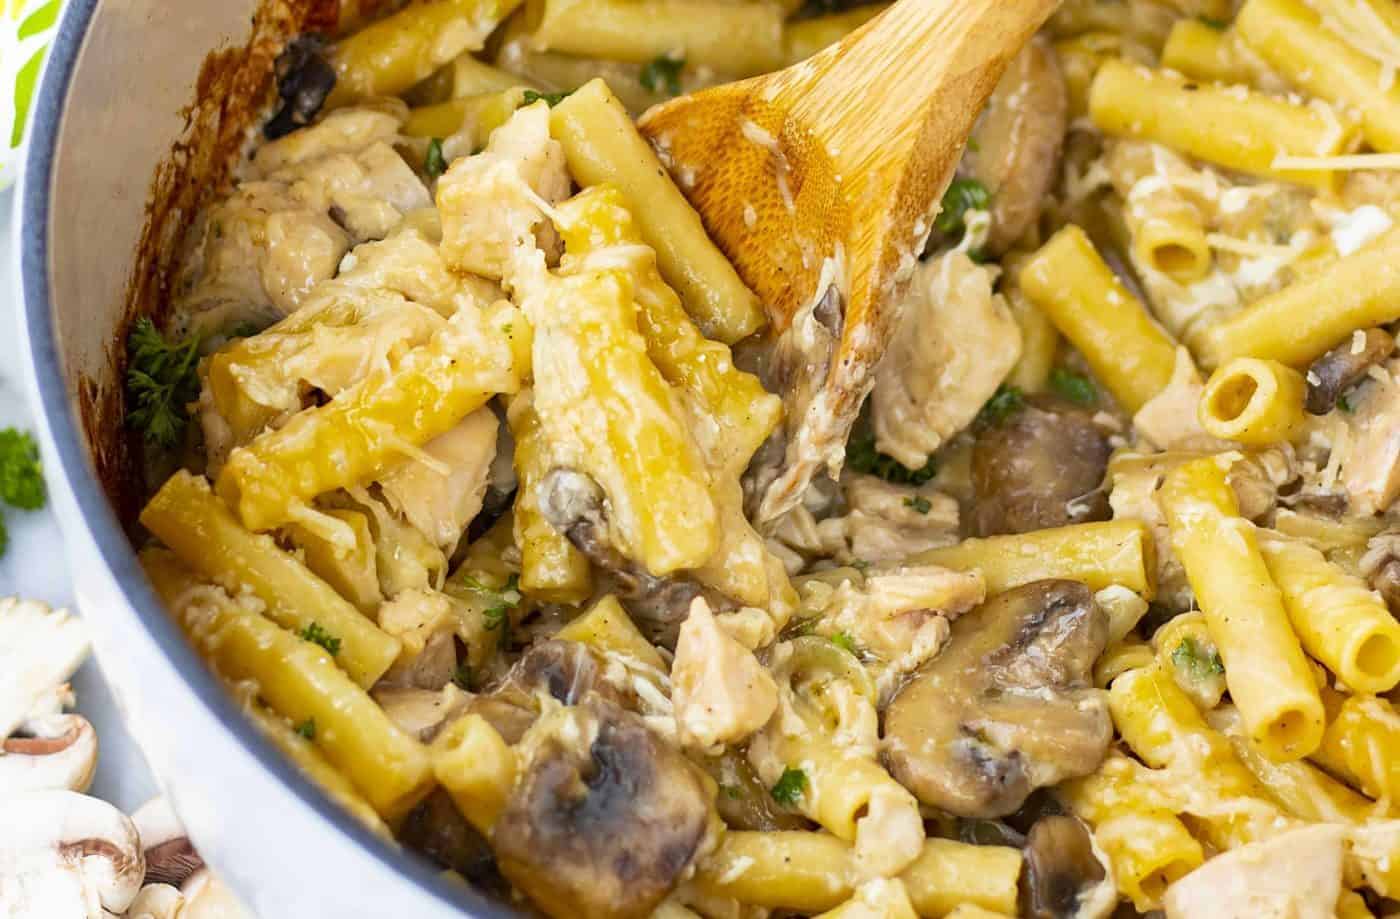
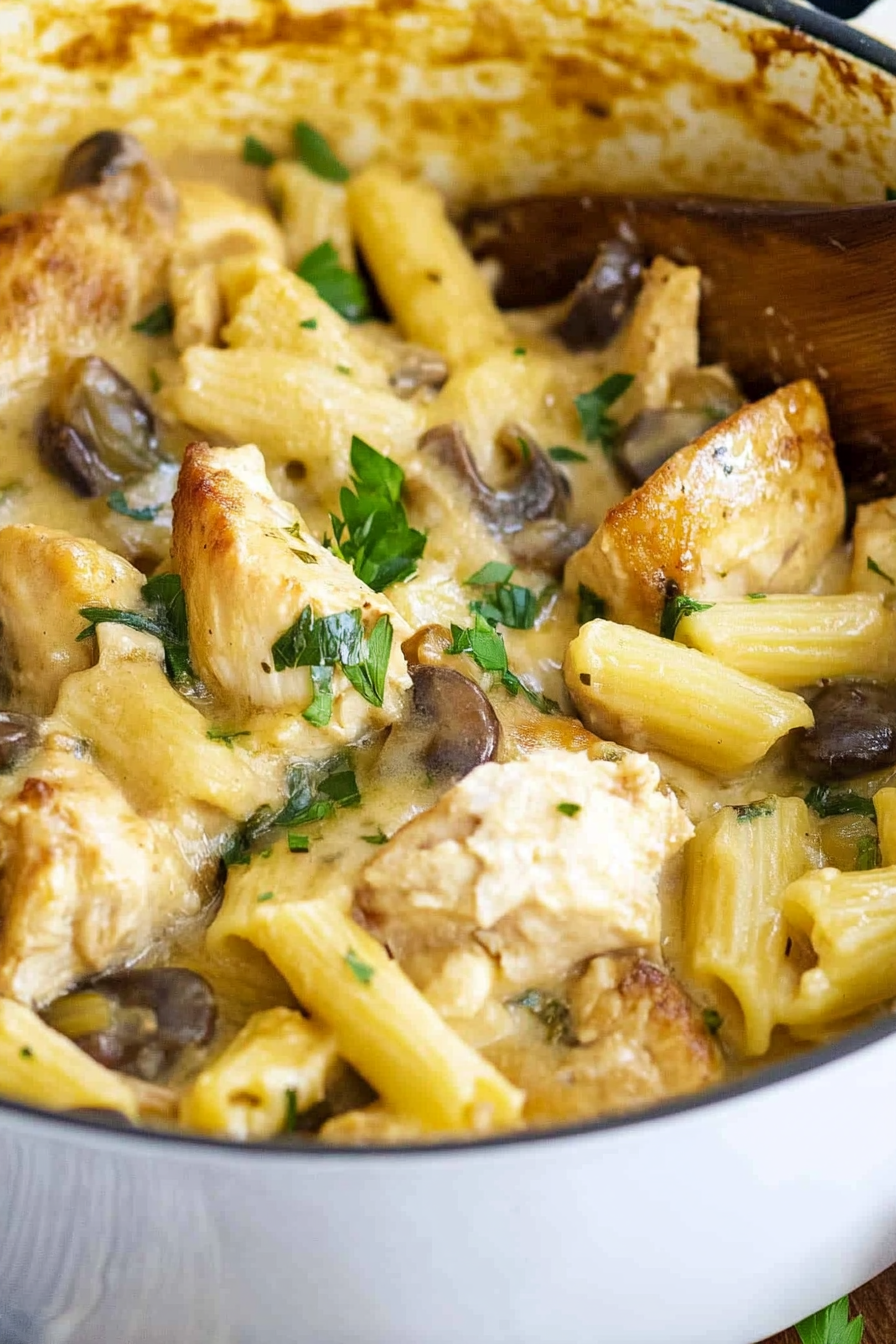
chicken marsala casserole
Ingredients
Method
- Preheat oven to 400°F (200°C).
- In a large oven-safe Dutch oven or stockpot, heat olive oil until it starts to sizzle. Add mushrooms and cook for about 2 minutes, just until they start to brown.
- Reduce heat to medium-high. Add onions, salt, and pepper and sauté until the liquid is nearly evaporated.
- Add minced garlic and cook for 1-2 more minutes, taking care not to burn it.
- Add Marsala wine, stirring occasionally, until it has been reduced by half or more.
- Add butter, and once melted, add all-purpose flour and stir until it has fully incorporated, forming a roux.
- Add chicken broth, a little at a time, scraping the bottom of the pan and stirring constantly. Repeat until all broth has been added.
- Simmer for 2 minutes, stirring frequently, until the sauce begins to thicken.
- Remove the pan from heat.
- Add cooked ziti noodles, cubed chicken, fresh mozzarella, chopped parsley, and half of the grated Parmesan cheese. Stir gently to combine all ingredients.
- Top the casserole with the remaining grated Parmesan cheese.
- Bake for 25 to 30 minutes, or until the edges of the pasta are golden brown and the casserole is bubbly.