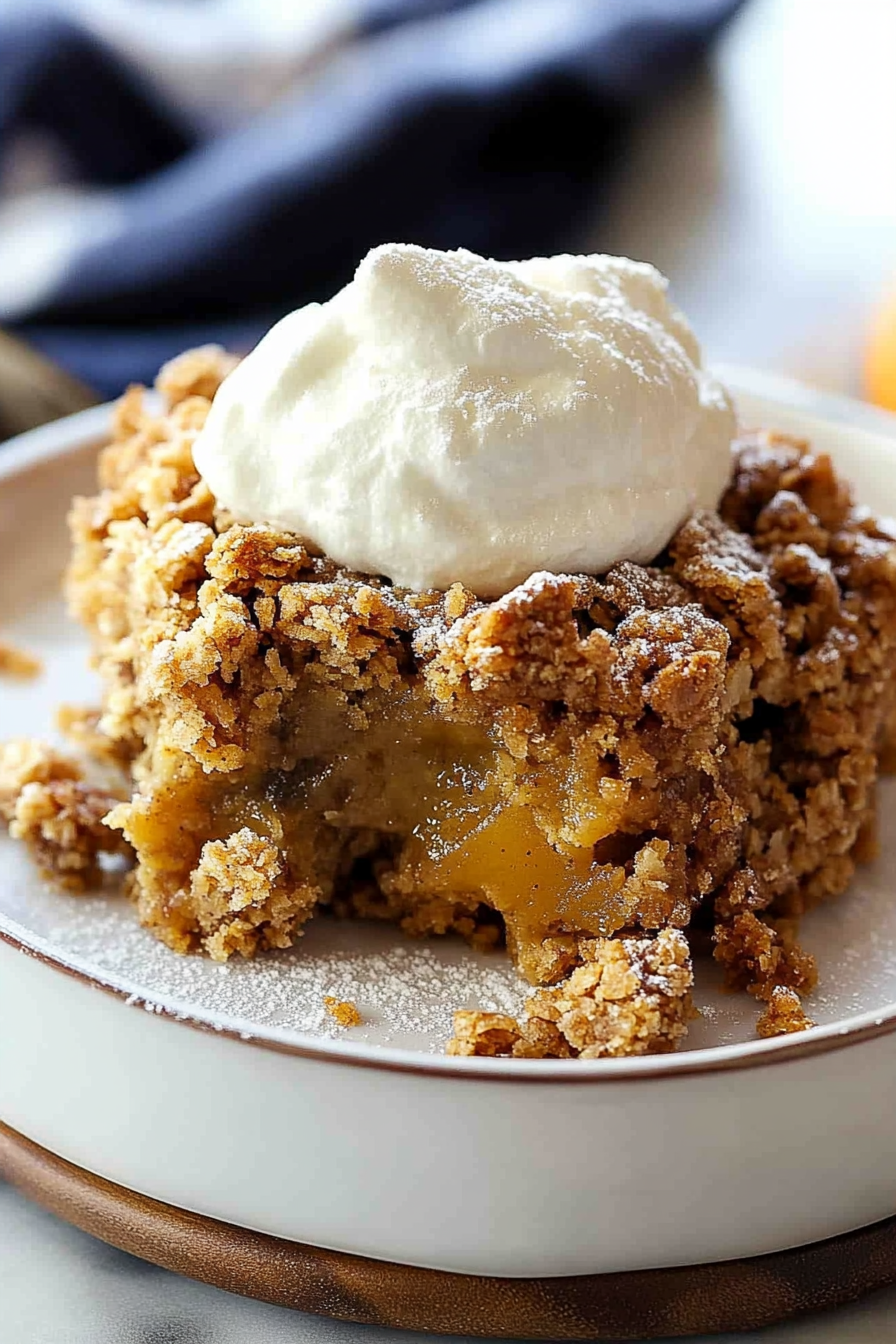
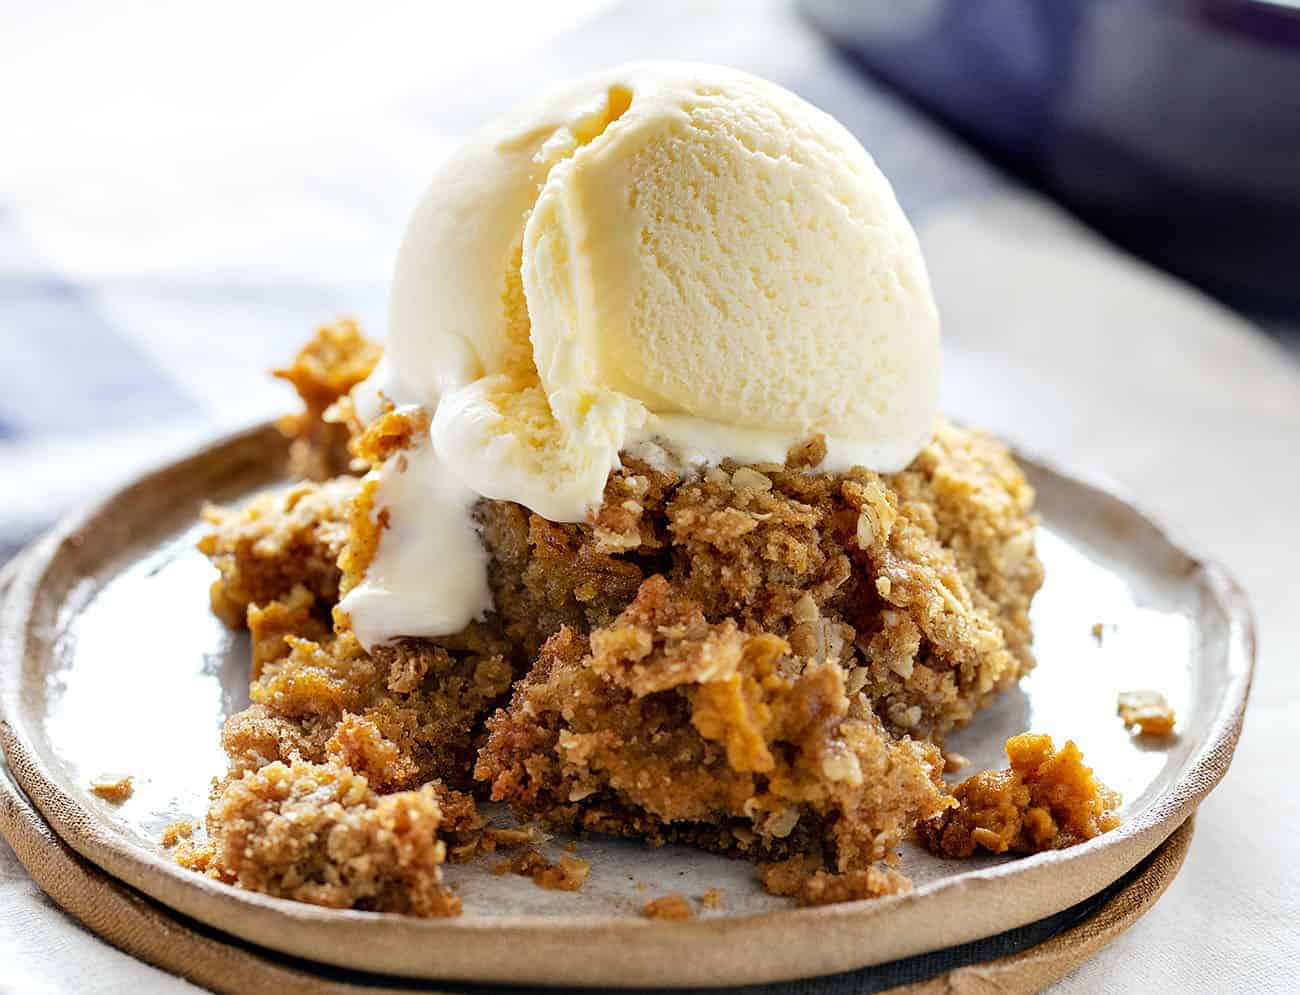
Pumpkin Crisp Best Fall Dessert Ever
Okay, so I have to tell you about this zucchini bread. It’s not just any zucchini bread, mind you. This is the one. The one that smells like heaven is baking in your kitchen, the one that’s so moist it practically melts in your mouth, and the one that my family, without fail, devours faster than I can slice it. I remember the first time I made it years ago, trying to use up a surplus of zucchini from my garden that was threatening to take over the world. I was skeptical, honestly. Zucchini in a sweet bread? But oh, was I wrong! It’s become my absolute go-to, especially when I need a little comfort or a simple, satisfying treat. Think of it as the cozy blanket of baked goods, way easier than a full cake but just as delightful. This recipe is my little secret weapon, and today, I’m spilling the beans with you!
What is Zucchini bread?
So, what exactly *is* zucchini bread, and why is it so darn popular? At its heart, it’s a quick bread, meaning it doesn’t require yeast and is leavened with baking soda or baking powder. The star ingredient, of course, is zucchini! But before you picture a salad, let me reassure you. When baked, zucchini becomes incredibly tender and adds a fantastic moisture content to the bread without any discernible “zucchini” flavor. Honestly, you’d never know it was in there unless I told you! The name itself is pretty straightforward – it’s a bread where zucchini is a key player. It’s often described as a cousin to banana bread, but with its own unique, subtle charm. It’s the kind of thing you can whip up on a Tuesday afternoon and have ready for an after-school snack or a simple dessert. It’s essentially a delicious vehicle for spices, sweetness, and that wonderfully tender crumb.
Why you’ll love this recipe?
There are so many reasons why this zucchini bread has earned a permanent spot in my baking repertoire, and I’m pretty sure you’re going to fall in love with it too. First off, the flavor is just *chef’s kiss*. It’s perfectly spiced with cinnamon, a hint of nutmeg, and just enough sweetness to satisfy any craving, but it never feels overly done. The texture? Oh my gosh, it’s unbelievably moist and tender. That’s all thanks to the grated zucchini, which is pure magic. Speaking of magic, this recipe is surprisingly simple. You don’t need any fancy equipment or complicated techniques. It’s a true lifesaver on busy weeknights when you want to bake something homemade without the fuss. And the cost-efficiency? Incredible! Zucchini is usually pretty affordable, and the other ingredients are pantry staples. You can whip up a whole loaf for next to nothing. What I love most about this is its versatility. It’s perfect with my morning coffee, amazing as an afternoon snack, and I’ve even served it as a casual dessert with a dollop of whipped cream. Compared to something like my classic chocolate chip cookie recipe, it feels a bit more wholesome, but it still delivers that delightful sweet treat satisfaction. It’s the kind of recipe that makes your kitchen smell incredible and your family ask, “When can we have more?”
How do you make Zucchini bread?
Quick Overview
The beauty of this zucchini bread is its simplicity. You’ll mostly be mixing dry ingredients in one bowl, wet ingredients in another, and then combining them. Grating the zucchini is really the most “involved” step! Then it’s just a matter of pouring it into a loaf pan and letting the oven do the work. The result is a wonderfully moist, flavorful bread that’s perfect for any occasion. Trust me, even if you’re a beginner baker, you can absolutely nail this.
Ingredients
For the Main Batter:
You’ll need about 2 cups of grated zucchini – I usually use medium-sized ones, and it’s best to grate them on the large holes of your box grater. Don’t worry about peeling them; the skin adds a little bit of extra fiber and color. Plus, who has time for that? Make sure you pat them dry *really* well with paper towels; this is a crucial step for a good texture. You’ll also need all-purpose flour (about 2 cups), granulated sugar (around 1 cup, but you can adjust slightly), a couple of teaspoons of cinnamon, a pinch of nutmeg, baking soda (1 teaspoon), and a little salt (half a teaspoon). I also love adding a teaspoon of vanilla extract to the wet ingredients for that extra warm flavor.
For the Filling:
This is where you can really play! My absolute favorite filling is a simple swirl of cinnamon and brown sugar. For this, you’ll need about half a cup of packed brown sugar and a tablespoon or two of cinnamon. Sometimes, I’ll even add a handful of chopped walnuts or pecans if I’m feeling fancy and have them on hand. It’s optional, but oh-so-good. If you want to get a little more decadent, a few chocolate chips tossed into the batter or the swirl are never a bad idea!
For the Glaze:
This is totally optional, but highly recommended! It adds another layer of sweetness and a lovely finish. For a basic glaze, just whisk together about 1 cup of powdered sugar with 2-3 tablespoons of milk (or almond milk for a slightly creamier texture!) until you reach a pourable consistency. You can also add a splash of vanilla or even a little lemon zest for a brighter flavor. Don’t make it too thin, or it’ll just run off. You want it thick enough to coat.
Step-by-Step Instructions
Step 1: Preheat & Prep Pan
First things first, let’s get our oven fired up to 350 degrees Fahrenheit (175 degrees Celsius). While it’s heating, grab a standard 9×5 inch loaf pan. Grease it really well with butter or cooking spray, and then I like to dust it with a little flour, tapping out any excess. This ensures your beautiful loaf won’t stick. I also like to line the bottom with a strip of parchment paper, leaving a little overhang on both sides. It makes lifting the bread out so much easier!
Step 2: Mix Dry Ingredients
In a large mixing bowl, whisk together your all-purpose flour, granulated sugar, cinnamon, nutmeg, baking soda, and salt. Whisking them all together ensures that everything is evenly distributed. You don’t want pockets of baking soda! Give it a good whirl until it all looks nicely combined and there are no big clumps. This is the base for our lovely bread.
Step 3: Mix Wet Ingredients
In a separate medium bowl, crack your eggs (usually two for this recipe). Add your melted butter or oil (I often use a neutral oil like vegetable or canola, about half a cup, but melted butter is divine too!) and your vanilla extract. Whisk these together until they’re well combined. Then, gently fold in your *well-drained* grated zucchini. Give it a gentle stir just to coat the zucchini. Remember, patting that zucchini dry is key!
Step 4: Combine
Now, pour the wet ingredients into the bowl with the dry ingredients. Using a spatula or a wooden spoon, gently fold everything together until *just* combined. Seriously, resist the urge to overmix! A few streaks of flour are okay. Overmixing develops the gluten too much, which can lead to a tough bread, and we want this to be super tender. It should be a thick batter, but not stiff.
Step 5: Prepare Filling
If you’re doing a swirl, now’s the time to make that magic happen. In a small bowl, mix together your brown sugar and cinnamon. If you’re adding nuts, chop them up and toss them in now. This simple mixture is what gives you those beautiful pockets of spiced goodness throughout the loaf.
Step 6: Layer & Swirl
Pour about half of your batter into your prepared loaf pan. Sprinkle about half of your brown sugar-cinnamon mixture evenly over the batter. Then, pour the remaining batter on top, spreading it gently to cover. Sprinkle the rest of the brown sugar-cinnamon mixture over the top. Now, here’s the fun part: take a butter knife or a skewer and gently swirl the mixture through the batter. Don’t go crazy or over-swirl, you want distinct ribbons, not a muddy mess. Just a few gentle twists and turns will do the trick!
Step 7: Bake
Pop that beautiful loaf into your preheated oven. Bake for about 50-65 minutes. The exact time will vary depending on your oven, so keep an eye on it. How do you know it’s done? Insert a toothpick into the center of the loaf. If it comes out clean or with just a few moist crumbs attached (not wet batter!), it’s ready. If it’s still gooey, give it another 5-10 minutes and test again.
Step 8: Cool & Glaze
Once it’s baked to perfection, take the loaf pan out of the oven and let it cool in the pan for about 10-15 minutes. This allows it to set up a bit more. Then, using those handy parchment paper overhangs, lift the loaf out of the pan and place it on a wire rack to cool completely. This is super important! If you try to glaze it while it’s still warm, the glaze will melt right off. Once it’s *completely* cool, whip up your glaze and drizzle it over the top. Let the glaze set for a few minutes before slicing.
Step 9: Slice & Serve
Once the glaze is set (or if you skipped the glaze, once the bread is fully cooled!), it’s time to slice and enjoy! Use a serrated knife for the cleanest slices. I like to cut mine about ¾ inch thick. The aroma alone will make your mouth water. Serve it at room temperature for the best texture and flavor.
What to Serve It With
Honestly, this zucchini bread is pretty much a meal in itself, but it also plays well with others! For a lovely breakfast treat, a simple cup of hot coffee or a glass of cold milk is perfection. It’s not too sweet, so it’s a great way to start the day. For a more elaborate brunch spread, I love serving it alongside fresh fruit salad or a yogurt parfait. The sweetness of the bread is a wonderful contrast to the tartness of berries or the creaminess of yogurt. As a dessert, it’s fantastic on its own, but if you want to elevate it, a small scoop of vanilla bean ice cream or a dollop of lightly sweetened whipped cream is pure bliss. For those cozy, rainy-day snack moments, I often pair a thick slice with a steaming mug of herbal tea. It’s just pure comfort. My family also loves it when we have a little mini charcuterie board with some cheese and crackers; the bread adds a sweet element that complements the savory perfectly.
Top Tips for Perfecting Your Zucchini Bread
I’ve made this zucchini bread more times than I can count, and over the years, I’ve picked up a few tricks that I think make all the difference. For zucchini prep, I can’t stress enough how important it is to grate it and then pat it *very* dry with paper towels. Excess moisture is the enemy of a good, tender quick bread. If you don’t get enough moisture out, your bread can end up dense or even gummy. For mixing, remember the golden rule of quick breads: gentle does it. Overmixing is the most common mistake that leads to a tough loaf. You want to mix until the ingredients are *just* combined; a few tiny lumps of flour are actually a good sign! When it comes to the swirl, don’t overdo it. A few gentle passes with a knife are enough to create those lovely ribbons of spice and sugar. If you swirl too much, you’ll just end up with a uniformly brown loaf, which is still tasty, but you lose that visual appeal and those concentrated pockets of flavor. For ingredient swaps, I’ve experimented quite a bit! If you’re out of eggs, you can use a flax egg (1 tablespoon flaxseed meal mixed with 3 tablespoons water, let sit for 5 minutes) for each egg, though the texture might be slightly denser. I’ve also successfully used almond milk instead of dairy milk in the glaze, and it makes it wonderfully creamy. For baking, make sure your oven is accurately preheated. Ovens can be notoriously inaccurate, so an oven thermometer is a good investment! And always do the toothpick test; it’s the most reliable way to know when your bread is done. If the top starts browning too quickly, you can loosely tent it with foil for the last 15-20 minutes of baking.
Storing and Reheating Tips
This zucchini bread is fantastic fresh, but it also keeps beautifully, which is why it’s such a great make-ahead treat. For room temperature storage, once the bread is completely cool, wrap it tightly in plastic wrap or place it in an airtight container. It will stay fresh and moist for about 2-3 days. It’s perfect for slicing off a piece throughout the day. If you need it to last longer, the refrigerator is your friend. Wrapped well in plastic wrap and then a layer of foil, or kept in an airtight container, it can last up to a week in the fridge. The texture might firm up slightly, but it’s still delicious. If you want to freeze it, I highly recommend doing so *before* glazing. Wrap the completely cooled, unglazed loaf tightly in two layers of plastic wrap, then a layer of aluminum foil. It can stay frozen for up to 3 months. To thaw, unwrap it and let it come to room temperature on the counter for a few hours. If you want to reheat a slice, you can pop it in a toaster oven for a few minutes until warmed through. For the glaze, I always recommend waiting until the bread is completely cool before adding it. If you’re freezing the bread, glaze it *after* it’s thawed and at room temperature.
Frequently Asked Questions
Final Thoughts
I truly hope you give this zucchini bread recipe a try. It’s more than just a recipe for me; it’s a feeling of warmth and comfort, a reminder of simple joys, and a testament to how amazing simple ingredients can be. It’s proof that you can create something incredibly delicious and satisfying without a lot of fuss. If you’re a fan of quick breads or just looking for a fantastic way to use up that garden zucchini, this is the one. It’s so forgiving and always turns out wonderfully moist and flavorful. I can’t wait to hear how yours turns out! Don’t forget to share your own twists or any questions you might have in the comments below. Happy baking, my friends!
pumpkin crisp recipe
Ingredients
Method
- Preheat oven to 375°F. Lightly spray a 12-inch oven-safe skillet with nonstick cooking spray. Set aside.
- Combine the oats, flour, brown sugar, and pumpkin spice together. Add in the cubed butter and use your hands or a fork to combine. You want the butter to be no larger than pea-sized.
- Spread 4 cups of crisp mixture over the bottom and up the sides of the prepared skillet and press flat. Set the remaining crisp mixture aside.
- In a large bowl, whisk together the eggs and granulated sugar until combined.
- Add pure pumpkin, heavy cream, vanilla, pumpkin pie spice, and kosher salt. Whisk ingredients together until smooth.
- Pour the pumpkin mixture on top of the layer of crisp in the skillet.
- Sprinkle the remaining crisp mixture over top of the pumpkin.
- Bake uncovered at 375°F for 35-45 minutes, or until golden brown.
- Serve (warm or cold) with whipped cream or ice cream.