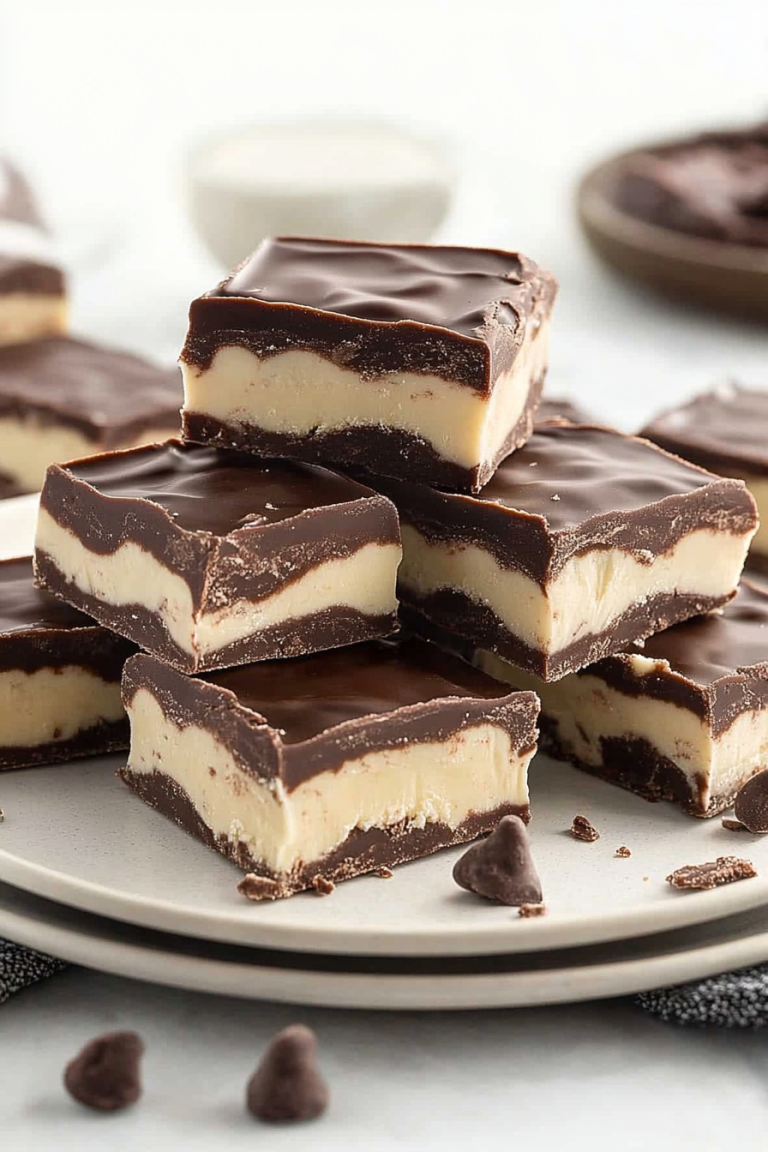
Cheesecake Carrot Cake Bites So Good
Oh, my gosh, you guys. I have to tell you about this zucchini bread. I know, I know, “zucchini bread” might sound a little… well, *healthy*, right? Like something you’d begrudgingly eat. But trust me on this one, because this is NOT that. This is the kind of zucchini bread that makes your kitchen smell like pure heaven, the kind that has everyone hovering around the oven, practically drooling. It’s moist, it’s tender, it’s got this perfect balance of sweet and spiced, and honestly, it’s the best way to use up those garden zucchini that seem to multiply overnight. I’ve made countless versions over the years, always tweaking, always searching for *that* perfect bite, and I genuinely think I’ve cracked the code with this recipe. It’s the kind of thing that disappears in minutes at my house, and my kids? They practically beg for it. It’s my go-to when I need a little something sweet, or when unexpected guests pop over. It’s so good, in fact, that I’ve even convinced a few die-hard zucchini-haters to become fans. So, let’s dive into this magic, shall we?
What is Zucchini bread?
So, what exactly *is* this “amazing zucchini bread”? At its heart, it’s a quick bread, meaning you don’t need yeast or any fancy rising techniques. Think of it as a super moist, deeply flavorful cake that just happens to have zucchini in it. The “amazing” part comes from a few key elements: the perfect ratio of wet to dry ingredients that makes it incredibly tender, a generous amount of warming spices that hug you with every bite, and of course, the secret weapon – finely grated zucchini. The zucchini itself is pretty mild in flavor, especially when baked, but it adds this incredible moisture that you just can’t get otherwise. It’s not about tasting zucchini; it’s about experiencing a unbelievably moist and delicious treat. It’s essentially a hug in baked good form, perfect for any time of day, really. It’s the kind of comfort food that feels wholesome but delivers pure indulgence.
Why you’ll love this recipe?
There are so many reasons why this zucchini bread has become a staple in my kitchen, and I have a feeling it’ll become one in yours too. First off, the flavor is just out of this world. It’s got that comforting, warm spice blend – cinnamon, nutmeg, maybe a hint of cloves if you’re feeling it – that just makes everything feel cozy. Then there’s the texture. Oh, the texture! It’s impossibly moist and tender, thanks to the star ingredient, zucchini. I’ve tested this with almond milk and it actually made it even creamier, which is a happy accident I’ve stuck with! It’s not dense or heavy at all; it just melts in your mouth. And let’s talk about simplicity. Seriously, this is a lifesaver on busy weeknights or when you have friends coming over last minute. You probably have most of the ingredients already, and it comes together in a flash. No stand mixer required, just a couple of bowls and a whisk. Plus, it’s surprisingly budget-friendly! Zucchini is usually pretty affordable, and the other pantry staples are things you likely keep on hand. And the versatility? Chef’s kiss! While it’s phenomenal on its own, it’s also fantastic with a smear of cream cheese or a dollop of whipped cream. It’s perfect when you’re craving something sweet at 10pm but don’t want to bake a whole cake. What I love most about this is that it’s so forgiving. Even if you’re a novice baker, you can totally nail this recipe and feel like a baking pro. It’s a crowd-pleaser, a budget-saver, and a taste sensation all rolled into one. What’s not to love?
How do I make Zucchini bread?
Quick Overview
The whole process is wonderfully straightforward. You’ll start by mixing your dry ingredients together, then whisking your wet ingredients in a separate bowl. Combine them gently, fold in your prepared zucchini, and bake until a toothpick comes out clean. It’s that simple! The magic truly lies in the way the zucchini integrates into the batter, creating that signature moistness. This method ensures even distribution and a wonderfully tender crumb every single time. You’ll be amazed at how quickly this comes together, making it perfect for any occasion.
Ingredients
For the Main Batter:
* 2 cups all-purpose flour: I always use a good quality all-purpose flour. If you’re feeling adventurous and want to try gluten-free, I’ve had success with a 1-to-1 gluten-free blend, though the texture might be slightly different. Sift it if you like, but I usually just whisk it well.
* 1 teaspoon baking soda: This is crucial for that lovely lift. Make sure it’s fresh!
* 1 teaspoon ground cinnamon: I’m a huge fan of cinnamon here. Don’t skimp!
* ½ teaspoon ground nutmeg: Just a touch adds that warmth and depth.
* ¼ teaspoon ground cloves (optional): If you love a spicier bread, this is your cue.
* ½ teaspoon salt: Balances the sweetness and brings out the flavors.
* 1 cup granulated sugar: You can reduce this slightly if you prefer a less sweet bread, but I find this amount perfect.
* ½ cup packed light brown sugar: This adds a lovely caramelly depth and extra moisture.
* 2 large eggs: At room temperature is best for emulsifying nicely.
* ½ cup vegetable oil or melted unsalted butter: I’ve tried both! Oil makes it super moist, while butter adds a slightly richer flavor. Use what you have!
* ¼ cup unsweetened applesauce: My little secret for extra moisture and a hint of natural sweetness.
* 1 teaspoon vanilla extract: Pure vanilla extract, always! It makes a world of difference.
* 1 ½ cups grated zucchini: About two medium zucchini. Don’t peel them! The skin adds color and nutrients. Make sure to squeeze out excess moisture, though.
For the Filling (Optional, but highly recommended!):
* ½ cup chopped walnuts or pecans: Toasted, if you have the time – it really amps up the flavor.
* 2 tablespoons granulated sugar
* 1 teaspoon ground cinnamon
For the Glaze:
* 1 cup powdered sugar: Sifted to avoid lumps.
* 2-3 tablespoons milk or buttermilk: Start with 2 and add more if needed to reach your desired drizzling consistency. Buttermilk adds a lovely tang.
* ½ teaspoon vanilla extract
* Pinch of salt: To cut through the sweetness.
Step-by-Step Instructions
Step 1: Preheat & Prep Pan
First things first, let’s get that oven humming. Preheat it to 350°F (175°C). While the oven heats up, grab a standard loaf pan (about 9×5 inches). Grease it really well with butter or cooking spray, then lightly flour it, tapping out any excess. This is so important for preventing sticking – nobody wants their beautiful bread stuck in the pan! I usually use butter because, well, butter makes everything better, but any good non-stick spray works too.
Step 2: Mix Dry Ingredients
In a large bowl, whisk together the flour, baking soda, cinnamon, nutmeg, cloves (if using), and salt. Whisking them thoroughly at this stage ensures everything is evenly distributed. This means no pockets of baking soda or salt in your finished bread, just a uniform, delicious flavor. I like to use a balloon whisk for this step; it really aerates the dry ingredients beautifully.
Step 3: Mix Wet Ingredients
In a separate medium bowl, whisk together the granulated sugar, brown sugar, eggs, oil (or melted butter), applesauce, and vanilla extract. Beat them until they’re well combined and the mixture is relatively smooth. The sugars will start to dissolve, and the eggs and oil will emulsify, creating a lovely, cohesive base for our batter. This is where the magic starts to happen.
Step 4: Combine
Now, pour the wet ingredients into the bowl with the dry ingredients. Using a spatula or wooden spoon, gently fold them together until *just* combined. It’s really important not to overmix here! A few streaks of flour are totally fine. Overmixing develops the gluten too much, which can lead to a tough, dense bread. We want tender and fluffy!
Step 5: Prepare Filling
If you’re adding the optional filling, give those ingredients a quick mix in a small bowl: the chopped nuts, sugar, and cinnamon. This is a simple little addition, but it adds a wonderful texture and extra burst of cinnamon-nut flavor throughout the bread.
Step 6: Layer & Swirl
Gently fold the grated, squeezed zucchini into the batter. Make sure it’s evenly distributed. Now, if you’re using the filling, pour about half of the batter into your prepared loaf pan. Sprinkle half of the nut filling over the batter. Then, pour the remaining batter on top, and sprinkle the rest of the filling over that. If you’re feeling fancy, you can lightly swirl a knife through the batter to create pretty patterns, but it’s totally not necessary for amazing flavor.
Step 7: Bake
Pop that pan into your preheated oven. Bake for about 50-65 minutes. The exact time will depend on your oven, so keep an eye on it. You’ll know it’s done when a toothpick inserted into the center comes out clean, or with just a few moist crumbs attached (no wet batter!). If the top starts to brown too quickly, you can loosely tent it with aluminum foil.
Step 8: Cool & Glaze
Once it’s baked, let the zucchini bread cool in the pan on a wire rack for about 10-15 minutes. This allows it to set up a bit. Then, carefully invert it onto the wire rack to cool completely. This is critical! If you try to glaze it while it’s still warm, the glaze will melt right off. While it’s cooling, whisk together your powdered sugar, vanilla extract, salt, and enough milk to reach a drizzly consistency. Once the bread is completely cool, drizzle that glorious glaze all over the top. Let the glaze set for a few minutes before slicing.
Step 9: Slice & Serve
Once the glaze has set, slice your amazing zucchini bread with a serrated knife for clean cuts. Serve it up and watch it disappear! It’s delicious at room temperature, but I sometimes like it slightly warm with a bit of butter – pure bliss!
What to Serve It With
This amazing zucchini bread is honestly a star all on its own, but it can play really nicely with other things too, depending on the occasion. For a simple, cozy breakfast, I love it toasted with a generous smear of cream cheese or a dab of butter. It’s hearty enough to keep you going but feels like a treat. Pair it with a hot cup of coffee or a tall glass of cold milk – classic for a reason! For a more elegant brunch spread, I’ll often slice it a little thinner and arrange it on a nice platter. It’s lovely alongside a fruit salad or a plate of scrambled eggs. Sometimes, I’ll even add a sprinkle of edible flowers on top for an extra special touch. As a dessert, it’s surprisingly decadent. Serve it with a scoop of vanilla bean ice cream or a dollop of lightly sweetened whipped cream – the warm spices and the cool creaminess are just heavenly. And for those quiet, cozy snack times? It’s perfect. I love it with a cup of herbal tea, curled up on the sofa with a good book. My family tradition is to have a slice (or two!) with a big glass of cold milk after school. It’s such a comforting and delicious pick-me-up.
Top Tips for Perfecting Your Amazing Zucchini Bread
I’ve made this recipe more times than I can count, and over the years, I’ve picked up a few tricks that I think really elevate it. First, for the zucchini prep: it’s absolutely essential to squeeze out as much moisture as possible. I use a fine-mesh sieve and my hands, but a clean kitchen towel or cheesecloth works wonders too. Grate your zucchini on the large holes of a box grater; this gives you nice little pieces that disappear into the batter without making it watery. If you skip this step, your bread can end up gummy and dense. When it comes to mixing the batter, remember my rule: don’t overmix! Seriously, as soon as you don’t see big streaks of dry flour, stop stirring. A few little lumps are perfectly fine and will bake out. Overmixing is the enemy of tender quick breads. For the filling, toasting your nuts beforehand (just a few minutes in a dry skillet or a low oven) brings out their nutty flavor so much more. It’s a small step but makes a big difference. If you want to get creative with swirl customization, you can divide the batter and filling into smaller portions, adding a tiny bit of cocoa powder to one part of the batter for a marble effect, or even a swirl of jam. When it comes to ingredient swaps, I’ve experimented a lot! For the oil, melted coconut oil works, but can impart a slight coconut flavor, which might not be what you’re going for. I’ve also used a neutral oil like canola or grapeseed oil successfully. If you want to reduce the sugar, you can, but it might affect the moisture and tenderness slightly. Experiment with natural sweeteners like maple syrup (though this will change the liquid ratio, so be mindful), but be prepared for a different outcome. Baking tips are crucial too! Always use the middle rack of your oven for even baking. If your oven tends to run hot, consider using a baking stone on the rack below to help regulate the temperature. And don’t be afraid of that toothpick test; it’s your best friend for ensuring it’s cooked through without being overbaked. Finally, glaze variations are endless! If you don’t want a sweet glaze, you can simply dust it with powdered sugar once it’s cooled, or even a sprinkle of cinnamon-sugar before baking. A lemon zest added to the glaze can give it a bright, fresh lift. I once tried adding a bit of orange zest, and it was surprisingly delicious!
Storing and Reheating Tips
This zucchini bread is so good, you’ll want to enjoy it for days, and thankfully, it stores beautifully! At room temperature, if it’s not glazed, it will stay fresh for about 2-3 days. Just wrap it tightly in plastic wrap or store it in an airtight container. If it has glaze, it’s best to keep it at room temperature for only a day or two, as the glaze can get sticky in warmer environments. For longer storage, the refrigerator is your friend. Wrapped well in plastic wrap and then in foil, or in a good airtight container, it can last up to a week in the fridge. The texture might firm up slightly, but it’s still delicious. To reheat, you can pop a slice in a toaster oven or a regular oven at a low temperature (around 300°F or 150°C) for a few minutes until warmed through. It’s also surprisingly good cold! If you want to freeze it, I highly recommend doing so before glazing. Wrap the cooled, unglazed loaf tightly in plastic wrap, then in a layer of aluminum foil, and finally in a freezer bag. It should keep well in the freezer for up to 3 months. Thaw it overnight at room temperature, and then you can glaze it once it’s completely thawed. If you’re freezing slices, wrap them individually before putting them in a freezer bag. For reheating frozen slices, you can often toast them directly from frozen, though it might take a little longer.
Frequently Asked Questions
Final Thoughts
So there you have it – my absolute favorite, go-to zucchini bread recipe. It’s the kind of recipe that just brings a smile to my face every time I make it, and seeing the joy it brings to my family and friends is the best part. It’s more than just a recipe; it’s a little piece of comfort and deliciousness that’s surprisingly easy to create. The incredible moisture, the warm spice blend, and that perfect tender crumb make it a real winner, and it’s so forgiving for bakers of all levels. If you love this recipe, you might also enjoy my Moist Blueberry Muffins or my Easy Apple Crumble Pie – they have that same homey, delicious vibe. Seriously, give this zucchini bread a try. I have a feeling it’s going to become a new favorite in your kitchen too. I can’t wait to hear how yours turns out! Don’t be shy, leave a comment below with your thoughts or any fun variations you try!

carrot cake cheesecake bites
Ingredients
Method
- Before adding the cake mix, it is important to heat treat the dry cake mix. Pour the dry cake mix into a medium-sized heat-safe bowl. Microwave the cake mix in two 30-second intervals, stirring after each interval. Allow the cake mix to cool completely before mixing it into the cream cheese.
- Using a medium-sized mixing bowl and a handheld mixer on medium-high speed, beat the cream cheese for 2 to 2½ minutes until completely smooth.
- Sprinkle the dry cake mix over the top of the cream cheese. Continue mixing just until the dry cake mix is completely incorporated.
- Tightly cover the cream cheese mixture and chill in the refrigerator for 2 hours.
- Line a baking sheet with parchment paper. Set it aside.
- Using a 1 tablespoon cookie scoop, scoop the cheesecake dough. Roll into a ball and set the cheesecake bites onto the prepared baking sheet. Repeat the steps.
- Using a heat-safe medium-sized mixing bowl, heat the white/vanilla candy wafer melts in 30-second intervals, stirring after each interval, until completely melted.
- Roll the cheesecake bites in the melted white/vanilla candy wafers. Place the coated cheesecake bites on a fork and gently tap any excess coating off. You can also use a spoon to pour the coating over any bare spots on the cheesecake bites. Use a toothpick to remove excess melted wafer from the bottom of the fork and then to gently push the ball onto the prepared baking sheet.
- Return the coated cheesecake bites to the prepared baking sheet.
- Using a small heat safe mixing bowl, microwave the orange candy melts in 30-second intervals, stirring well after each interval.
- Using a spoon or small dipper, drizzle thin ribbons of the melted orange candy over the coated cheesecake bites.
- Once all the cheesecake bites are completely coated and drizzled, return them to the refrigerator until ready to serve.