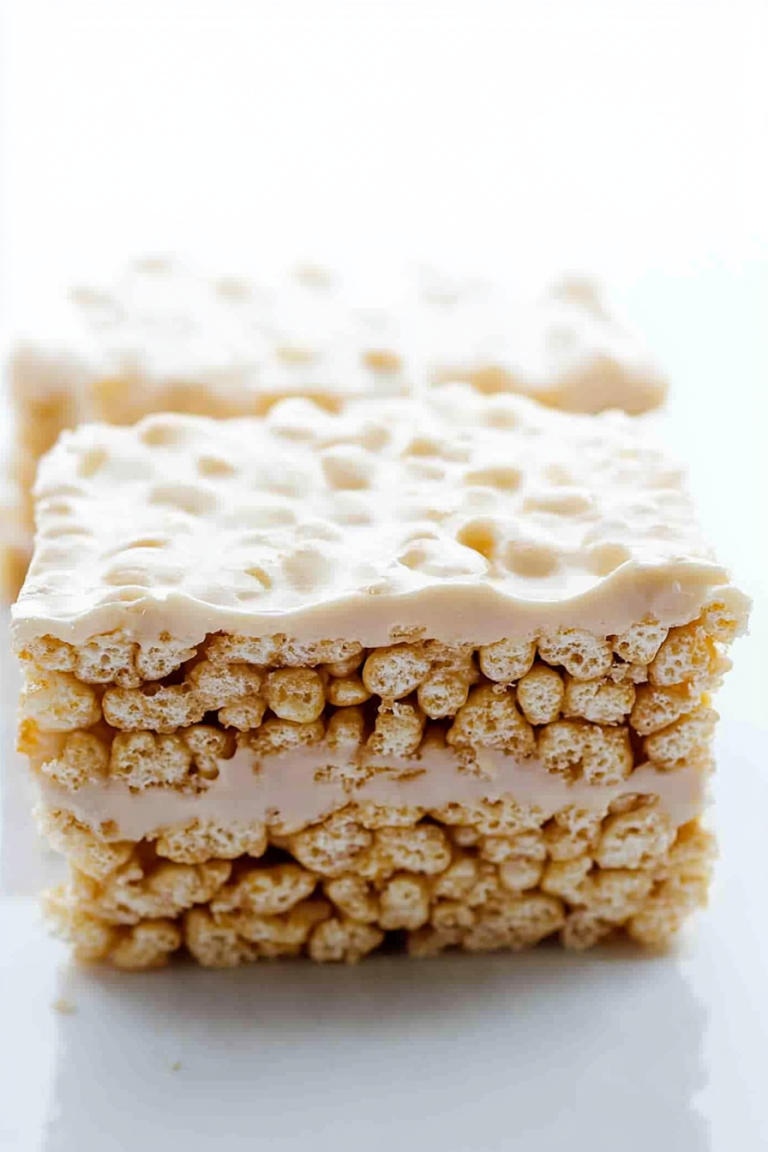
Easy Little Debbie Cake Bites
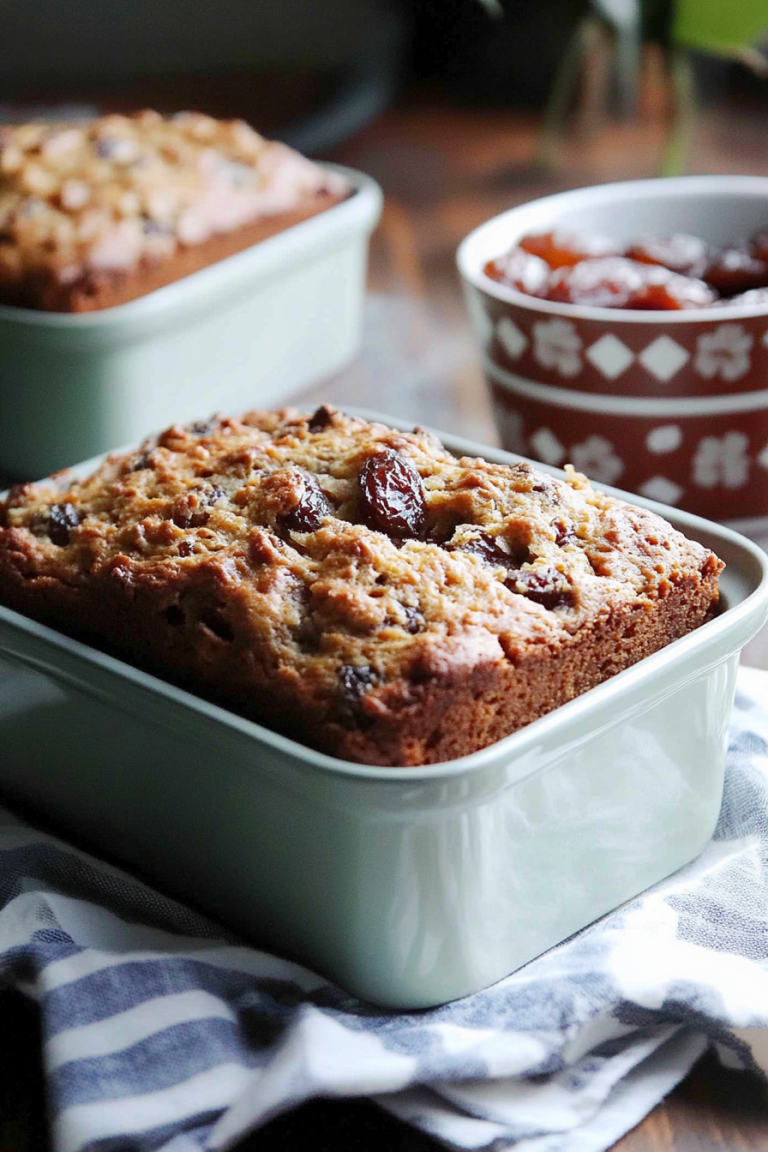
Okay, so I have to tell you about this chocolate zucchini bread. It’s not just *any* chocolate zucchini bread, mind you. This is the one that’s been a family favorite for years, the one my kids beg for on weekends, and honestly, the one I sneak a slice of late at night when that sweet craving hits and I don’t want to deal with a whole cake. It’s ridiculously moist, perfectly chocolatey, and you *cannot* taste the zucchini, I promise! It’s like a little slice of heaven, and I swear, it’s easier to make than you might think. If you’ve ever tried those dense, heavy quick breads that feel more like bricks, forget about them. This is the opposite. Think light, tender, and just… pure joy. It’s basically my go-to when I want something impressive but also incredibly comforting. It even reminds me a little of those amazing bakery muffins, but in a much more satisfying loaf form!
What is chocolate Zucchini bread?
So, what exactly *is* this magical chocolate zucchini bread? At its heart, it’s a quick bread – meaning you don’t need yeast or any complicated rising. It’s built on the same principles as a classic quick bread, but we’re jazzing it up with a serious dose of cocoa powder and, of course, the secret ingredient: zucchini! The zucchini might sound a little out there, right? But trust me, it’s the unsung hero. It adds this incredible moisture and tenderness to the bread without any weird vegetable flavor. When it bakes, the zucchini basically disappears into the batter, leaving behind the most wonderfully soft crumb you can imagine. It’s not a cake, and it’s not quite a muffin, it’s this perfect middle ground that’s substantial enough to feel like a treat but light enough that you can enjoy it any time of day. Think of it as your ultimate comfort food disguised as a healthy-ish baked good!
Why you’ll love this recipe?
Honestly, the list is pretty long! First off, the FLAVOR is just out of this world. It’s deeply chocolatey, but not overly sweet. The cocoa gives it this rich, dark taste, and if you add chocolate chips (which I *always* do!), you get those gooey pockets of melted chocolate goodness. It’s pure bliss in every bite. Then there’s the SIMPLICITY. Seriously, if you can stir things together, you can make this. There’s no fancy equipment needed, no waiting around for dough to rise. It’s a lifesaver on those busy weeknights when you need a quick dessert or a pick-me-up. And let’s talk about COST-EFFICIENCY. Zucchini is usually pretty affordable, especially when it’s in season. The other ingredients are pantry staples for most bakers. This recipe gives you so much bang for your buck; it feels like you’re getting a gourmet treat without the gourmet price tag. Plus, it’s so VERSATILE! I’ll share some serving ideas later, but this loaf is great for breakfast, as a dessert, or just a midday snack. It pairs wonderfully with a cup of coffee or a glass of milk. What I love most about this particular recipe, though, is how reliably perfect it turns out. I’ve made it countless times, and it always comes out moist and delicious. It’s the kind of recipe you can truly count on, and that’s gold in my kitchen. It’s so much better than a store-bought loaf, and you get that wonderful homemade aroma filling your kitchen. It’s truly a win-win!
How do I make Zucchini bread?
Quick Overview
This recipe is all about simple mixing and baking. We’ll start by getting our wet and dry ingredients combined separately, then bring them together. The zucchini gets grated and squeezed dry, which is a super important step for texture. Then we’ll fold in some chocolate chips and bake it into a beautiful, moist loaf. The whole process from start to finish takes about an hour and fifteen minutes, with most of that being hands-off baking time. It’s honestly one of the easiest, most rewarding baked goods you can whip up!
Ingredients
For the Main Batter:
2 cups all-purpose flour. I always use unbleached, it seems to give a slightly better texture.
1/2 cup unsweetened cocoa powder. Make sure it’s good quality; it really makes a difference in that deep chocolate flavor.
1 teaspoon baking soda. This is crucial for giving the bread its lift.
1/2 teaspoon baking powder. Works with the soda to ensure a nice, tender crumb.
1/2 teaspoon salt. Balances out the sweetness and enhances the chocolate.
1 1/2 cups granulated sugar. You can reduce this slightly if you prefer, but I find this amount is perfect for balancing the cocoa.
2 large eggs. At room temperature, they incorporate better.
1 cup vegetable oil (or melted coconut oil). This is key for that incredible moisture. You can also use canola oil.
1 teaspoon vanilla extract. A must for that classic baked good aroma and flavor.
1 cup grated zucchini, squeezed dry. I’ll explain how to do this perfectly in the steps!
For the Filling (Optional but highly recommended!):
1 cup semi-sweet chocolate chips. Or dark chocolate, or milk chocolate – whatever your heart desires!
1/4 cup chopped nuts (walnuts or pecans are my favorites), optional.
For the Glaze (Optional but gorgeous!):
1 cup powdered sugar.
2-3 tablespoons milk (any kind works, even a dairy-free alternative like almond milk).
1 tablespoon unsweetened cocoa powder.
1/2 teaspoon vanilla extract.
Step-by-Step Instructions
Step 1: Preheat & Prep Pan
First things first, get your oven preheated to 350 degrees Fahrenheit (175 degrees Celsius). Then, grab a standard 9×5 inch loaf pan. You want to grease it really well with butter or cooking spray, and then give it a little dusting of flour or cocoa powder. I like to use cocoa powder for this bread so you don’t get any white streaks on the finished loaf. Tap out any excess. This step is super important to make sure your beautiful bread doesn’t stick!
Step 2: Mix Dry Ingredients
In a large bowl, whisk together the flour, cocoa powder, baking soda, baking powder, and salt. Whisking really well ensures that all the leavening agents and cocoa are evenly distributed. You don’t want any pockets of unmixed baking soda! It should look like a uniform, slightly darker powder. This step is quick and easy, but it lays the foundation for a perfectly risen and evenly flavored bread.
Step 3: Mix Wet Ingredients
In a separate medium bowl, whisk together the granulated sugar, eggs, vegetable oil, and vanilla extract. Whisk until everything is well combined and the mixture is smooth. It should look slightly thickened and glossy. If your eggs are cold, giving them a quick whisk on their own first can help them emulsify better with the oil.
Step 4: Combine
Now, pour the wet ingredients into the bowl with the dry ingredients. Gently stir everything together with a spatula or wooden spoon until *just* combined. You’ll see some streaks of flour, and that’s okay. The key here is to not overmix! Overmixing develops the gluten in the flour too much, which can lead to a tougher bread. Once the dry ingredients are *almost* incorporated, add in your grated, squeezed-dry zucchini. Fold it in gently until no dry streaks remain. The batter will be thick, but don’t worry, the zucchini will keep it super moist.
Step 5: Prepare Filling
If you’re adding chocolate chips and nuts, this is the time to gently fold them into the batter. Just a few turns with your spatula should do it. Don’t overwork the batter at this stage either. This is what gives you those delightful little bursts of chocolate and crunch throughout the loaf.
Step 6: Layer & Swirl
Spoon about half of the batter into your prepared loaf pan and spread it evenly. If you’re feeling fancy, you can sprinkle half of your chocolate chips (and nuts, if using) over this layer. Then, spoon the remaining batter on top and spread it out. Sprinkle the rest of your chocolate chips and nuts over the top. For an extra pretty look, you can even give it a gentle swirl with a knife or skewer, but it’s totally optional!
Step 7: Bake
Pop that pan into your preheated oven. Bake for 50-65 minutes. How long it takes can vary depending on your oven, so start checking around the 50-minute mark. You’ll know it’s done when a wooden skewer or toothpick inserted into the center comes out clean, or with just a few moist crumbs attached (no wet batter!). If the top starts to brown too quickly, you can loosely tent it with aluminum foil for the last 10-15 minutes of baking.
Step 8: Cool & Glaze
Once it’s baked to perfection, take the loaf pan out of the oven and let it cool in the pan on a wire rack for about 15-20 minutes. This allows the bread to set up properly. After that, carefully invert the pan to remove the loaf. Let it cool *completely* on the wire rack before glazing. If you try to glaze a warm loaf, the glaze will just melt off! For the glaze, whisk together the powdered sugar, cocoa powder, milk, and vanilla extract in a small bowl until smooth. You want it to be thick enough to coat the bread but still pourable. Drizzle it over the cooled loaf and let it set.
Step 9: Slice & Serve
Once the glaze has set (or if you skipped the glaze), slice your beautiful chocolate zucchini bread! A serrated knife works best for clean slices. Enjoy it warm or at room temperature. It’s truly a masterpiece, and you made it!
What to Serve It With
This chocolate zucchini bread is so versatile, it’s a star on its own, but it also plays well with others! For a simple BREAKFAST, a thick slice is perfect with a hot cup of coffee or a tall glass of cold milk. It’s not too sweet, so it feels like a lovely treat to start the day. If you’re planning a BRUNCH, it elevates the whole spread. You could serve it alongside some fresh fruit salad, yogurt parfaits, or even some crispy bacon. It looks gorgeous on a brunch table, especially with the drizzle of chocolate glaze. As a DESSERT, it’s pure indulgence. A warm slice with a scoop of vanilla bean ice cream or a dollop of whipped cream is simply divine. It’s perfect for satisfying those after-dinner sweet cravings. And for COZY SNACKS, it’s unbeatable. Grab a slice (or two!) with a mug of hot chocolate on a chilly afternoon, or pack a piece for an afternoon pick-me-up at work. My family also loves it with a smear of cream cheese sometimes – sounds odd, I know, but it’s surprisingly good! It’s that kind of treat that just makes everything feel a little bit better.
Top Tips for Perfecting Your Chocolate Zucchini Bread
I’ve made this bread more times than I can count, and over the years, I’ve picked up a few tricks that really make a difference. First, let’s talk about ZUCCHINI PREP. This is arguably the *most* crucial step. You need to grate your zucchini, and then you absolutely *must* squeeze out as much moisture as possible. I usually grate it on the large holes of a box grater. Then, I put the grated zucchini in a fine-mesh sieve set over a bowl and press down firmly with a spoon, or I wrap it in a clean kitchen towel or cheesecloth and wring it out like a sponge. Seriously, get as much liquid out as you can! Too much moisture will make your bread dense and gummy. It might seem like a lot of zucchini goes in, but don’t be alarmed by the volume; after squeezing, it’s much less. For MIXING ADVICE, remember the golden rule of quick breads: don’t overmix! As soon as you combine the wet and dry ingredients, stop stirring when you no longer see dry flour. A few lumps are perfectly fine. Overmixing makes the bread tough. When it comes to SWIRL CUSTOMIZATION, if you’re adding chocolate chips or nuts, just fold them in gently at the very end. You don’t want to crush them. For the glaze, aim for a consistency that’s pourable but not watery. If it’s too thick, add a tiny bit more milk, a teaspoon at a time. If it’s too thin, add a little more powdered sugar. For ingredient swaps, I’ve had success using melted butter instead of oil, but it does change the texture slightly, making it a bit less moist. You can also try adding a tablespoon of instant espresso powder to the dry ingredients to really deepen the chocolate flavor; it doesn’t add coffee taste, just more chocolate intensity! When it comes to BAKING TIPS, always trust the toothpick test. Ovens can be so different, so relying on the time alone isn’t foolproof. Make sure your oven rack is in the middle of the oven for even heat distribution. And for GLACE VARIATIONS, if you don’t want a chocolate glaze, a simple dusting of powdered sugar or a drizzle of melted chocolate is lovely. You could even add a little orange zest to the glaze for a hint of citrus!
Storing and Reheating Tips
This chocolate zucchini bread is pretty forgiving when it comes to storage, but here’s how I keep it tasting its best. At ROOM TEMPERATURE, it stays wonderfully moist for about 2-3 days. I usually just wrap the cooled loaf tightly in plastic wrap or store it in an airtight container. After 3 days, I’ll move it to the refrigerator just to be safe, especially if it’s warm in my kitchen. In the REFRIGERATOR, it will keep well for about a week. Make sure it’s in an airtight container or well-wrapped to prevent it from drying out. When you’re ready to eat it from the fridge, you can enjoy it cold, or let it sit out for about 20 minutes to come back to room temperature. For FREEZER INSTRUCTIONS, this bread freezes like a dream! Once it’s completely cooled (and un-glazed, if possible, as glaze can sometimes weep a bit), wrap the entire loaf or individual slices tightly in plastic wrap, then in aluminum foil, or place in a freezer-safe bag. It will keep well in the freezer for up to 3 months. To thaw, simply unwrap it and let it sit at room temperature for a few hours, or gently reheat slices in a toaster oven or microwave. If you do glaze it before freezing, sometimes it’s best to re-glaze it after thawing if the glaze has softened too much. I usually prefer to store it un-glazed in the freezer and add a fresh glaze or dusting of powdered sugar once it’s thawed and ready to serve!
Frequently Asked Questions
Final Thoughts
So there you have it – my absolute favorite chocolate zucchini bread! I truly believe this recipe is a keeper. It’s proof that you can create something incredibly delicious and comforting with simple ingredients and a little bit of love. It’s one of those recipes that just makes people happy, and that’s what baking is all about for me. If you love tender, moist quick breads with a fantastic chocolate punch, you’ve got to give this one a try. It’s perfect for using up that summer zucchini bounty, or just for those moments when you need a little bit of homemade magic. If you enjoy this recipe, you might also love my recipe for Lemon Blueberry Scones or my super easy No-Knead Artisan Bread! I can’t wait to hear what you think, so please leave a comment below and let me know how your chocolate zucchini bread turns out, or if you have any fun variations! Happy baking, everyone!

cake bites
Ingredients
Method
- Line two large baking sheets with parchment paper or a silicone mat and set aside.
- To a large mixing bowl, add the softened cream cheese and beat on medium speed, using a handheld mixer, for 1-2 minutes or until fluffy and smooth.
- Break the Little Debbie vanilla Christmas tree Snack Cakes into smaller pieces and add to the bowl of beaten cream cheese. Mix on low speed just until fully combined. You may still have some small pieces of the vanilla coating from the snack cakes remaining in the mixture however the mixture should be relatively smooth.
- Using a small cookie scoop, scoop out a 1 tablespoon sized portion of cake ball mixture and place into the palm of your hand. Gently roll to form a smooth ball.
- Place the Little Debbie Christmas tree cake ball onto one of the prepared baking sheets. Repeat with the remaining mixture until all the cake balls have been formed and placed onto the prepared baking sheet.
- Freeze the cake balls for 30-45 minutes, or until completely solid. This will make it easier to coat the cake balls in the melted white chocolate.
- Melt the white chocolate wafers in a medium bowl according to package directions and stir to a smooth consistency.
- In a separate small bowl, melt the red vanilla flavored candy wafers according to package directions and stir until smooth. Transfer the melted red candy wafers into a small piping bag with the tip cut off.
- Place a single cake ball into the melted white chocolate, being sure to coat all sides. Using a fork, lift the coated cake ball out of the melted white chocolate and gently tap the fork on the side of the bowl allowing the excess melted white chocolate to drip back into the bowl.
- Place the white chocolate coated Little Debbie Christmas tree cake ball onto the second prepared baking sheet. Pipe a decorative zig-zag pattern across the top of the white chocolate coated cake ball and sprinkle with a pinch of the green sanding sugar sprinkles. Try to mimic the look of the original Little Debbie Christmas tree snack cakes. Repeat until all the cake balls have been coated and decorated.
- Let the Little Debbie Christmas tree cake balls set for 15-20 minutes until the white chocolate coating is completely firm before plating and serving.