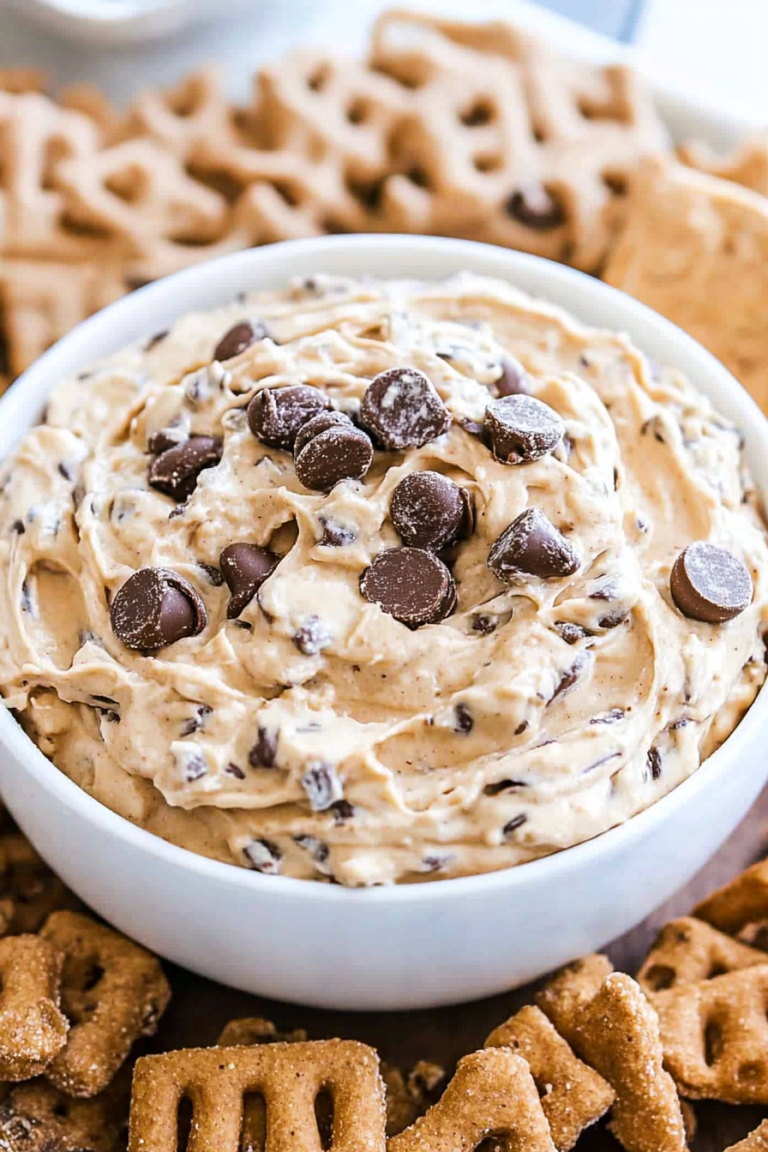
Easy Chocolate Lava Cakes Melt Your Heart
You know those recipes that just feel like a warm hug? The ones you pull out when you need a little comfort, or when you’ve got unexpected guests and need something delicious, fast? This zucchini bread is exactly that for me. It’s more than just a baked good; it’s a memory baked into every slice. I remember my grandma making this when I was little, the whole house filling with that sweet, spiced aroma. It was always the first thing to disappear at any family gathering, and even now, my kids ask for this zucchini bread all the time. Honestly, if you’re looking for a truly moist, flavorful, and ridiculously easy zucchini bread that rivals any bakery’s, you’ve found it. It’s so good, you’ll forget it’s packed with veggies!
What is Zucchini bread?
So, what exactly *is* zucchini bread? At its heart, it’s a quick bread – meaning it uses chemical leaveners like baking soda or baking powder instead of yeast, so no fancy rising times or kneading required! Think of it as a super moist, slightly sweet cake that happens to have shredded zucchini baked right into the batter. The zucchini is the secret weapon here. It doesn’t impart a strong flavor, but it adds incredible moisture, making the bread tender and almost fudgy. It’s often spiced with cinnamon and sometimes nutmeg, and you can add nuts or chocolate chips to make it even more decadent. It’s the kind of thing that’s perfect with a cup of coffee in the morning, as an afternoon pick-me-up, or even as a light dessert. It’s essentially a hug in bread form!
Why you’ll love this recipe?
There are so many reasons why this zucchini bread has earned a permanent spot in my recipe binder, and why I think you’ll fall in love with it too. First off, the flavor is just spot-on. It’s not too sweet, with that perfect hint of cinnamon that makes it taste so cozy and comforting. The texture is absolutely divine – it’s incredibly moist and tender, thanks to the magical properties of zucchini. No dry, crumbly bread here, I promise! And honestly, the simplicity of it is a lifesaver on busy nights or when I just don’t have a lot of energy to bake. You can whip up the batter in about 10-15 minutes, and then it’s just hands-off baking time. Plus, it’s surprisingly cost-efficient. Zucchini is often super affordable, especially when it’s in season. What I love most is its versatility. It’s perfect on its own, of course, but it’s also amazing with a smear of butter, cream cheese, or even a little bit of whipped cream if you’re feeling fancy. If you love my classic banana bread, you’ll definitely appreciate the moist texture and comforting flavors in this zucchini bread. It’s just a universally loved treat, and this recipe is a real winner.
How do you make Zucchini bread?
Quick Overview
The beauty of this zucchini bread is its straightforward approach. We’re talking about simply whisking together wet and dry ingredients, folding in the star of the show (shredded zucchini!), and then pouring it into a pan to bake. It’s designed to be incredibly forgiving, making it perfect for beginner bakers or anyone looking for a quick win in the kitchen. The result? A loaf that’s unbelievably moist, fragrant, and satisfying, all with minimal fuss. You’ll be amazed at how quickly you can go from pantry staples to a warm, freshly baked treat.
Ingredients
For the Main Batter:
I always use all-purpose flour for this, but if you’re looking for a gluten-free version, I’ll share some tips later! Make sure your baking soda and baking powder are fresh – that’s key for a good rise. For the sugar, I usually go with granulated, but brown sugar adds a lovely depth of flavor and extra moisture, so feel free to mix them or use all brown if you prefer! The eggs bind everything together, and unsalted butter makes sure we have control over the saltiness, though I’ve tested this with a good quality vegetable oil too, and it comes out just as wonderfully moist. And of course, vanilla extract – don’t skimp on this! It really rounds out the flavors.
For the Filling:
This is where the magic happens! You’ll need fresh zucchini, of course. I always find it’s best to use medium-sized zucchini, not the gigantic ones, as they tend to have more moisture and larger seeds. Don’t bother peeling them! The skin is tender and adds a lovely little fleck of color. Grating it is best – I use the medium holes on my box grater. It releases just the right amount of moisture. For optional additions, chopped walnuts or pecans add a fantastic crunch and nutty flavor, and if you’re a chocolate lover like me, mini chocolate chips are an absolute game-changer. I’ve even stirred in some blueberries once, and that was delicious too!
For the Glaze:
This is totally optional, but I highly recommend it! It takes the zucchini bread from great to absolutely sublime. It’s a simple combination of powdered sugar, a little bit of milk or even cream cheese for richness, and a touch of vanilla. You want it to be thick enough to coat but still pourable. I usually adjust the liquid until it’s the consistency of thick honey. You can also add a little lemon zest for brightness or a pinch of cinnamon if you like.
Step-by-Step Instructions
Step 1: Preheat & Prep Pan
First things first, get your oven preheated to 350 degrees Fahrenheit (175 degrees Celsius). This ensures it’s nice and hot when the batter is ready. Then, grab a standard loaf pan – a 9×5 inch one is perfect. You’ll want to grease it really well, and then flour it. I like to use butter or non-stick cooking spray for greasing, and then a tablespoon or two of flour. Tap out any excess flour. This whole step ensures your beautiful loaf doesn’t stick. I’ve learned this the hard way after a few loaves stubbornly clung to the pan!
Step 2: Mix Dry Ingredients
In a large bowl, whisk together your all-purpose flour, granulated sugar (or brown sugar, or a mix!), baking soda, baking powder, and salt. Whisking them together really well is important. It helps to distribute the leavening agents evenly, which means a more consistent rise and texture for your bread. You don’t want pockets of baking soda! Just give it a good swirl until everything looks uniform and there are no big clumps of flour.
Step 3: Mix Wet Ingredients
In a separate medium bowl, crack your eggs. Add the melted (and slightly cooled) butter or oil, and the vanilla extract. Give this a good whisk until everything is well combined and the eggs are nicely beaten into the mixture. You want it to be a smooth, homogenous blend. Make sure your melted butter isn’t too hot, or it could scramble the eggs!
Step 4: Combine
Now, pour the wet ingredients into the bowl with the dry ingredients. Here’s where you need to be gentle. Use a spatula or a wooden spoon to mix until *just* combined. It’s really important not to overmix here! A few streaks of flour remaining are perfectly fine. Overmixing develops the gluten in the flour too much, which can lead to a tough, dense bread. We want tender and moist, remember?
Step 5: Prepare Filling
Grate your zucchini using the medium holes of a box grater. You don’t need to squeeze out the excess liquid – the moisture is our friend! If you’re adding nuts or chocolate chips, gently fold them into the batter now. I usually add about a cup to a cup and a half, depending on how much I want them to show up.
Step 6: Layer & Swirl
Now, gently fold the grated zucchini into the batter. Again, be careful not to overmix. You want to see little pockets of zucchini throughout. If you’re using a swirl, like cinnamon sugar, now’s the time to add that layer. I usually mix about 1/4 cup sugar with 1 teaspoon cinnamon and dollop half of it over the batter, then swirl gently with a knife or skewer. Then pour the rest of the batter, and swirl the other half of the cinnamon sugar on top.
Step 7: Bake
Pour the batter evenly into your prepared loaf pan. Smooth the top a bit with your spatula. Now, pop it into the preheated oven. Bake for about 50-65 minutes. The exact time will depend on your oven, of course. You’ll know it’s done when a wooden skewer or toothpick inserted into the center comes out clean, with just a few moist crumbs attached. If the top starts to get too brown before the inside is cooked, you can loosely tent it with foil.
Step 8: Cool & Glaze
Once it’s baked, take the loaf pan out of the oven and let it cool in the pan on a wire rack for about 10-15 minutes. This allows it to set up a bit. Then, carefully invert the loaf onto the wire rack to cool completely. Once it’s completely cool, you can make and drizzle on your glaze. If you add the glaze while it’s warm, it’ll just melt right off! Patience is key here.
Step 9: Slice & Serve
Once the glaze is set (or if you skipped the glaze), slice the bread using a serrated knife for the cleanest cuts. Serve it at room temperature for the best flavor and texture. I like to slice it about half an inch thick. It’s delicious on its own, but a little pat of butter never hurt anyone!
What to Serve It With
This zucchini bread is so versatile, it’s a winner for almost any occasion! For a simple, delightful breakfast, I love serving a thick slice toasted, with a generous smear of butter. It pairs perfectly with a hot cup of coffee or a glass of cold milk. For a more leisurely brunch spread, it’s fantastic alongside scrambled eggs, crispy bacon, and a fresh fruit salad. It adds a touch of sweetness and texture that everyone will rave about. If you’re looking for an easy dessert, especially after a hearty meal, a slice of this zucchini bread, perhaps warmed slightly and topped with a dollop of whipped cream or a scoop of vanilla ice cream, is just heavenly. And for those moments when you just need a cozy snack, it’s perfect on its own, maybe with a cup of tea. My family loves it as an after-school treat with a glass of chocolate milk. It’s that comforting bite that makes any moment feel a little more special.
Top Tips for Perfecting Your Zucchini Bread
Over the years, I’ve learned a few tricks that help make this zucchini bread absolutely perfect every single time. Here are my top tips:
Zucchini Prep: Don’t bother peeling the zucchini! The skin is tender and adds lovely flecks of color. Grating it on the medium side of a box grater is key; it releases just the right amount of moisture. I’ve found that larger zucchini can be a bit more watery, so I tend to stick with medium-sized ones. And please, don’t wring out the zucchini. The moisture is what makes this bread so incredibly tender and delicious!
Mixing Advice: This is probably the most crucial tip for a tender quick bread: do not overmix! Once the wet and dry ingredients are combined, mix until you *just* see no more dry flour streaks. A few small lumps are fine. Overmixing develops the gluten too much, leading to a tough, chewy texture. Gently folding in the zucchini and any add-ins is also important. We’re not trying to beat it into submission; we’re just incorporating.
Swirl Customization: If you love a swirl, get creative! My go-to is cinnamon sugar (about 1/4 cup sugar mixed with 1 teaspoon cinnamon), but you could also do a cocoa swirl by mixing cocoa powder with a little sugar and a tiny bit of milk to make a paste. For a fruity twist, a dollop of raspberry or strawberry jam swirled in can be divine. Just don’t add too much liquid to your swirl ingredients, or it can make the bread gummy.
Ingredient Swaps: I’ve experimented with different flours, and while all-purpose is my favorite for classic texture, a good gluten-free blend usually works well – you might need a touch more liquid or a binder like xanthan gum if your blend doesn’t have it. For sweetness, you can reduce the sugar slightly, but remember it contributes to moisture. I’ve also found that using a mix of granulated and brown sugar offers a wonderful caramel-like note and extra tenderness. For the fat, both melted butter and a neutral oil like canola or vegetable oil work beautifully, offering slightly different richness and crumb.
Baking Tips: Always preheat your oven properly. A consistent temperature is vital for even baking. Placing the loaf pan in the center of the oven ensures it cooks from all sides. If you notice the top browning too quickly before the center is cooked through, don’t hesitate to loosely tent the loaf with aluminum foil for the last 15-20 minutes of baking. The toothpick test is your best friend here; a few moist crumbs are perfect, but wet batter means it needs more time.
Glaze Variations: While my classic vanilla glaze is a winner, feel free to experiment! A little bit of lemon zest added to the glaze provides a lovely brightness that cuts through the sweetness. A dash of almond extract can add a sophisticated nutty flavor. If you prefer a simpler finish, a light dusting of powdered sugar or a sprinkle of coarse sugar before baking can also be lovely.
Storing and Reheating Tips
This zucchini bread is fantastic on its own, but properly storing and reheating can ensure it stays delicious for days. If you plan on eating it within a couple of days, leaving it at room temperature, well-wrapped in plastic wrap or tucked into an airtight container, is perfectly fine. It actually tends to get even more moist as it sits for a day. For longer storage, the refrigerator is your friend. Wrap the cooled loaf tightly in plastic wrap, then in a layer of foil, or place it in an airtight container. It should keep well in the fridge for about 4-5 days. If you want to freeze it, I highly recommend freezing it *before* glazing, or just a portion of it. Wrap the cooled, unglazed loaf tightly in plastic wrap, then in a layer of aluminum foil, and place it in a freezer-safe bag. It can stay frozen for up to 3 months. To reheat, you can gently warm slices in the oven at a low temperature (around 300°F or 150°C) for a few minutes, or even pop them in the toaster for a quick crisp. If you do glaze your bread, I find it’s best to add the glaze after thawing and bringing it to room temperature, or right before serving if you’re reheating a whole loaf.
Frequently Asked Questions
Final Thoughts
Honestly, this zucchini bread is such a comfort food for me, and I truly hope it becomes one for you too. It’s proof that you can sneak in some veggies and create something incredibly delicious and satisfying. The moist texture, the warm spices, the delightful aroma that fills your kitchen as it bakes – it’s all just pure joy. It’s a recipe that’s reliable, forgiving, and always a crowd-pleaser. If you love recipes that are easy to make but deliver big on flavor and texture, you might also enjoy my recipe for moist banana muffins or my classic lemon poppy seed bread – they have a similar comforting vibe! I can’t wait for you to try this zucchini bread and experience that perfect slice of homemade goodness. Let me know in the comments how yours turns out, or if you have any fun variations to share! Happy baking!
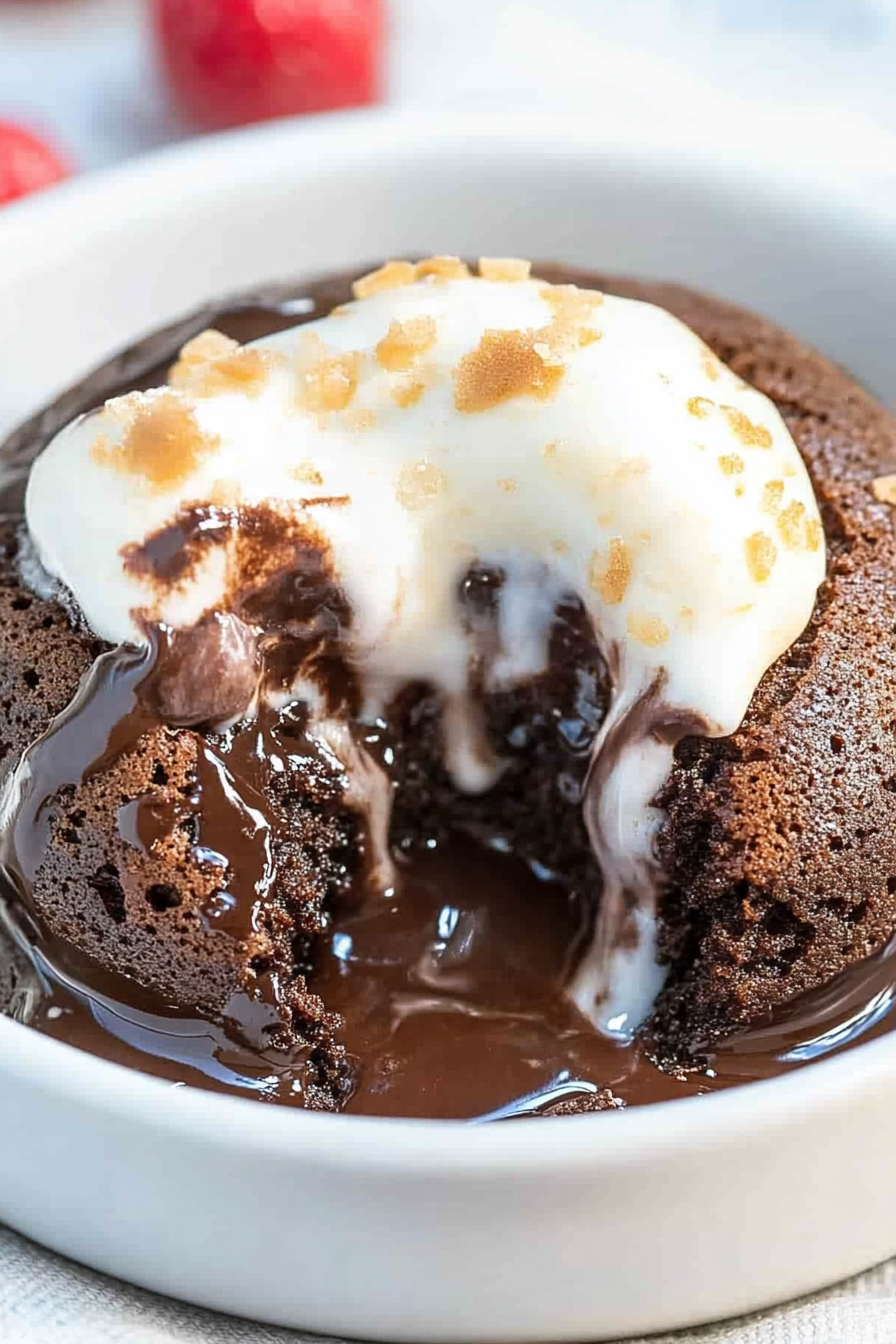
molten chocolate lava cakes
Ingredients
Method
- Preheat oven to 425F and spray two ramekins (about 3-4 inches in diameter or about 4 ounces each) with cooking spray, place ramekins on a baking sheet; set aside.
- To a medium microwave-safe bowl, add the chocolate, butter, and heat on high power to melt, about 1 minute. Stop to whisk until smooth. If needed, return bowl to micro and heat in 15-second increments until chocolate can be whisked smooth.
- Add the sugar, egg, egg yolk, and whisk until smooth.
- Add the flour, optional espresso granules, and stir until just combined; don’t overmix.
- Pour batter into prepared ramekins, divided evenly.
- Bake for about 12 minutes, or until edges are set but center is still soft; don’t overbake. Baking times will vary based on oven, ramekins, and climate variances; bake until as done as desired.
- Allow cakes to cool in ramekins for about 1 minute, gently rim the edges of ramekins with a paring knife, and invert over serving dishes to dislodge cakes.
- Optionally top with ice cream, hot fudge, and serve immediately. Cakes are best warm and fresh.