Easy Zucchini Tomato Pasta
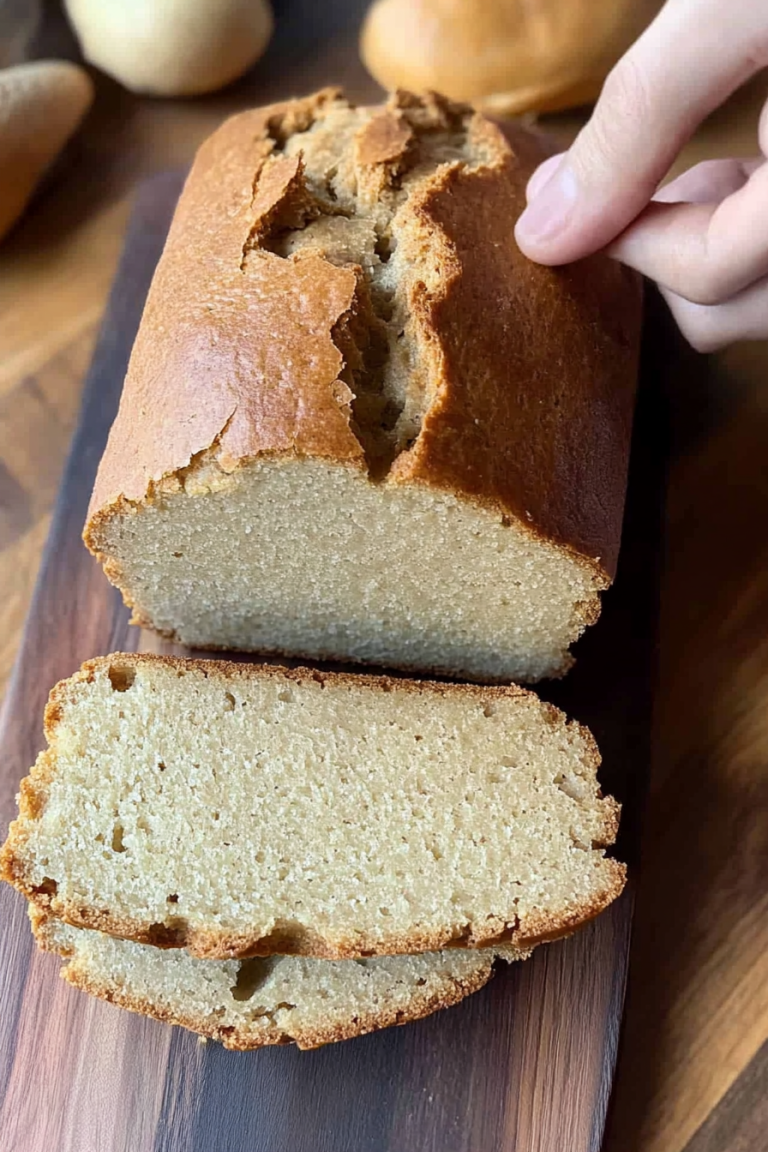
You know those recipes that just feel like a warm hug? The ones that transport you back to your grandma’s kitchen or bring your family running to the table, noses twitching in anticipation? Well, this zucchini bread recipe is exactly that for me. It’s not just a quick bread; it’s a memory maker. I remember my mom making this for us after school, the smell wafting through the whole house, and now my own kids ask for it all the time, especially when they see me grating zucchini. It’s got that perfect balance of moist, tender crumb and subtle sweetness, with just enough spice to make it interesting. Honestly, it’s my absolute favorite way to use up those summer zucchini, and it’s so much easier and more satisfying than I ever thought a baked good could be. If you’ve ever found yourself intimidated by baking, or just looking for that perfect, no-fuss treat, you’ve come to the right place. This zucchini bread is a total game-changer, kind of like discovering that boxed cake mix wasn’t the only way to have dessert.
What is Zucchini bread?
So, what exactly *is* zucchini bread? At its heart, it’s a quick bread, meaning it uses a chemical leavener like baking soda or baking powder instead of yeast, which makes it super fast to whip up. The “zucchini” part comes from, you guessed it, grated zucchini! Now, don’t let that scare you. You can’t really taste the zucchini itself, but it’s the secret weapon that makes this bread unbelievably moist and tender. Think of it as a fluffy, spiced cake that happens to be healthy-ish thanks to all that hidden veggie goodness. It’s typically spiced with cinnamon and sometimes nutmeg, giving it that cozy, comforting aroma and flavor. It’s a classic for a reason, folks. It’s humble, it’s delicious, and it always hits the spot. It’s the kind of treat you can enjoy with your morning coffee or as a sweet pick-me-up any time of day.
Why you’ll love this recipe?
Honestly, there are so many reasons why I keep coming back to this recipe again and again. For starters, the flavor is just phenomenal. It’s sweet, but not *too* sweet, with a warm cinnamon undertone that feels so inviting. And the texture? Oh my goodness, it’s like velvet. It’s incredibly moist and tender, thanks to that magical zucchini. My kids, who can be a bit picky, gobble this up without even realizing they’re eating a vegetable. Plus, it’s ridiculously easy to make. I can whip this up from start to finish in under an hour, which is a lifesaver on busy weeknights when the sweet craving hits hard and I don’t want to spend ages in the kitchen. It’s also incredibly budget-friendly. Zucchini is usually pretty affordable, and the other ingredients are pantry staples. You likely have most of them right now! What I love most about this specific recipe, though, is its versatility. You can add nuts, chocolate chips, or even a swirl of cream cheese for an extra special touch. It’s forgiving, too, which is a huge plus for less experienced bakers. If you’re looking for something similar but a little different, you might also enjoy my Banana Bread: Classic Banana Bread. or my Lemon Blueberry Muffins: What are some good recipes?, but this zucchini bread holds a special place in my heart because it’s just so reliably delicious and satisfying. It’s the perfect bake for a lazy weekend morning or a quick snack when you need a little comfort.
How to Make Zucchini Bread
Quick Overview
The process for this zucchini bread is wonderfully straightforward. You’ll start by mixing your dry ingredients, then your wet ingredients separately, and then combining them. The key is not to overmix! Then, we fold in the grated zucchini and bake it until golden and a tester comes out clean. It’s a simple assembly line that leads to pure deliciousness. Trust me, even if you’re a beginner baker, you’ll nail this on the first try. It’s honestly more about putting things in bowls and stirring than complex techniques.
Ingredients
For the Main Batter:
This is where all the magic begins. I always use all-purpose flour because it gives the best texture. Make sure your baking soda and baking powder are fresh; that’s crucial for a good rise. And for the sugar, I use a mix of granulated and brown sugar – the brown sugar adds a lovely depth of flavor and extra moisture, giving it that classic cozy taste. The eggs bind everything together and add richness. And of course, we can’t forget the zucchini! I usually use medium-sized ones, and you’ll want to grate them on the large side of your box grater. Don’t worry about squeezing out all the liquid; that moisture is exactly what we want! A good quality vanilla extract makes a huge difference, too. A pinch of salt just balances out all the sweetness.
For the Filling:
This part is totally optional, but I love to add cinnamon and a touch of brown sugar for a little something extra. It creates a lovely spiced swirl throughout the bread. Sometimes, if I’m feeling extra decadent, I’ll add a handful of chopped walnuts or pecans for a bit of crunch, or even some chocolate chips. My kids are OBSESSED with chocolate chip zucchini bread. You can also experiment with adding a pinch of nutmeg or allspice to the filling for a more complex spice profile. The great thing is, you can totally customize this to your liking!
For the Glaze:
This is the crown jewel for me! It’s a simple powdered sugar glaze with a touch of milk and vanilla. You want it thick enough to coat the bread nicely but still pourable. It’s the perfect sweet finish. Sometimes I’ll add a tiny splash of lemon juice for a little zing, or even some orange zest. It’s so easy to whip up while the bread is cooling.
Step-by-Step Instructions
Step 1: Preheat & Prep Pan
First things first, get that oven preheating to 350°F (175°C). This is super important because you want your oven nice and hot when your batter is ready. While that’s happening, grease and flour a standard loaf pan. I like to use a little butter or cooking spray, then dust it with flour, tapping out any excess. You can also line it with parchment paper, leaving some overhang on the sides, which makes lifting the baked bread out a breeze. I’ve learned that a well-prepped pan prevents those frustrating stuck bits!
Step 2: Mix Dry Ingredients
In a large bowl, whisk together your flour, granulated sugar, brown sugar, baking soda, baking powder, cinnamon, and salt. Whisking them together helps distribute the leavening agents evenly, ensuring your bread rises beautifully. You want to make sure there are no lumps of baking soda or baking powder. Give it a good stir until everything looks uniformly combined. This is the foundation of our tender bread.
Step 3: Mix Wet Ingredients
In a separate medium bowl, whisk your eggs until they’re well beaten. Then, stir in the melted butter (make sure it’s cooled slightly so it doesn’t cook the eggs!), milk, and vanilla extract. Whisk it all together until it’s smooth and emulsified. The color should be a nice uniform pale yellow. This is where the moisture and richness start to come in.
Step 4: Combine
Now, pour the wet ingredients into the bowl with the dry ingredients. Using a spatula or a wooden spoon, mix gently until *just* combined. Seriously, stop as soon as you don’t see any more dry streaks of flour. Overmixing develops the gluten too much, which can lead to a tough bread, and nobody wants that! A few small lumps are perfectly okay.
Step 5: Prepare Filling
If you’re adding the optional swirl, now’s the time to mix those ingredients. In a small bowl, combine the extra cinnamon and brown sugar. If you’re adding nuts or chocolate chips, have them ready to go.
Step 6: Layer & Swirl
Gently fold in your grated zucchini into the batter. Again, don’t overmix! Just fold until it’s evenly distributed. Now, if you’re doing the swirl, pour about half of the batter into your prepared loaf pan. Sprinkle half of your cinnamon-sugar mixture (or nuts/chocolate chips) over the batter. Then, spoon the remaining batter on top, followed by the rest of the cinnamon-sugar mixture. If you want a more marbled effect, you can use a knife or skewer to gently swirl it through the batter. Don’t over-swirl, though; you don’t want to mix it all in!
Step 7: Bake
Pop that loaf pan into your preheated oven. Bake for 50-60 minutes, or until a wooden skewer or toothpick inserted into the center comes out clean. Ovens can be finicky, so start checking around the 50-minute mark. If the top is browning too quickly, you can loosely tent it with foil. The smell that fills your kitchen during this stage is pure heaven!
Step 8: Cool & Glaze
Once it’s done baking, let the bread cool in the pan on a wire rack for about 10-15 minutes. This allows it to firm up a bit. Then, carefully invert it onto the wire rack to cool completely. Glaze it *only* when it’s fully cooled, otherwise, the glaze will melt and drip off. To make the glaze, whisk together powdered sugar, a tablespoon or two of milk, and a splash of vanilla until smooth and pourable. Drizzle it over the top, letting it drip down the sides. So pretty!
Step 9: Slice & Serve
Once the glaze has set a little, slice your beautiful zucchini bread. I like to use a serrated knife for a clean cut. It’s best served at room temperature. The smell alone is enough to make anyone happy!
What to Serve It With
This zucchini bread is so versatile, it fits into almost any occasion! For breakfast, I love a thick slice toasted and served with a smear of butter. It’s perfect alongside a steaming mug of coffee or a glass of cold milk. It feels like a treat to start the day without being too heavy. For brunch, it’s always a welcome addition. I’ll slice it neatly and arrange it on a platter with fresh fruit like berries or melon. It pairs wonderfully with other brunch favorites like scrambled eggs or crispy bacon. The sweetness of the bread is a nice contrast to savory dishes. As a dessert, it’s just divine. I sometimes serve it slightly warm with a dollop of whipped cream or a scoop of vanilla bean ice cream. The contrast of the warm bread and cold cream is heavenly. For cozy snacks, it’s my go-to. Whether it’s an afternoon pick-me-up or a late-night craving, a slice of this zucchini bread is pure comfort. I often pair it with a cup of herbal tea. My family has a tradition of having this after a Sunday family dinner, and it never disappoints!
Top Tips for Perfecting Your Zucchini Bread
After making this countless times, I’ve picked up a few tricks that make a world of difference. For zucchini prep, I find that grating it on the larger holes of a box grater gives you the best texture; the smaller shreds can release too much moisture and make the bread watery. Don’t worry about squeezing out all the liquid – that’s where the moisture comes from! When mixing the batter, the most important thing is to not overmix once you add the flour. Seriously, just mix until you don’t see dry flour anymore. A few lumps are fine! Overmixing is the quickest way to a tough, dense bread. For the swirl, less is more. You want distinct swirls, not a muddy mess, so just a few gentle passes with a knife or skewer will do the trick. If you’re adding nuts or chocolate chips, fold them in gently at the very end. For ingredient swaps, I’ve tested this with unsweetened applesauce instead of some of the oil, and it works really well, making it even healthier! You can also use almond milk if you don’t have regular milk on hand; I found it actually made the glaze even creamier! When it comes to baking, every oven is different, so get to know yours. Start checking for doneness a bit before the suggested time. A wooden skewer is your best friend for testing; it should come out clean or with a few moist crumbs attached, but no wet batter. For the glaze, if it’s too thick, add milk a teaspoon at a time. If it’s too thin, add a little more powdered sugar. The consistency is key for that beautiful drizzle!
Storing and Reheating Tips
This zucchini bread is so good, you’ll want to savor every bite, so proper storage is key! If you’ve got some leftover (which is rare in my house!), you can store it at room temperature for about 2-3 days. Just make sure it’s completely cooled and tightly wrapped in plastic wrap or an airtight container. This keeps it from drying out. If you think you’ll need longer, the refrigerator is your friend. Stored in an airtight container in the fridge, it will stay good for about a week. The texture might get a tiny bit firmer, but it’s still delicious. And guess what? This bread freezes beautifully! Once it’s completely cooled, wrap it tightly in plastic wrap, then in foil, or place it in a freezer-safe bag. It can stay in the freezer for up to 3 months. To thaw, just unwrap it and let it sit at room temperature for a few hours. If you want to reheat a slice, I find that a quick 15-20 seconds in the microwave is perfect to warm it up and bring back some of that fresh-baked tenderness. If you glazed it, add the glaze *after* reheating, or just before serving, to prevent it from getting soggy. If it’s unglazed, reheating is even easier!
Frequently Asked Questions
Final Thoughts
So there you have it – my absolutely cherished zucchini bread recipe. It’s more than just a baked good; it’s a slice of comfort, a reliable friend in the kitchen, and a guaranteed crowd-pleaser. I truly hope you’ll give it a try, especially if you’ve got a surplus of zucchini or just need a little something sweet to brighten your day. It’s proof that simple ingredients, made with a little bit of love, can create something truly magical. If you’re a fan of this recipe, you might also enjoy my Perfectly Moist Carrot Cake or my Easy Apple Crumble – they’ve got that same cozy, home-baked goodness. I can’t wait to hear how yours turns out! Please leave a comment below and let me know your favorite add-ins or any variations you tried. Happy baking!
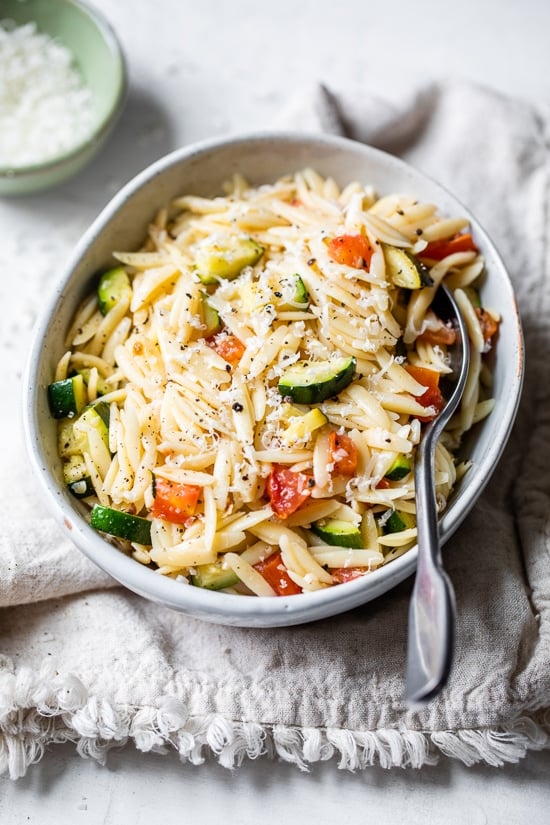
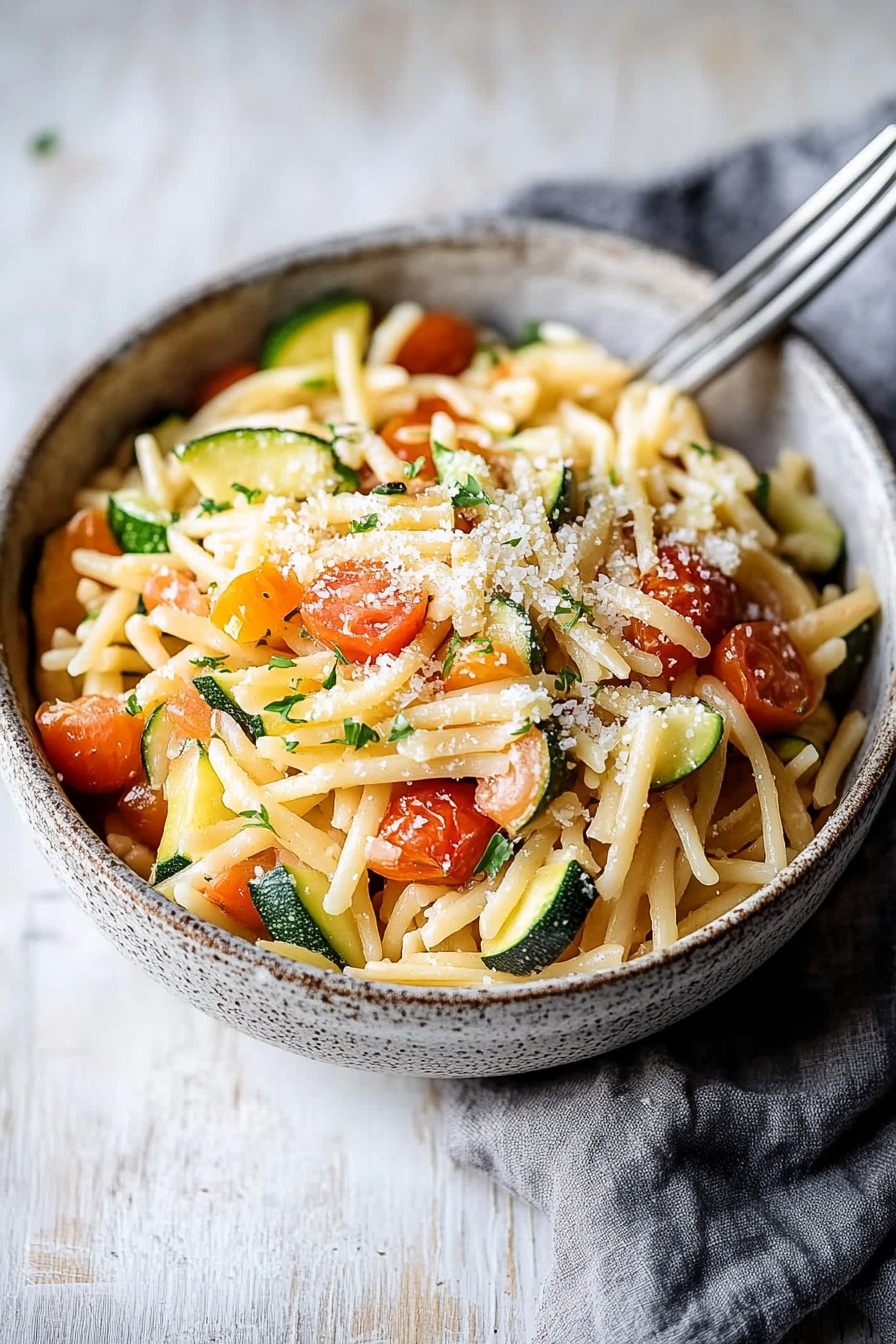
zucchini tomato pasta
Ingredients
Method
- Cook pasta in large pot of salted water as directed for al dente.
- Reserve about 0.5 cup liquid before draining. Drain orzo in a colander and add the oil to the pot.
- Sauté garlic for 1 minute, until fragrant, then add the zucchini and tomatoes. Season with salt and pepper and mix well. Cook until tender, 3 to 4 minutes.
- Add the cooked orzo and stir to combine all. Add some of the reserved liquid as needed so the pasta isn't dry.
- Add freshly grated cheese and stir.