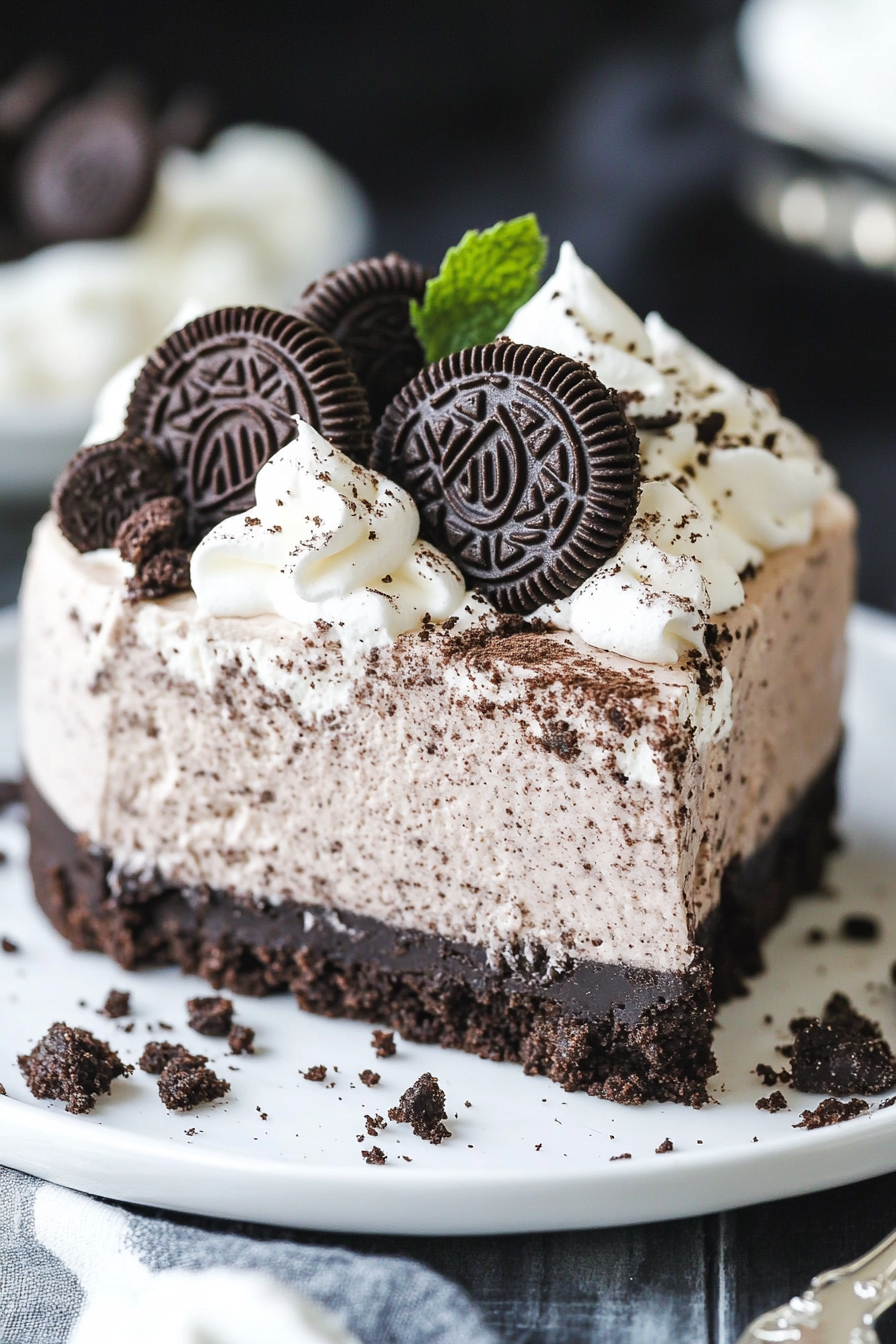
Easy Oreo Cheesecake No Bake Delight
You know those recipes that just feel like a warm hug? The ones you pull out when you need a little comfort, or when you want to impress someone without breaking a sweat? Well, this zucchini bread recipe is *that* recipe for me. I swear, the moment that sweet, spiced aroma fills the kitchen, my whole family gravitates towards it like magnets. It’s not just any zucchini bread, though. It’s the kind that’s impossibly moist, perfectly spiced, and has this lovely little sweet swirl running through it that makes it feel a bit like a treat, but it’s secretly packed with goodness. My kids devour it, my husband requests it for his office potlucks, and honestly, I’m pretty sure my neighbors know when I’m baking it just by the smell wafting down the street. If you’ve ever felt intimidated by baking, or if you’ve had those past zucchini bread experiences that were… well, let’s just say a bit too dense or dry, please, please give this one a shot. It’s the cousin to a good banana bread, but with its own special magic.
What is Zucchini bread?
So, what exactly *is* zucchini bread? At its heart, it’s a quick bread, meaning it doesn’t rely on yeast for leavening. Think of it like a cake that’s just a *little* bit less sweet, or a muffin that’s decided to get a bit more sophisticated. The star ingredient, of course, is zucchini! Now, I know what you might be thinking: zucchini in a sweet bread? But trust me on this. When you grate it and bake it, that zucchini practically disappears, leaving behind nothing but incredible moisture and a tender crumb. It’s like a baking secret weapon. The “bread” part means it’s baked in a loaf pan, making it super easy to slice and serve. And the “swirl” we’re talking about? That’s just a little bit of extra magic – usually a cinnamon-sugar mixture that gets swirled into the batter before baking, creating these beautiful ribbons of flavor and texture. It’s essentially a delicious way to use up that garden zucchini abundance, or just a fantastic excuse to make something utterly delicious!
Why you’ll love this recipe?
Honestly, there are so many reasons why this zucchini bread has become my go-to. First off, the flavor is just… *chef’s kiss*. It’s perfectly spiced with cinnamon and a hint of nutmeg, which is just divine. But the real hero is the moisture. This bread is never dry. Ever. I’ve made it countless times, and it always comes out unbelievably tender and moist, thanks to that grated zucchini and the right ratio of wet to dry ingredients. And speaking of ingredients, you probably have most of them in your pantry right now! It’s incredibly cost-efficient, which is a lifesaver for busy families like mine. No fancy ingredients needed here. Then there’s the simplicity. Seriously, if you can stir things together in a bowl, you can make this. It’s a one-bowl wonder for the batter, and the swirl is just an extra little step that takes it from good to absolutely spectacular. What I love most is its versatility. It’s perfect for a quick breakfast, a satisfying snack with a cup of coffee, or even a simple dessert with a dollop of whipped cream. It’s way easier than making a full cake, but feels just as special. It’s one of those recipes that just brings joy, pure and simple.
How do you make Zucchini bread?
Quick Overview
This recipe is beautifully straightforward. You’ll mix your dry ingredients, whisk together your wet ingredients, combine them gently, then add that delightful cinnamon-sugar swirl. Bake until golden and fragrant, and you’ve got yourself pure happiness in loaf form. The beauty of this method is that it minimizes the risk of overmixing, which is crucial for a tender crumb. You’re essentially building moisture and flavor layer by layer, ensuring a fantastic result every single time. It’s a process that respects the ingredients and delivers a truly delicious outcome without any fuss.
Ingredients
For the Main Batter:
Let’s talk ingredients! For the main batter, you’ll need all-purpose flour – I usually opt for a good quality unbleached kind. Then, a couple of teaspoons of baking soda and baking powder for that perfect lift, a pinch of salt to balance the sweetness, and of course, plenty of cinnamon and a touch of nutmeg for that warm, cozy spice profile. I’ve found that using a generous amount of spices really makes this bread sing. And the sugar? A mix of granulated and brown sugar gives it a lovely depth of flavor and moisture. Don’t skimp on the zucchini – about two cups of finely grated zucchini is perfect. Make sure to give it a good squeeze to remove excess water; this is a key step! For the wet ingredients, you’ll need a couple of eggs, some melted butter (or vegetable oil for a slightly different, but still delicious, texture – I’ve tested both!), and a splash of vanilla extract. For extra moisture, I love using buttermilk or even plain yogurt; it makes the crumb unbelievably tender. If you’re dairy-free, almond milk or oat milk can work too, though I found almond milk made it even creamier!
For the Filling:
This is where the real magic happens! For the swirl, it’s super simple: just a few tablespoons of granulated sugar, a good teaspoon of cinnamon, and a tiny pinch of nutmeg. That’s it! You just mix them together. Some people add a tablespoon of flour to help it hold its shape, but I usually find it’s not necessary if your batter isn’t too thin. You can also add a little extra spice if you’re a big cinnamon lover like me!
For the Glaze:
Optional, but highly recommended for that extra touch of sweetness and shine! You’ll just need a little powdered sugar, a tablespoon or two of milk (or lemon juice for a citrusy zing!), and a tiny splash of vanilla extract. You can adjust the milk to get your desired consistency – a thinner glaze for drizzling, or a thicker one that sets up nicely.
Step-by-Step Instructions
Step 1: Preheat & Prep Pan
First things first, let’s get your oven preheated to 350 degrees Fahrenheit (175 degrees Celsius). I always find my oven runs a little hot, so sometimes I knock it down to 325 if I’m worried about the edges getting too dark too quickly. While that’s heating up, grab your trusty 9×5 inch loaf pan. I like to grease it really well with butter or cooking spray, and then dust it with a little flour. Or, even easier, line it with parchment paper, leaving a little overhang on the sides. This makes lifting the cooled bread out a breeze – no sticking, no drama!
Step 2: Mix Dry Ingredients
In a large bowl, whisk together your flour, baking soda, baking powder, salt, cinnamon, and nutmeg. I like to give it a good whisk for at least 30 seconds to really combine everything and break up any clumps of baking soda or powder. This ensures even leavening throughout your loaf. You want a nice, uniform mixture. Don’t rush this step; it’s important for getting that beautiful, even rise!
Step 3: Mix Wet Ingredients
In a separate medium bowl, whisk together your eggs, melted butter (or oil), granulated sugar, brown sugar, vanilla extract, and your dairy or non-dairy milk/yogurt. Whisk until everything is nicely combined and smooth. Make sure your butter isn’t too hot when you add it to the eggs, otherwise, you might scramble them! Just let it cool for a minute or two after melting.
Step 4: Combine
Now, pour the wet ingredients into the dry ingredients. Grab a spatula and gently fold everything together until *just* combined. Seriously, stop mixing the second you don’t see any dry flour streaks. A few small lumps are perfectly fine, even desirable! Overmixing is the enemy of tender quick bread; it develops the gluten too much and can lead to a tough, chewy loaf. Trust me, I’ve learned this lesson the hard way!
Step 5: Prepare Filling
While your batter is resting for a moment, quickly mix together the ingredients for your swirl: sugar, cinnamon, and nutmeg. Just stir them in a small bowl until well combined. That’s it! This little mixture is going to give you those gorgeous ribbons of flavor.
Step 6: Layer & Swirl
Pour about half of your batter into the prepared loaf pan. Sprinkle about half of your cinnamon-sugar mixture over the top. Then, carefully pour the remaining batter over that. Sprinkle the rest of the cinnamon-sugar mixture on top. Now for the fun part! Take a knife or a skewer and gently swirl it through the batter, making figure-eights or just random zig-zags. Don’t over-swirl, or you’ll muddy the colors. You just want to create distinct ribbons. Aim for about 4-5 gentle passes through the batter. You want to see those pretty layers!
Step 7: Bake
Pop that loaf pan into your preheated oven. Bake for about 50-65 minutes. The exact time will depend on your oven, but you’ll know it’s done when a wooden skewer or toothpick inserted into the center comes out clean, or with just a few moist crumbs attached (no wet batter!). The top should be beautifully golden brown. If the top is browning too quickly, you can loosely tent it with a piece of aluminum foil for the last 15-20 minutes of baking.
Step 8: Cool & Glaze
Once it’s baked, let the loaf cool in the pan for about 10-15 minutes. This allows it to set up a bit. Then, carefully use the parchment paper overhang (or invert it if you didn’t use parchment) to remove the loaf from the pan and place it on a wire rack to cool completely. Patience is key here! Trying to glaze a warm loaf is a messy business. Once it’s completely cool, you can whip up that simple glaze by whisking powdered sugar, milk, and vanilla until smooth. Drizzle it over the top and let it set. Or, if you prefer, a simple dusting of powdered sugar is lovely too!
Step 9: Slice & Serve
Once the glaze has set (or if you skipped it), it’s time to slice into your masterpiece! I always like to use a serrated knife for clean cuts. Serve at room temperature for the best flavor and texture. It’s absolutely perfect on its own, but a little butter or cream cheese never hurt anyone!
What to Serve It With
This zucchini bread is so versatile, it’s truly a champion in the kitchen. For a relaxed breakfast, I love it toasted and slathered with a bit of butter, alongside a steaming mug of my favorite dark roast coffee. The warm spices in the bread pair so beautifully with the richness of the coffee. If you’re aiming for a more elegant brunch spread, think about serving thicker slices with a side of fresh berries or a dollop of Greek yogurt and a drizzle of honey. It also makes a fantastic addition to a brunch buffet, looking lovely next to quiches and fruit salads. And as a dessert? Oh my goodness. A warm slice, maybe with a tiny scoop of vanilla bean ice cream or a swirl of lightly sweetened whipped cream, is pure indulgence. For those cozy, late-night cravings when you want something sweet but don’t want to bake a whole cake, this is your answer. A slice with a glass of cold milk is pure comfort. I’ve even served it with a light raspberry coulis, and it was divine!
Top Tips for Perfecting Your Zucchini Bread
Okay, let’s talk about the nitty-gritty. Over the years, I’ve learned a few things that have really elevated my zucchini bread game, and I’m happy to share them with you! When it comes to zucchini prep, the most crucial step is draining it. Grate your zucchini (I use the medium holes on a box grater), then place it in a fine-mesh sieve over a bowl. Let it sit for about 10-15 minutes, then press down with a spoon or your hands to squeeze out as much liquid as possible. Don’t skip this! Too much moisture can make your bread gummy. For mixing, remember my golden rule: gentle does it. Fold until *just* combined. Seriously, a few streaks of flour are okay. Overworking the batter is the fastest way to a tough loaf. When it comes to the swirl, don’t go crazy! You want distinct ribbons, not a muddy mess. Gentle, shallow swirls are best. For ingredient swaps, if you don’t have buttermilk, plain yogurt or sour cream mixed with a tablespoon of milk works wonders. You can also substitute half the all-purpose flour with whole wheat for a slightly nuttier flavor and added fiber – just be aware it might absorb a bit more liquid. Baking can be tricky, but a good oven thermometer is a lifesaver! Always check for doneness with a toothpick; it’s the most reliable test. If the top is browning too fast, tent it with foil. For the glaze, if it’s too thick, add milk a *tiny* drop at a time. If it’s too thin, whisk in a little more powdered sugar. The key is to achieve a drizzly but not watery consistency.
Storing and Reheating Tips
This zucchini bread is delicious on day one, but honestly, I think it’s even better on day two! Once it’s completely cooled, you can store it at room temperature, tightly wrapped in plastic wrap or in an airtight container, for about 3-4 days. It stays wonderfully moist. If you live in a really warm or humid climate, or if you’ve added a glaze that needs to set, popping it in the refrigerator might be a better option. Wrapped well, it should keep for about a week in the fridge, though I’ve never had it last that long! If it does get a little firm from refrigeration, just pop a slice in the toaster or microwave for a few seconds to bring back its lovely soft texture. Freezing is also a fantastic option if you want to make a double batch. Wrap the cooled loaf tightly in plastic wrap, then in aluminum foil, or place it in a freezer-safe bag. It will keep well in the freezer for up to 3 months. To thaw, simply unwrap it and let it come to room temperature on the counter, or gently reheat slices in the oven or microwave. If you’ve glazed it, it’s often best to add the glaze *after* thawing and reheating, just to keep it looking its best. For storage, I always recommend waiting until the bread is completely cool before wrapping, as any residual steam can create condensation and make it soggy.
Frequently Asked Questions
Final Thoughts
So there you have it – my absolute favorite, foolproof zucchini bread recipe. It’s more than just a recipe to me; it’s a memory maker, a crowd-pleaser, and a testament to how simple ingredients can create something truly magical. The way it bakes up, impossibly moist and fragrant, is just a joy. It’s the kind of thing that makes your kitchen feel like home. If you love this recipe, you might also enjoy my {{
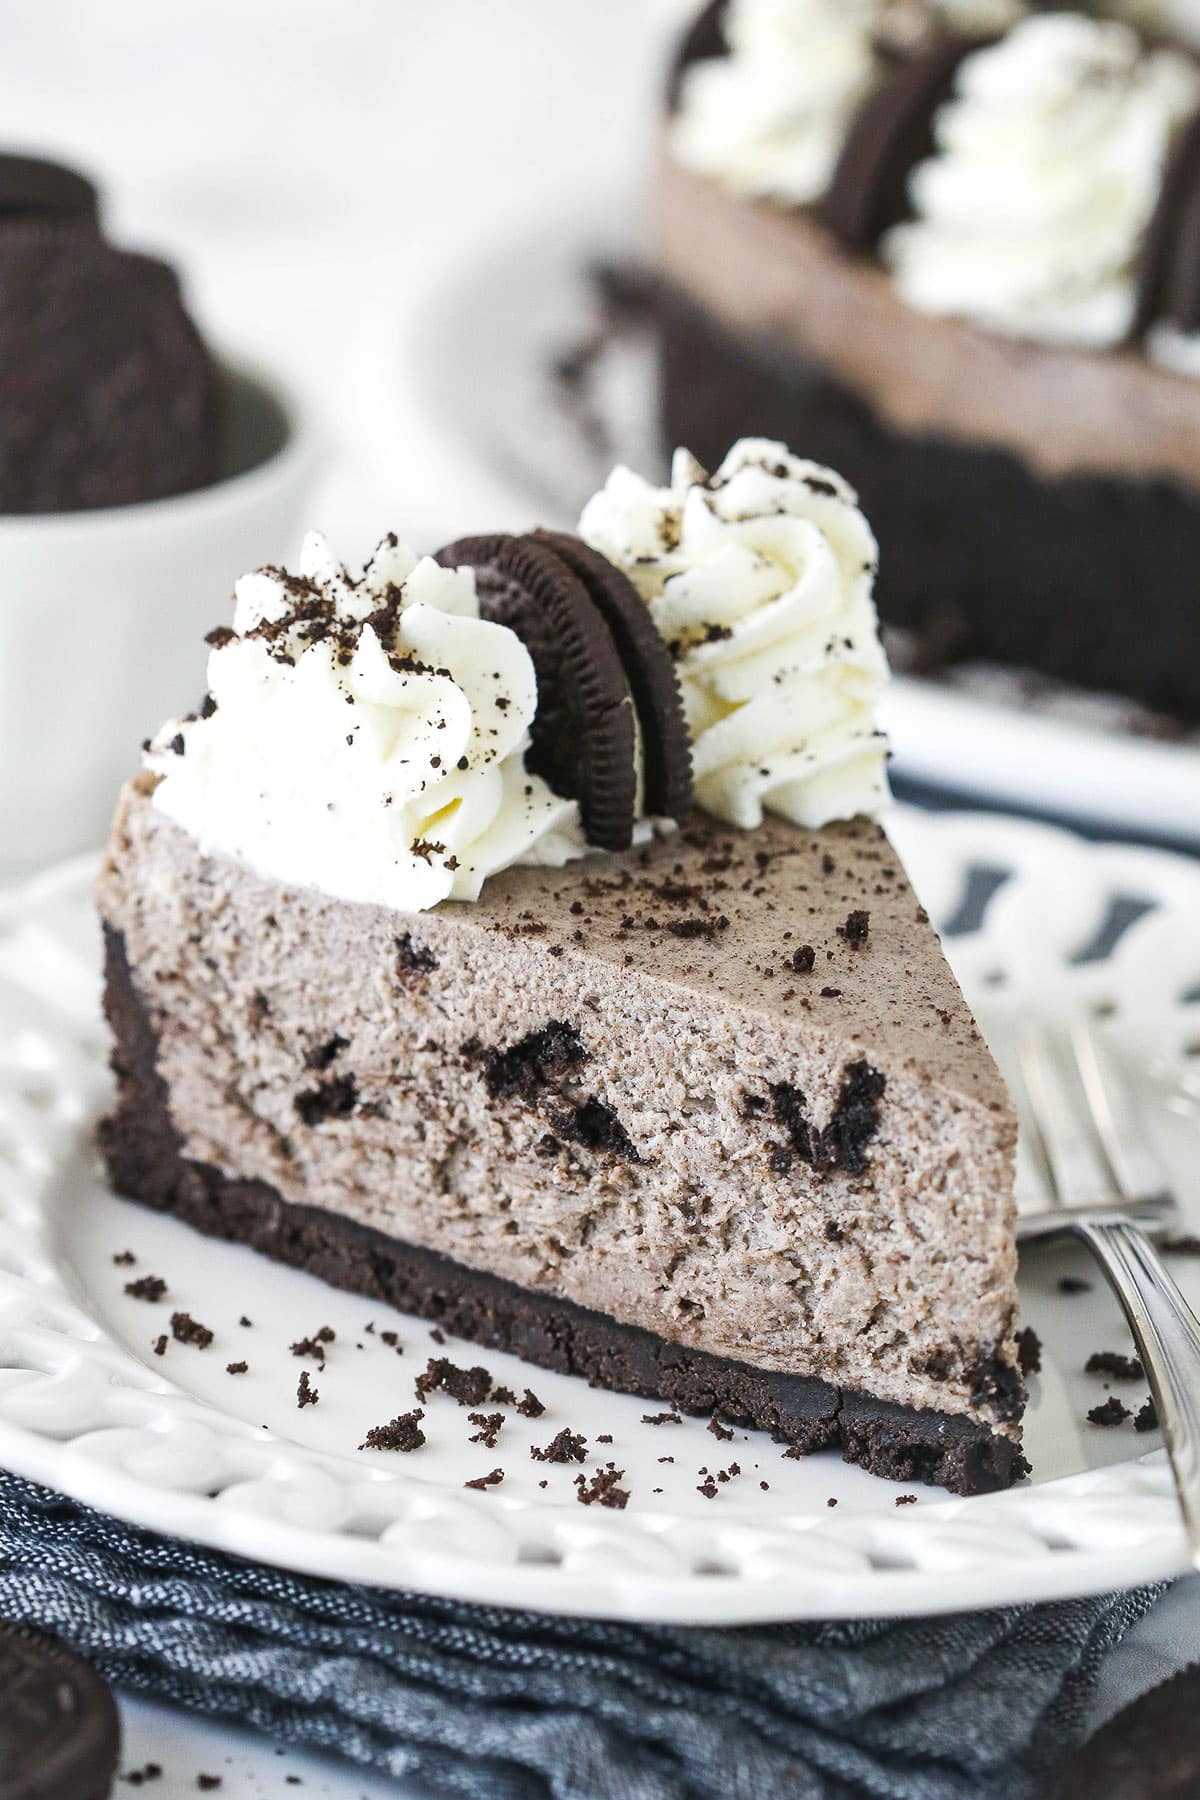
no bake oreo cheesecake
Ingredients
Method
- Line a 9-inch (23cm) springform pan with parchment paper in the bottom and grease the sides.
- Combine the Oreo crumbs and melted butter in a small bowl. Press the mixture into the bottom and up the sides of the springform pan.
- Place the crust in the fridge while you make the filling.
- In a large mixer bowl, beat the cream cheese, granulated sugar, and vanilla extract together until well combined and smooth. Set aside.
- In another large mixer bowl, add 1 1/4 cups of cold heavy whipping cream and 3/4 cup powdered sugar. Whip on high speed until stiff peaks form.
- Gently fold the whipped cream into the cream cheese mixture in two parts until well combined.
- Gently fold the 1 1/2 cups of Oreo crumbs and chopped Oreos into the cheesecake filling.
- Spread the Oreo cheesecake filling evenly over the prepared crust and refrigerate the cheesecake until firm, 5-6 hours or overnight.
- Once the cheesecake is firm, add the remaining 3/4 cup heavy whipping cream, 6 tablespoons powdered sugar, and 1/2 teaspoon vanilla extract to a large mixer bowl. Whip on medium speed until stiff peaks form.
- Remove your cheesecake from the springform pan and set it on a plate or serving platter. Pipe the whipped cream around the rim of the cheesecake.
- Place Oreo halves between each whipped cream swirl and finish it off with a sprinkle of Oreo crumbs.
- Store the cheesecake in the fridge until ready to serve. Cheesecake is best if eaten within 4-5 days.