Easy Homemade Hamburger Helper You’ll Love
You know those days? The ones where the sun is just starting to dip, casting that warm, golden light across your kitchen, and you suddenly get this *craving*? Not for something fussy, or complicated, but for something deeply comforting, something that smells like pure home. That’s when I reach for my zucchini bread. And not just any zucchini bread, mind you. This is *the* zucchini bread. It’s the one that disappears in minutes, the one my family asks for by name, the one that makes even the most chaotic weeknight feel a little bit softer. Forget those dense, dry loaves that leave you feeling like you’ve eaten sawdust. This is moist, tender, perfectly spiced, and has just the right amount of sweetness. It’s the kind of treat that rivals even the most decadent chocolate cake, but with a wholesome goodness that makes you feel good about eating it. Seriously, if you’ve ever been let down by a sad, crumbly zucchini bread, trust me, this one is going to change your mind forever. It’s become my go-to, my little culinary secret weapon, and I’m so thrilled to finally share it with you.
What is Zucchini bread?
Okay, so when I say “zucchini bread,” you might be picturing something… well, *green*. And yes, there’s zucchini in there, but that’s part of its magic! Think of it as a wonderfully moist, subtly sweet quick bread, elevated by the incredible moisture and tenderness that grated zucchini lends. It’s not about tasting the zucchini itself, it’s about how it transforms the texture, making it unbelievably soft and keeping it that way for days. It’s essentially a blank canvas for warm spices like cinnamon and nutmeg, which are my absolute favorites. Some people add nuts, some add chocolate chips (which, don’t get me wrong, are also divine!), but at its heart, this recipe is about that pure, comforting spiced cake flavor. It’s the kind of treat that just feels *right*, any time of day, any day of the year. It’s familiar, it’s forgiving, and it’s ridiculously delicious.
Why you’ll love this recipe?
What are some of the reasons why this recipe has earned a permanent spot in my baking rotation?flavor is just out of this world. It’s got that perfect balance of sweet and spice – not too much of either, just harmonious. The cinnamon and nutmeg really sing, and the subtle sweetness makes it perfect for any time of day. Then there’s the simplicity. I’m talking about a “mix everything in one bowl” kind of simple. No fancy techniques, no weird ingredients you can only find in specialty stores. It’s the kind of recipe you can whip up even when you’re exhausted after a long day. And let’s talk about Cost-efficiency: What is the best way to measure cost-efficiency?. Zucchini is usually pretty affordable, especially when it’s in season. Flour, sugar, eggs – these are all pantry staples. So, you get this incredibly satisfying, crowd-pleasing baked good without breaking the bank. It’s a lifesaver for busy parents, busy professionals, anyone who needs a little pick-me-up! And its versatility is just incredible. While I adore it plain with a simple glaze, I’ve also tossed in a handful of walnuts for crunch, or even some dark chocolate chips when I’m feeling extra indulgent. It’s the kind of recipe that’s perfect for a quick breakfast on the go, a delightful afternoon tea treat, or even a lovely dessert if you serve it warm with a dollop of whipped cream. It’s like the friend who always shows up and makes everything better. Compared to other quick breads, this one just has that extra something – that perfect moist crumb and rich flavor that keeps you coming back for more. It’s truly a winner!
How to Make This Dreamy Zucchini Bread
Quick Overview
The beauty of this zucchini bread is its straightforward approach. You’ll essentially grate your zucchini, whisk together your dry ingredients, whisk your wet ingredients, combine them gently, fold in the zucchini, and bake until golden and fragrant. It’s that simple! No creaming butter and sugar for ages, no complicated folding techniques. This method ensures a wonderfully moist and tender crumb every single time. It’s seriously foolproof, and the results are consistently spectacular, making it perfect even for beginner bakers!
Ingredients
For the Main Batter:
Let’s get these cozy ingredients ready. I always like to use fresh, firm zucchinis for the best moisture content. Grating them is key – and don’t worry about peeling them unless the skin is super tough. It adds nutrients and color! For the flour, all-purpose works like a charm, but I’ve also had success with a 1-to-1 gluten-free blend if you need it. Brown sugar is my secret for that extra depth of flavor and moisture, but granulated white sugar works too if that’s what you have on hand. A good quality cinnamon and a pinch of nutmeg are non-negotiable for that classic spiced aroma and taste. And of course, eggs to bind everything, and oil (vegetable or canola) for that incredible moistness. A little bit of baking soda and baking powder will give it that perfect lift.
For the Filling:
This is where you can get a little creative! My absolute favorite is a simple cinnamon-sugar swirl. It just elevates the whole experience. You just need a bit more cinnamon and a touch of brown sugar. If you’re feeling decadent, a handful of chocolate chips or chopped walnuts is always a welcome addition. I usually mix these components separately and then layer them in. Some people like to add a touch of cocoa powder to the cinnamon sugar for a chocolatey swirl – also delicious!
For the Glaze:
This is totally optional, but oh-so-worth-it! A simple powdered sugar glaze is my go-to. It’s just powdered sugar and a little bit of milk or lemon juice for a bit of tang. You want it to be thick enough to drizzle but not so thick that it’s hard to get out of the bowl. I’ve also done a cream cheese glaze, which is heavenly, especially if you’re going for a more cake-like vibe. It’s all about what you’re craving!
Step-by-Step Instructions
Step 1: Preheat & Prep Pan
First things first, let’s get that oven ready. I always preheat mine to 350°F (175°C). It’s crucial for even baking. While that’s heating up, grab your loaf pan – a standard 9×5 inch one is perfect. I like to grease it really well with butter or cooking spray, and then dust it lightly with flour. This ensures your beautiful loaf pops out in one piece, no sticking whatsoever. If you’re feeling fancy, you can also line it with parchment paper, leaving some overhang on the sides to make lifting it out super easy. Trust me, that little step saves you a lot of potential frustration later!
Step 2: Mix Dry Ingredients
In a large bowl, whisk together your all-purpose flour, baking soda, baking powder, salt, cinnamon, and nutmeg. Give it a good whisk until everything is evenly distributed. This is important because it ensures your leavening agents are spread out, so you get an even rise and no pockets of baking soda taste. I usually do this step first to get it out of the way and make sure everything is well combined before we add the wet stuff.
Step 3: Mix Wet Ingredients
In a separate medium bowl, whisk together your eggs, brown sugar (or granulated sugar), melted butter or oil, and vanilla extract. Whisk until it’s all nicely combined and smooth. Make sure your sugar is pretty well incorporated into the wet ingredients. This helps everything come together more easily later on. I find it’s best if the eggs are at room temperature, but honestly, I often forget to take them out early and it still turns out great!
Step 4: Combine
Now, pour the wet ingredients into the bowl with the dry ingredients. Using a spatula or a wooden spoon, gently fold them together until *just* combined. I cannot stress this enough: do NOT overmix! Overmixing develops the gluten in the flour, which can lead to a tough, dense bread. A few streaks of flour are totally fine at this stage. We’re aiming for a slightly lumpy batter, not a smooth, uniform paste. The zucchini will take care of smoothing things out.
Step 5: Prepare Filling
If you’re doing a cinnamon-sugar swirl, now’s the time to prepare it. In a small bowl, mix together about 2 tablespoons of brown sugar with 1 teaspoon of cinnamon. That’s it! If you’re adding chocolate chips or nuts, just have them ready to go.
Step 6: Layer & Swirl
Now for the fun part! Add your grated zucchini to the batter and gently fold it in until it’s evenly distributed. Don’t be alarmed by how much batter the zucchini seems to loosen up – that’s exactly what we want! Now, spoon about half of the batter into your prepared loaf pan, spreading it evenly. Sprinkle about half of your cinnamon-sugar mixture (or chocolate chips/nuts) over the batter. Then, dollop the remaining batter on top, followed by the rest of the cinnamon-sugar mixture. Now, take a knife or a skewer and gently swirl it through the batter to create that beautiful marbled effect. Don’t overdo it, just a few passes will do the trick. You want distinct swirls, not a muddy mess.
Step 7: Bake
Pop that beautifully swirled batter into your preheated oven. Bake for about 50-65 minutes. The exact time can vary depending on your oven and your loaf pan, so keep an eye on it. You’ll know it’s done when a wooden skewer or toothpick inserted into the center comes out clean, with just a few moist crumbs attached. If the top is browning too quickly, you can loosely tent it with aluminum foil for the last 15-20 minutes of baking.
Step 8: Cool & Glaze
Once it’s baked to perfection, let the bread cool in the pan for about 10-15 minutes. This allows it to set up a bit and makes it easier to remove without breaking. Then, carefully invert it onto a wire rack to cool completely. If you’re adding a glaze, this is the part you wait for! Make sure the bread is completely cool before drizzling on your glaze. If it’s still warm, the glaze will just melt and disappear into the bread. For a simple glaze, whisk together about 1 cup of powdered sugar with 1-2 tablespoons of milk or lemon juice until you get a smooth, drizzly consistency. Drizzle it over the top and let it set. It’s the perfect finishing touch!
Step 9: Slice & Serve
Once the glaze has set (or if you skipped the glaze!), it’s time to slice into this masterpiece! I like to use a serrated knife for a clean cut. Serve it warm for an extra cozy experience, or at room temperature. It’s delicious on its own, but also pairs wonderfully with a cup of coffee or tea. Enjoy every single moist, flavorful bite!
What to Serve It With
This zucchini bread is so wonderfully versatile, it feels like it fits into any meal or occasion! For a leisurely Breakfast, I love pairing a warm slice with a freshly brewed cup of coffee or a steaming mug of herbal tea. It’s hearty enough to keep you going, but still feels like a treat. Sometimes, I’ll even toast it lightly and add a thin smear of butter. For a more elegant Brunch spread, it’s a fantastic addition. I’ll often cut it into smaller, bite-sized pieces and arrange them on a tiered stand with other pastries and fruit. It’s a lovely counterpoint to quiches or savory dishes. And when I’m serving it as Dessert, oh boy, the possibilities! A warm slice served with a scoop of vanilla bean ice cream or a dollop of softly whipped cream is just heavenly. Sometimes, I’ll even drizzle it with a little extra caramel sauce for a truly decadent experience. And for those simple, Cozy Snacks when you just need a little something comforting, a slice of this zucchini bread is pure bliss. It’s perfect for an afternoon pick-me-up with a glass of milk, or even a late-night craving buster when you don’t want to bake a whole cake. My family tradition is to have it after dinner on Sundays, and it’s become a cherished part of our week.
Top Tips for Perfecting Your Zucchini Bread
After making this more times than I can count, I’ve picked up a few little tricks that I think really make a difference. So, listen up, because these are the gems!
Zucchini Prep: This is arguably the most important step! You want to grate your zucchini using the medium-sized holes on a box grater. Don’t wring out *all* the moisture – a little bit of moisture is good! But if your zucchini is exceptionally watery, you might want to gently squeeze out just a tiny bit of excess liquid. Too much liquid can make the bread soggy. Also, make sure you’re using fresh, firm zucchini for the best results. Overripe or mushy zucchini just won’t give you that lovely texture.
Mixing Advice: Remember what I said about not overmixing? It’s so crucial! Once you combine the wet and dry ingredients, fold until *just* combined. A few small streaks of dry flour are perfectly okay – they’ll disappear during baking. Overmixing develops the gluten, leading to a tough, chewy texture, which is the exact opposite of what we want in a tender quick bread. So, resist the urge to stir and stir!
Swirl Customization: For that beautiful swirl effect, don’t go crazy with the swirling. You want distinct layers of batter and filling. Just a few gentle passes with a knife or skewer are enough to create those lovely marbled patterns. If you swirl too much, you’ll end up with a uniform color and texture, which is still delicious, but doesn’t have that visual appeal. Experiment with different patterns – a zigzag or a figure-eight can look lovely.
Ingredient Swaps: I’ve tested this recipe with a few variations, and here are my findings. If you don’t have brown sugar, granulated white sugar works, but you might lose a little bit of that deep, moist flavor. For the oil, I’ve used vegetable, canola, and even a light olive oil in a pinch, and they all work well. For nuts, walnuts are classic, but pecans are also fantastic. And for chocolate chips, mini chips tend to distribute more evenly, but regular ones are great too – just make sure they’re good quality!
Baking Tips: Always use the middle rack of your oven for the most even heat distribution. If you notice the top browning too quickly before the center is cooked, don’t be afraid to loosely tent the loaf pan with aluminum foil. This will protect the top from burning while the inside finishes baking. Also, oven temperatures can vary, so getting to know your oven is key. The toothpick test is your best friend here!
Glaze Variations: The basic powdered sugar glaze is a dream, but don’t stop there! For a tangier kick, add a bit of lemon zest to the glaze. For a richer finish, try a cream cheese frosting – just make sure the bread is completely cool first. You can even use a simple dusting of powdered sugar or a drizzle of honey for a lighter touch. The options are endless, and each adds its own special charm.
Storing and Reheating Tips
One of the best things about this zucchini bread is how well it keeps its moisture. It’s almost like it gets better the next day! For Room Temperature storage, I like to let the loaf cool completely, then wrap it tightly in plastic wrap. It stays wonderfully moist for about 2-3 days. If it’s very warm or humid where you are, you might want to pop it in an airtight container to be safe. For Refrigerator Storage, you can extend its life even further, up to about a week. Again, wrap it well in plastic wrap, then place it in an airtight container or a resealable bag. The texture might firm up slightly in the fridge, but don’t worry, it’s still delicious! When you’re ready to eat, you can just let it come to room temperature or give it a quick warm-up. Freezer Instructions are a lifesaver for when you bake a double batch (which I often do!). Let the bread cool completely, then wrap it very tightly in plastic wrap, followed by a layer of aluminum foil or a freezer-safe bag. It can stay frozen for up to 3 months. To thaw, simply remove the wrapping and let it come to room temperature on the counter for a few hours. If you want it warm, you can pop a slice in the microwave for about 15-30 seconds, or toast it gently in a toaster oven. My advice on Glaze Timing is crucial: *always* let the bread cool completely before applying any glaze. If you glaze a warm loaf, the glaze will melt and become a sticky mess. If you plan to freeze the bread with glaze, it’s often best to glaze it *after* thawing for the freshest look and taste.
Frequently Asked Questions
Final Thoughts
So there you have it – my absolute favorite, go-to zucchini bread recipe. I genuinely believe this recipe embodies everything that makes home baking so special: comfort, warmth, and a whole lot of love. It’s proof that you don’t need to be a professional baker to create something truly magical in your own kitchen. The way it smells while it’s baking, filling your home with that irresistible spiced aroma, is just pure joy. And the taste? Well, it’s like a cozy hug in bread form. If you love a good quick bread, I think you’ll also really enjoy my (link to a hypothetical banana bread recipe) or my (link to a hypothetical pumpkin bread recipe). They share that same spirit of simple, comforting deliciousness. I truly hope you give this zucchini bread a try. I can’t wait to hear how it turns out for you and what your family thinks! Happy baking, and may your kitchens always be filled with wonderful aromas!
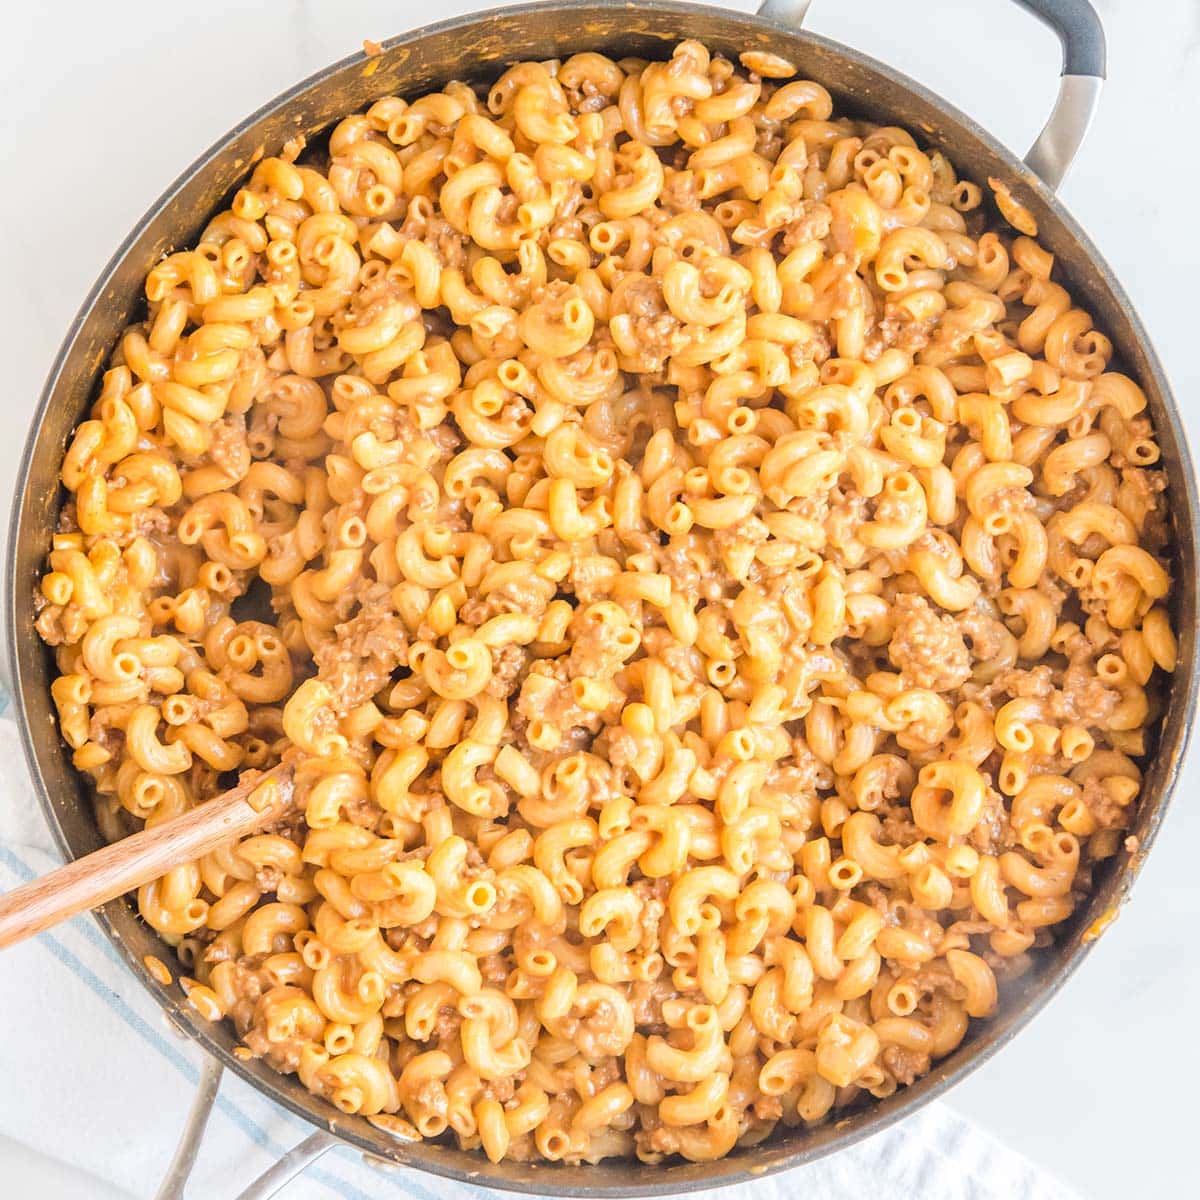
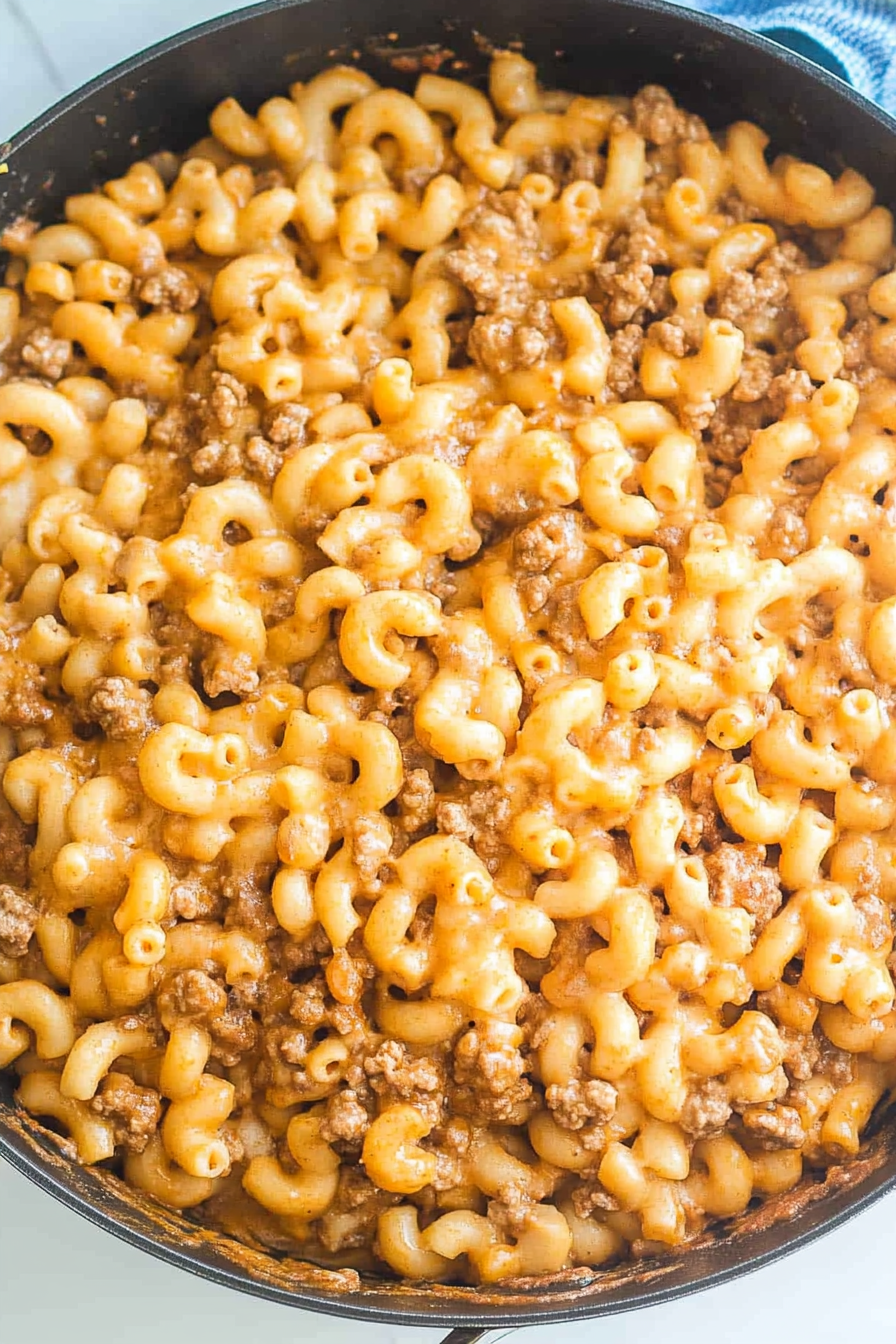
homemade hamburger helper
Ingredients
Method
- Add onions to a large saucepan with olive oil. Cook over low-medium heat for 1-2 minutes or until onions have become semi-translucent and fragrant.
- Add ground beef and continue to cook over medium-high heat for 6-8 minutes or until the beef is fully browned. When done, drain beef over a bed of paper towels and return to the saucepan.
- Stir in the tomato paste, Worcestershire sauce and seasonings. Cook for about 1 minute, stirring and mixing frequently.
- Add in the elbow macaroni, beef broth and heavy whipping cream and bring heat to high. Stir frequently as the mixture comes to a light boil (adjust your heat if needed). When boiling, place a lid over the pot and cook for an additional 12-14 minutes, stirring occasionally.
- During the last minute of cooking, top with cheese and stir until fully melted and combined into the dish.
- Remove from heat and serve immediately. Add additional salt and pepper to taste as needed.