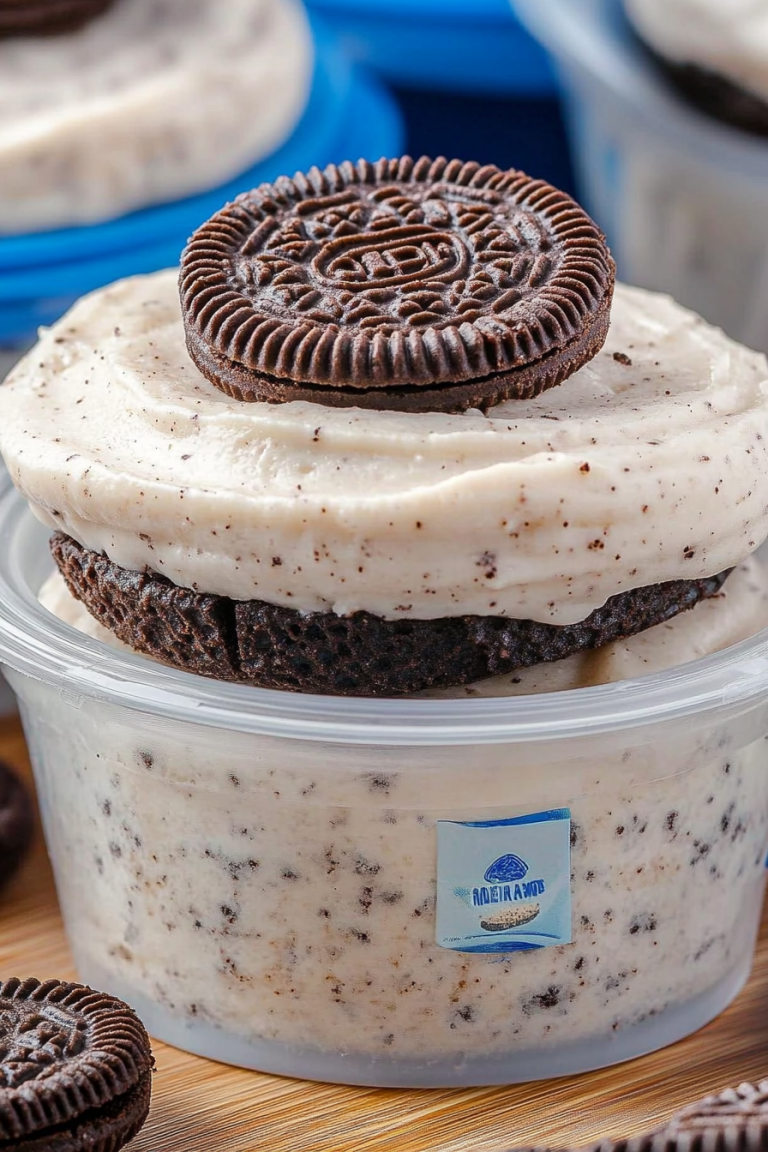
Butterfinger Bars Simple Sweet Treat
Oh, hey there! Grab your favorite mug, because I’ve got something seriously special to share with you today. You know those recipes that just feel like a warm hug? The ones that fill your kitchen with the most incredible aroma and have everyone peeking in, asking “What’s baking?” This zucchini bread is *that* recipe for me. It’s become my go-to, my trusty sidekick for everything from lazy weekend mornings to unexpected dessert cravings. Honestly, it’s even better than the classic coffee cake I grew up with, and that’s saying a lot! I’ve tinkered with this so many times, and I think I’ve finally perfected it. Get ready, because this zucchini bread is going to be your new obsession.
What is Zucchini bread?
So, what exactly *is* zucchini bread? At its heart, it’s a quick bread that’s moist, tender, and absolutely packed with flavor, thanks to the star ingredient: zucchini! Don’t let that veggie name fool you, though. When baked, zucchini becomes incredibly tender and adds a fantastic moisture factor without imparting any strong “green” taste. Think of it as a magical ingredient that makes your baked goods incredibly soft and delicious. It’s kind of like a humble cousin to banana bread, but with its own unique charm. The name “zucchini bread” itself is pretty straightforward, but the magic lies in how it transforms simple ingredients into something truly delightful. It’s essentially a super moist, subtly sweet cake that happens to have vegetables hidden inside – the ultimate stealthy baking win!
Why you’ll love this recipe?
Let’s be honest, there are a million zucchini bread recipes out there, but THIS one is different. What I love most about this recipe is its sheer versatility and how forgiving it is. First off, the flavor! It’s got this beautiful balance of sweetness with just a hint of warmth from the cinnamon and nutmeg. It’s not overly sweet, which is something I really appreciate, making it perfect for any time of day. And the texture? Oh my goodness. It’s incredibly moist and tender, almost melt-in-your-mouth. The secret, I’ve found, is in how you prep the zucchini and not overmixing the batter. It’s also ridiculously easy to make. Even if you’re a beginner baker, you can whip this up without a hitch. I’ve made it on nights when I’ve only got 30 minutes before needing to get kids to bed, and it’s still totally doable. Plus, it’s a fantastic way to use up those garden zucchinis that seem to multiply overnight! And let’s talk about cost-efficiency – the ingredients are super basic pantry staples, so it won’t break the bank. You can also customize it endlessly. Add chocolate chips? Yep. Nuts? Absolutely. A little swirl of cream cheese? Don’t mind if I do! This recipe is my secret weapon for satisfying those sweet cravings without feeling guilty, and it always gets rave reviews. It’s just… comforting. It smells like home.
How do you make Zucchini bread?
Quick Overview
The process for this zucchini bread is super straightforward. We’re essentially going to combine our dry ingredients, whisk together our wet ingredients, and then gently fold them together before pouring into a prepared pan. The real magic happens with the zucchini prep and a gentle mixing technique to ensure that super tender crumb. It’s a recipe that truly celebrates simplicity and delivers maximum flavor and texture with minimal fuss. You’ll be amazed at how quickly it comes together, and the aroma that fills your house while it bakes is just heavenly.
Ingredients
For the Main Batter:
You’ll need about 2 cups of grated zucchini. Make sure to use fresh zucchini! I find that medium-sized zucchinis work best. You’ll also need all-purpose flour (around 2 cups), baking soda and baking powder for that perfect lift, salt to balance the sweetness, and ground cinnamon and nutmeg for warmth. Don’t skip the spices; they really make a difference! I also use granulated sugar (about 1.5 cups, but you can adjust this) and a couple of large eggs. For the fat, I prefer melted butter for that rich flavor, but a neutral oil like vegetable or canola oil works beautifully too and can make it even more moist. And finally, a splash of vanilla extract is a must for that classic baked good aroma.
For the Filling (Optional but Highly Recommended!):
This is where you can really make it your own. My favorite filling is a simple mix of brown sugar (about half a cup), a little extra cinnamon, and some chopped walnuts or pecans. If you’re a chocolate lover, a handful of chocolate chips works wonders here! Some people love to add a bit of cream cheese to the filling too, which adds a delightful tang. The key is to have it ready to go when you’re ready to swirl.
For the Glaze (Optional):
A simple glaze takes this over the top. You’ll just need powdered sugar (about 1 cup) and a few tablespoons of milk or cream. A little splash of vanilla or even lemon juice can add a nice twist. The consistency is key here – you want it thick enough to drizzle but not so thick it’s unmanageable.
Step-by-Step Instructions
Step 1: Preheat & Prep Pan
First things first, preheat your oven to 350°F (175°C). I like to grease and flour a 9×5 inch loaf pan really well. You can also line it with parchment paper, leaving a little overhang on the sides. This makes it super easy to lift the bread out once it’s baked. Don’t skimp on the greasing; nobody wants their beautiful bread stuck to the pan!
Step 2: Mix Dry Ingredients
In a large bowl, whisk together your flour, baking soda, baking powder, salt, cinnamon, and nutmeg. Give it a good whisk to make sure everything is evenly distributed. This ensures your leavening agents work their magic throughout the loaf. You want to see no lumps of baking soda or powder.
Step 3: Mix Wet Ingredients
In a separate medium bowl, whisk together your melted butter (or oil), granulated sugar, eggs, and vanilla extract until well combined. It should look smooth and a little glossy.
Step 4: Combine
Now, pour the wet ingredients into the dry ingredients. Gently fold them together with a spatula or wooden spoon until *just* combined. It’s really important not to overmix here. A few streaks of flour are okay; they’ll disappear as you add the zucchini. Overmixing develops the gluten too much, which can lead to a tough bread, and we definitely don’t want that.
Step 5: Prepare Filling
If you’re adding a filling, mix your brown sugar, cinnamon, and nuts (or chocolate chips!) in a small bowl until it resembles coarse crumbs. This is ready to go for swirling.
Step 6: Layer & Swirl
Add your grated zucchini to the batter and gently fold it in until it’s just distributed. Don’t mash it; just fold until you don’t see big pockets of zucchini. Now, pour about half of the batter into your prepared loaf pan. Sprinkle about half of your filling mixture over the top. Then, add the remaining batter, and sprinkle the rest of the filling on top. You can use a knife or a skewer to gently swirl the filling into the batter. Don’t over-swirl, or you’ll lose the definition!
Step 7: Bake
Bake for 50-65 minutes, or until a toothpick inserted into the center comes out clean. Ovens can be a little quirky, so start checking around the 50-minute mark. If the top is browning too quickly before the inside is cooked, you can loosely tent it with foil.
Step 8: Cool & Glaze
Let the bread cool in the pan for about 15-20 minutes before inverting it onto a wire rack to cool completely. This is crucial! Trying to glaze a warm loaf will just make a mess. Once it’s totally cool, whisk together your powdered sugar and milk for the glaze until you have a smooth, drizzle-able consistency. Drizzle it generously over the top. Let the glaze set for about 15-20 minutes before slicing.
Step 9: Slice & Serve
Once the glaze is set, slice it up with a serrated knife for nice, clean cuts. Enjoy! The smell of this fresh zucchini bread is just pure happiness.
What to Serve It With
This zucchini bread is so wonderfully versatile, it fits in perfectly with almost any meal or craving! For a truly classic breakfast, I love it alongside a hot cup of coffee or a refreshing glass of iced tea. The sweetness of the bread is just the perfect complement to a strong brew. If you’re feeling a bit fancier and doing a weekend brunch, it’s fantastic served sliced with a dollop of Greek yogurt and some fresh berries. The creamy tang of the yogurt and the burst of freshness from the berries are just divine. As a dessert, it’s a winner on its own, of course, but I also love serving it with a scoop of vanilla bean ice cream or a light raspberry sauce. For those moments when you just need a cozy snack, it’s perfect with a glass of milk. Honestly, my kids will ask for this after school as a treat, and it’s a lifesaver when they need a little energy boost. My family also has a tradition of having a slice on movie nights; it’s the perfect light dessert that doesn’t weigh you down.
Top Tips for Perfecting Your Zucchini Bread
I’ve learned a few things over the years of making this zucchini bread, and I want to share them so yours turns out perfectly every time! For the zucchini prep, I always grate it using the medium holes on a box grater. You don’t need to peel it; the skin adds nice color and nutrients. The most important part of the zucchini prep is squeezing out the excess moisture. I usually put the grated zucchini in a clean kitchen towel or cheesecloth and wring out as much liquid as humanly possible. This is key to preventing a soggy bread and ensuring a good crumb. When it comes to mixing, remember what I said: gentle is best! You want to mix the wet and dry ingredients until they’re *just* combined. A few small lumps in the batter are totally fine; they will disappear during baking. Overmixing is the enemy of tender quick breads. For the swirl, don’t go overboard. You want distinct layers of flavor and texture, not a muddy mess. Just a few gentle passes with your knife are enough to create a beautiful marbled effect. If you’re looking for ingredient swaps, you can easily substitute about half of the flour with whole wheat flour for a nuttier flavor, or use a gluten-free all-purpose blend. For the sweetener, maple syrup can be used, but you might need to reduce the amount of liquid slightly. When it comes to baking, always trust your oven’s calibration. I find that most recipes bake around the same time, but it’s best to rely on the toothpick test. A simple metal skewer or a thin wooden dowel works perfectly for checking doneness. If you want to get creative with the glaze, try adding a pinch of lemon zest for a bright note, or even a bit of cocoa powder for a chocolate drizzle. The key to a good glaze is the consistency; it should be thick enough to coat but thin enough to drizzle easily. Don’t be afraid to experiment!
Storing and Reheating Tips
This zucchini bread is fantastic for making ahead, which is always a win in my book! Once it’s completely cooled, you can store it at room temperature in an airtight container for up to 3 days. I usually wrap the entire loaf tightly in plastic wrap, then place it in a container. If you find yourself with a lot of it (or if it’s particularly warm where you are), you can store it in the refrigerator for up to a week. Just make sure it’s well-wrapped to prevent it from drying out. The flavor often even improves after a day or two! For longer storage, freezing is your best bet. You can freeze the whole loaf or individual slices. Wrap it tightly in plastic wrap, then in a layer of aluminum foil or place it in a freezer-safe bag. It will keep well in the freezer for up to 3 months. To thaw, simply unwrap it and let it come to room temperature on the counter. If you want to reheat it, you can pop a slice in the toaster oven for a few minutes until warmed through, or microwave it for about 15-20 seconds. For the glaze, I always recommend applying it only *after* the bread has completely cooled and just before you plan to serve or store it, especially if it’s going to be at room temperature. If you’re storing it in the fridge or freezer, it’s often best to glaze it right before serving to keep the glaze from getting sticky or cracking.
Frequently Asked Questions
Final Thoughts
So there you have it – my absolute favorite zucchini bread recipe! I truly believe this is the one that will make you fall in love with baking with zucchini, even if you were a little hesitant at first. It’s the perfect blend of comforting, delicious, and surprisingly easy to make. It’s the kind of recipe that brings people together, whether it’s for a casual breakfast or a special occasion. If you enjoy this recipe, you might also love my moist blueberry muffins or my easy banana bread. They share that same “made with love” quality. I really hope you give this zucchini bread a try; I can’t wait to hear how it turns out for you and what amazing variations you come up with! Happy baking, my friends!
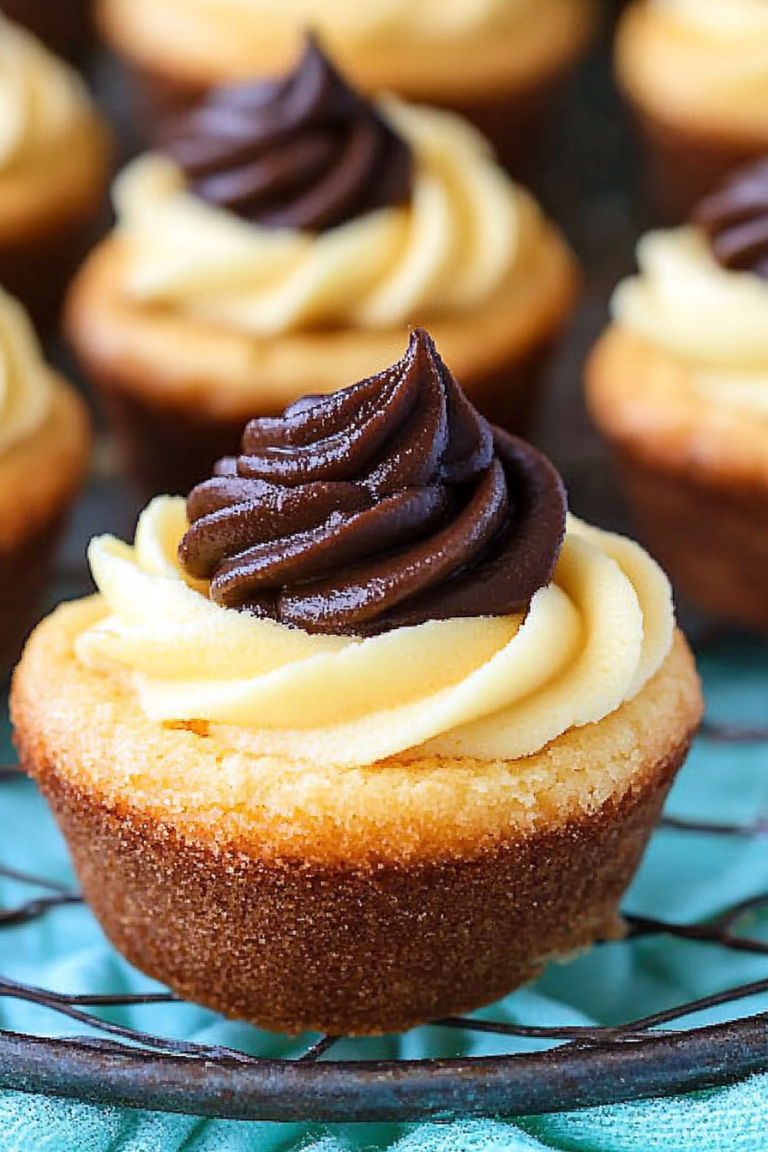
Butterfinger bars recipe
Ingredients
Method
- Preheat the oven to 350 degrees F (175 C). Line a cupcake pan with cupcake liners.
- In a medium bowl, combine the all-purpose flour, cocoa powder, baking soda, baking powder, and salt. Whisk together.
- In the bowl of a stand mixer, add the sugar and eggs and beat on medium-high speed until light and smooth.
- Add the vegetable oil, buttermilk, and vanilla extract. Mix all the ingredients together until well combined.
- Turn the mixer to low speed and slowly add in the dry ingredients until just combined. Do not overmix.
- Spoon about 0.25 cup of batter into each cupcake liner. Place the cupcake pan into the preheated oven and bake for 15 to 20 minutes, or until a toothpick inserted into the center comes out clean.
- Once the cupcakes are done baking, remove them from the pan and place them onto a wire cooling rack. Cool completely before frosting.
- While the cupcakes cool, prepare the ganache filling.
- Start by chopping the bittersweet or semisweet chocolate into small pieces and place them in a medium, heatproof bowl.
- Add the heavy cream to a small saucepan and heat over medium-low heat until it begins to simmer. Quickly pour the hot cream over the finely chopped chocolate. Let the chocolate sit for about 5 minutes to melt.
- Mix the cream and chocolate together until it becomes a smooth and shiny ganache. Let the ganache cool for about 15 minutes, stirring occasionally.
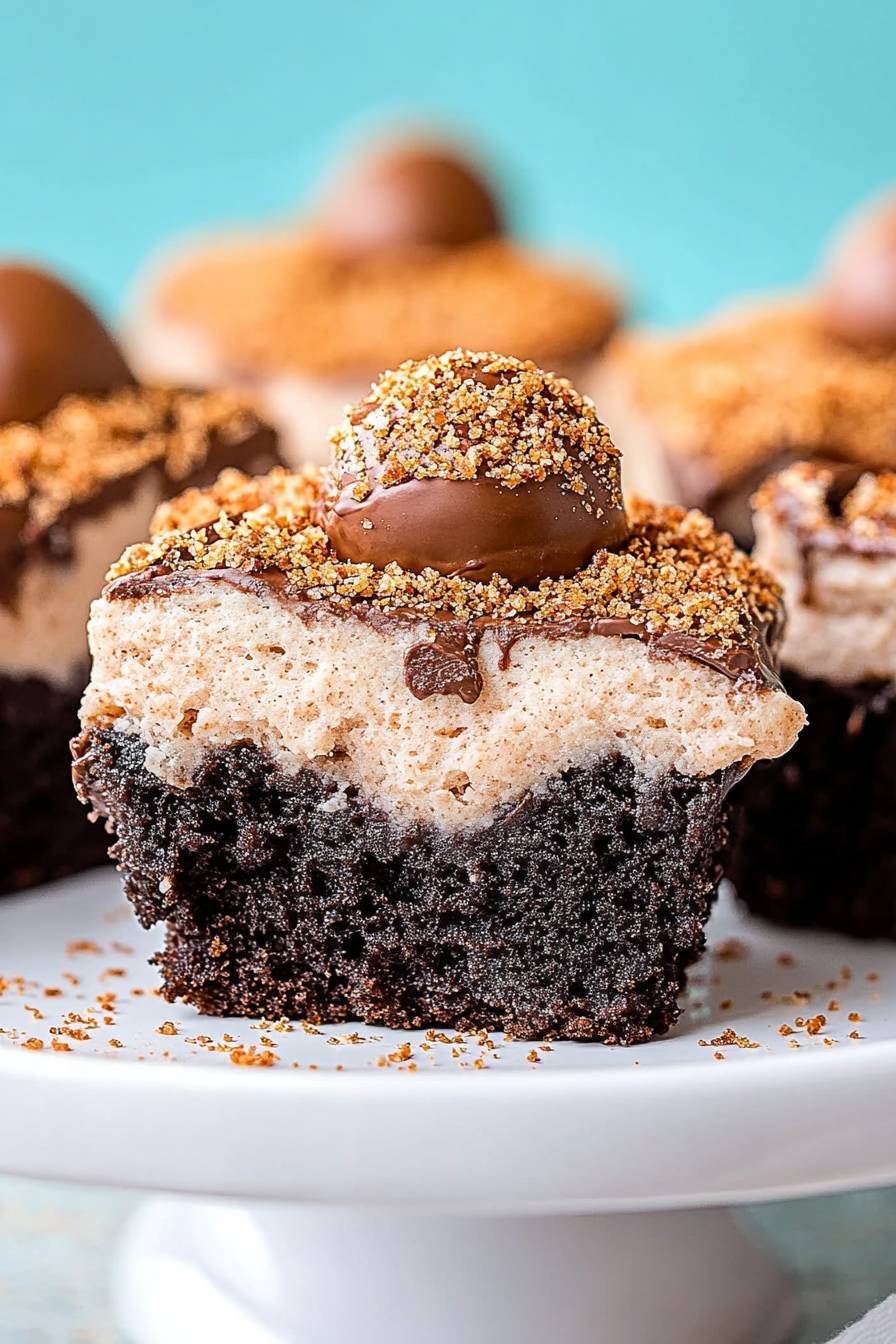
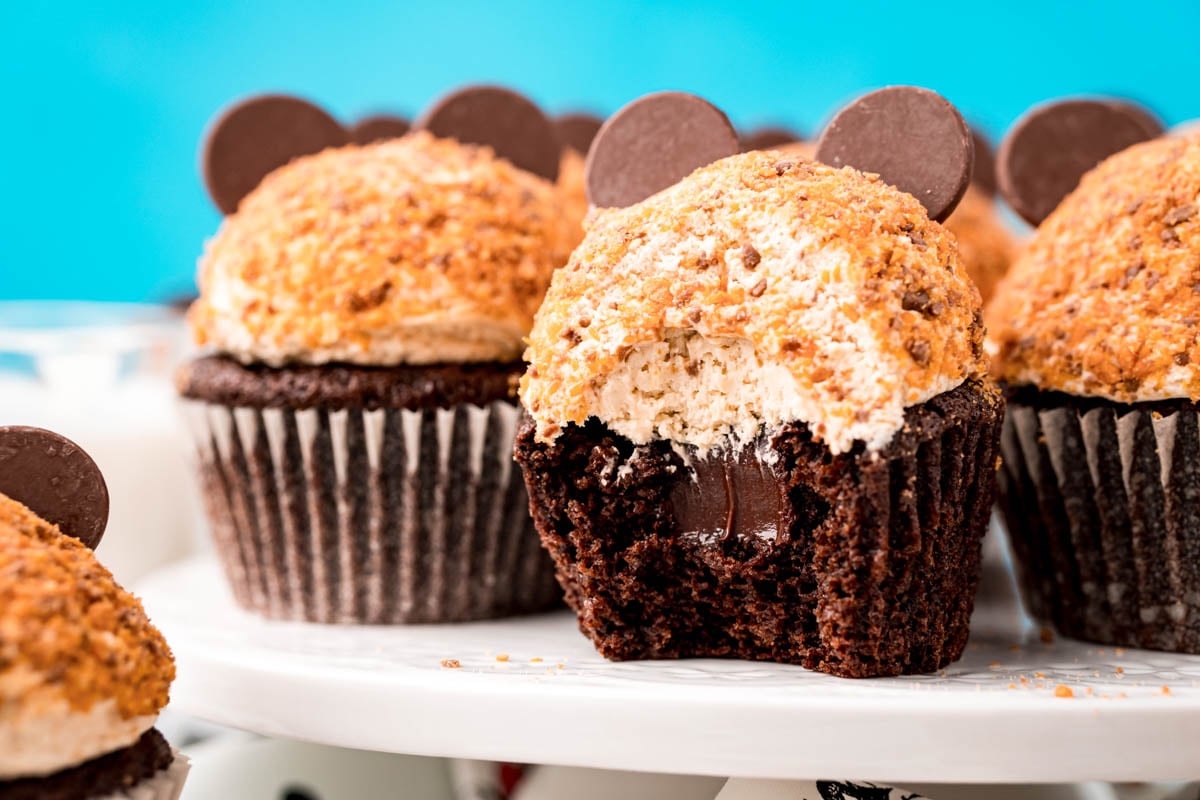
- Once cupcakes are completely cool, use a cupcake corer or a small knife to carefully core out the middle of the top of each cupcake.
- Spoon or pipe the cooled ganache into each cored cupcake.
- For the buttercream frosting, in the bowl of a stand mixer, add the softened unsalted butter and creamy peanut butter. Mix until light and creamy.
- With the mixer on low speed, slowly add the powdered sugar. Once incorporated, add the milk a little at a time until the frosting reaches a smooth, spreadable consistency.
- After the frosting is done, use a large cookie scoop or a piping bag to add the frosting on top of each filled cupcake.
- Generously sprinkle the crushed Butterfinger candy bars over the frosting.
- The Butterfinger bars can be served immediately or stored in an airtight container for later.