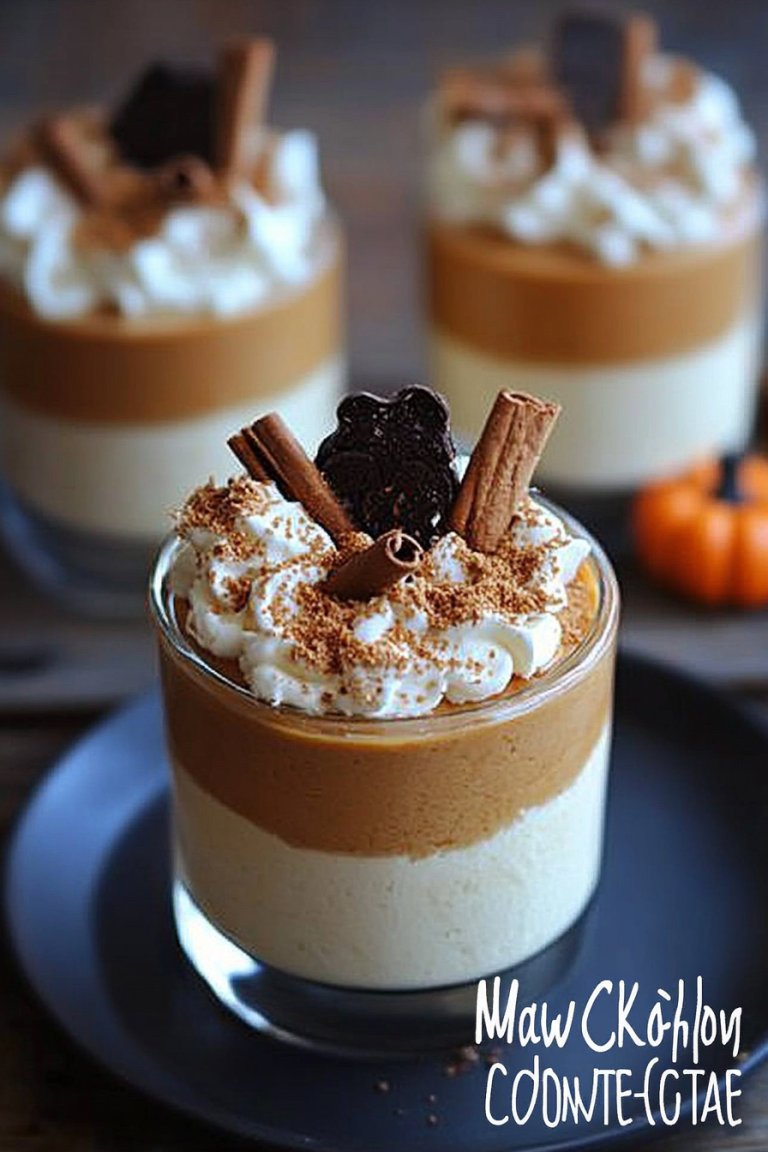
Sweet Pecan Pie Treats Made Easy
You know those recipes that just *feel* like home? The ones you can whip up without even looking at a cookbook, the ones that fill your kitchen with the most incredible aroma, and the ones that disappear faster than you can say “more please”? This zucchini bread is exactly that for me. It’s not fancy, it’s not complicated, but it’s hands-down the best. Honestly, it rivals my grandmother’s famous apple pie in terms of pure comfort and deliciousness, and that’s saying a lot! I first stumbled upon a version of this recipe years ago, and since then, it’s become my go-to. It’s a lifesaver on busy weeknights when I need a quick treat, perfect for unexpected guests, and always a hit at school bake sales. If you’ve ever been intimidated by baking, or just looking for a reliable, incredibly tasty zucchini bread recipe that’s almost foolproof, then you are in the right place. This is the one.
What is Zucchini bread?
So, what exactly *is* zucchini bread? At its heart, it’s a quick bread, meaning it uses chemical leaveners like baking soda and baking powder instead of yeast, so you don’t have to wait for dough to rise. Think of it as a super moist, slightly sweet loaf cake that just happens to have grated zucchini mixed in. The zucchini might sound a little… well, *vegetable-y*, but trust me on this one. When baked, it completely disappears into the batter, adding incredible moisture and a subtle tenderness without a hint of “green” flavor. It’s often compared to banana bread because of its moist crumb and comforting spice notes, but I find zucchini bread to have its own unique, delightful character. It’s less dense than a typical cake, making it wonderfully approachable for any home baker.
Why you’ll love this recipe?
There are so many reasons why this particular zucchini bread recipe has earned a permanent spot in my recipe binder, and I’m genuinely excited for you to try it! First off, the FLAVOR is just out of this world. It’s warm, spiced, and perfectly sweet – not cloying, but just enough to feel like a real treat. The hint of cinnamon and vanilla is divine. Then there’s the SIMPLICITY. I can’t stress this enough. You probably have most of the ingredients in your pantry right now. It’s a one-bowl wonder for the dry ingredients, and the wet ingredients come together in a flash. No fancy equipment needed, just a couple of bowls and a whisk. It’s also incredibly COST-EFFECTIVE. Zucchini is usually pretty affordable, especially when it’s in season. This recipe makes two loaves, so you get a lot of bang for your buck. And the VERSATILITY! This is where it truly shines. It’s fantastic on its own, of course, but you can jazz it up so easily. Add some chocolate chips (my kids’ favorite!), walnuts for crunch, or even a swirl of cream cheese. It’s perfect for breakfast with a cup of coffee, a delightful afternoon snack, or even a light dessert. What I love most about this is how forgiving it is. Even if you’re a beginner baker, you’re going to nail this. It’s the kind of recipe that boosts your confidence in the kitchen, and that’s priceless. It’s so much easier and quicker than making a full-on cake, but it delivers that same satisfying, homemade goodness.
How do you make Zucchini bread?
Quick Overview
The process is beautifully straightforward. You’ll start by combining your dry ingredients, then whisking together the wet ingredients. The magic happens when you gently fold the wet into the dry, then stir in the star of the show – the grated zucchini! Pour the batter into your prepared pans, bake until golden brown and a tester comes out clean, and then let it cool before drizzling with a simple, sweet glaze. It’s truly that easy. The beauty of this method is it ensures a moist, tender crumb without any fuss.
Ingredients
For the Main Batter:
3 cups all-purpose flour (I always use unbleached, it gives a nicer texture!)
1 teaspoon baking soda
1 teaspoon ground cinnamon (use good quality, it makes a difference!)
1/2 teaspoon ground nutmeg (optional, but I love the warmth it adds)
1/2 teaspoon salt
2 cups granulated sugar (you can reduce this slightly if you prefer, but I find this is the perfect sweetness balance)
4 large eggs, at room temperature (this helps them incorporate better)
1 cup vegetable oil (or any neutral-flavored oil like canola or melted coconut oil)
1/4 cup milk (whole milk or even almond milk works beautifully here!)
For the Filling:
2 cups finely grated zucchini (about 2-3 medium zucchinis – make sure to squeeze out excess moisture!)
1 cup chopped walnuts or pecans (optional, but highly recommended for crunch!)
1/2 cup chocolate chips (semi-sweet or dark, your choice! My kids go crazy for these.)
For the Glaze:
1 cup powdered sugar
2-3 tablespoons milk (start with 2 and add more if needed for desired consistency)
1/2 teaspoon vanilla extract
Step-by-Step Instructions
Step 1: Preheat & Prep Pan
First things first, get your oven preheating to 350°F (175°C). This is crucial for an even bake. Then, grease and flour two 9×5 inch loaf pans. You can also line them with parchment paper, leaving an overhang on the sides – this makes lifting the loaves out so much easier! I usually grease with butter or cooking spray, then give a light dusting of flour, tapping out any excess. Make sure you get into all the corners of the pan.
Step 2: Mix Dry Ingredients
In a large mixing bowl, whisk together the flour, baking soda, cinnamon, nutmeg (if using), and salt. Give it a good whisk to make sure everything is evenly distributed. This step is important because it ensures the leavening agents and spices are spread throughout the batter, preventing dense spots or pockets of flavor. I like to sift my flour sometimes, especially if I haven’t used it in a while, just to lighten it up a bit more.
Step 3: Mix Wet Ingredients
In a separate medium bowl, whisk together the granulated sugar and the eggs until they are well combined and slightly lighter in color. Then, gradually stream in the vegetable oil while whisking continuously. Finally, stir in the milk until everything is smooth and emulsified. Don’t worry if it looks a little thin at this stage; that’s perfectly normal!
Step 4: Combine
Pour the wet ingredients into the bowl with the dry ingredients. Now, this is where you need to be gentle. Use a spatula or a wooden spoon to fold the ingredients together *just* until there are no dry streaks of flour visible. It’s really important not to overmix at this stage! Overmixing develops the gluten in the flour, which can lead to a tough, dense loaf. A few little lumps are totally fine.
Step 5: Prepare Filling
Now for the fun part! If you’re using additions like walnuts or chocolate chips, gently fold them into the batter now. Then, take your grated zucchini – and this is key – squeeze out as much excess moisture as you possibly can. You can do this by placing it in a clean kitchen towel or cheesecloth and wringing it out. Once it’s as dry as you can get it, gently fold it into the batter. The goal is to distribute it evenly without overworking the batter.
Step 6: Layer & Swirl
Divide the batter evenly between your two prepared loaf pans. If you’re adding a swirl, now’s the time! You can do this with a chocolate chip batter or even a bit of cream cheese mixture. For chocolate chips, just sprinkle them over the top and give a gentle swirl with a knife or skewer. If you’re using a cream cheese mixture (which is divine, by the way!), dollop spoonfuls on top and swirl them in for a marbled effect. I often just sprinkle the chips and gently press them down a bit with my spatula. Make sure the batter is relatively even in both pans.
Step 7: Bake
Bake for 50-65 minutes, or until a wooden skewer or toothpick inserted into the center of the loaf comes out clean. The top should be a beautiful golden brown. Ovens can vary, so start checking around the 50-minute mark. If the top is browning too quickly, you can loosely tent it with aluminum foil. The aroma that fills your house during this stage is pure heaven – seriously, get ready for requests to hurry it up!
Step 8: Cool & Glaze
Once baked, let the loaves cool in their pans for about 10-15 minutes. This allows them to set up a bit. Then, carefully invert them onto a wire rack to cool completely. This is SO important! If you try to glaze a warm loaf, the glaze will just melt right off. Once completely cool, it’s time for the glaze. Whisk together the powdered sugar, vanilla extract, and milk until you have a smooth, drizzly consistency. You might need to adjust the milk a little to get it just right – you want it thick enough to coat, but thin enough to drizzle easily. Drizzle generously over the cooled loaves.
Step 9: Slice & Serve
Once the glaze has set a bit (or while it’s still slightly soft, my personal favorite!), slice your zucchini bread and enjoy! I find a serrated knife works best for clean slices. It’s fantastic served at room temperature, but I won’t lie, sometimes I sneak a piece when it’s still slightly warm and the glaze is gooey. Perfection!
What to Serve It With
This zucchini bread is such a versatile treat, it’s wonderful for so many occasions! For a cozy BREAKFAST, I love serving it toasted with a smear of butter and a big mug of coffee. It’s just satisfying without being too heavy to start the day. For a delightful BRUNCH spread, I’ll usually make it alongside some scrambled eggs, maybe some fresh fruit salad, and a pitcher of mimosas or fresh-squeezed orange juice. A few slices arranged nicely on a platter looks so inviting. As a dessert, it’s lovely on its own, perhaps with a dollop of whipped cream or a small scoop of vanilla bean ice cream. The spices in the bread pair wonderfully with rich flavors. And for those late-night cravings or COZY SNACKS, it’s just unbeatable. A slice with a glass of milk or a warm cup of tea is pure comfort. My family also loves it with a thin layer of cream cheese – it adds a lovely tanginess that balances the sweetness so well. It’s truly a crowd-pleaser, no matter how you serve it.
Top Tips for Perfecting Your Zucchini Bread
Over the years, I’ve picked up a few tricks that really make a difference in achieving that perfect zucchini bread. Let’s talk ZUCCHINI PREP. That squeezing step I mentioned? It’s not just for show! Too much moisture from the zucchini can make your bread heavy or even gummy. So, grate your zucchini, then lay it on paper towels or a clean kitchen towel and press down firmly to release as much liquid as possible. Fresh zucchini is best, but if you’ve got some that’s been sitting around, just make sure it’s still firm and not mushy. For MIXING ADVICE, remember that gentleness is key. Once you combine the wet and dry ingredients, stir only until *just* combined. Seriously, stop as soon as you don’t see any dry flour. A few lumps are good! Overmixing is the number one culprit for dense bread. When it comes to SWIRL CUSTOMIZATION, get creative! For chocolate chip swirls, I like to use mini chips so they distribute more evenly. For a more dramatic swirl effect, you can mix a few tablespoons of cocoa powder into a portion of the batter and then swirl that into the main batter before baking. For INGREDIENT SWAPS, if you’re out of all-purpose flour, a good quality gluten-free blend can work, though the texture might be slightly different. I’ve also experimented with replacing half the oil with unsweetened applesauce for a slightly lighter version, but it can sometimes make it a touch denser. When it comes to BAKING TIPS, always trust the skewer test. Different ovens have hot spots and different temperature calibrations. If your loaves are browning too fast on top, a simple piece of aluminum foil tented loosely over them can save the day. And for GLAZE VARIATIONS, don’t be afraid to play around! You can add a pinch of lemon zest for a bright citrus note, a dash of espresso powder to enhance the chocolate chips, or even a swirl of peanut butter into the glaze for a decadent treat. Just remember to adjust the liquid to get the perfect drizzling consistency.
Storing and Reheating Tips
This zucchini bread is so delicious, you’ll want to keep it fresh for as long as possible. For ROOM TEMPERATURE storage, once the loaves are completely cool, I like to wrap them tightly in plastic wrap and then place them in an airtight container or a zip-top bag. At room temperature, it usually stays fresh and moist for about 2-3 days. It’s amazing how well it holds up! If you think you’ll need longer, REFRIGERATOR STORAGE is your best bet. Wrapped well, it can last in the fridge for up to a week. The texture might firm up slightly, but it’s still wonderfully delicious. When you’re ready to eat it from the fridge, you can enjoy it cold, or just pop a slice in the toaster or microwave for a few seconds to warm it up. For FREEZER INSTRUCTIONS, this is my favorite way to keep it on hand for future cravings. Let the loaves cool completely, then wrap each loaf very tightly in plastic wrap, followed by a layer of aluminum foil or a freezer-safe bag. It can stay frozen for up to 3 months. To thaw, simply unwrap it and let it come to room temperature on the counter. Reheating from frozen is also an option – just pop slices in the toaster oven or a low oven for a few minutes. Regarding GLAZE TIMING ADVICE, I always recommend glazing *after* the bread has completely cooled, especially if you plan to store it for more than a day. If you’re going to freeze it, it’s often best to freeze the plain loaves and glaze them *after* thawing. This prevents the glaze from cracking or becoming sticky during the freezing and thawing process.
Frequently Asked Questions
Final Thoughts
I truly hope you give this zucchini bread recipe a try. It’s more than just a recipe to me; it’s a little slice of comfort, a memory of cozy afternoons, and a guaranteed way to bring smiles to faces. It’s proof that simple ingredients can create something truly magical. The way the spices bloom and the zucchini makes the crumb so unbelievably moist is something you just have to experience. If you love this recipe, you might also enjoy my favorite banana bread recipe or my super simple blueberry muffins, which also have that easy-breezy, delicious vibe. I can’t wait to hear what you think, so please leave a comment below and tell me how yours turned out! Did you add chocolate chips? Did your family devour it as quickly as mine does? I’d love to see your creations, so feel free to share photos too! Happy baking, my friends!
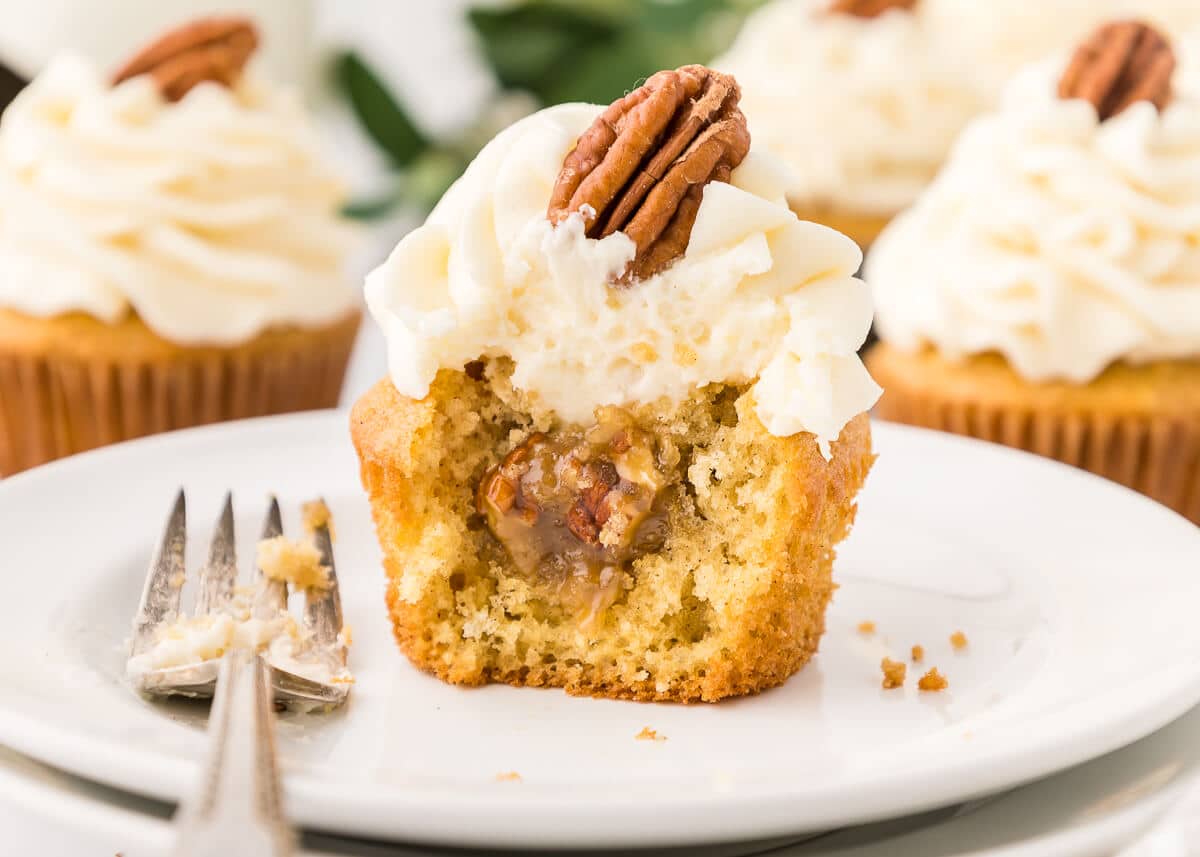
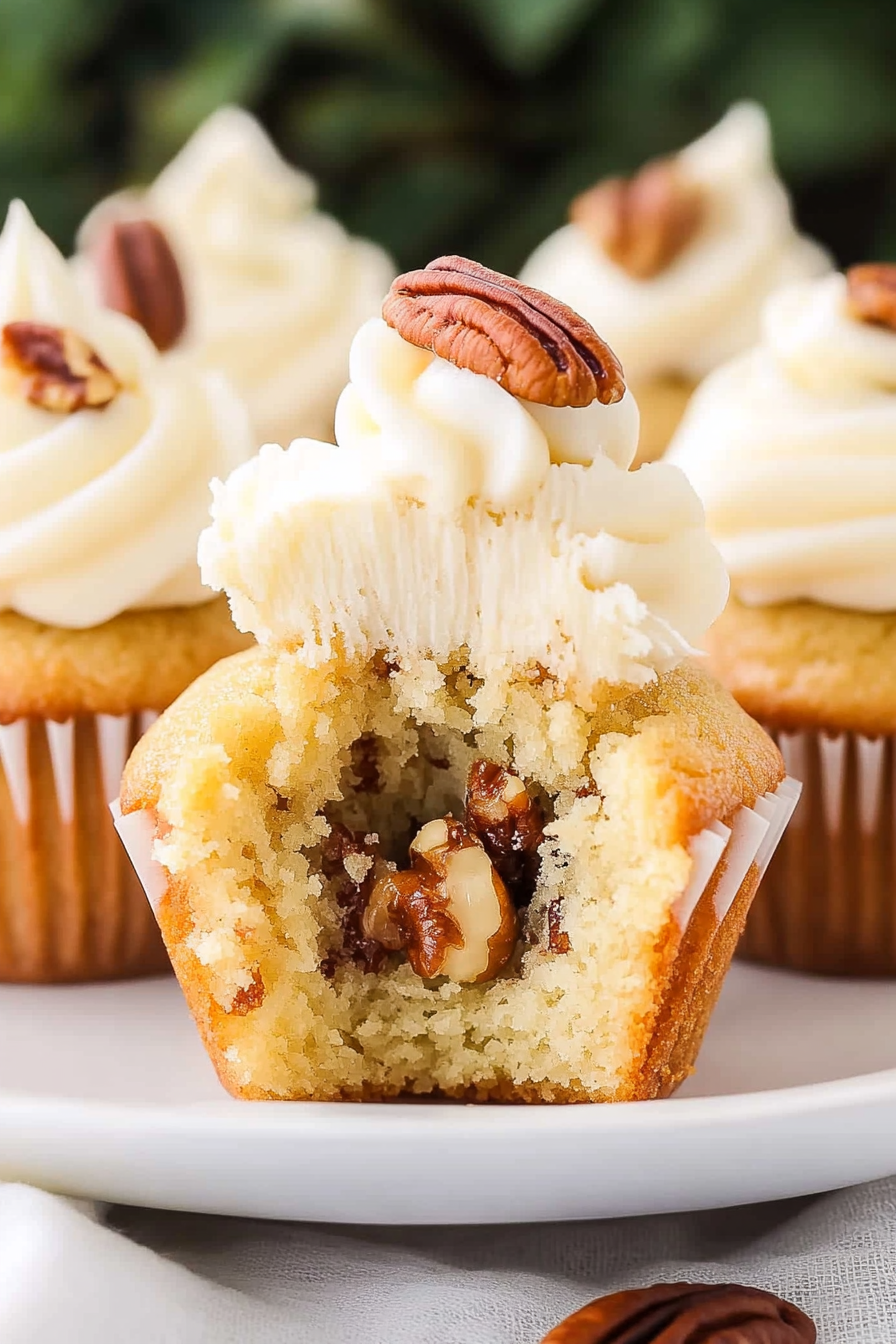
pecan pie cupcakes
Ingredients
Method
- Preheat the oven to 350°F (175°C). Place cupcake liners in a muffin tin and set aside.
- In a medium mixing bowl, whisk together eggs, vegetable oil, milk, and vanilla extract until well combined.
- Slowly add in all-purpose flour, granulated sugar, cinnamon, baking powder, baking soda, and salt to the wet ingredients. Mix until just combined, being careful not to overmix.
- Fill each cupcake liner about 3/4 of the way with batter. Bake at 350°F (175°C) for 20 minutes, or until a toothpick inserted into the center comes out clean. Remove from the oven and allow to cool completely on a wire rack.
- While the cupcakes are cooling, prepare the pecan pie filling. In a small saucepan over medium heat, combine brown sugar, honey, and salted butter. Stir constantly until the butter is melted and the brown sugar is dissolved, about 3-5 minutes.
- Remove the saucepan from the heat and mix in the chopped pecans. Set aside to cool slightly.
- Once the cupcakes are cool, use a cupcake corer or a small knife to carefully remove the middle from each cupcake. Fill each hole with the prepared pecan mixture.
- In a medium bowl, cream together the softened salted butter, powdered sugar, and vanilla extract until smooth and fluffy. Beat until the frosting reaches your desired consistency.
- Pipe the buttercream frosting onto each filled cupcake using a piping bag with your favorite tip, or spread it on with a knife.